
Free drawing lesson · 12 construction goals
How to draw an elephant, shape by shape
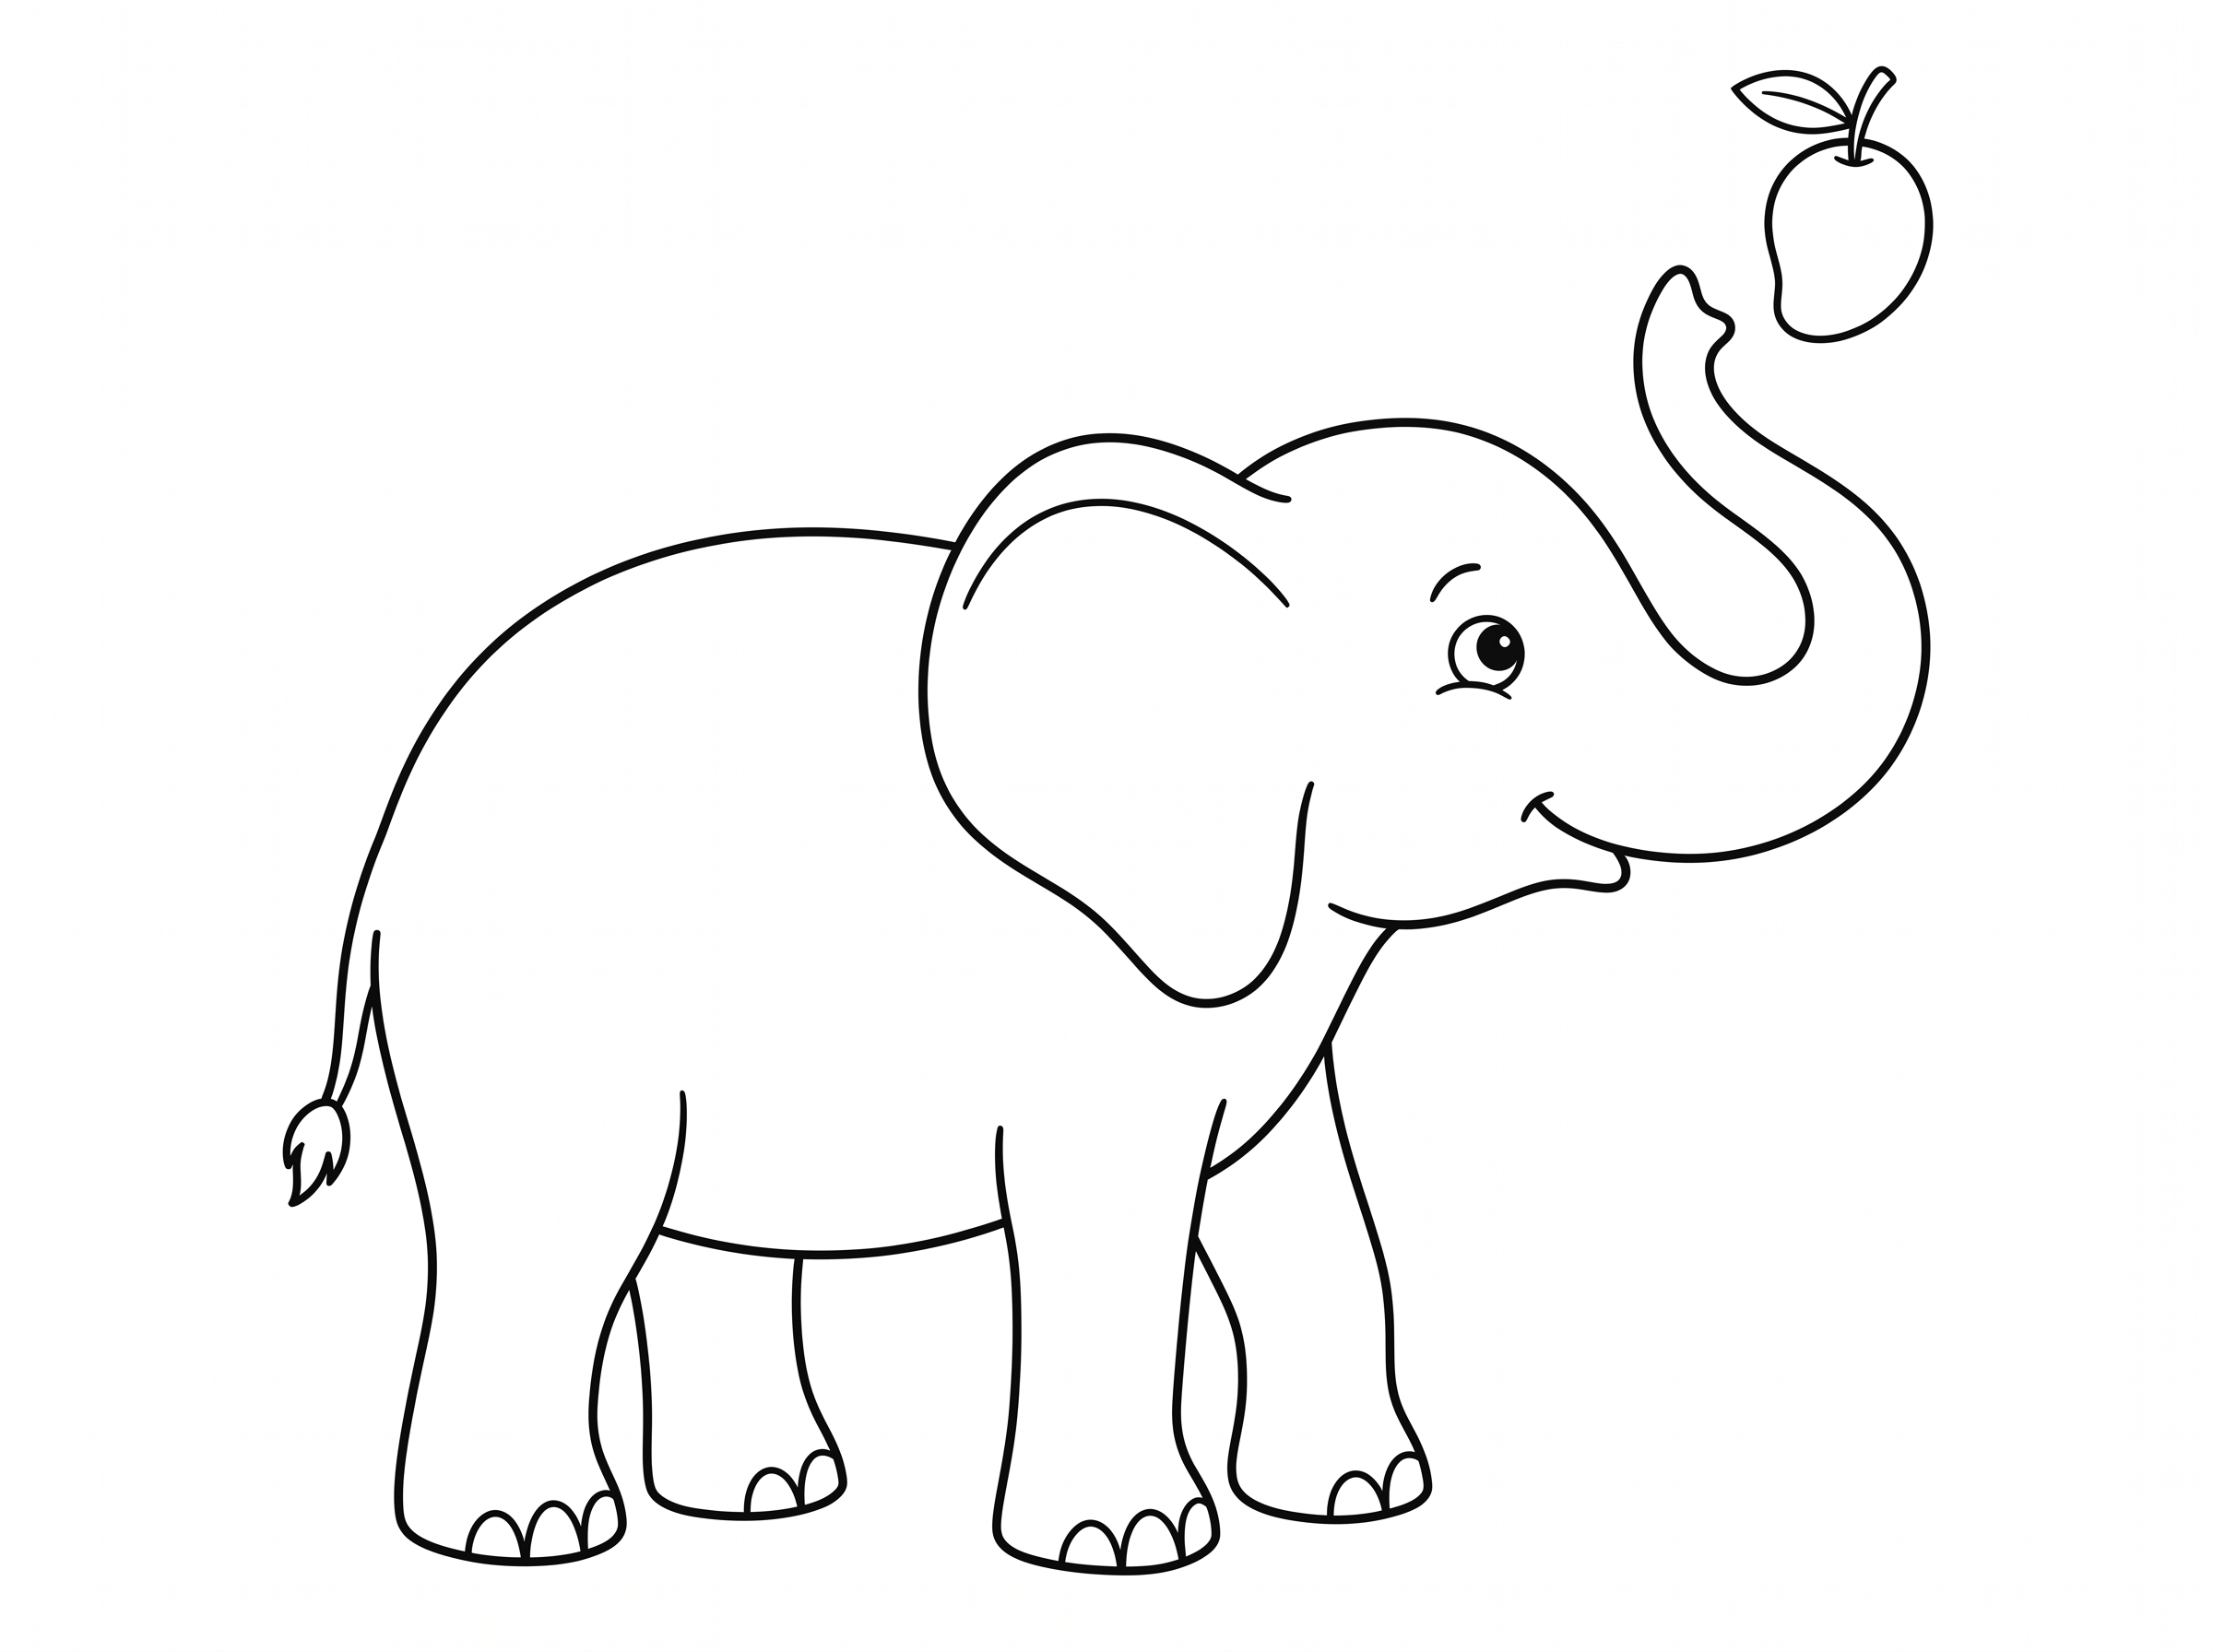
Place the body and head, build the curved trunk with light guides, then connect the ear and legs. Each goal shows the smaller drawing actions and exactly which guides to erase.
HardThe raised trunk changes width through a compound bend before joining the head and rounded tip.
You will practise: controlling both sides of a tapering trunk and connecting the ear, jaw and overlapping legs.
Choose paper or screen.
The full lesson is free. Use a pencil, plain paper and an eraser. Follow the pictures below, print the lesson, or use the phone PDF with larger text.
No email or purchase is needed. Drawing with a child? Read one instruction together, then leave time to try it. There is no video for this lesson.
Jump to a construction goal
- Place the main shapes
- Plan the trunk’s reach
- Build the inside curve
- Build the outside and close the tip
- Erase the guides and check
- Shape the hanging ear
- Join the jaw and clean the head
- Build the back and narrow tail
- Place and round the nearer legs
- Join the belly and clear its guides
- Add the two farther legs
- Finish the face and base elephant
Build your elephant one part at a time.
Gray dashes are light guides. Black is kept outline; orange is new outline. Green marks are helpers, not drawing marks. Open any picture for a closer look, then use Back to return to the lesson.
Goal 1 of 12
Place the main shapes
Make room for the elephant before drawing detail.
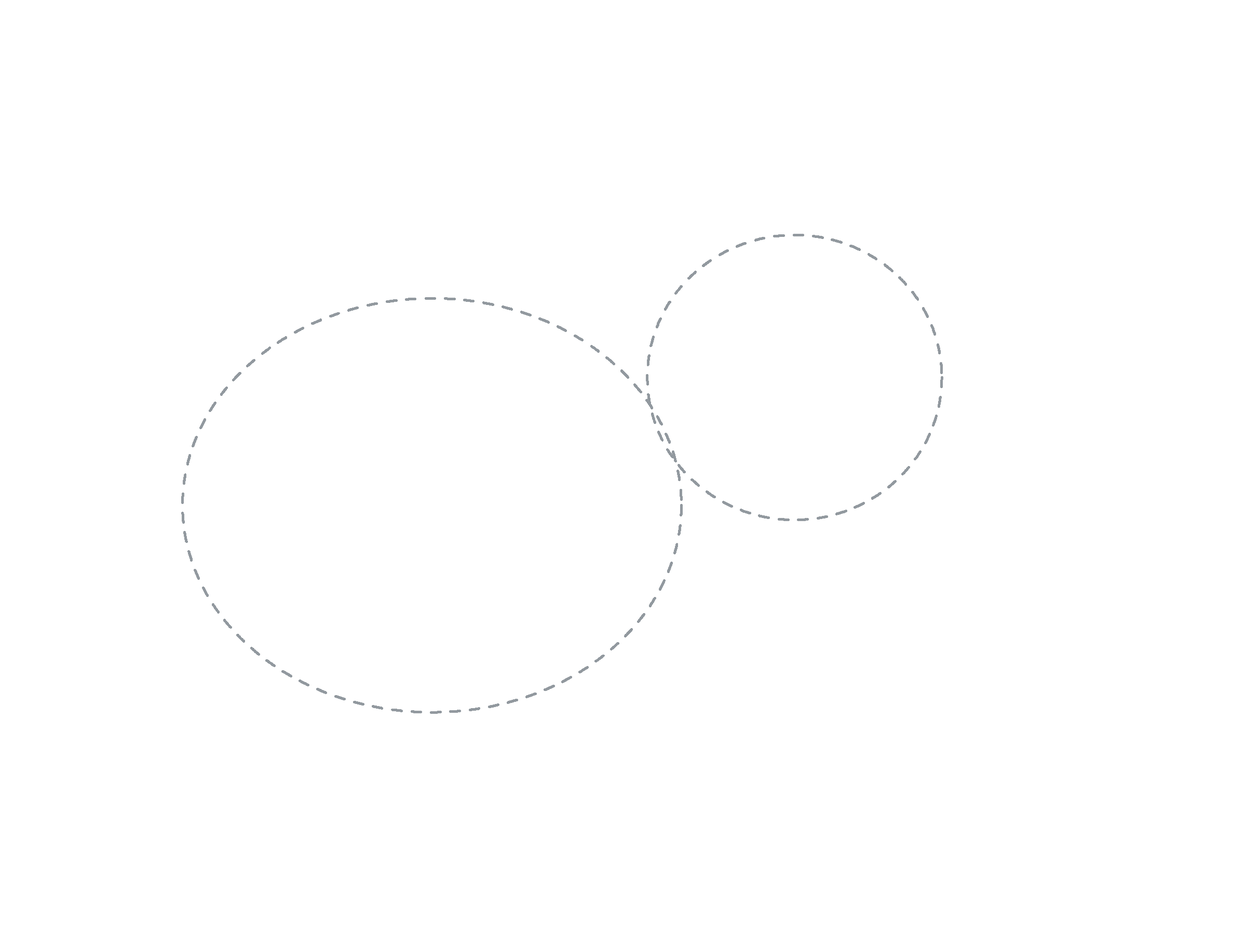
Body and head
Place a wide body oval, then overlap a smaller head oval at its upper right. Leave room above and to the right for the trunk.
Enlarge this picture ↗Check: The head is a little over half the body width. Adjust the light ovals now if the page feels crowded.
Goal 2 of 12
Plan the trunk’s reach
Set one direction path and make it broad at the base, narrow at the tip.
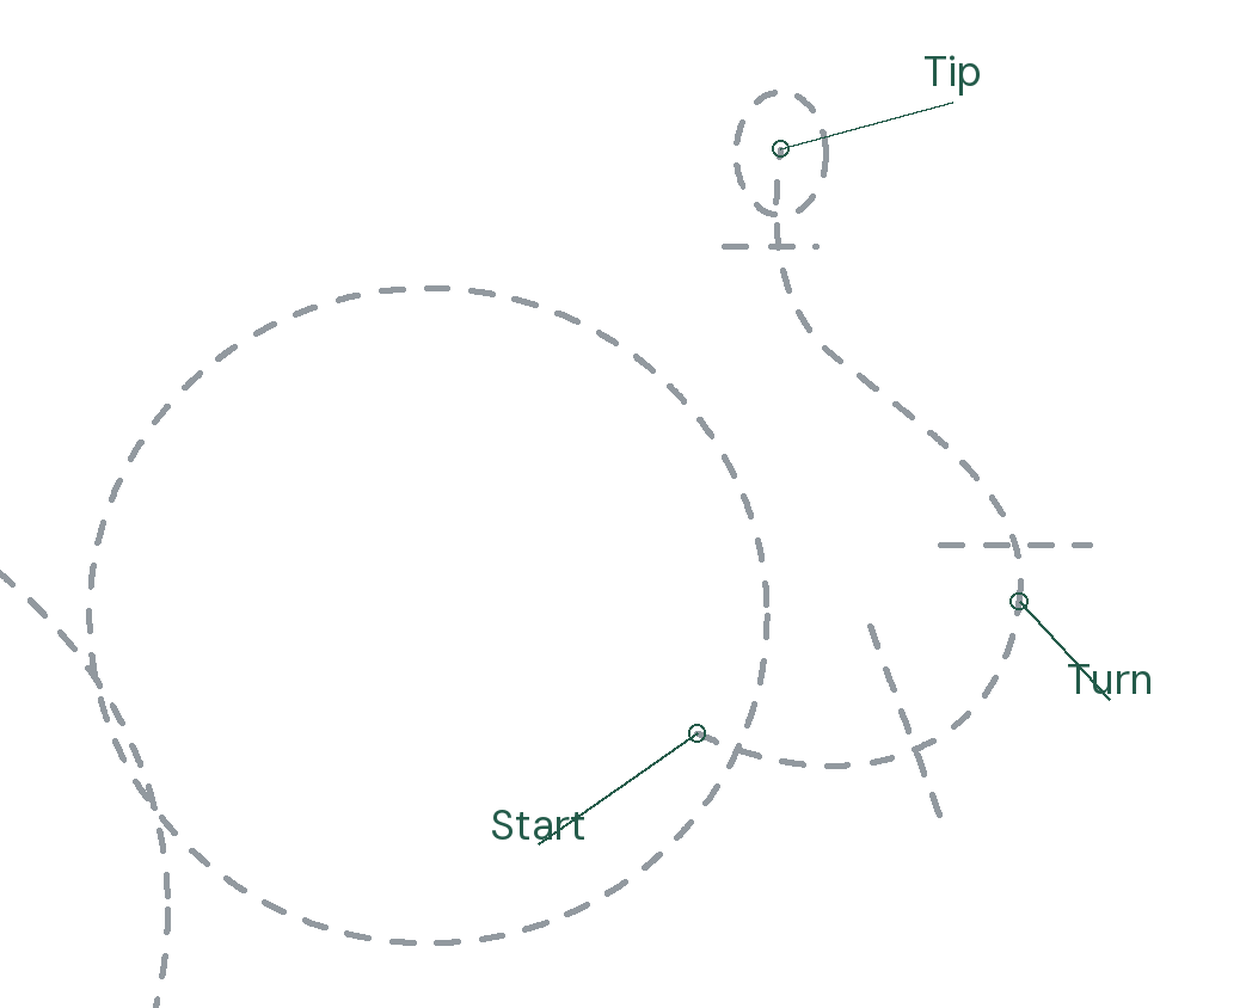
Path, width and tip
Sweep a light path out from the head, around the low turn, then up and back to the tip. Add three crossbars, broad at the base and narrow at the top, plus a small tip oval.
Enlarge this picture ↗Check: The path is the middle of the trunk. The crossbar ends show where its two edges will go.
Goal 3 of 12
Build the inside curve
Connect the head’s crown to the inside of the raised trunk.
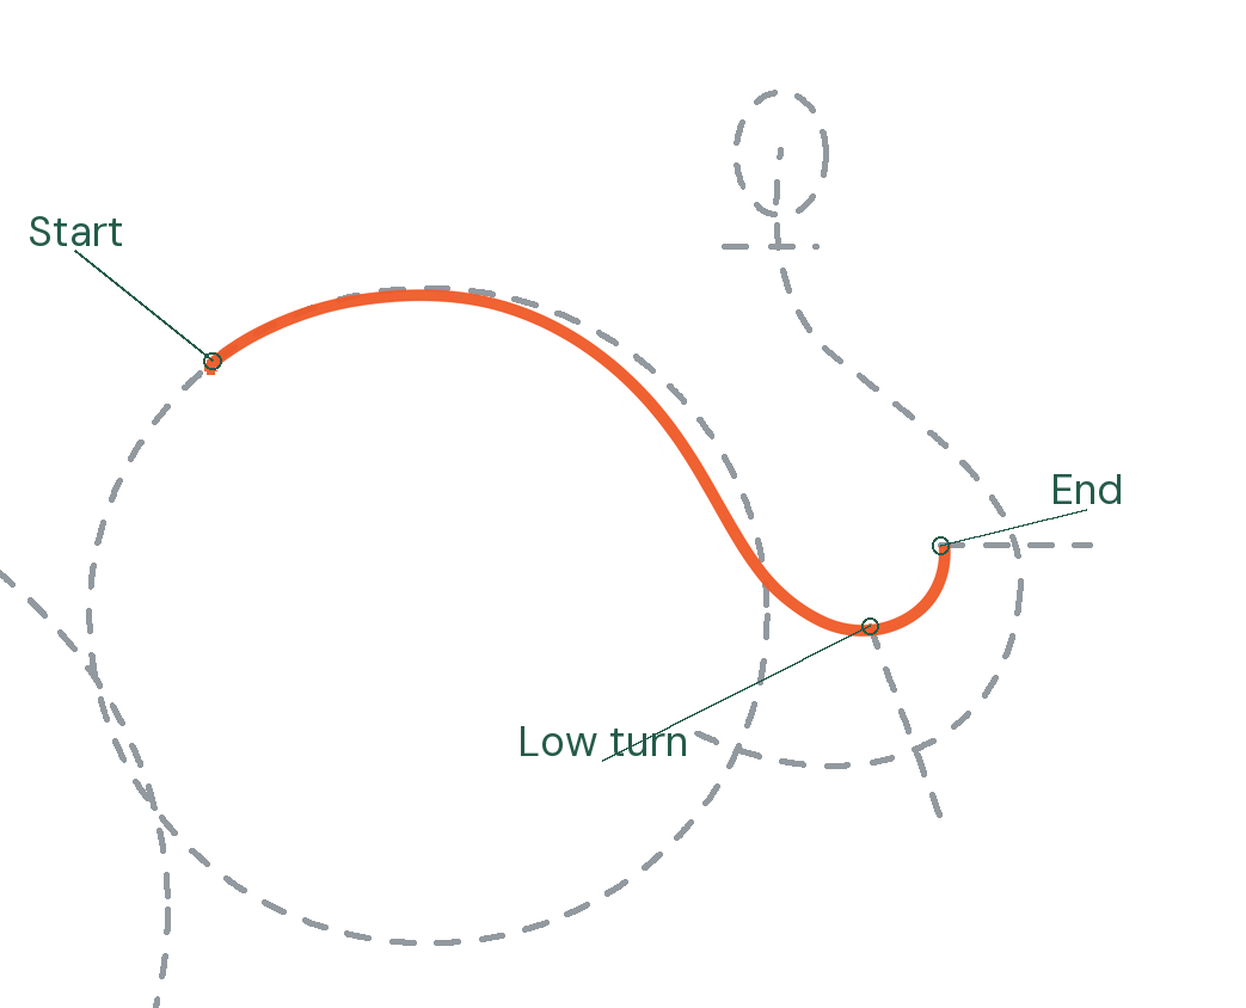
Round the crown and low bend
From the head oval’s upper left, round the crown and turn down. Curl around a broad U to the middle crossbar’s left end.
Enlarge this picture ↗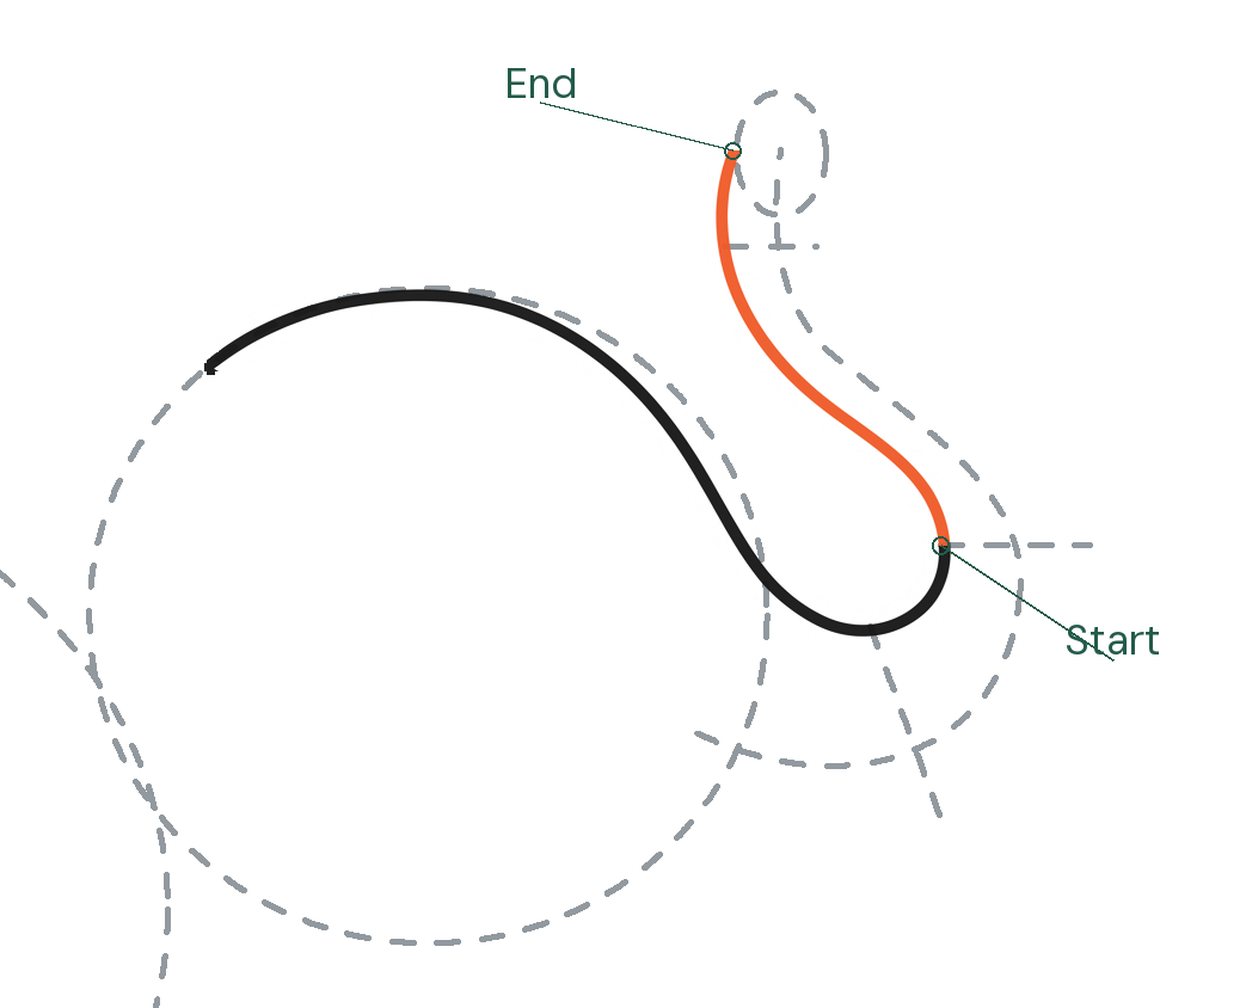
Continue up to the tip
Continue upward from that crossbar. Follow the left side of the light path, pass the narrow crossbar and stop at the left side of the tip oval.
Enlarge this picture ↗Check: Keep one connected curve and leave the tip open. The crossbars help place each turn.
Goal 4 of 12
Build the outside and close the tip
Follow the other side of the path, then join the two edges.
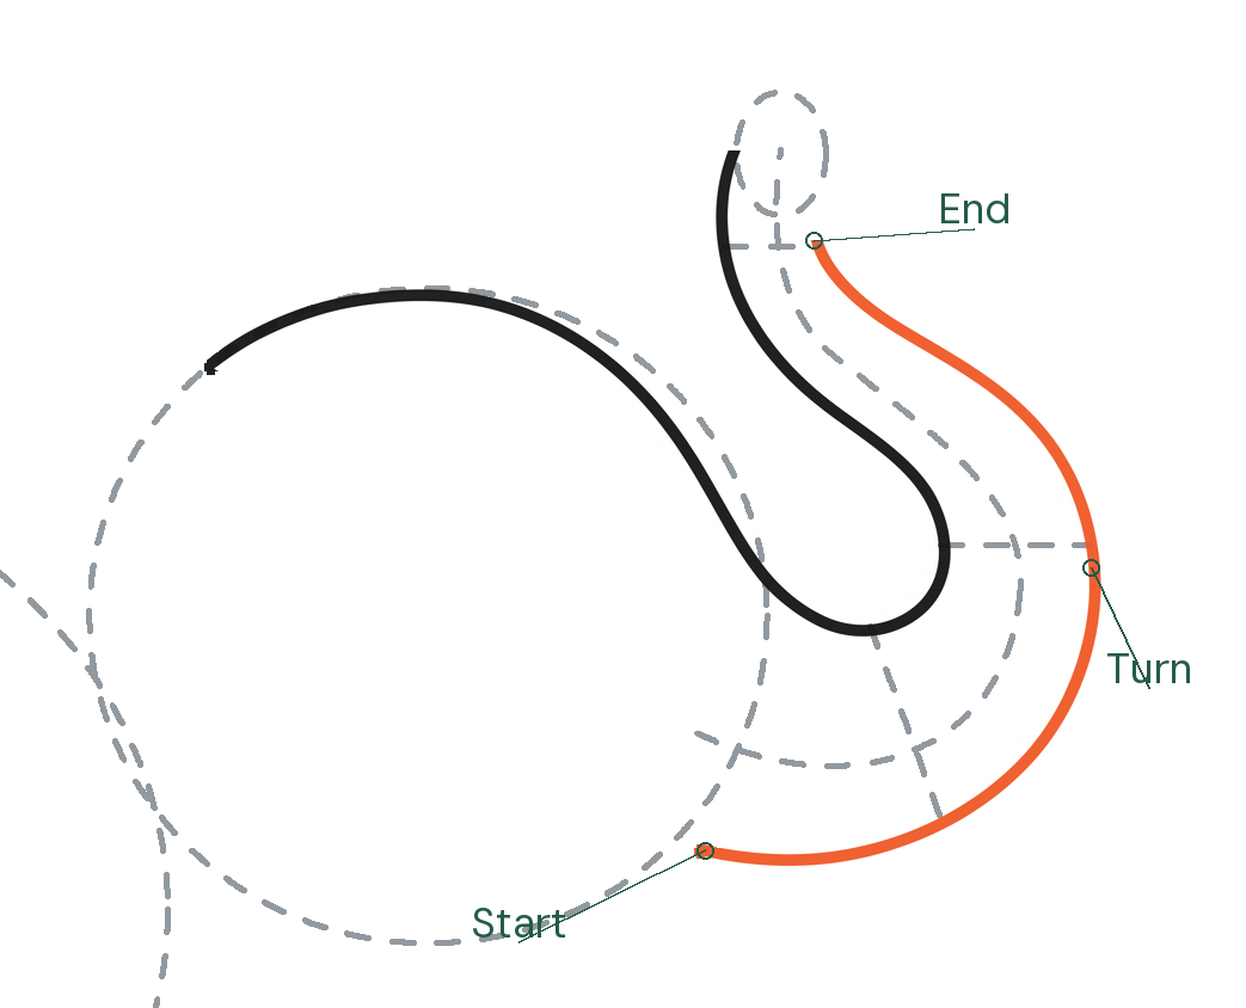
Sweep around the outside
Start low on the head. Curve beneath the path, around the wide bend and upward along the other side. Narrow toward the tip oval and stop at its lower right side.
Enlarge this picture ↗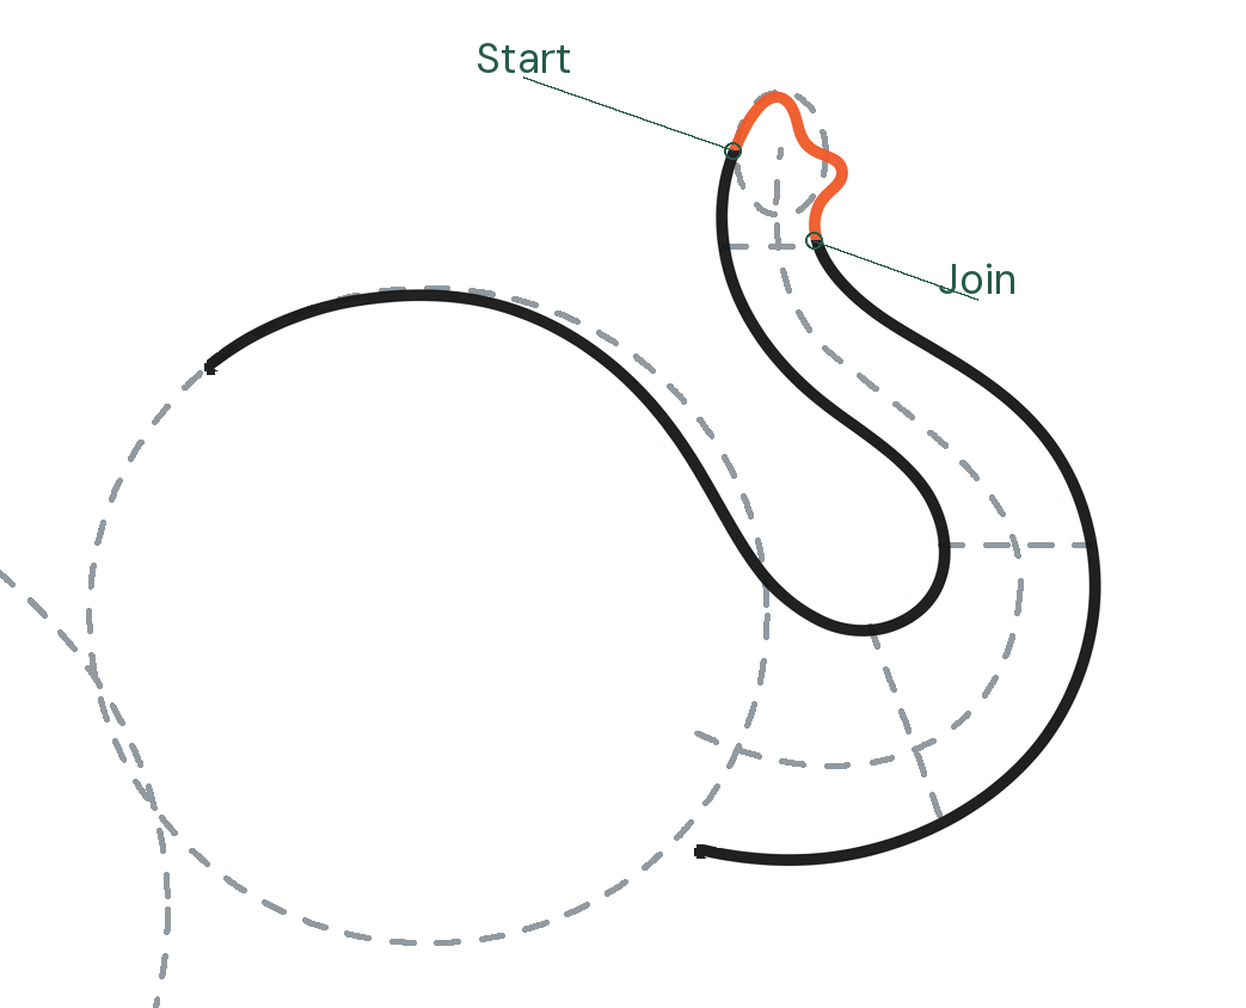
Round the tip and join
From the inner edge, round over the tip oval. Make the small outward bump, return inward, then meet the outside edge.
Enlarge this picture ↗Check: The tip should join both edges. Keep a wide opening inside the bend; the tiny tip bump may be gentler.
Goal 5 of 12
Erase the guides and check
Remove the planning marks without changing the outline.
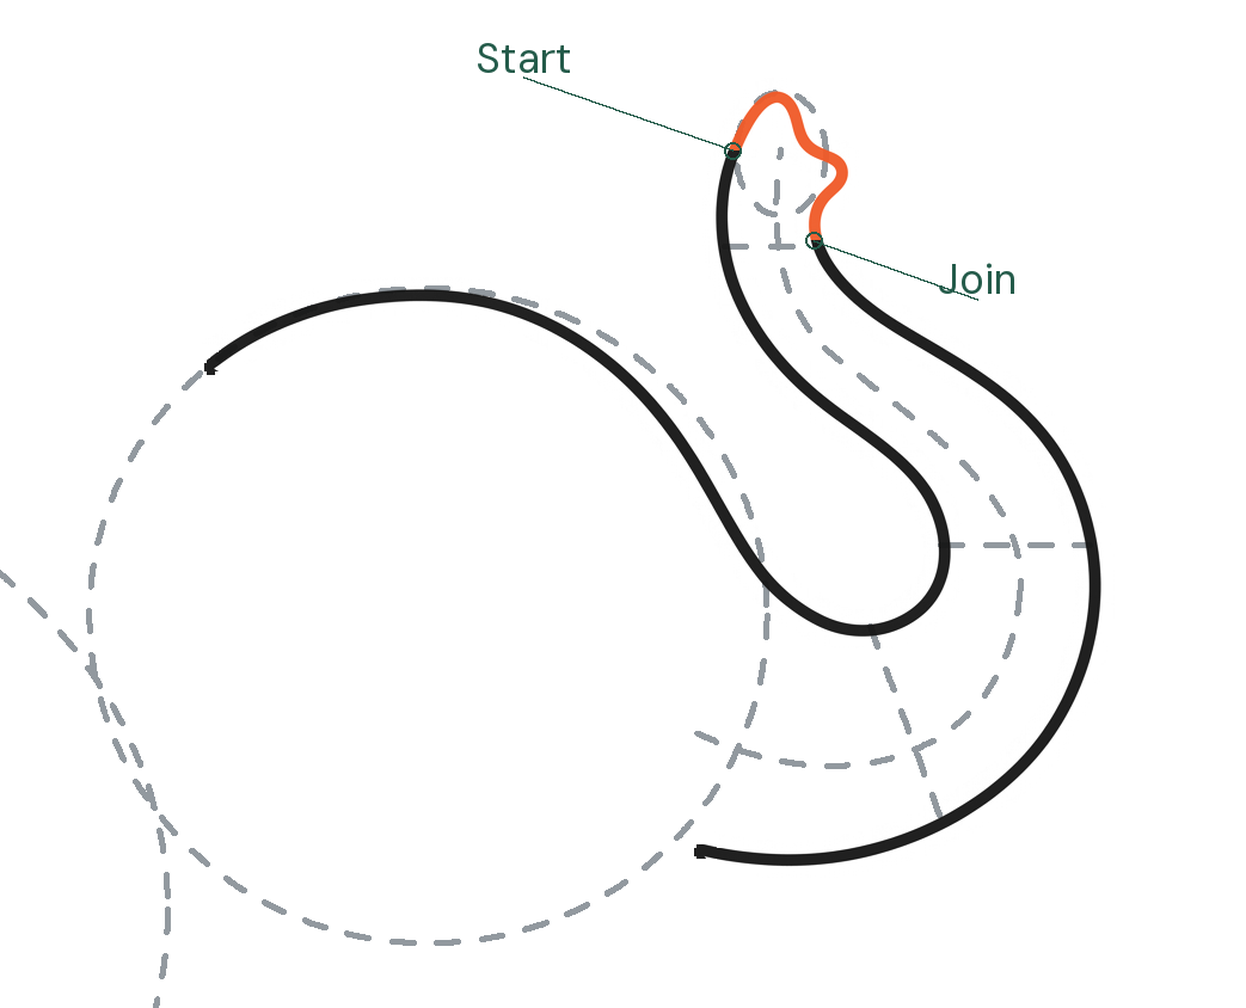
Before: choose what goes
Erase the dashed head oval, middle trunk path, three crossbars and small tip oval. Keep the solid outline and body oval.
Enlarge this picture ↗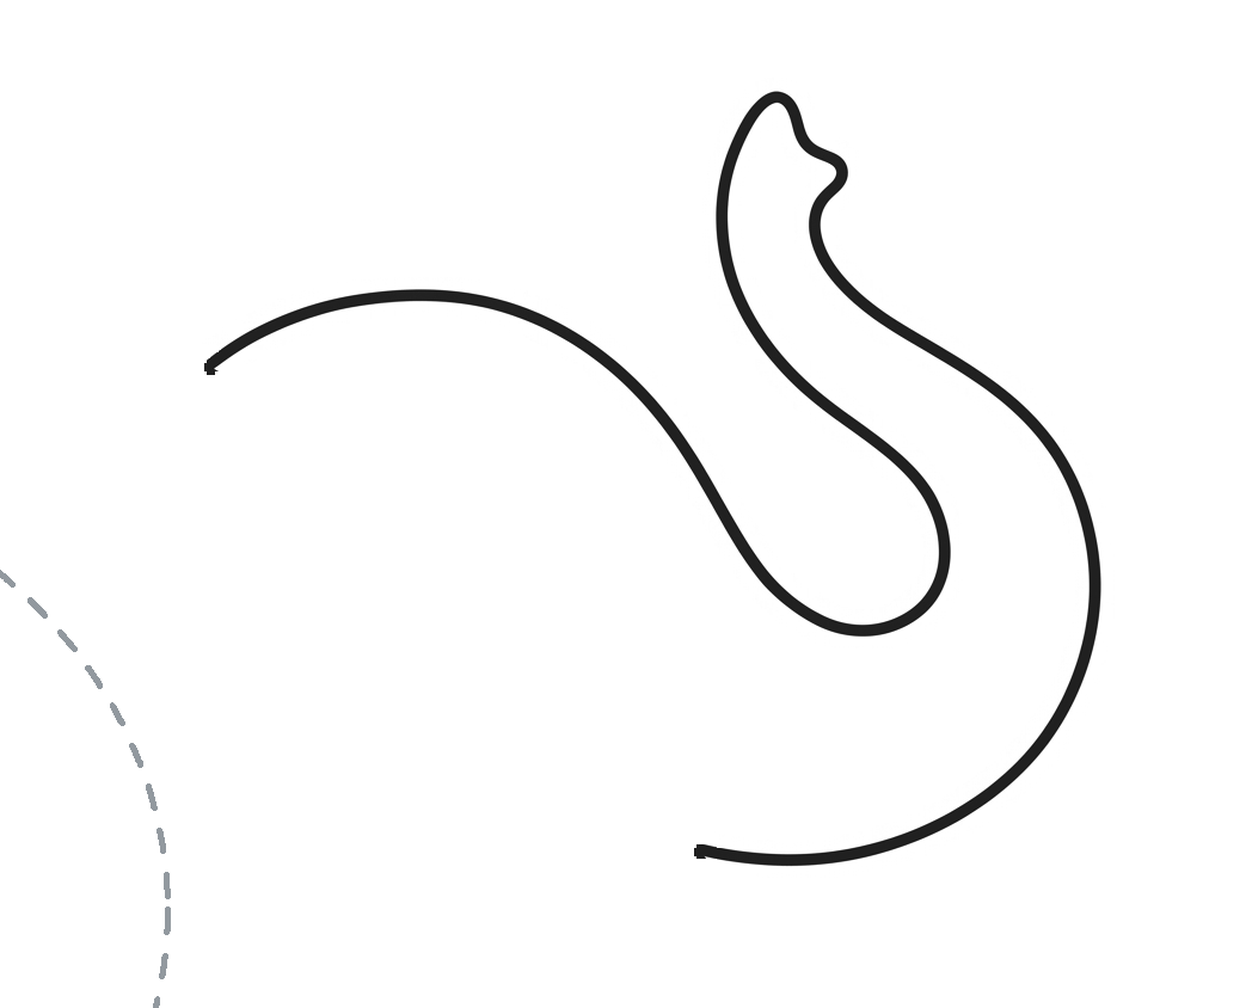
After: keep the outline
The named guides are gone. Keep the open ends on the left and below for the ear and jaw.
Enlarge this picture ↗Check: You have drawn the head and trunk. Keep the light body oval; the rest of the elephant comes next.
Goal 6 of 12
Shape the hanging ear
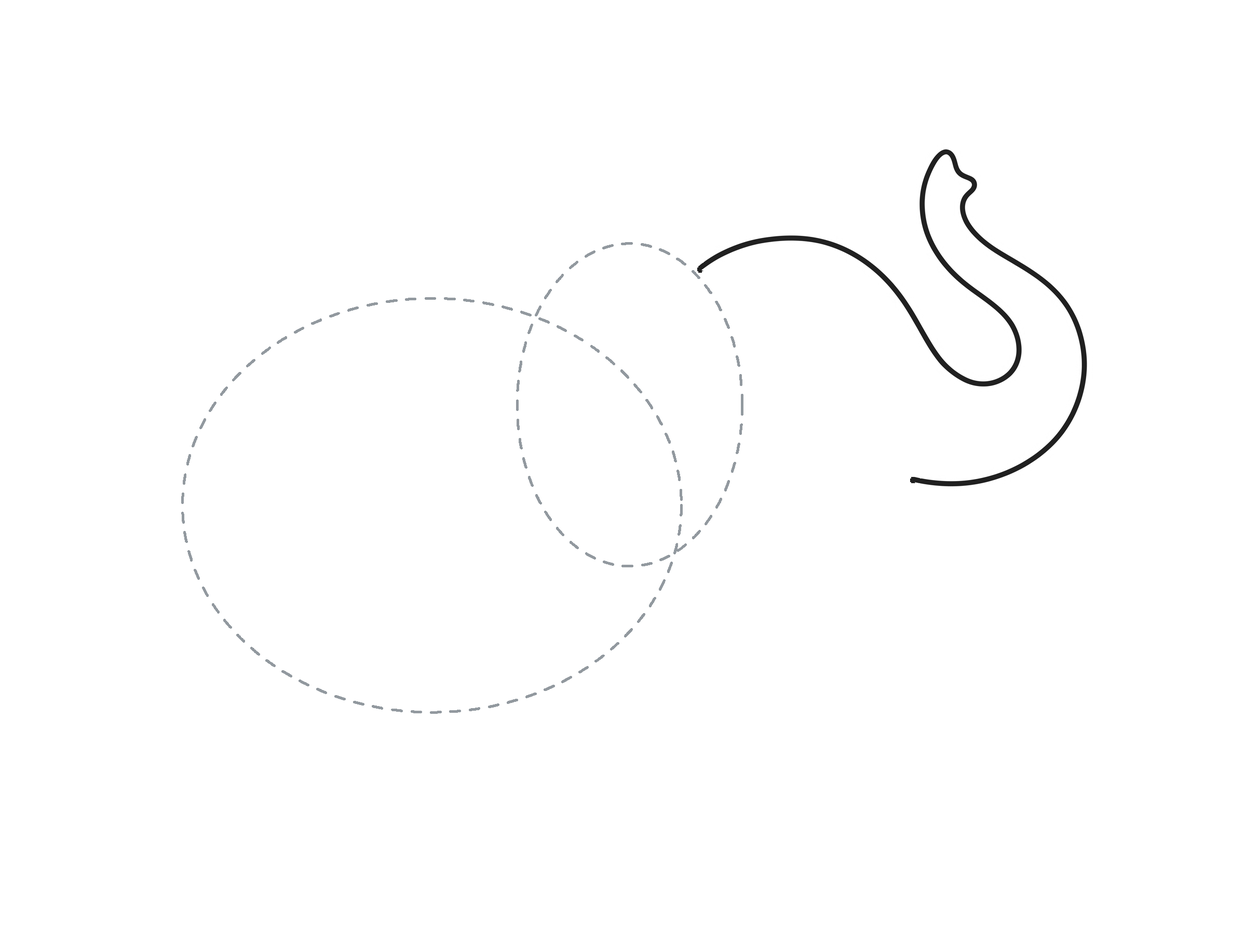
Place the hanging ear
Overlap a tall oval with the left side of the head. Let its lower end hang below the trunk base.
Enlarge this picture ↗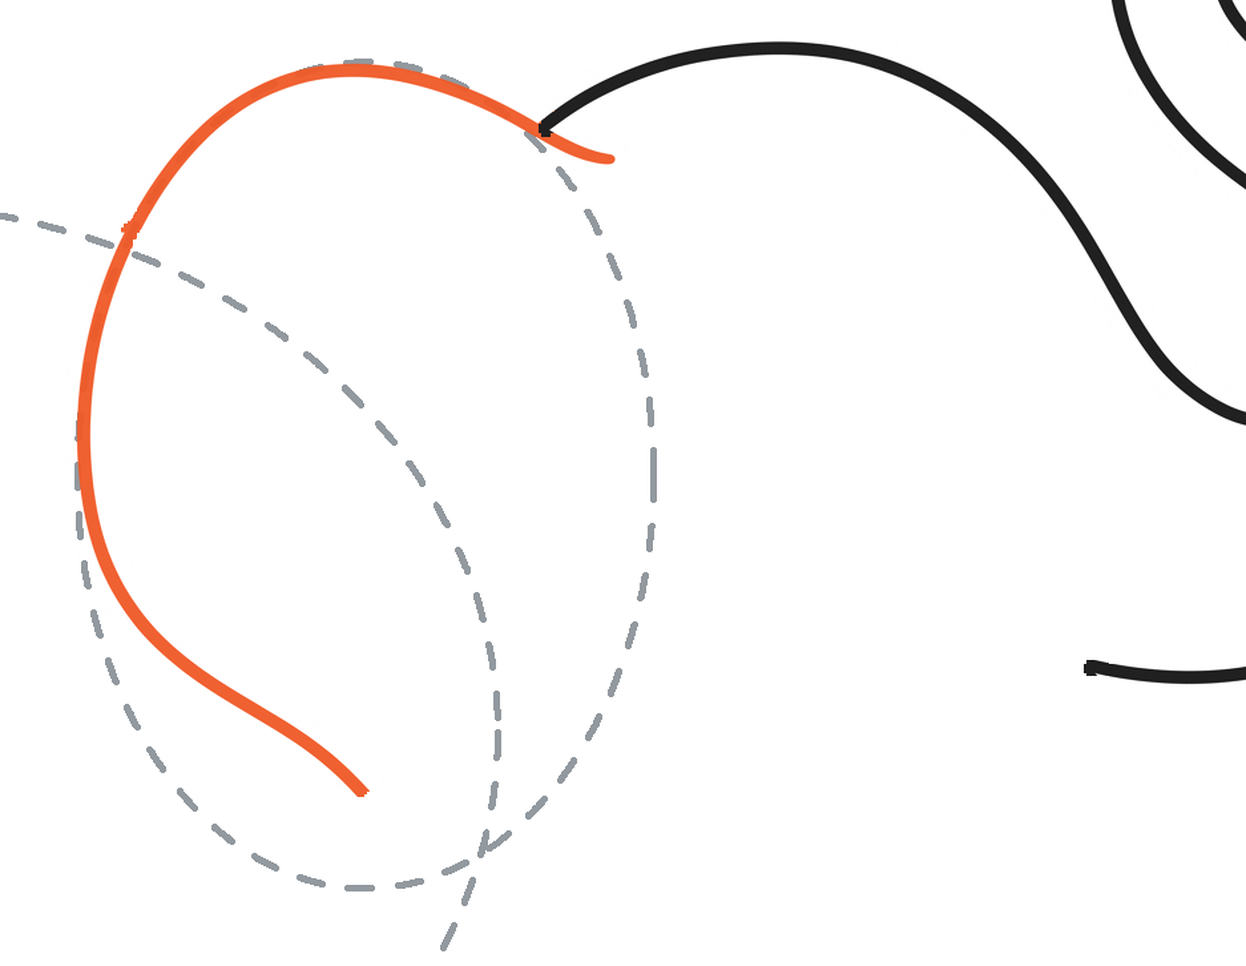
Round the top and outside
From the upper body side, round over the ear guide to the crown. Continue a short way into the head, then follow the ear’s left side down toward the lobe.
Enlarge this picture ↗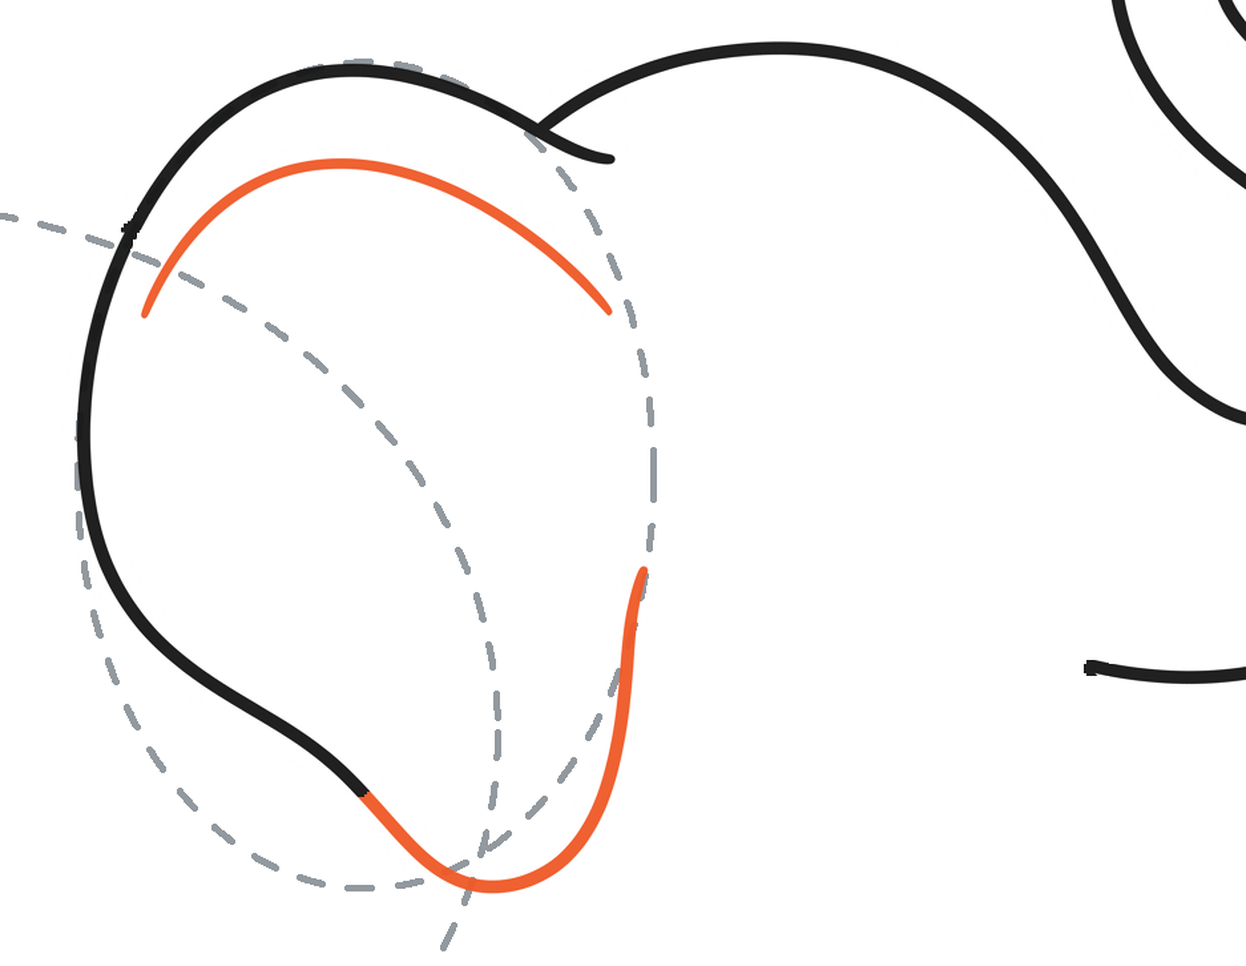
Curl the lobe back upward
Round the bottom lobe and curl upward inside the head. Stop before the top; add a smaller arch inside the upper ear.
Enlarge this picture ↗Check: Keep the large ear in front of the body and head; its inner end stays open.
Goal 7 of 12
Join the jaw and clean the head
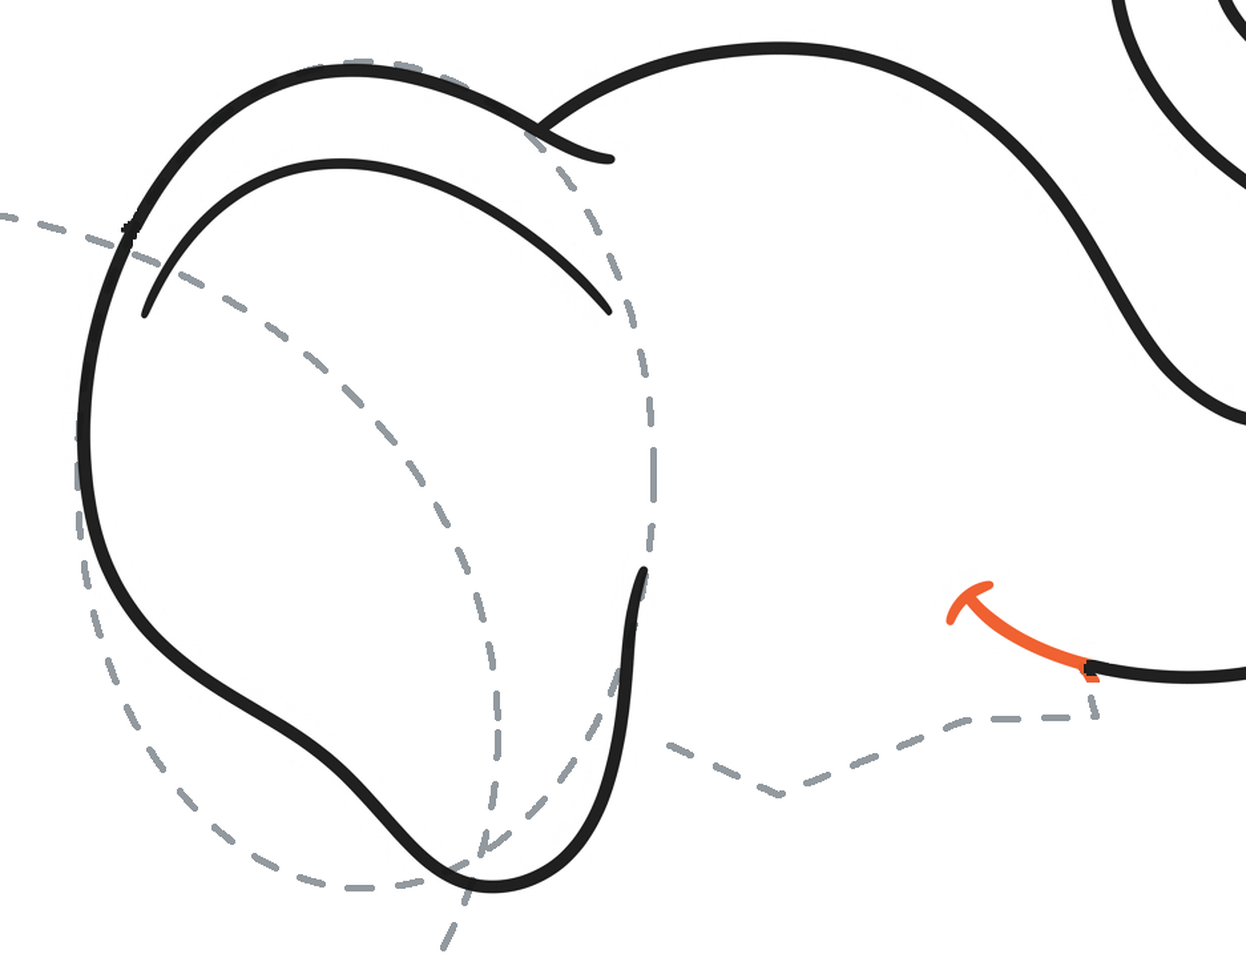
Place the jaw beneath the smile
Place a light bent line under the trunk. Add a short smile corner and curve its upper edge to the trunk’s existing lower end.
Enlarge this picture ↗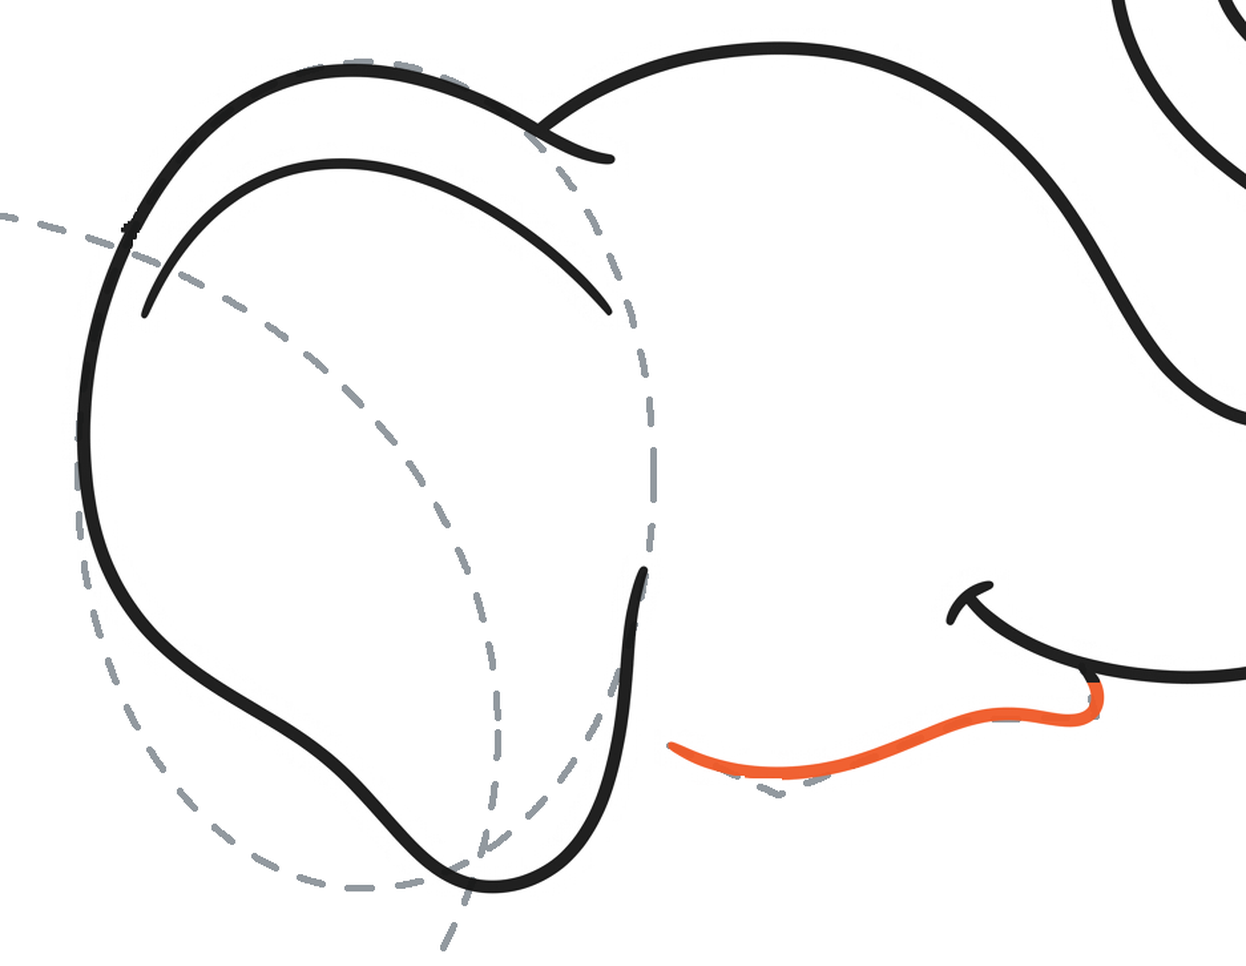
Round the chin toward the ear
From the trunk’s lower join, make a small rounded turn underneath, then sweep left along the jaw guide. Stop just before the ear’s folded edge.
Enlarge this picture ↗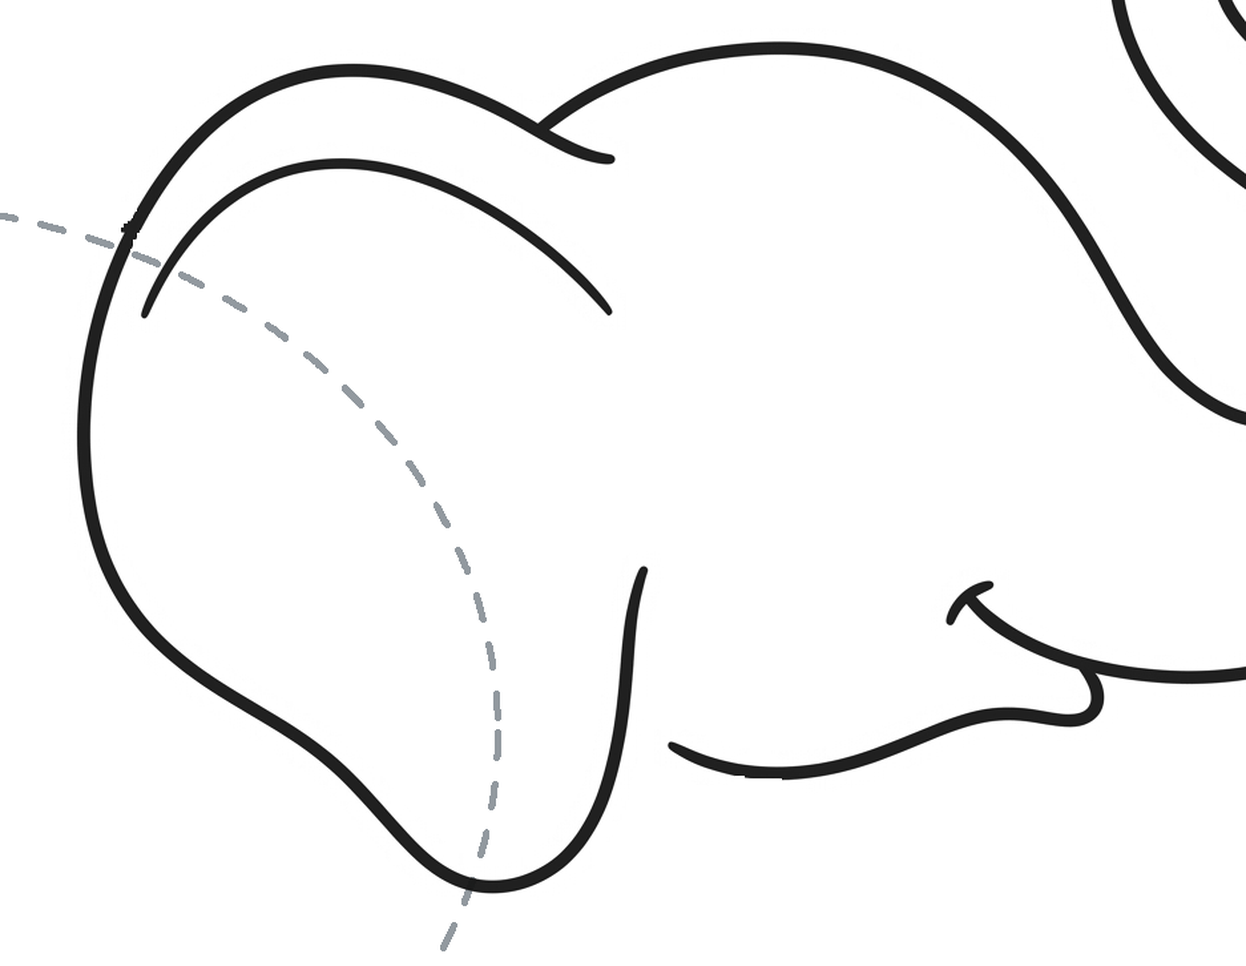
Keep the face, remove its guides
Erase the dashed ear oval and bent jaw guide. Keep the solid ear, smile and chin, plus the body oval.
Enlarge this picture ↗Check: The trunk, ear and jaw stay attached. The light body oval stays for the next form.
Goal 8 of 12
Build the back and narrow tail
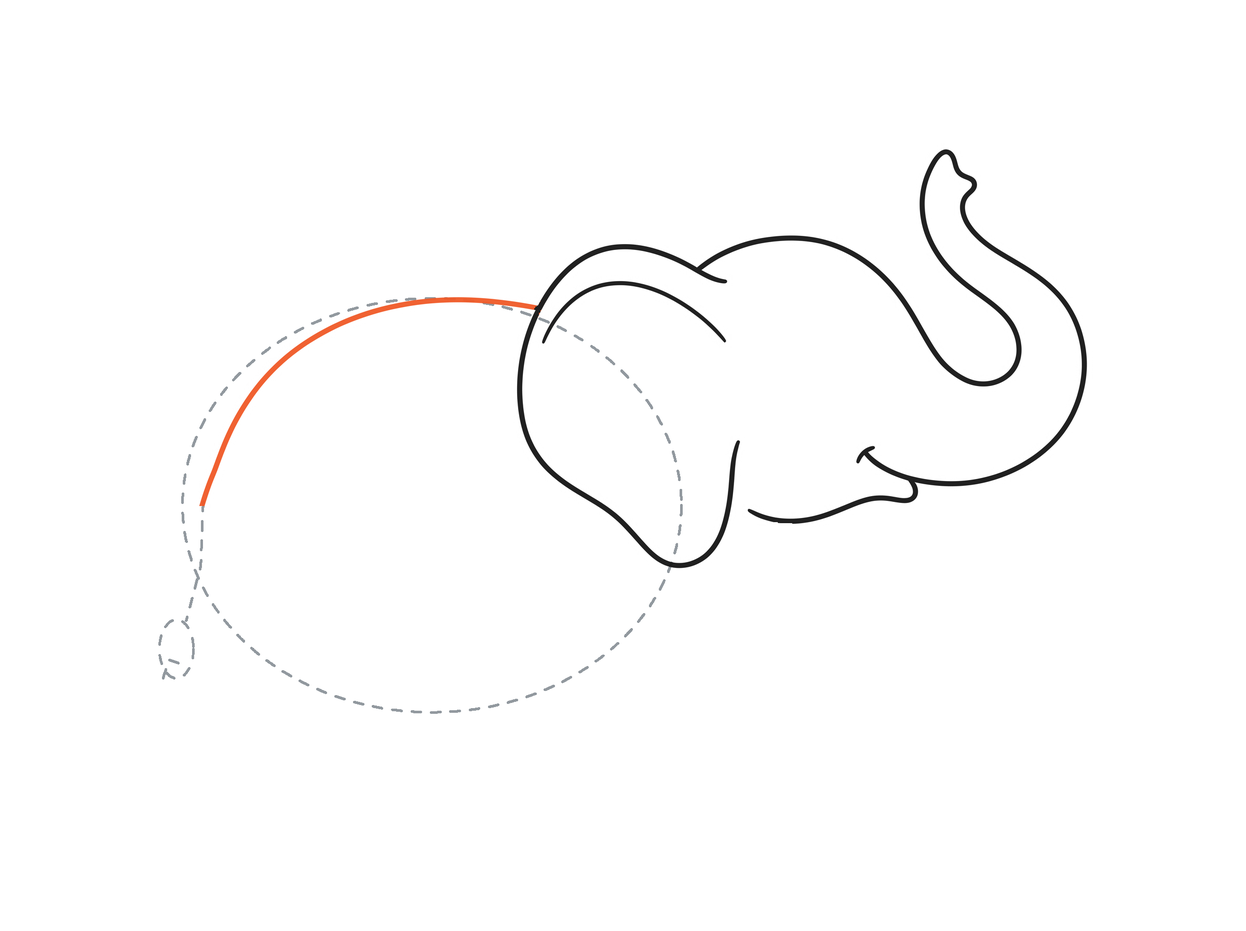
Round the back and place the tail
Follow the body oval from behind the ear over the back and down toward the rear. Place a thin tail path and a small tuft oval below it.
Enlarge this picture ↗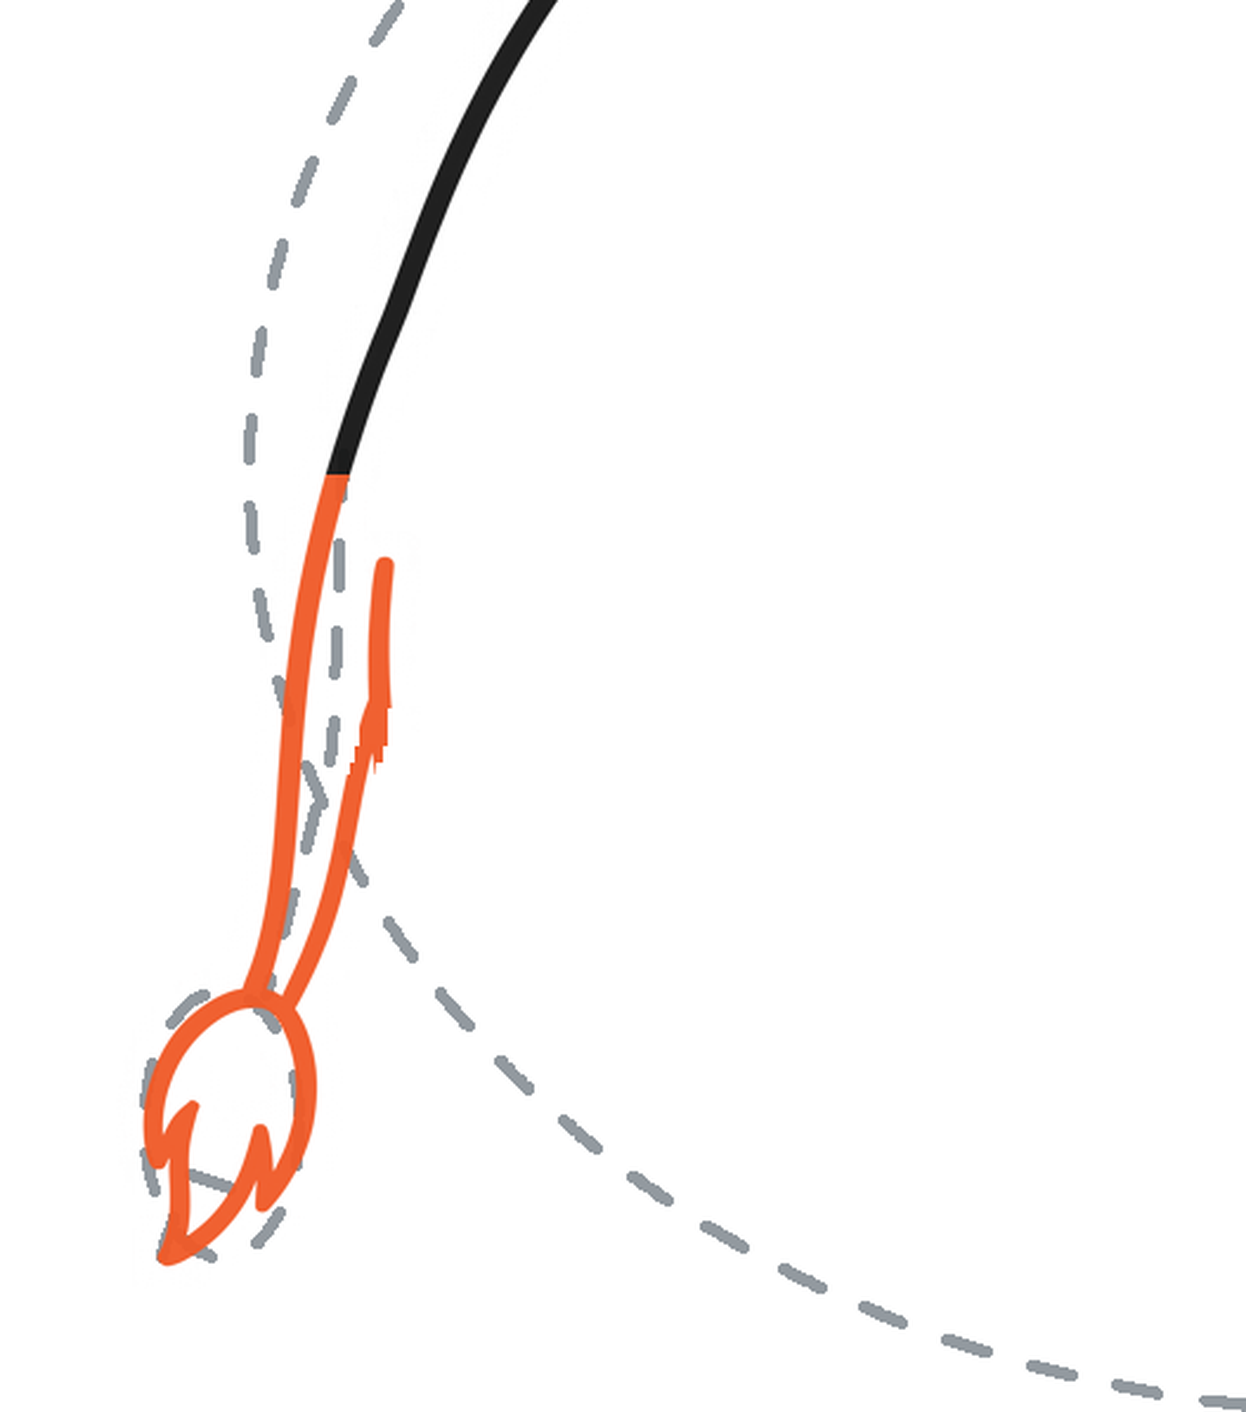
Shape the narrow tail and tuft
Continue along both sides of the tail path. Round the tuft’s top, then form a long point below the oval’s lower left and a shorter point on its right. Curve inward between them and return to the tail.
Enlarge this picture ↗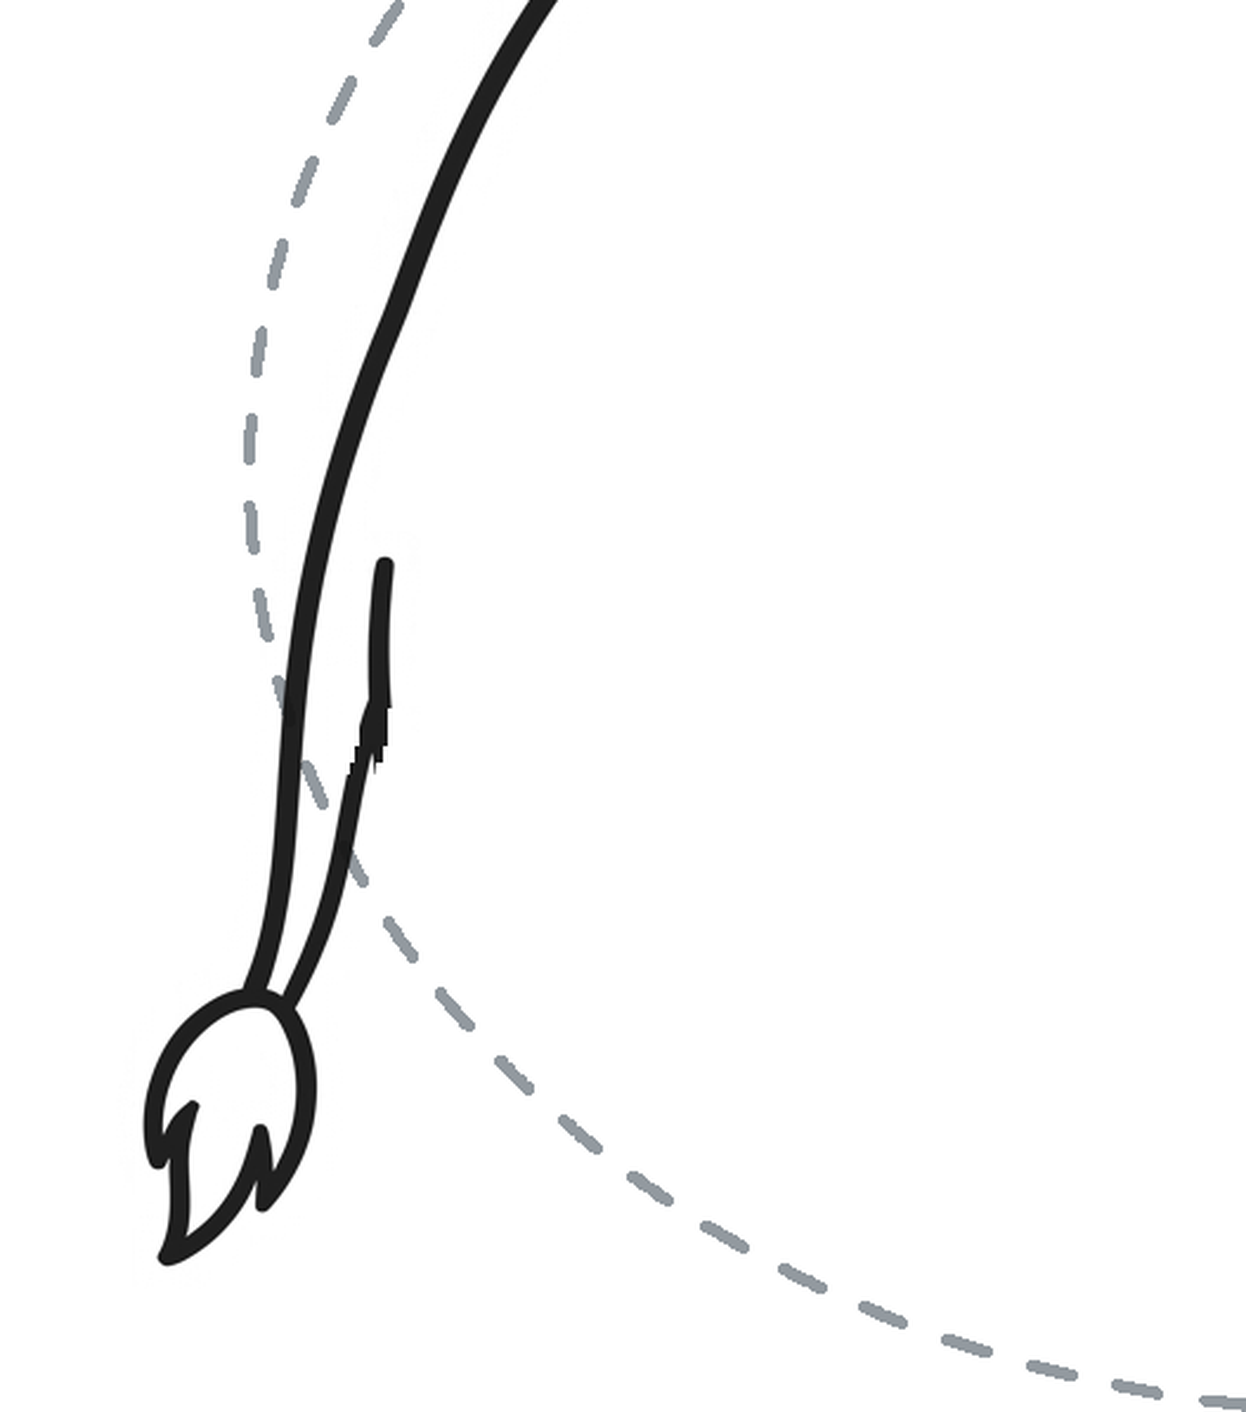
Keep the back and tail
Erase the thin tail path and tuft guide. Keep every solid curve and the body oval.
Enlarge this picture ↗Check: Keep the tail attached to the back, beside the space for the rear leg.
Goal 9 of 12
Place and round the nearer legs
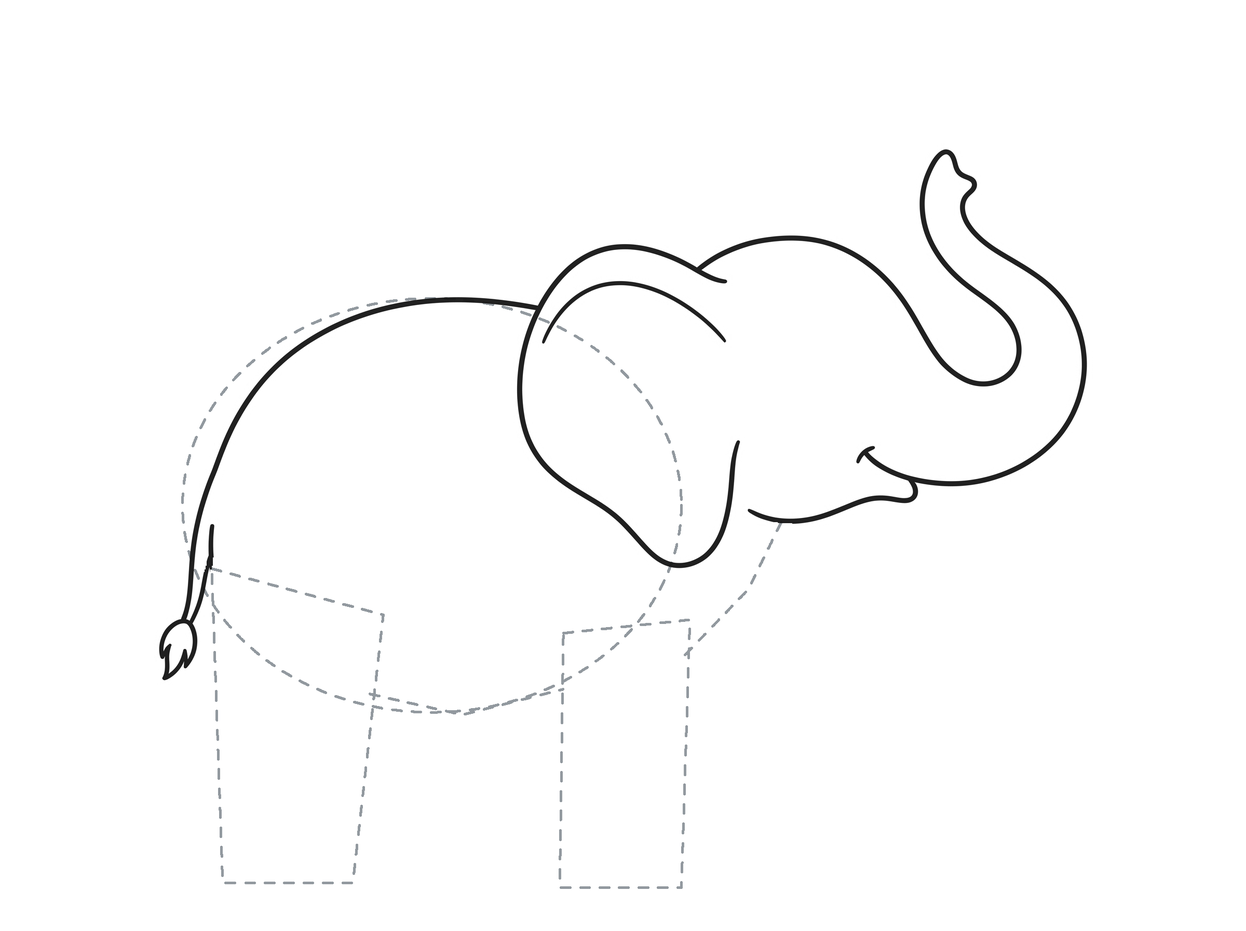
Place the legs and their joins
Place two broad leg blocks below the body, with their bottom edges almost level. Add a light chest path from the jaw to the front block and a shallow belly guide between the blocks.
Enlarge this picture ↗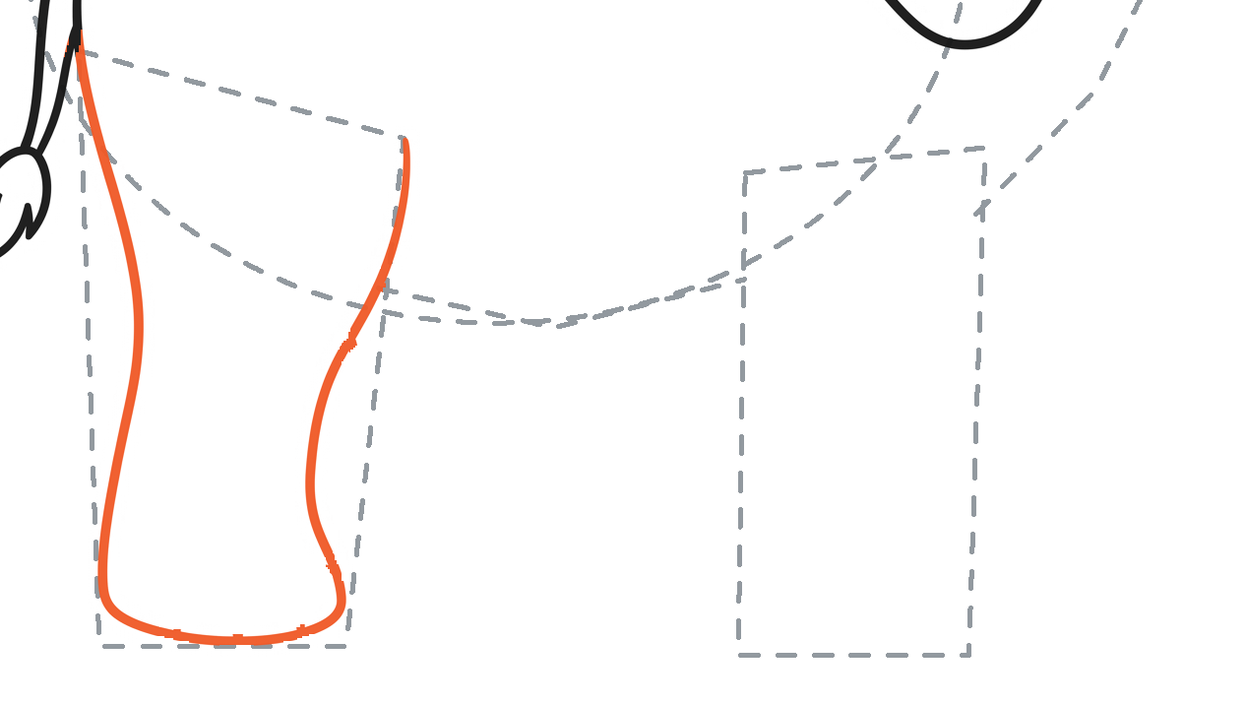
Round the nearer back leg
From the tail root, curve down the left side of the rear block. Round the wide foot and return up its inside edge.
Enlarge this picture ↗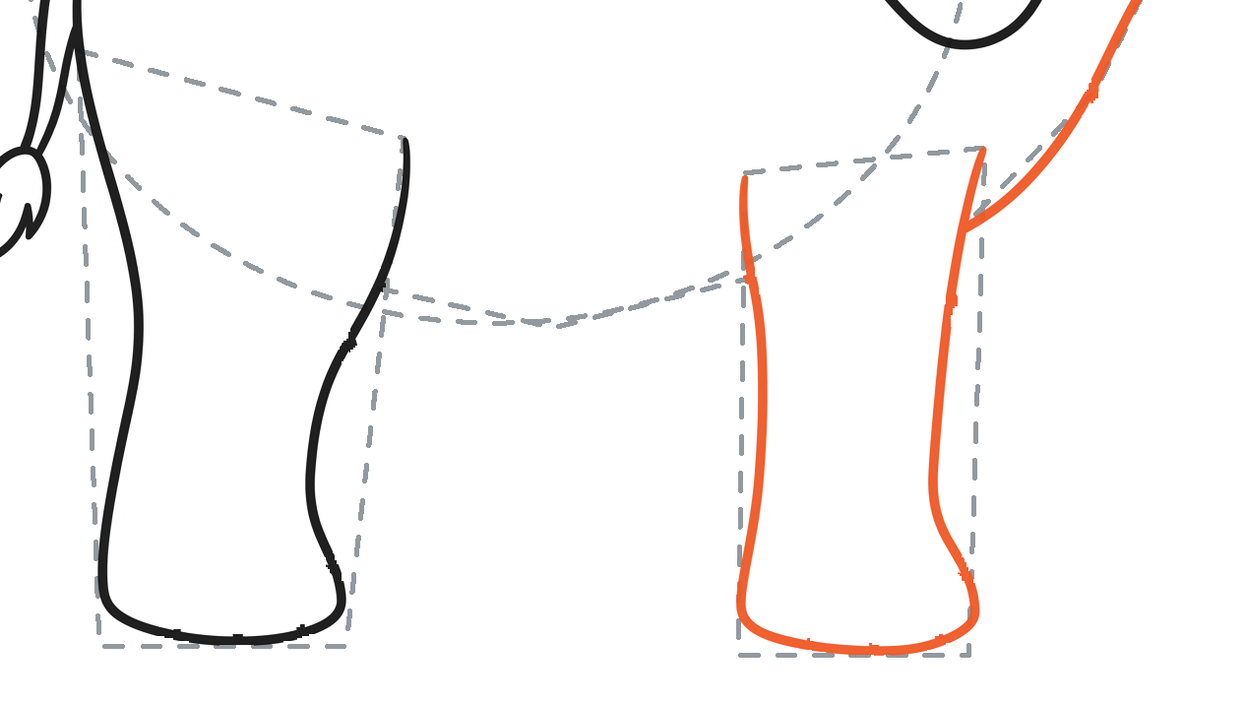
Connect the chest and front leg
Follow the chest guide down from the jaw. Continue along the front block, round its foot and bring the other edge upward.
Enlarge this picture ↗Check: The blocks locate both legs. Keep the feet broad; toenail arches are optional details later.
Goal 10 of 12
Join the belly and clear its guides
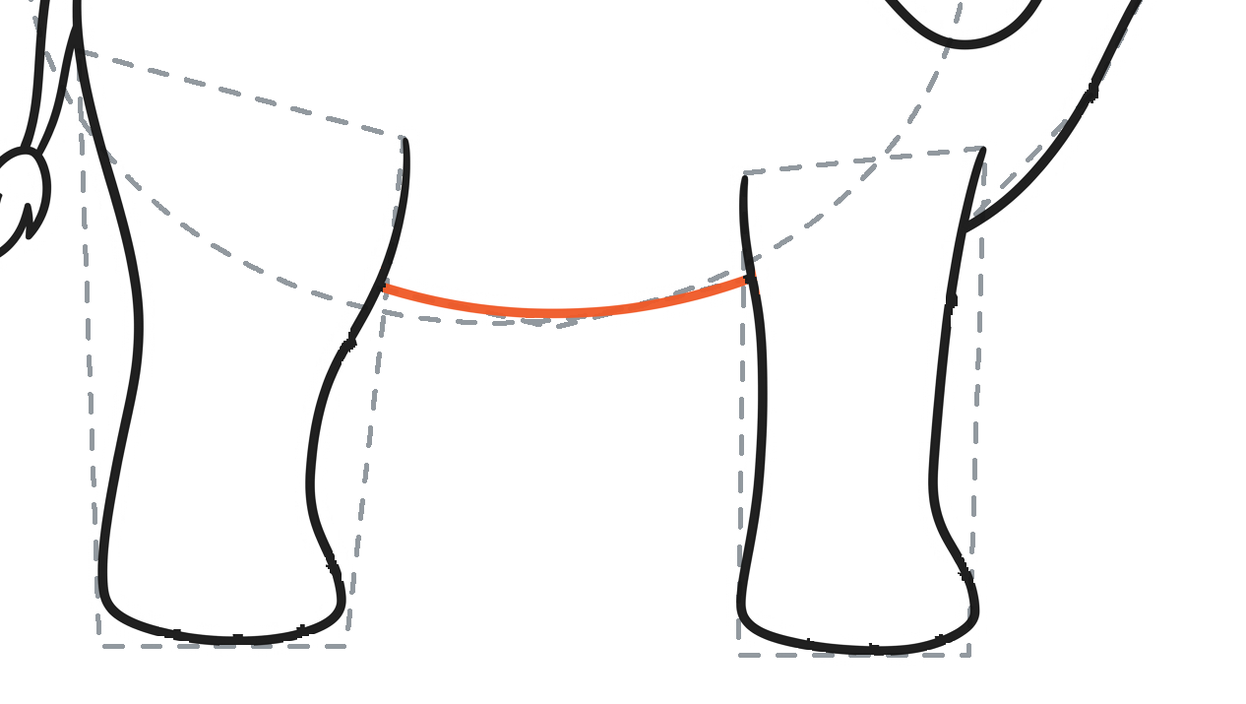
Join the shallow belly
Round the belly guide from the back leg’s inner edge to the front leg. Stop when the line meets each leg.
Enlarge this picture ↗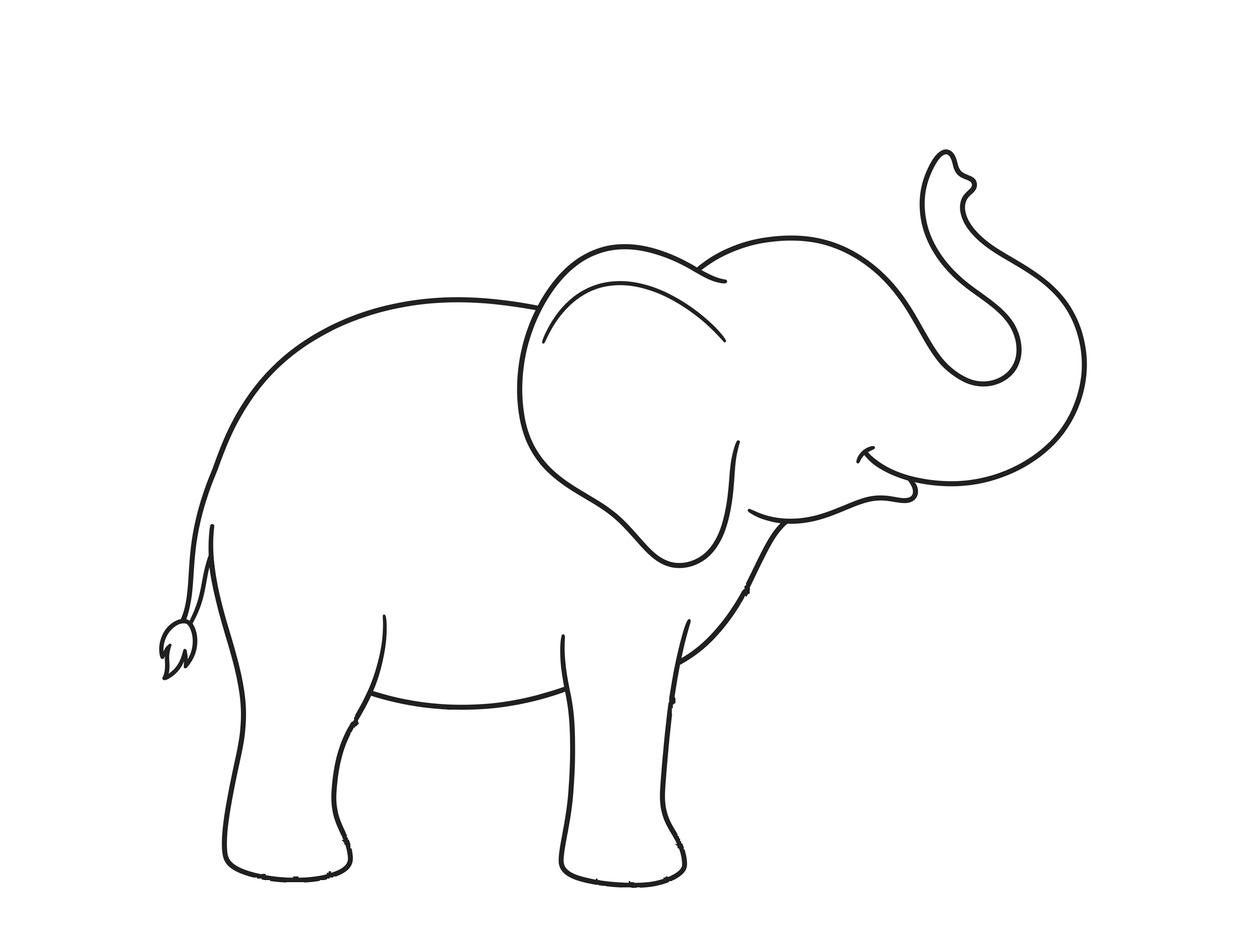
Keep the joined body and legs
Erase the body oval, near-leg blocks, chest path and belly guide. Keep the solid back, chest, belly and feet.
Enlarge this picture ↗Check: The body now joins both nearer legs. Optional repair help shows a short missing belly join.
Goal 11 of 12
Add the two farther legs
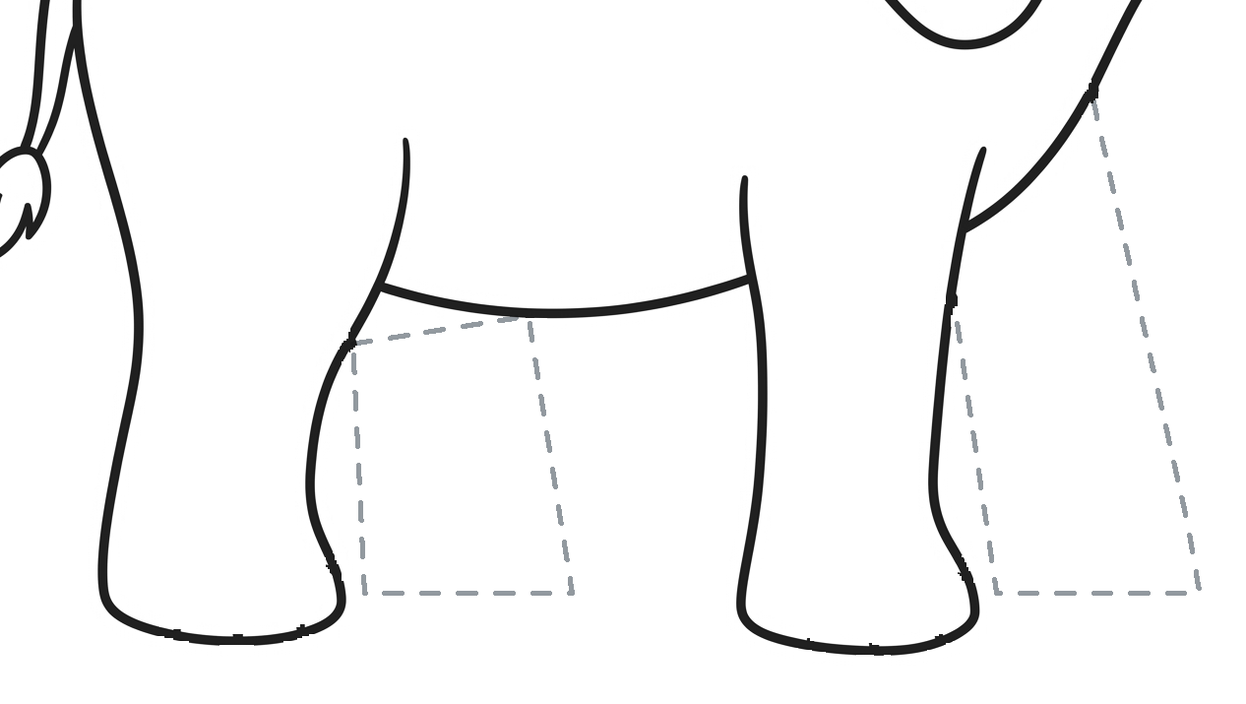
Place two legs behind
Place two narrower light blocks behind the nearer legs. Let their feet finish a little higher on the page.
Enlarge this picture ↗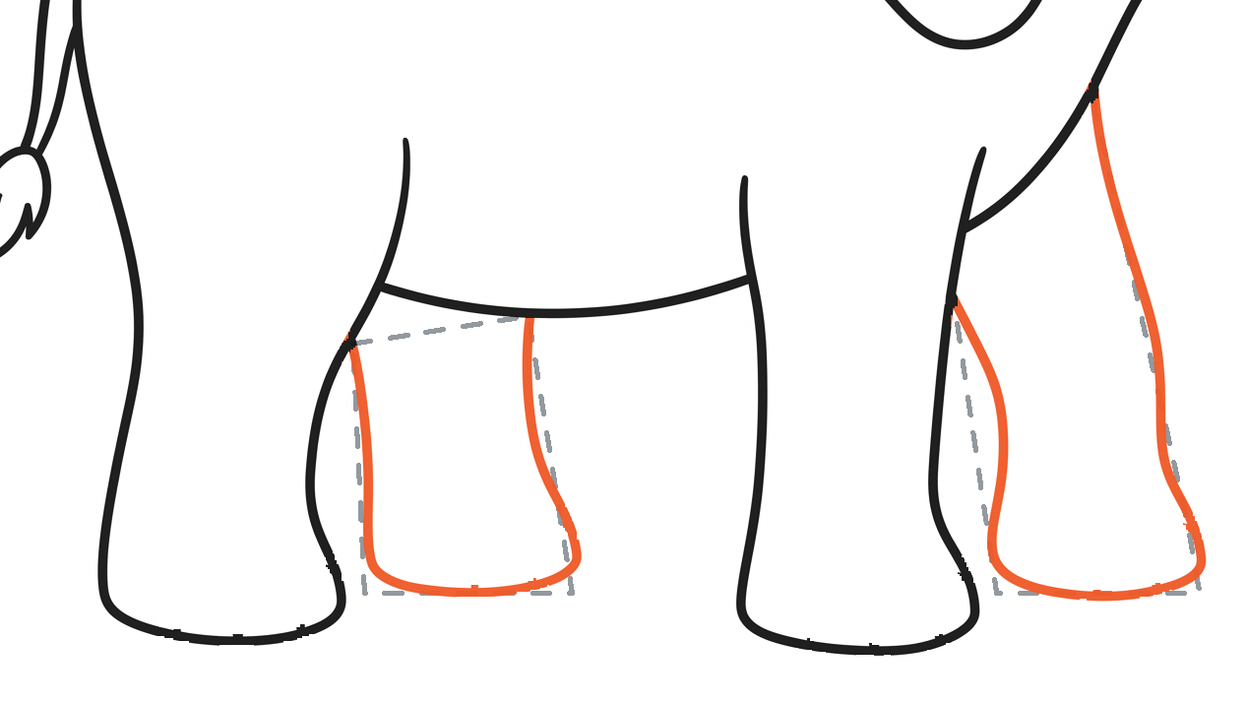
Repeat the rounded-leg method
Begin at the visible ends beside the nearer legs. Follow each smaller block down, round its foot and return upward until the nearer shape hides it.
Enlarge this picture ↗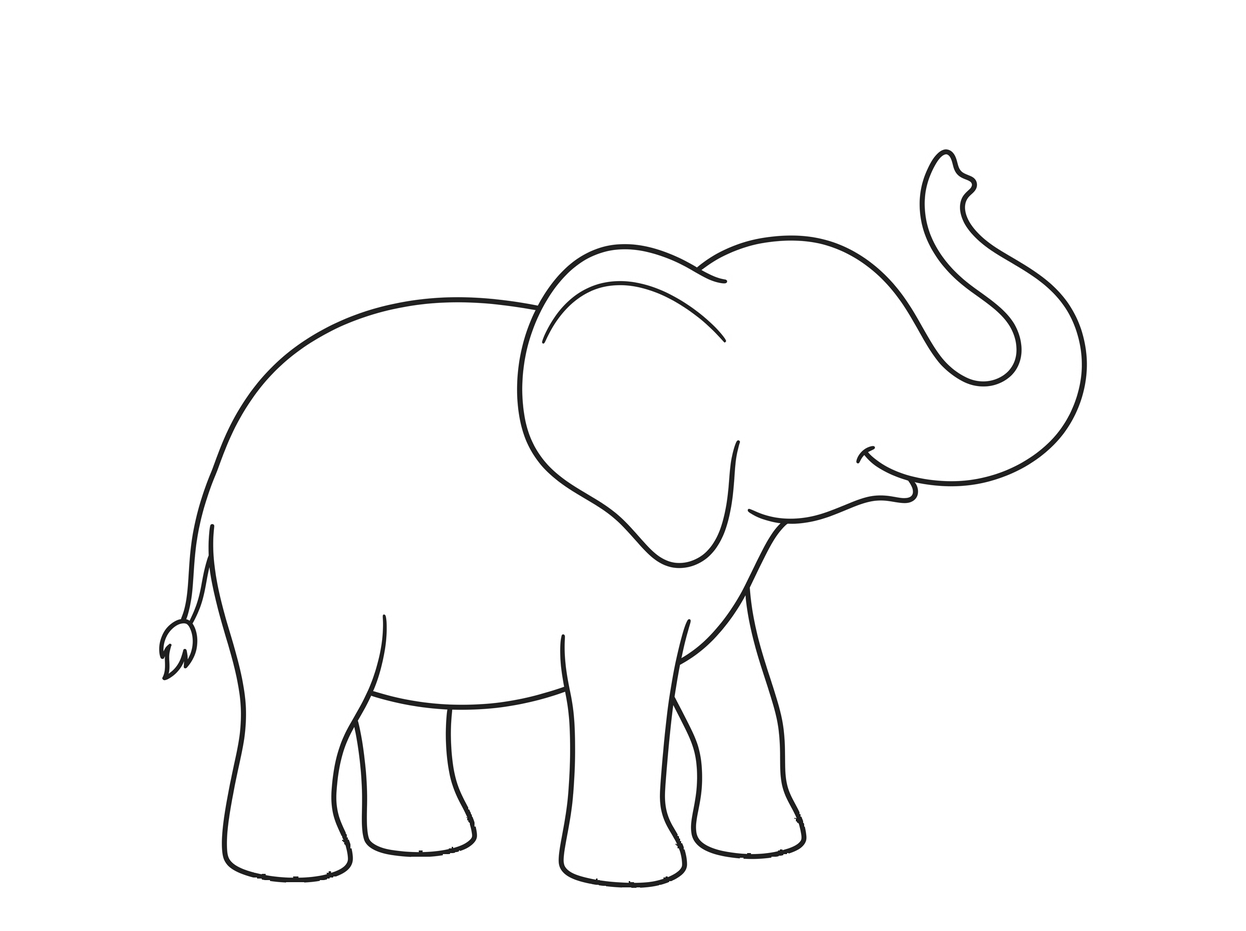
Keep four attached feet
Erase the two farther-leg blocks. Keep all four feet and the intentional overlaps.
Enlarge this picture ↗Check: The second pair repeats the same leg method; the new decision is which edges are hidden.
Goal 12 of 12
Finish the face and base elephant
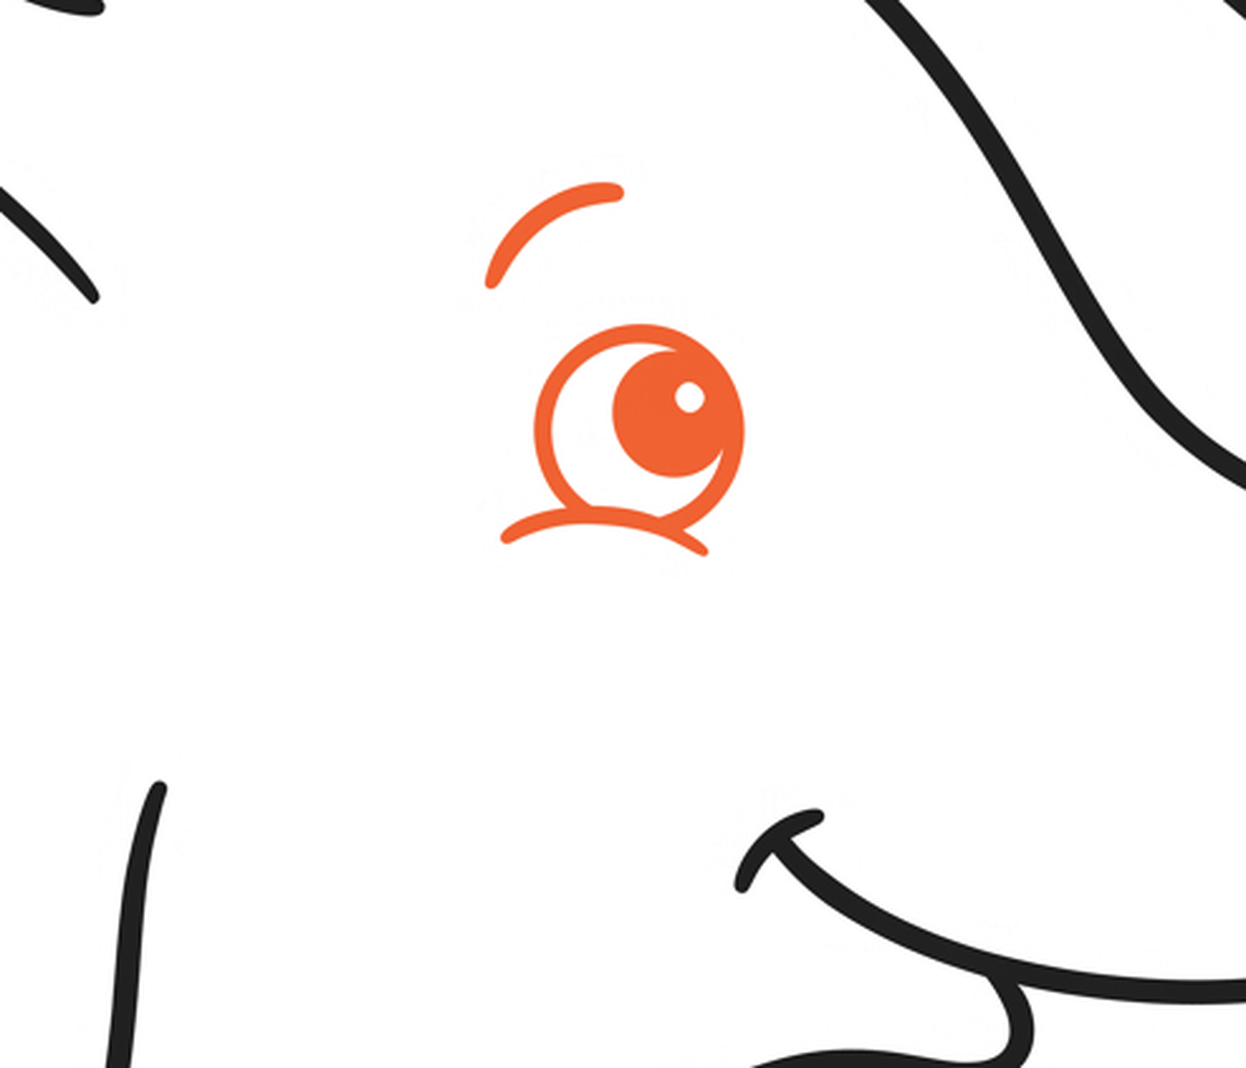
Give the face a curious look
Draw a small oval eye above the smile. Add a round pupil toward the trunk, leaving a white highlight. Curve a short lower eyelid beneath the oval and an eyebrow above it.
Enlarge this picture ↗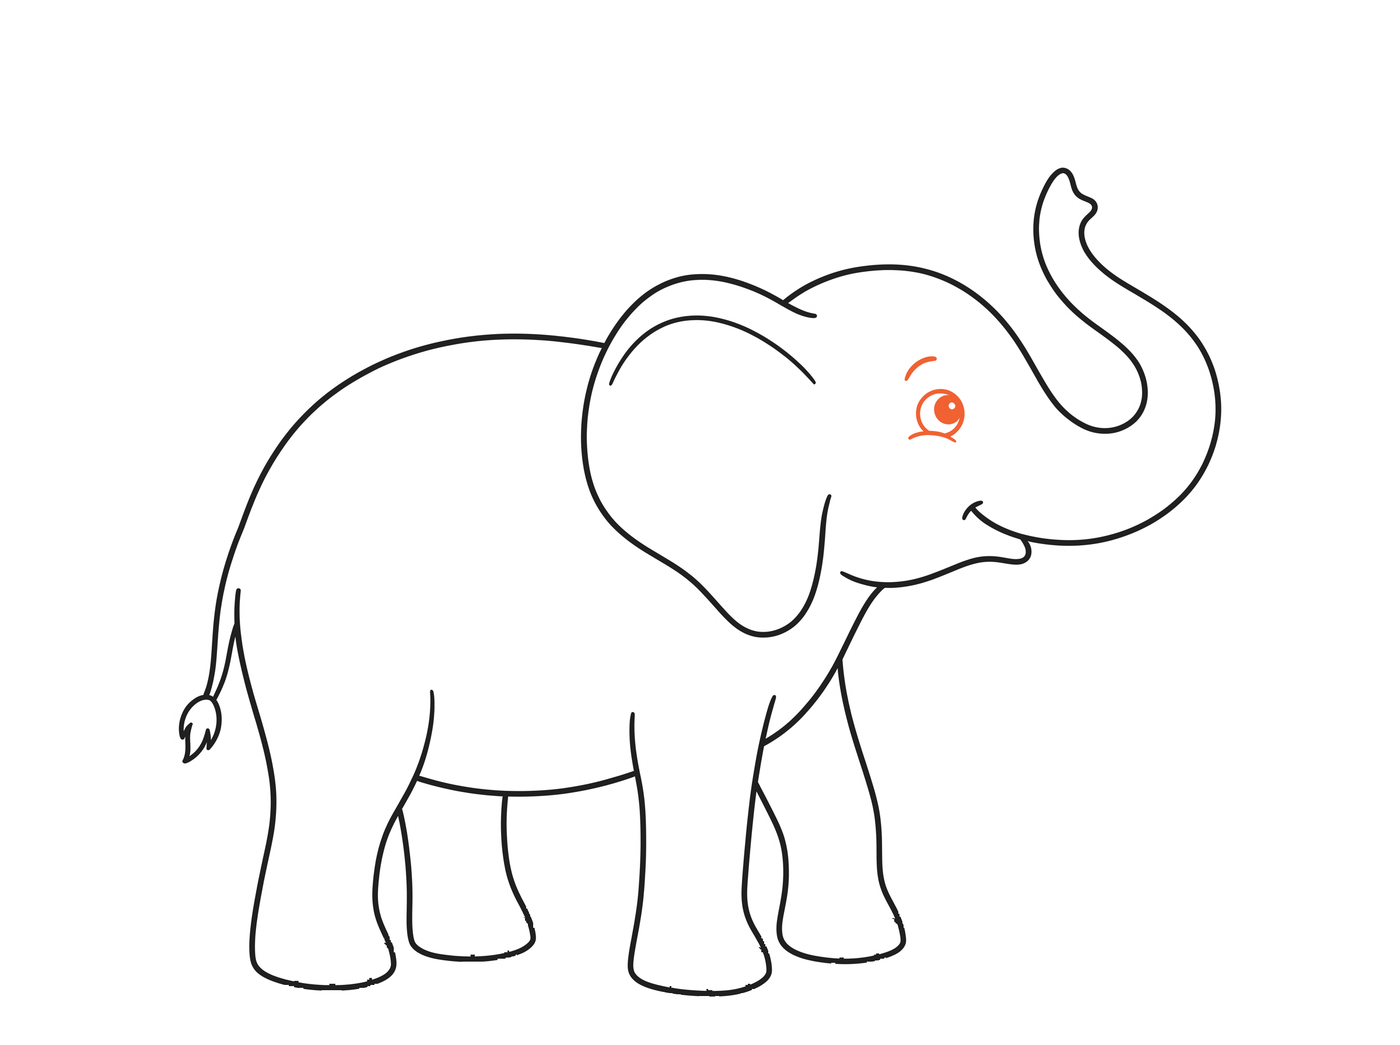
Your base elephant is complete
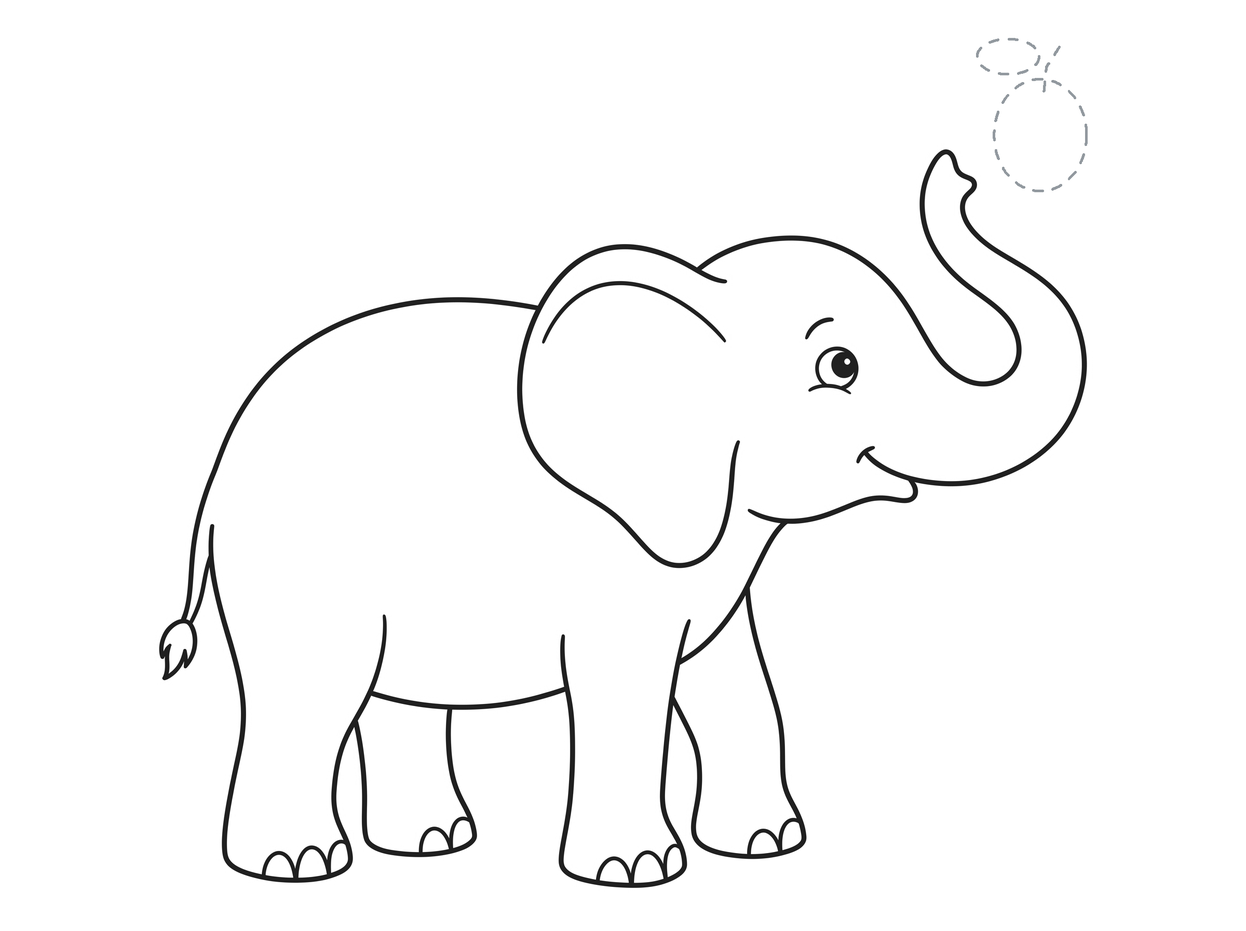
Keep the joined trunk, ear, jaw, body, four feet and tail. Toenails, fruit, coloring and another try are optional.
Enlarge this picture ↗Check: You can change the gaze or eyebrow. If you want another try, cover the details, place the big guides and uncover any picture when you need help.
Your base elephant is complete.
You can stop here. Add the details below only if you want them, or draw the main shapes again on fresh paper and use the lesson to check your joins.
Optional details and repair help
Optional toenail arches
Use the same small arch for each nail. Fewer marks are fine.
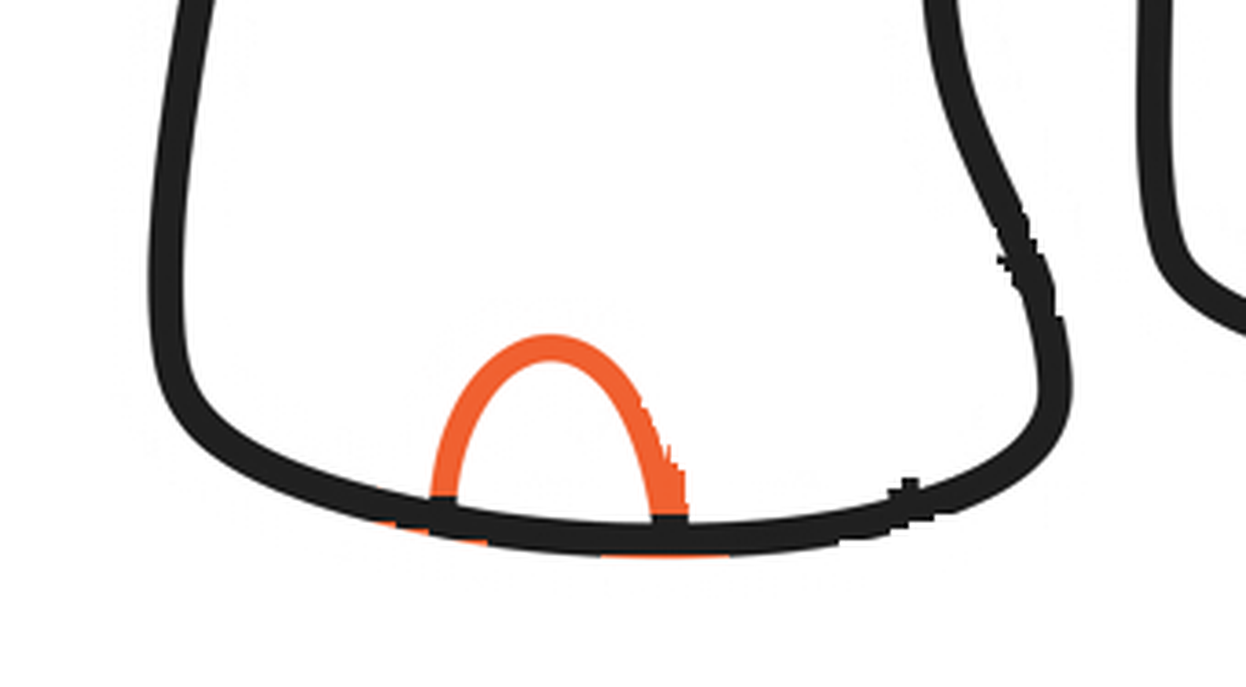
Make one arch inside a foot
Begin at the bottom edge of the nearer back foot. Curve upward, then return to the same edge.
Enlarge this picture ↗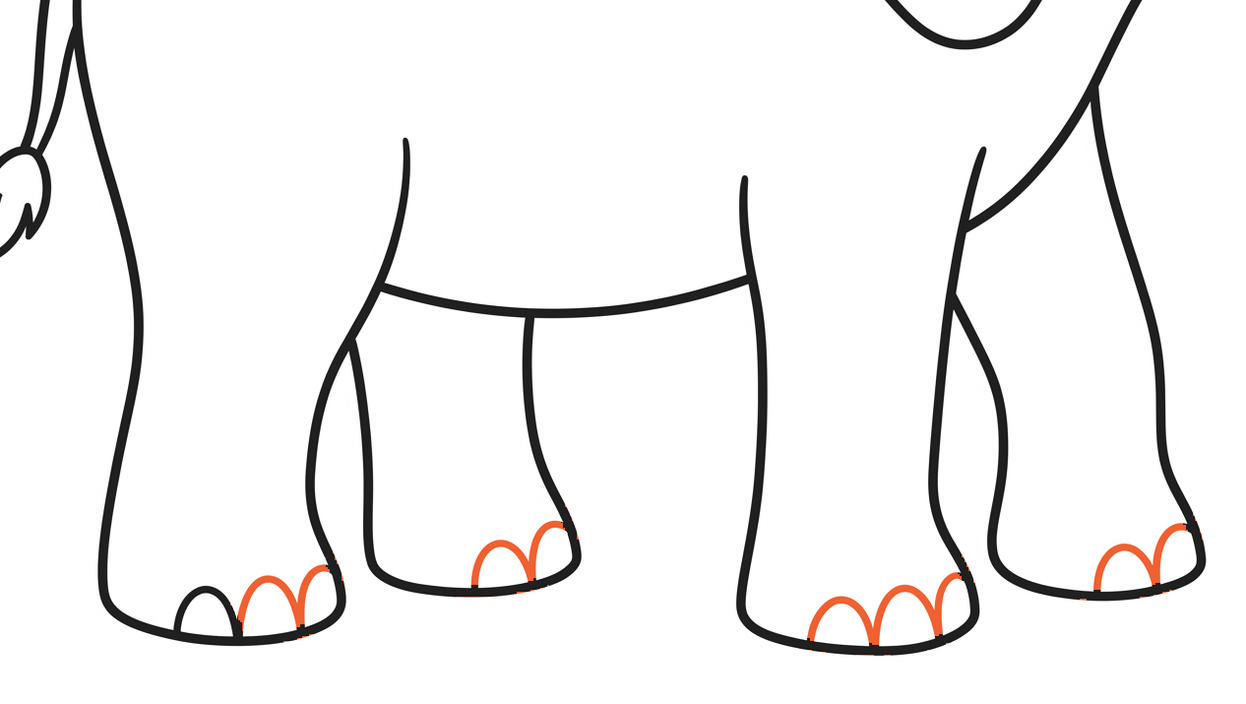
Repeat the arch if you want
Repeat the little arch beside the first, then inside the other feet. Let the outer foot edges close the end nails.
Enlarge this picture ↗Optional fruit to reach for
The fruit is a separate choice after the base elephant is complete.
Place a small fruit and leaf
Place a small upright oval above the trunk, a light stem path and a sideways leaf oval.
Enlarge this picture ↗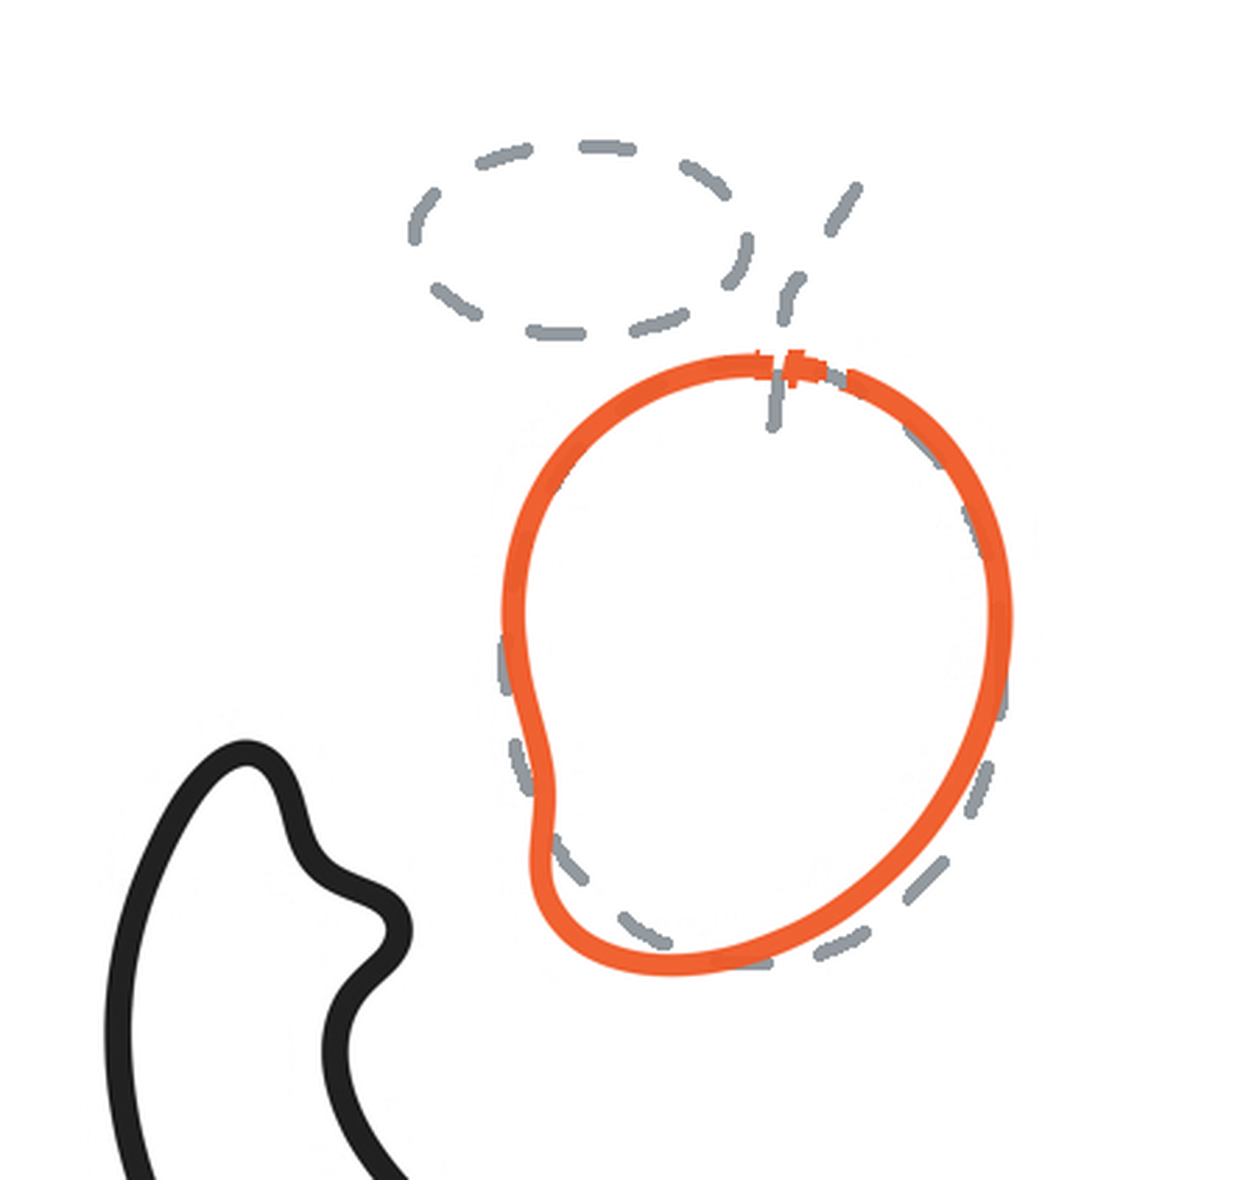
Round the fruit
Round the fruit oval, gently pinching its lower left side inward. Leave the two tiny openings at its top for the stem edges. Keep the stem and leaf guides light.
Enlarge this picture ↗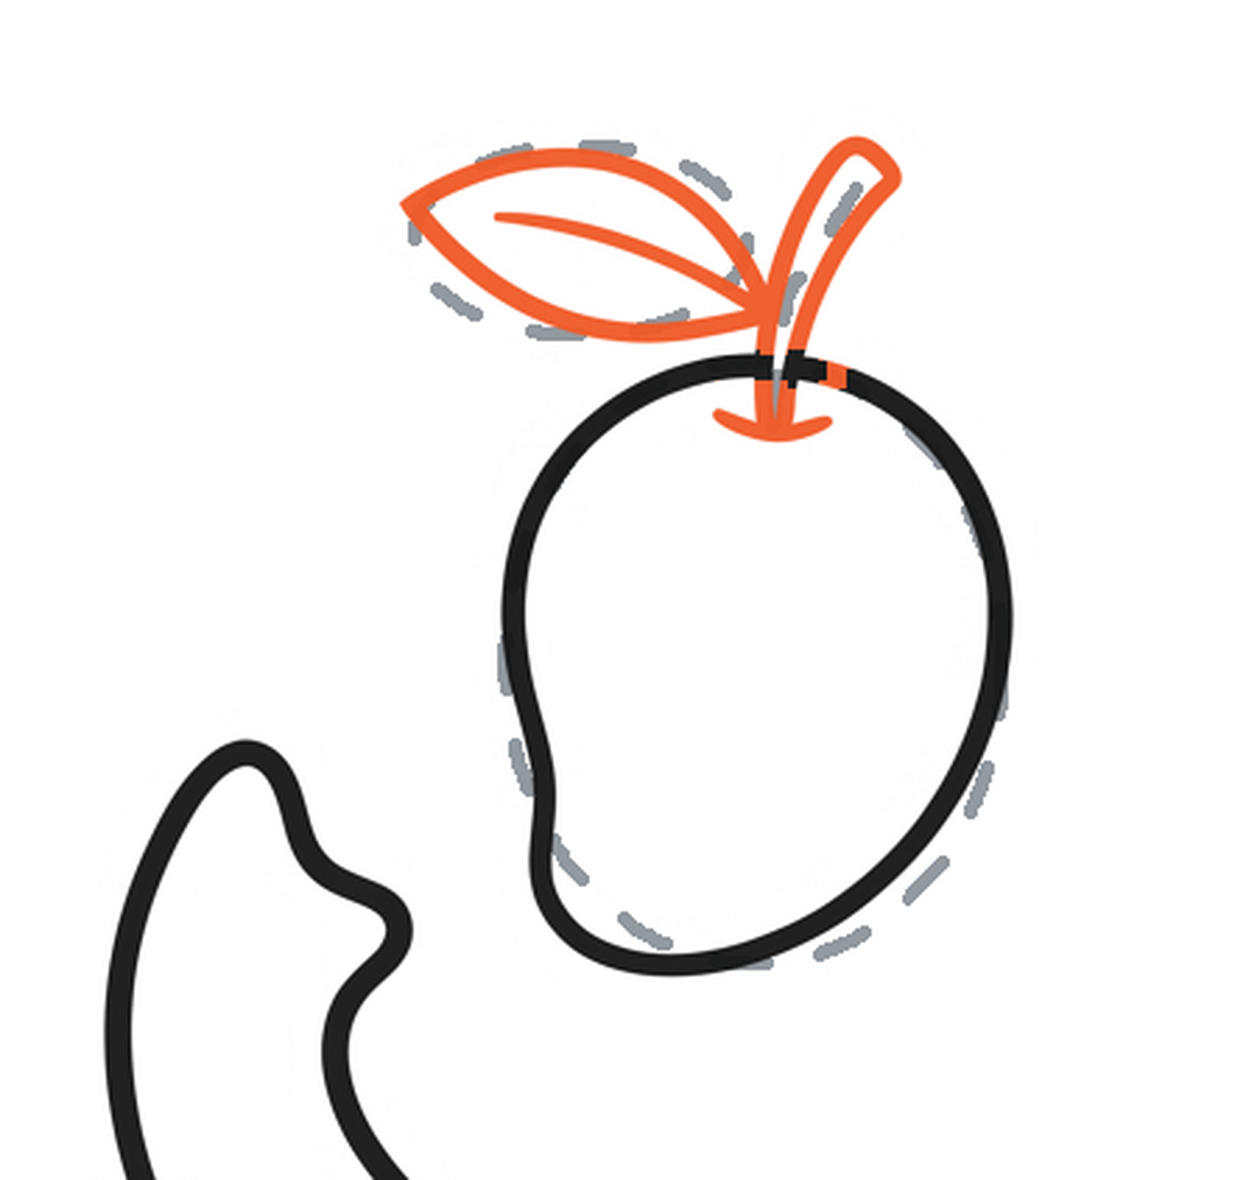
Join the stem and pointed leaf
Add narrow edges around the stem path. Round the leaf oval to its far point, return to the stem and add a short vein. Let the leaf hide the stem edge where they overlap.
Enlarge this picture ↗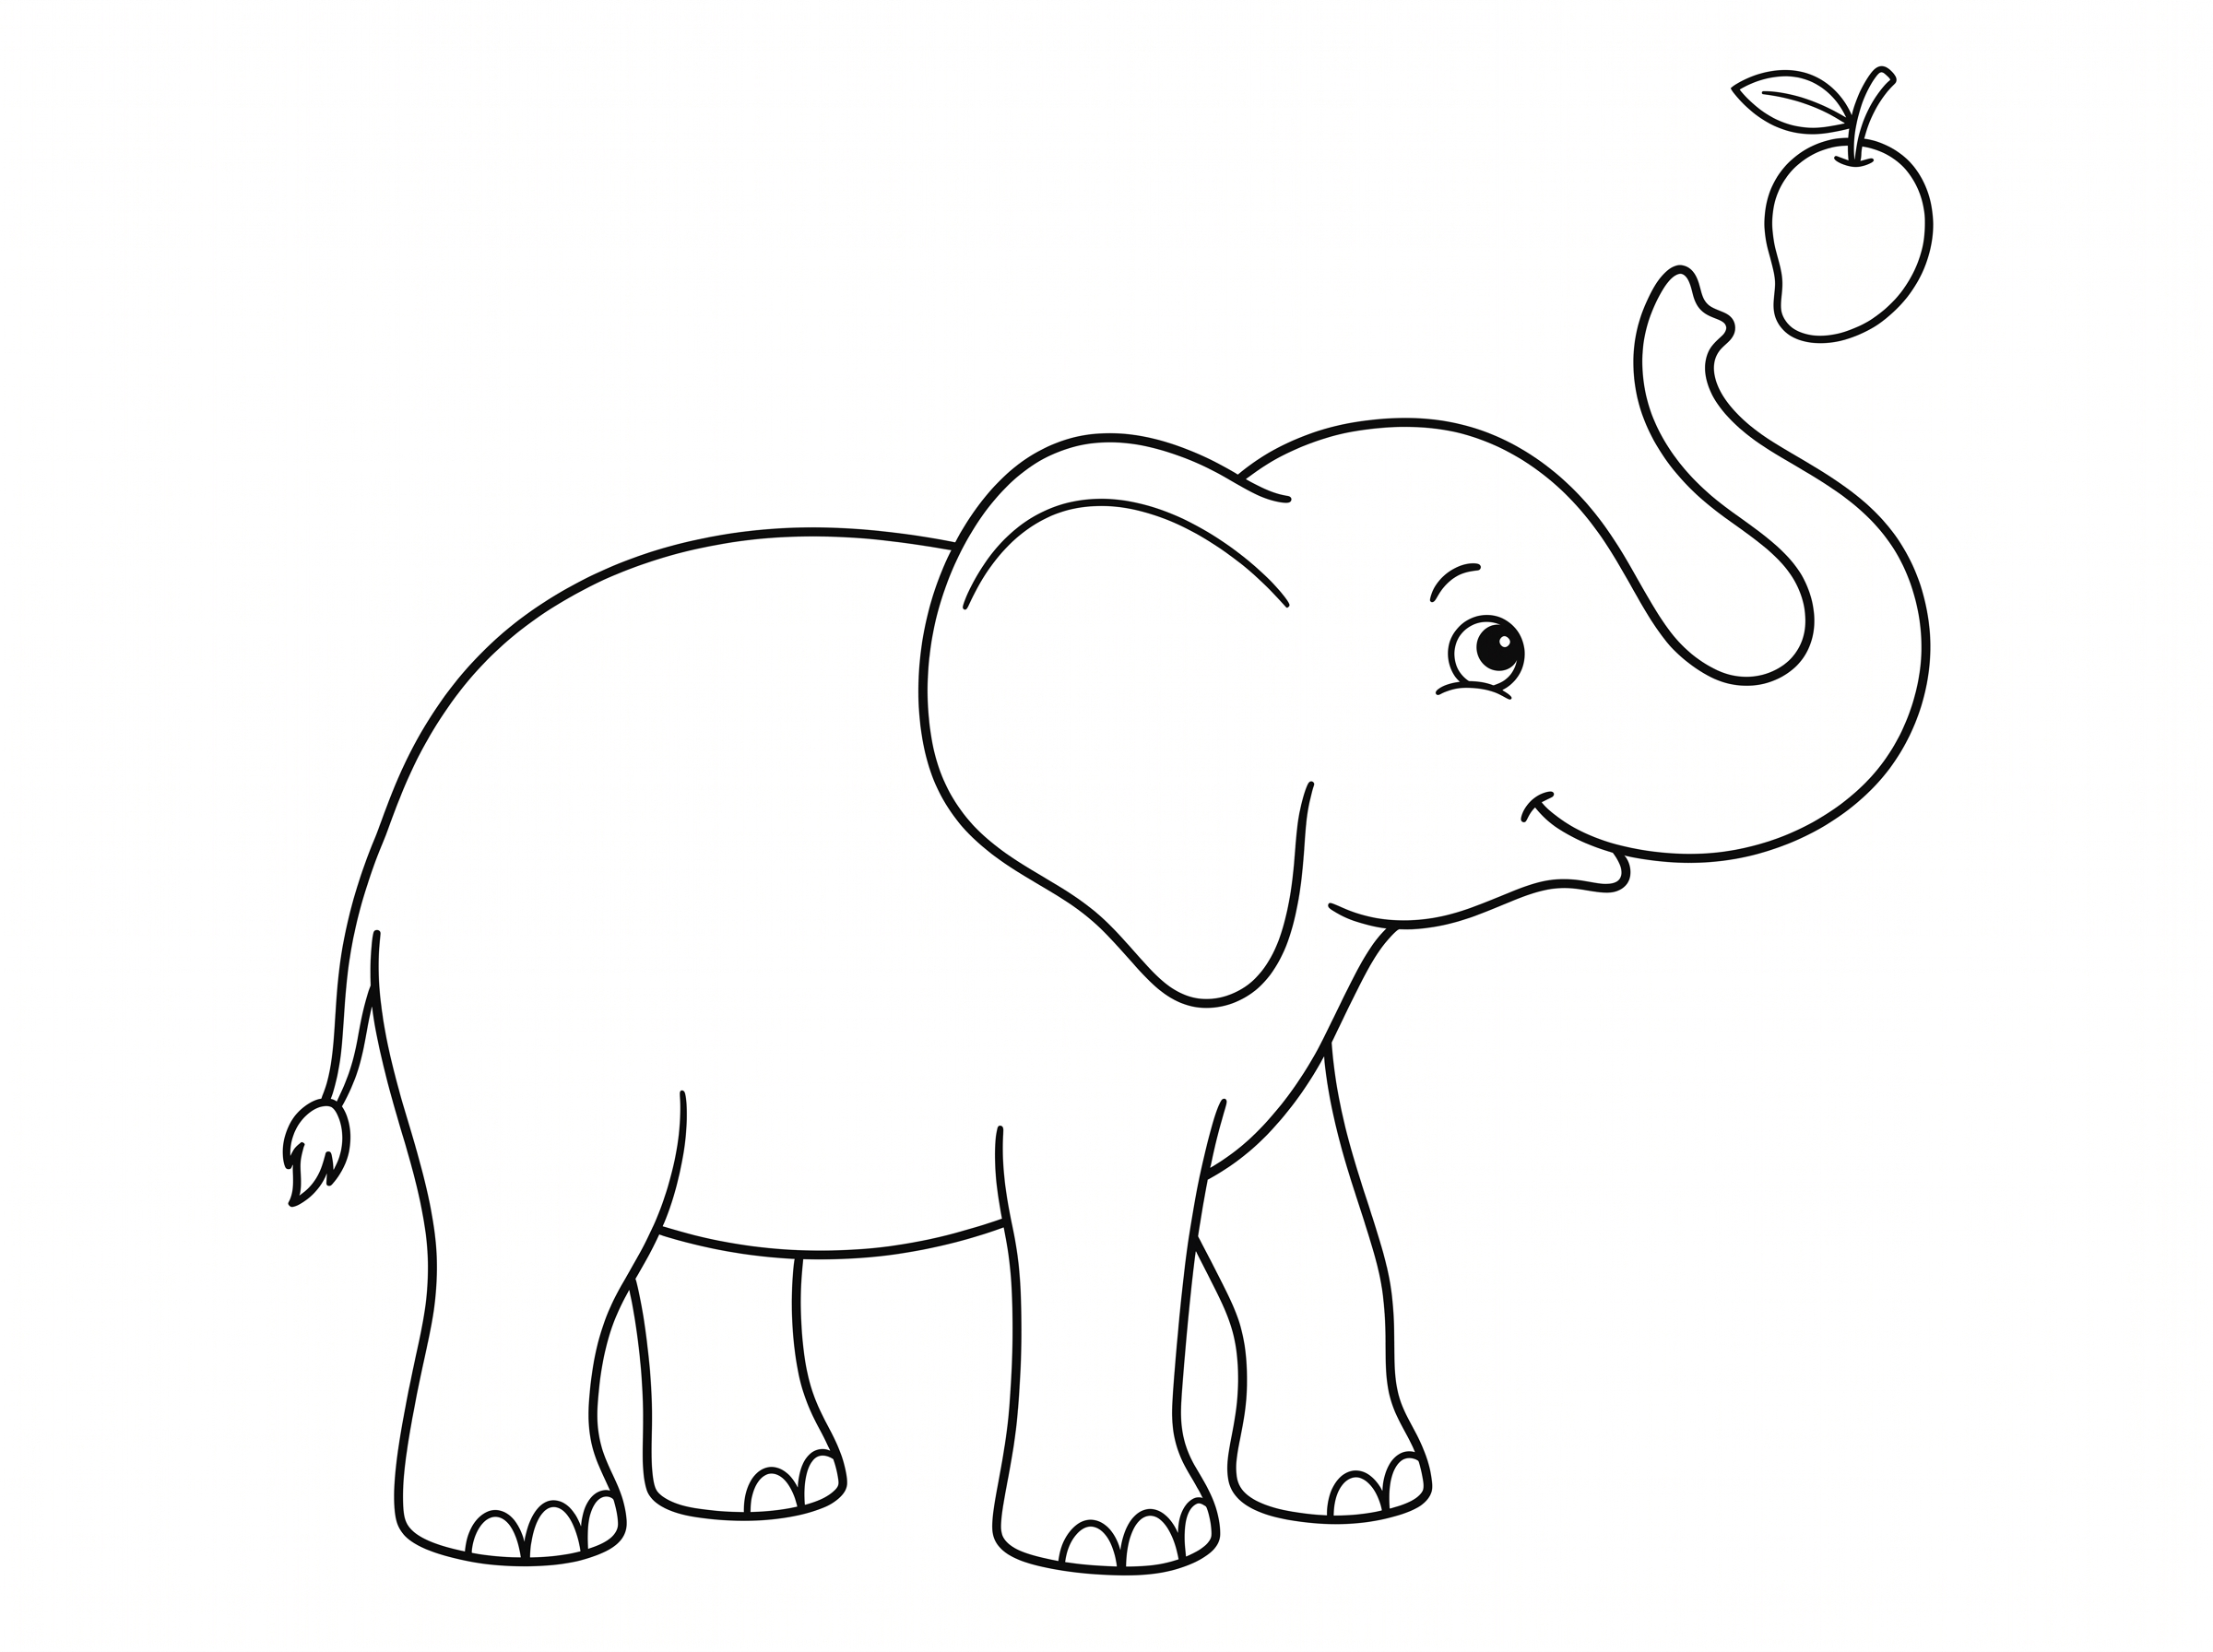
Keep your chosen details
Erase those three light guides. The finished reference includes toenails and fruit; your base drawing is complete without them.
Enlarge this picture ↗If the belly stops short
Repair only the short missing join; keep the surrounding curves.
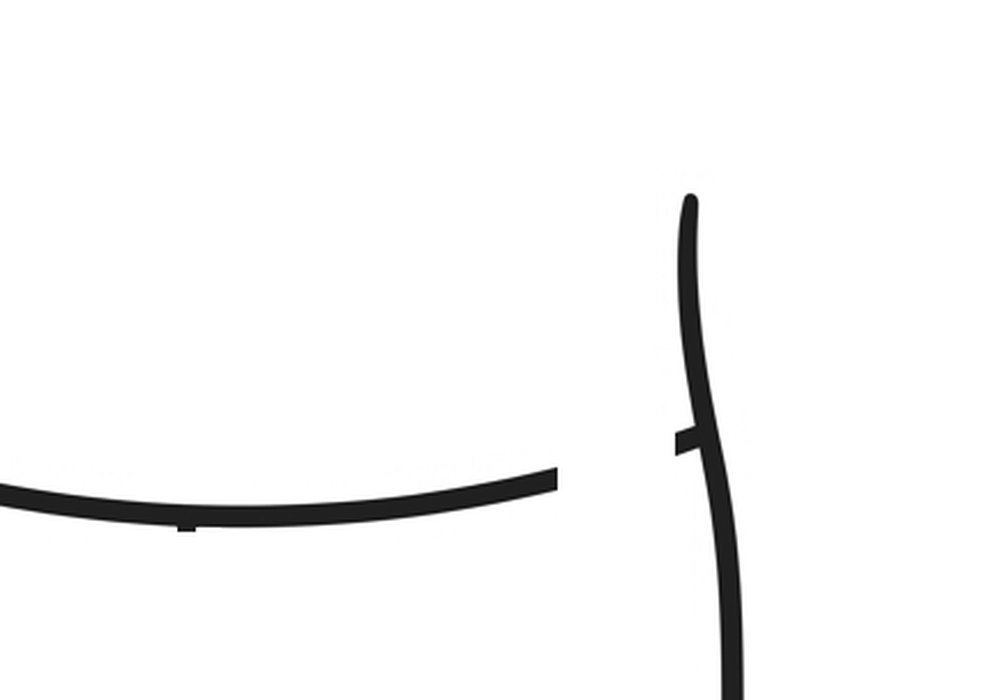
Before: a short belly gap
Keep the belly and front leg where they are.
Enlarge this picture ↗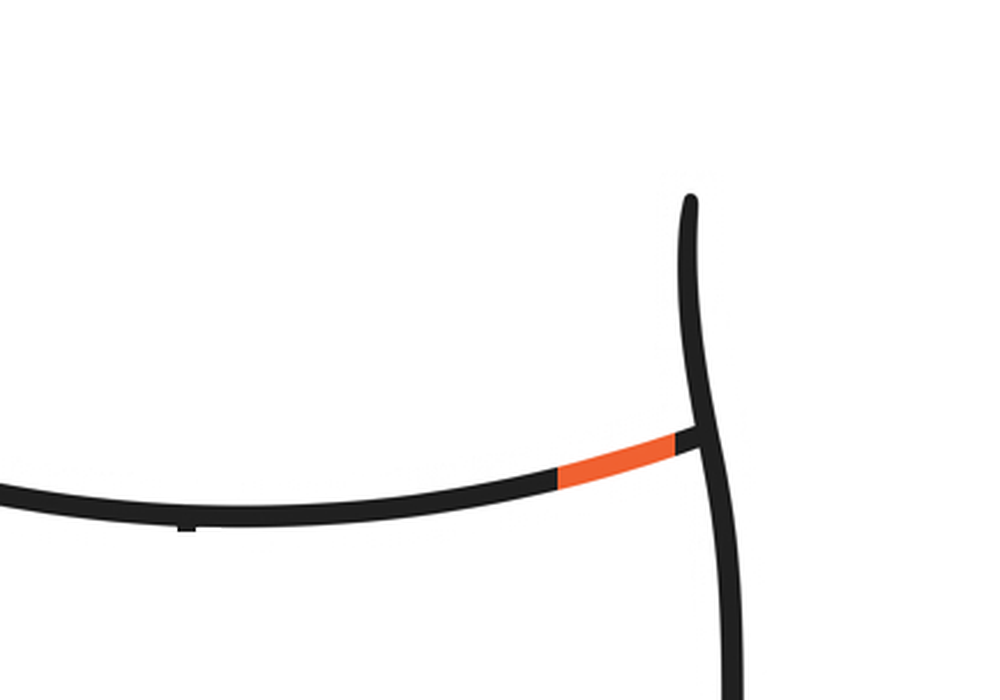
After: extend the same curve
Extend only the short belly end until it meets the front leg.
Enlarge this picture ↗Take the complete lesson with you.
Each PDF includes every construction goal, the optional details, a repair example and practice space. Letter and A4 have the same content. The phone edition uses a scrolling layout.
Printing help
Choose US Letter for 8.5 × 11 inch paper or A4 for 210 × 297 mm. Print at Actual Size / 100%, or use Fit if your printer needs more margin.
Read the printing guide →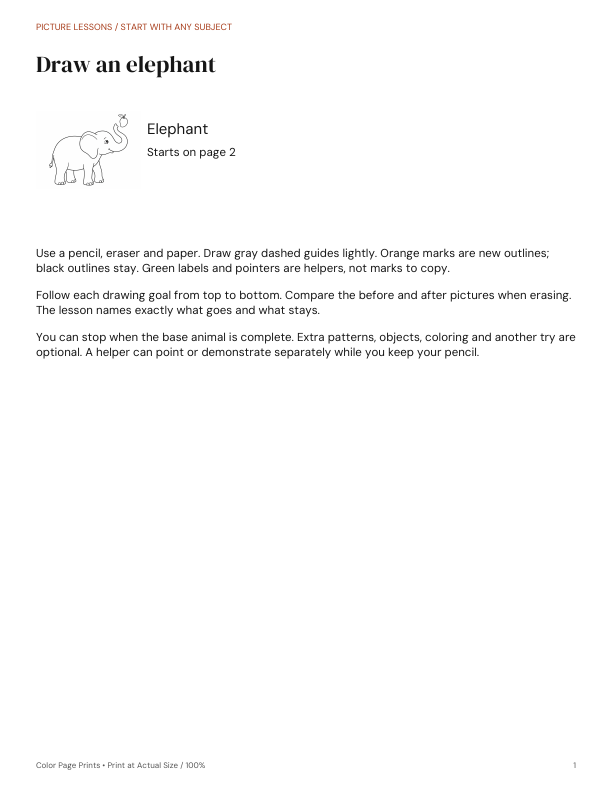 See the printable lesson ↗