Free drawing lesson · hard
How to draw an owl
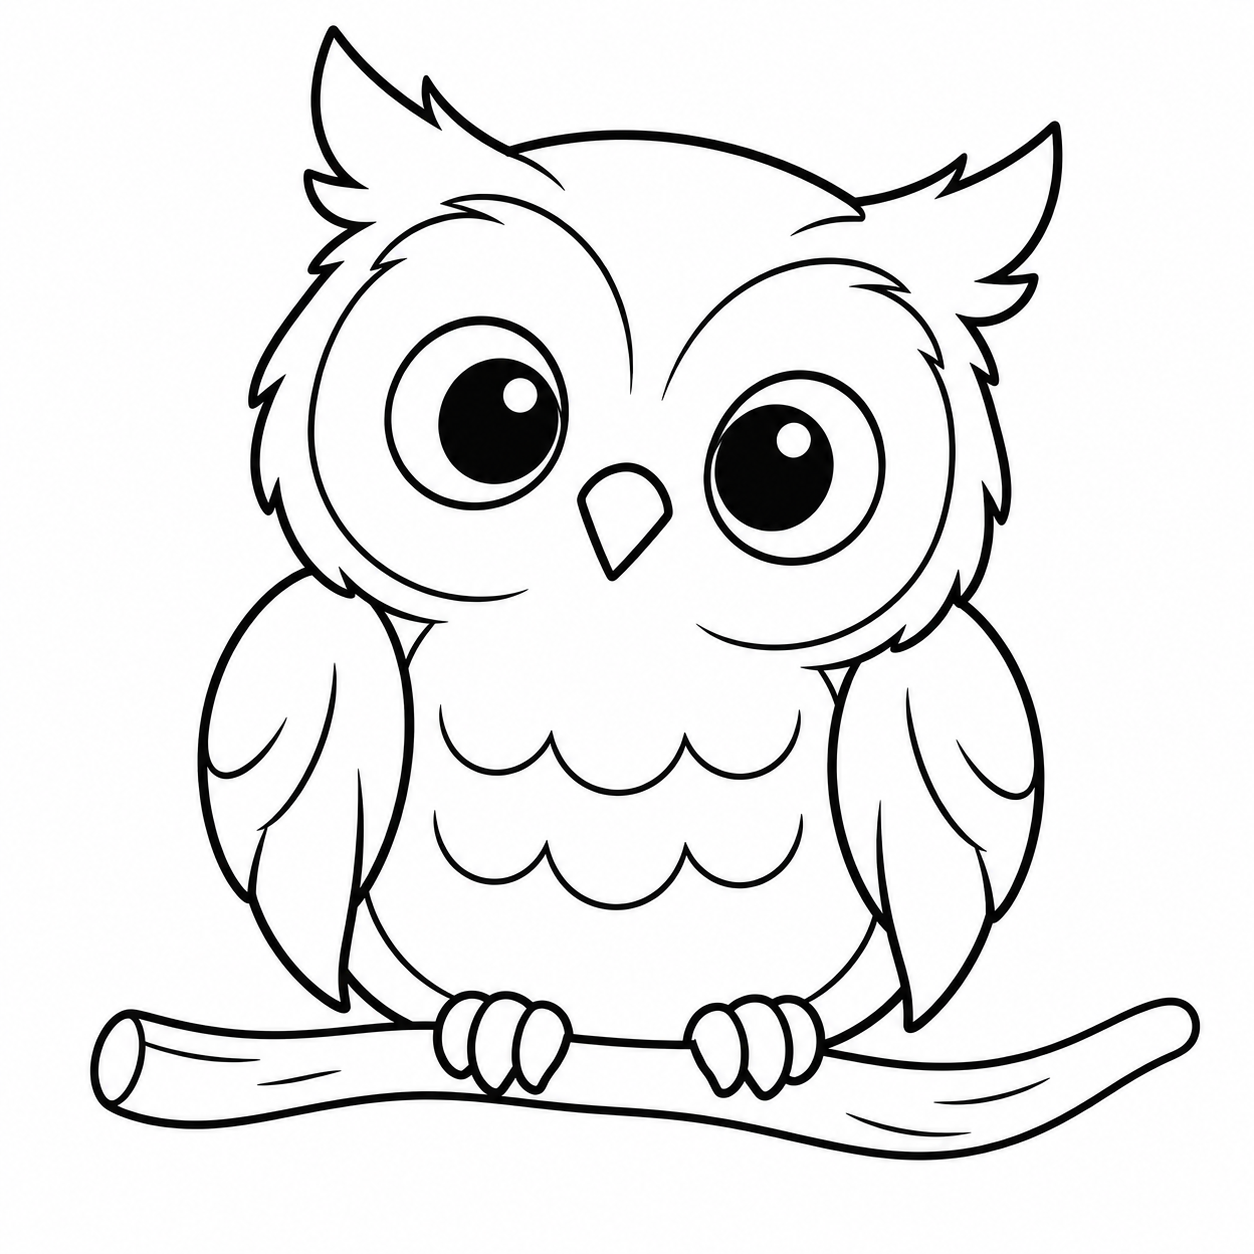
Build a perched owl from simple shapes, then connect its feathered outlines.
29 picture steps · 16 pages per PDF · No signup
Compare the three free guides ↓Finished drawing
Owl drawing tips
- Leave room for the whole drawing.
- Sketch lightly so the oval and wedge guides erase easily.
- Erase only the guides named in each picture.
- Check the overlaps before finishing each feather or foot.
Owl drawing skills · Hard
- Shape the owl’s head with pointed feather turns.
- Layer the wings by turning leaf guides into feathers.
- Connect the curves while keeping each feather edge clear.
- Place the feet in front of the branch.
Owl printing help
- Choose US Letter for 8.5 × 11 inch paper.
- Choose A4 for 210 × 297 mm paper.
- Print at actual size on matching paper.
- Use “Fit to page” if your printer needs more margin.
How to draw an owl: picture walkthrough
Draw the owl’s head
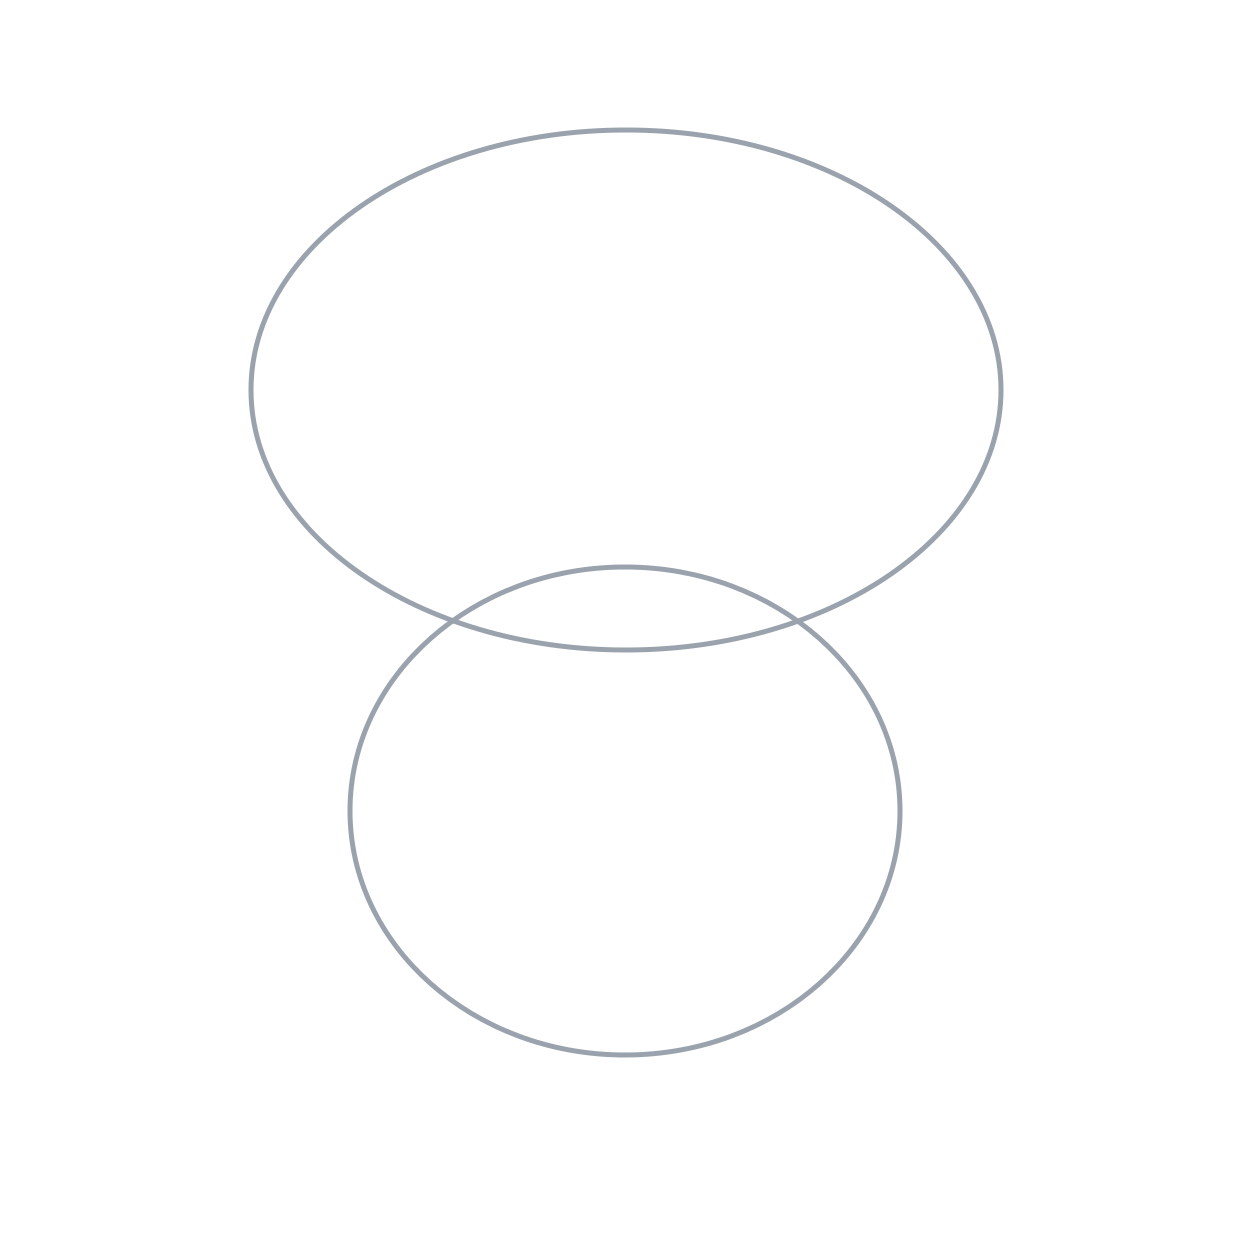
1. Place the head and body
- Lightly draw a wide oval for the head.
- Put a smaller, nearly round oval beneath it, about three-quarters as wide.
- Overlap their edges slightly so the head rests on the body.
Leave space below the body for two small feet and a branch.
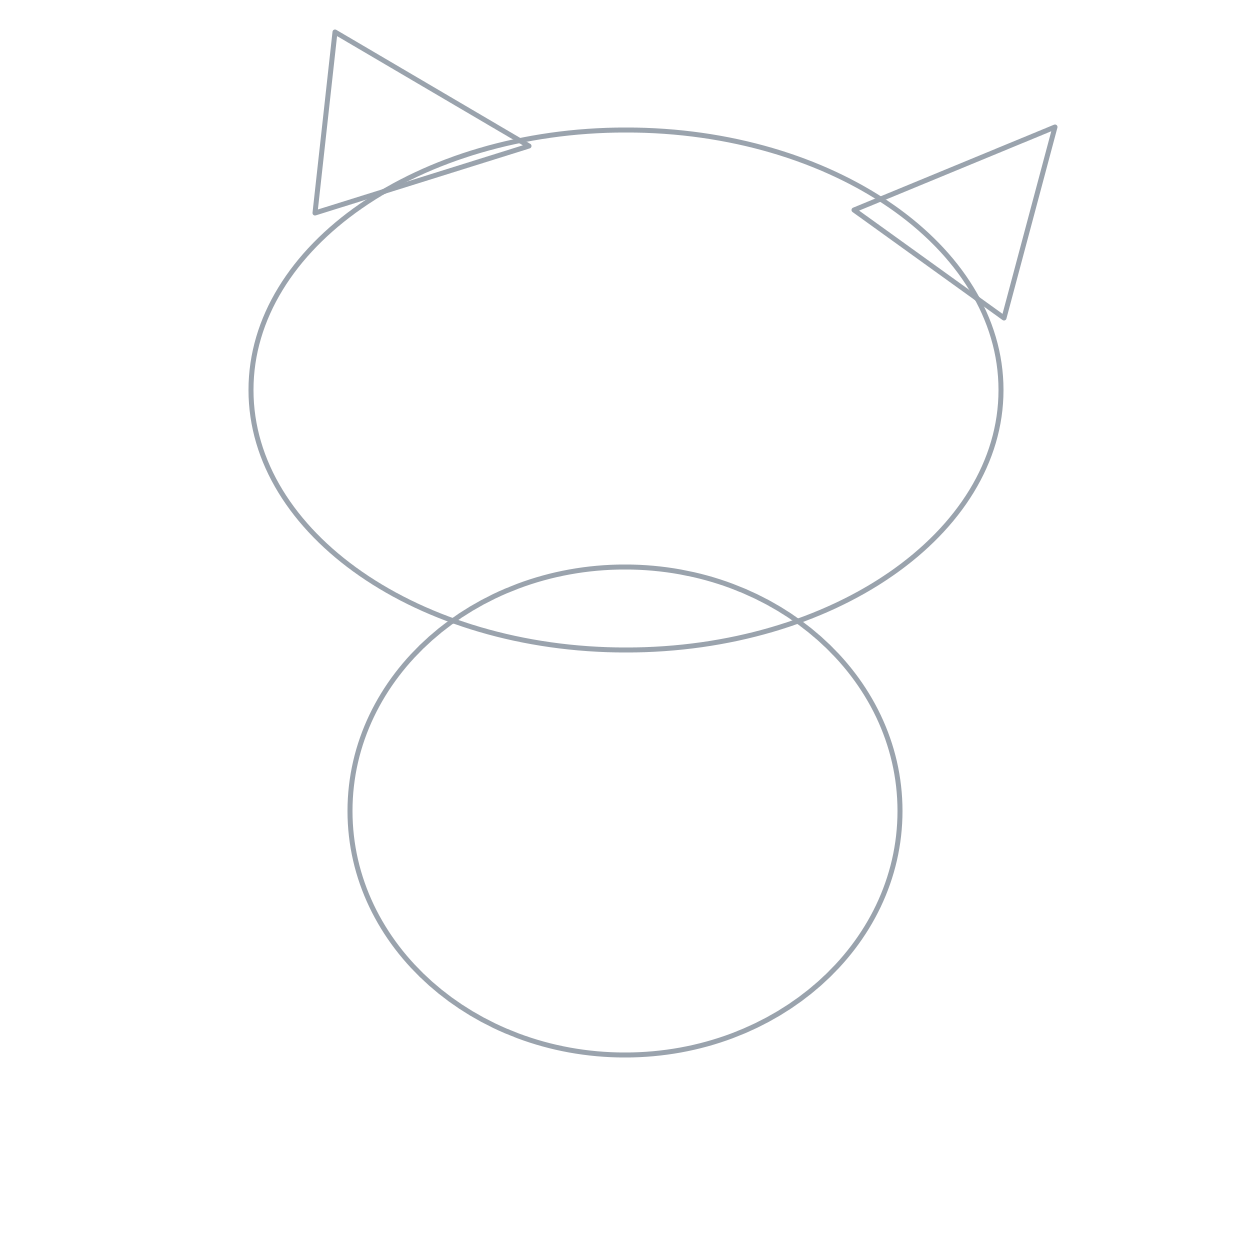
2. Plan the two crown tufts
- Add a simple wedge at each upper corner of the head oval.
- Point the left wedge upward and the right wedge outward.
- Let each wedge overlap the oval instead of sitting above it.
These light wedges locate the large tuft tips; they are not finished feather lines.
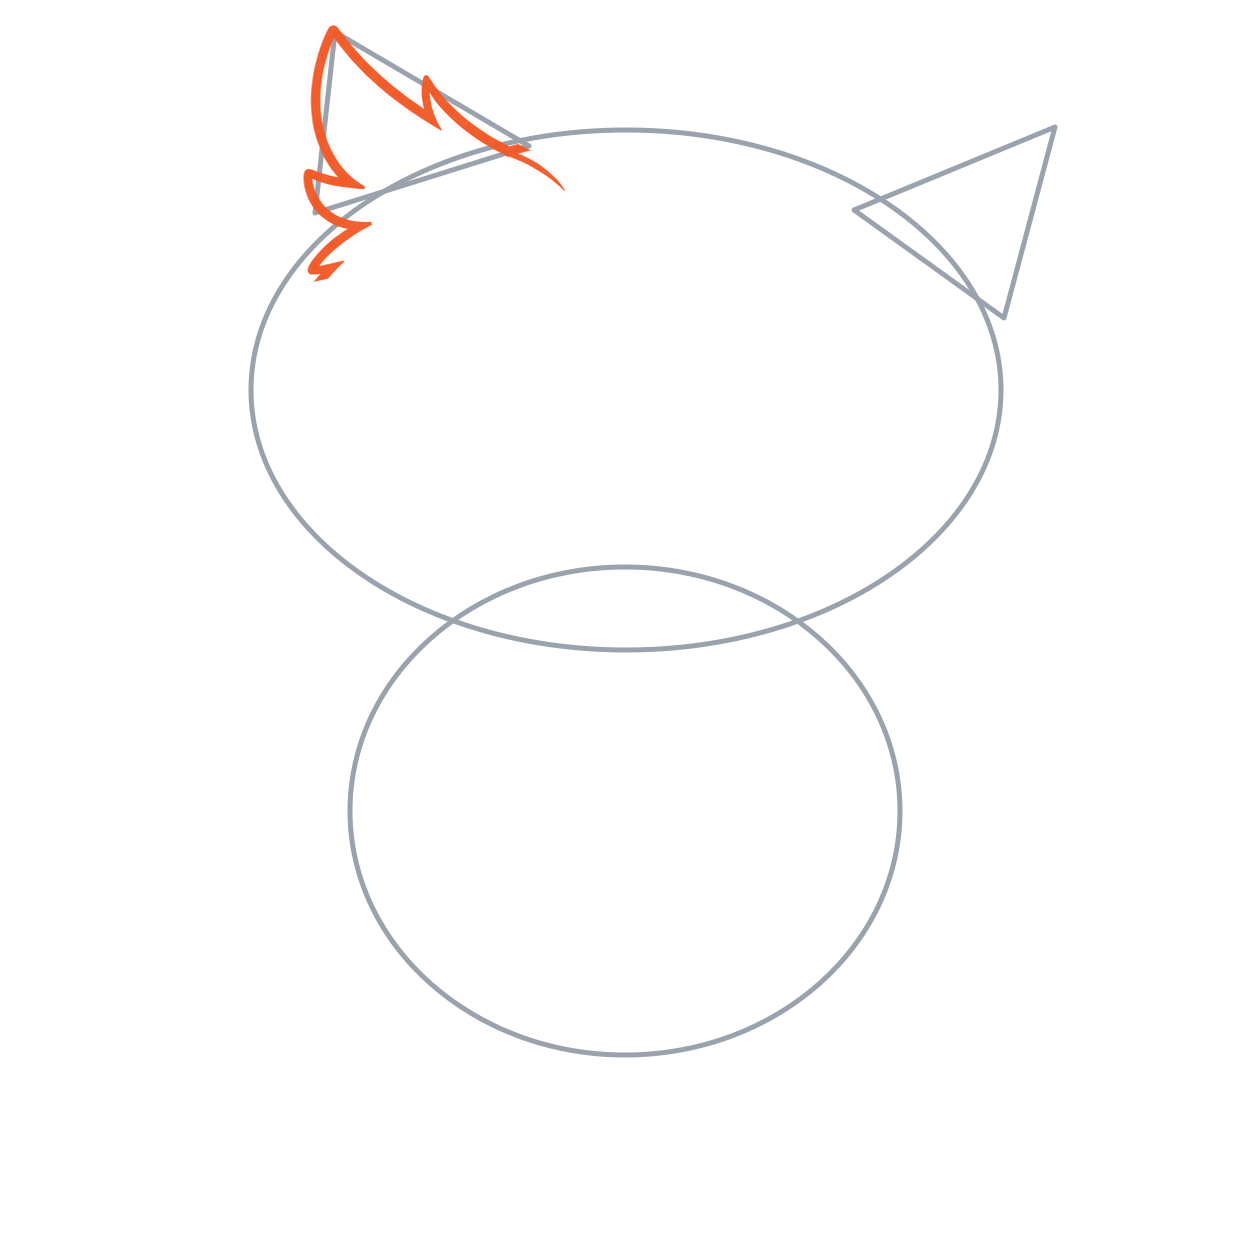
3. Finish the first crown tuft
- Begin at the tall tip of the left wedge.
- Bow down its outside and turn through the small outward-and-back feather points at the base.
- From the tall tip, sweep inward, make the short upper point, then curve toward the head arch.
Keep the two base ends open for the cheek and arch joins. Complete this tuft before its partner.
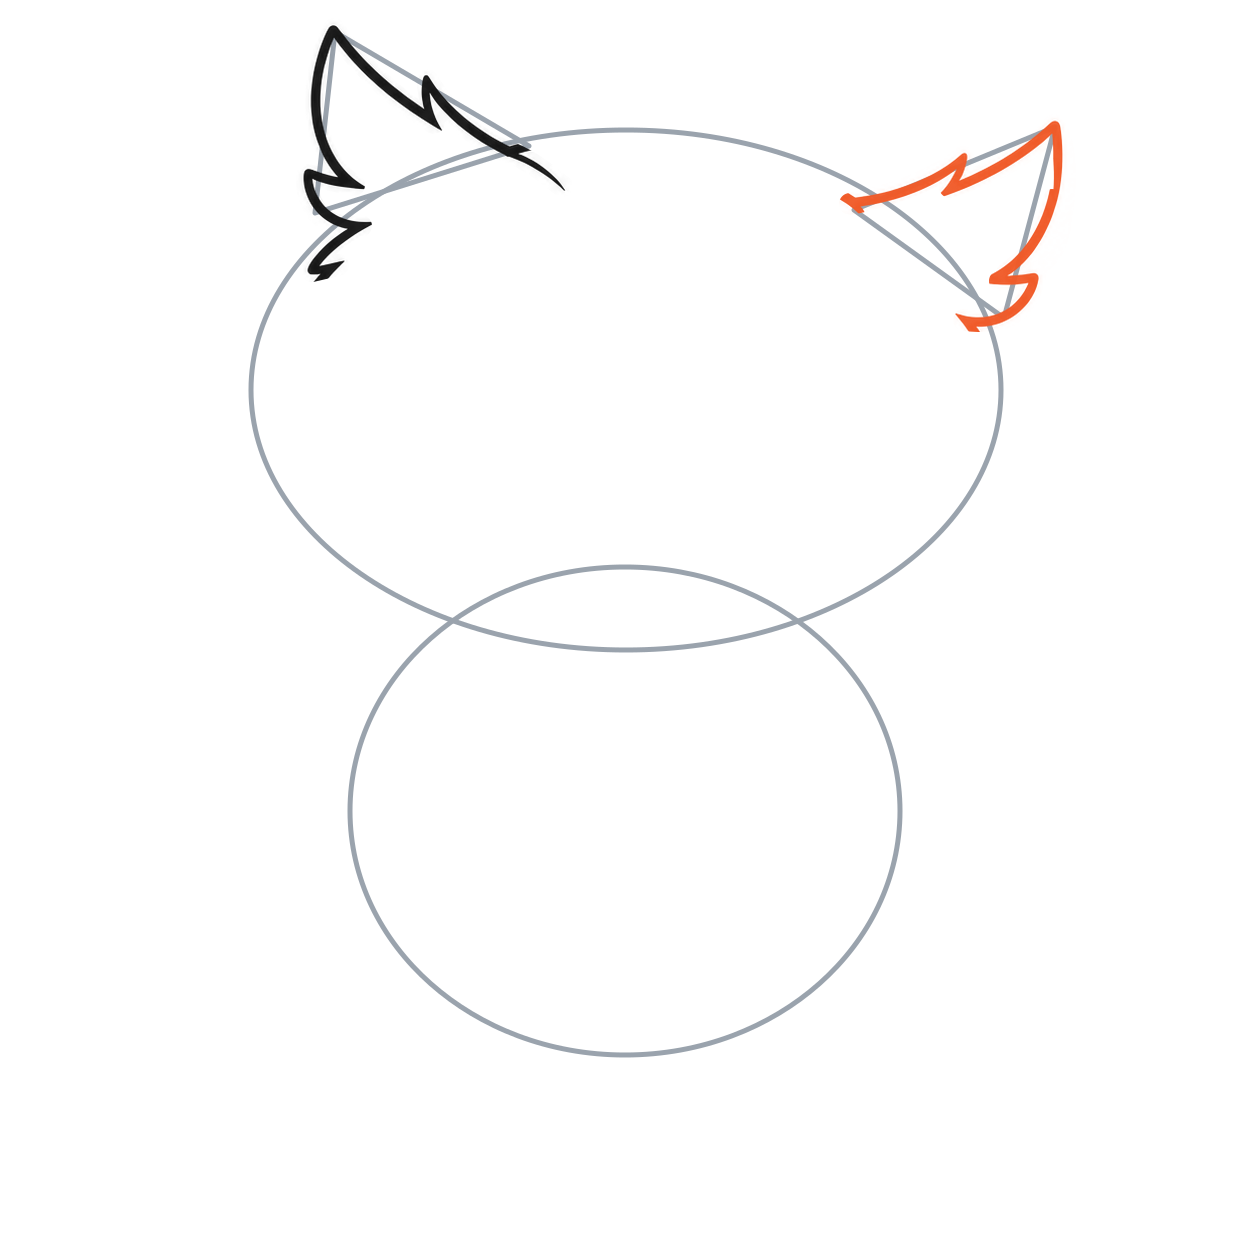
4. Finish the second crown tuft
- Start at the far tip of the right wedge.
- Curve down the outside and turn outward and back through the short lower feather point.
- From the far tip, sweep inward through the small upper point toward the head arch.
This tuft tilts outward with the head. Its inner end will join the arch; its lower end will join the cheek.
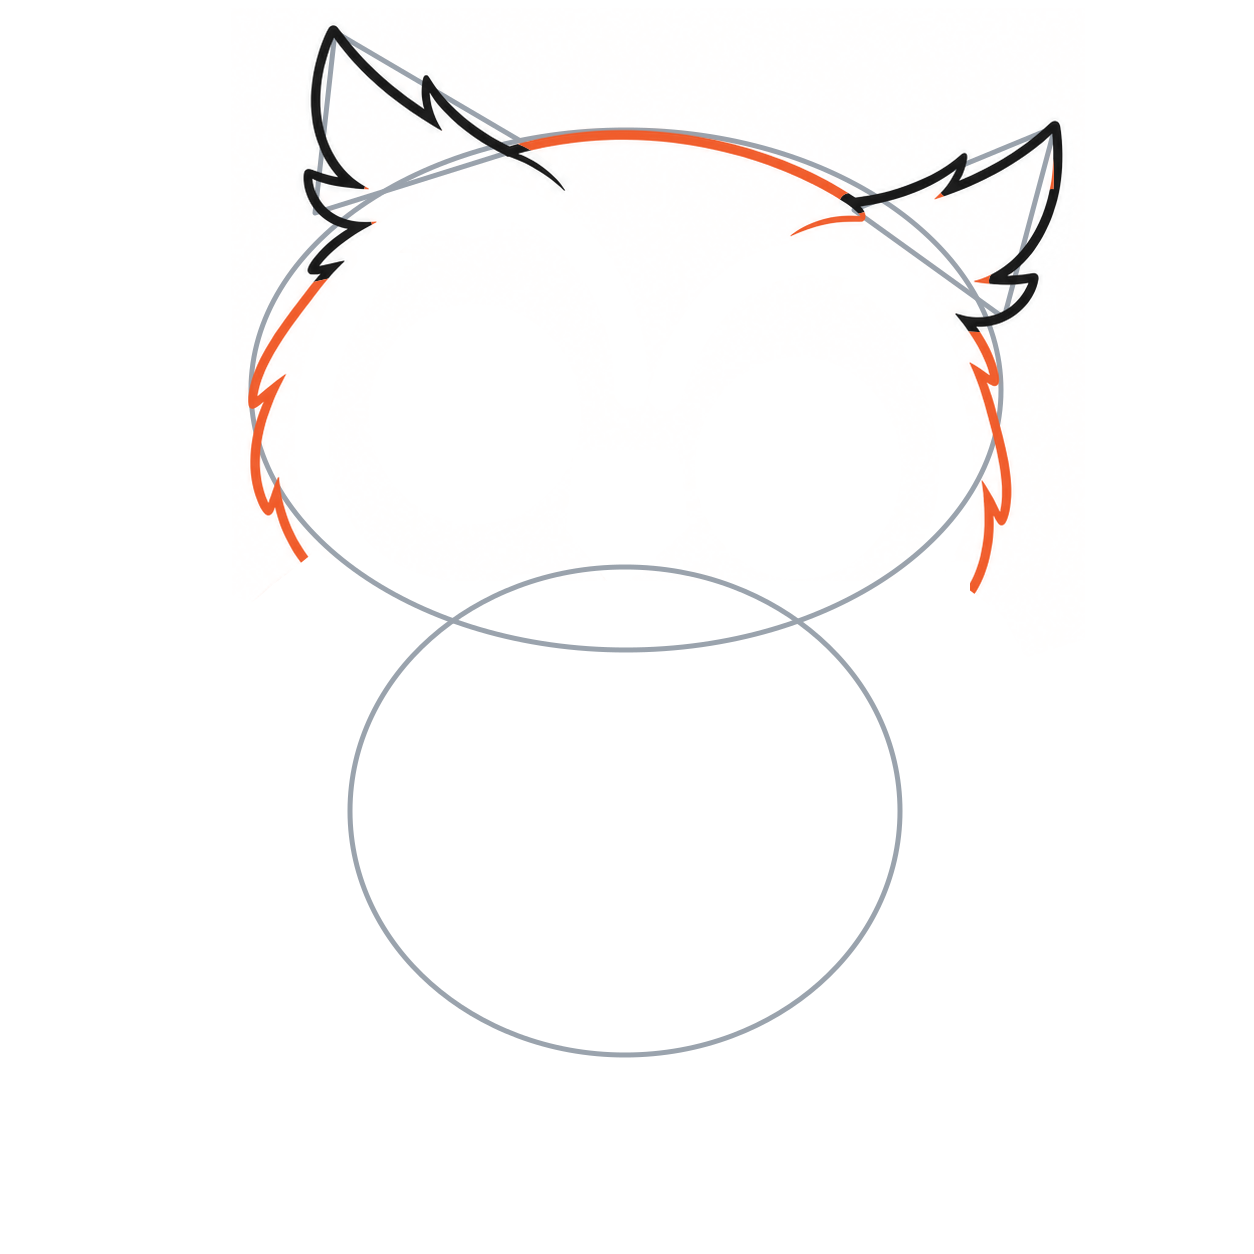
5. Connect the arch and cheeks
- Join the inner tuft ends with a broad curved arch along the top of the head oval.
- From each lower tuft end, follow the oval down the side, turning outward and back at the small cheek points.
- Stop at the shoulders.
The arch and cheek curves meet the finished tufts. Leave the lower cheek ends open for the shoulder joins.
Draw the owl’s face and eyes
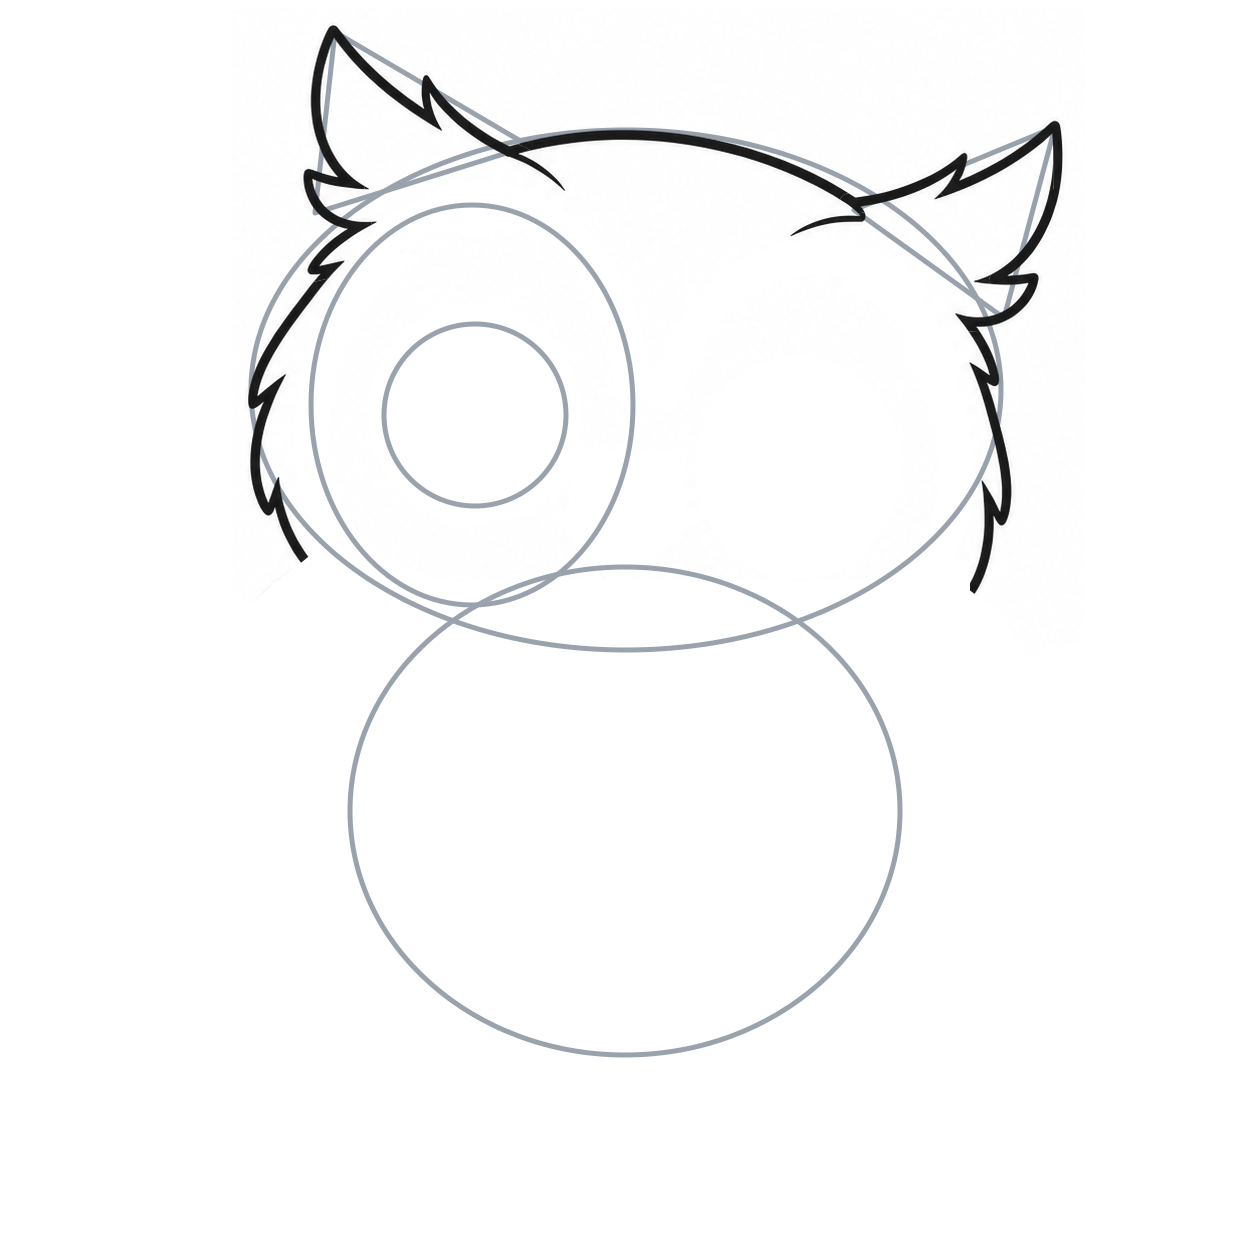
6. Place the first face patch and eye
- Inside the left half of the head, lightly draw a tall oval.
- Let its lower edge reach the head oval’s lower edge.
- Add a smaller circle inside it, a little nearer the center of the head.
The eye circle is a little over half the patch’s width; leave a wide rim around it.
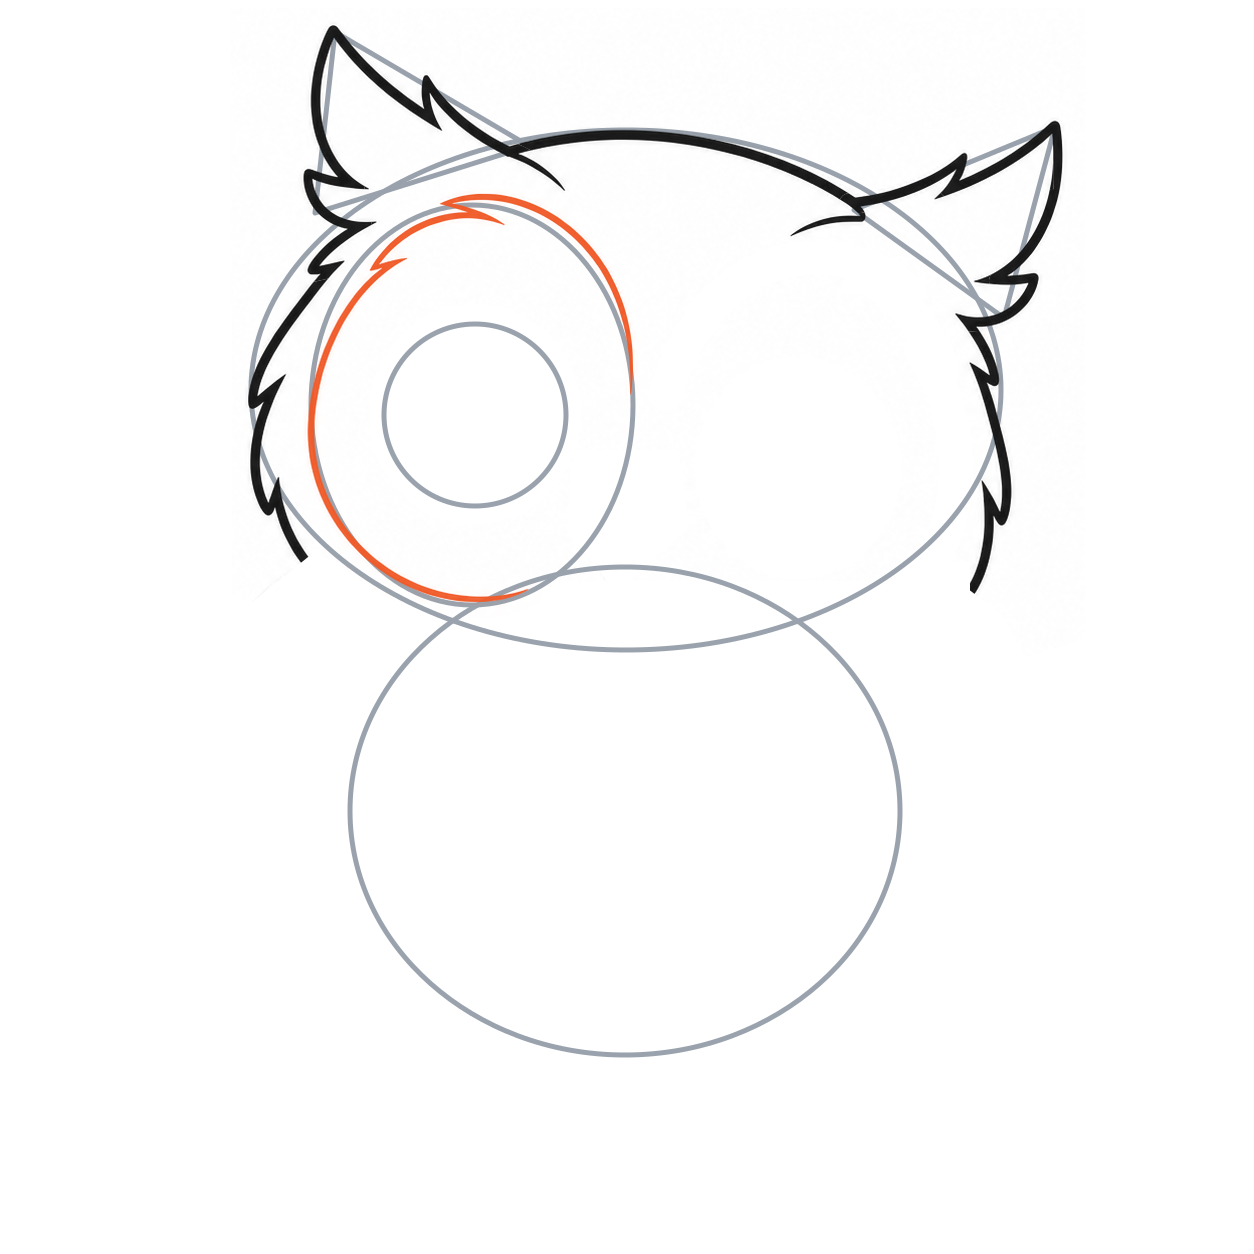
7. Shape the first face patch
- Start near the upper inside edge of the tall oval.
- Curve over its top and around the outer cheek, using two short feather points near the upper outside edge.
- Continue beneath the eye and stop before the middle of the face.
Leave the inside of the patch open. Do not close a full oval across the beak space.
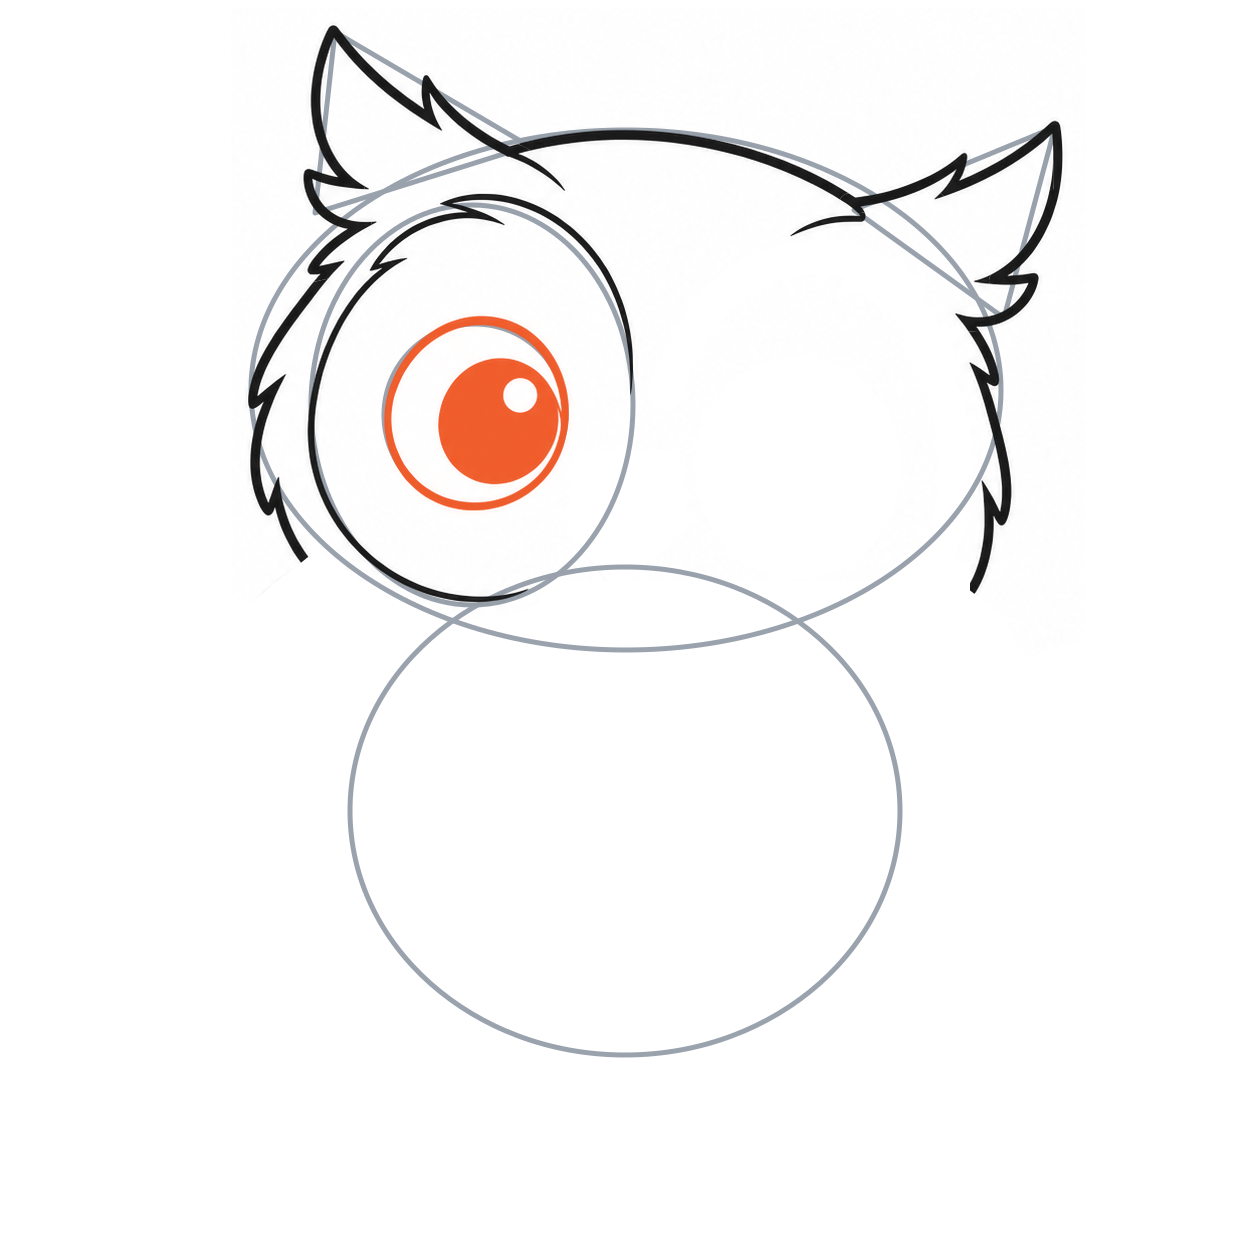
8. Finish the first round eye
- Follow the smaller circle to make a round eye.
- Add its large pupil toward the middle of the face and leave one small white highlight.
The complete eye sits inside the larger patch; the white rim stays visible.
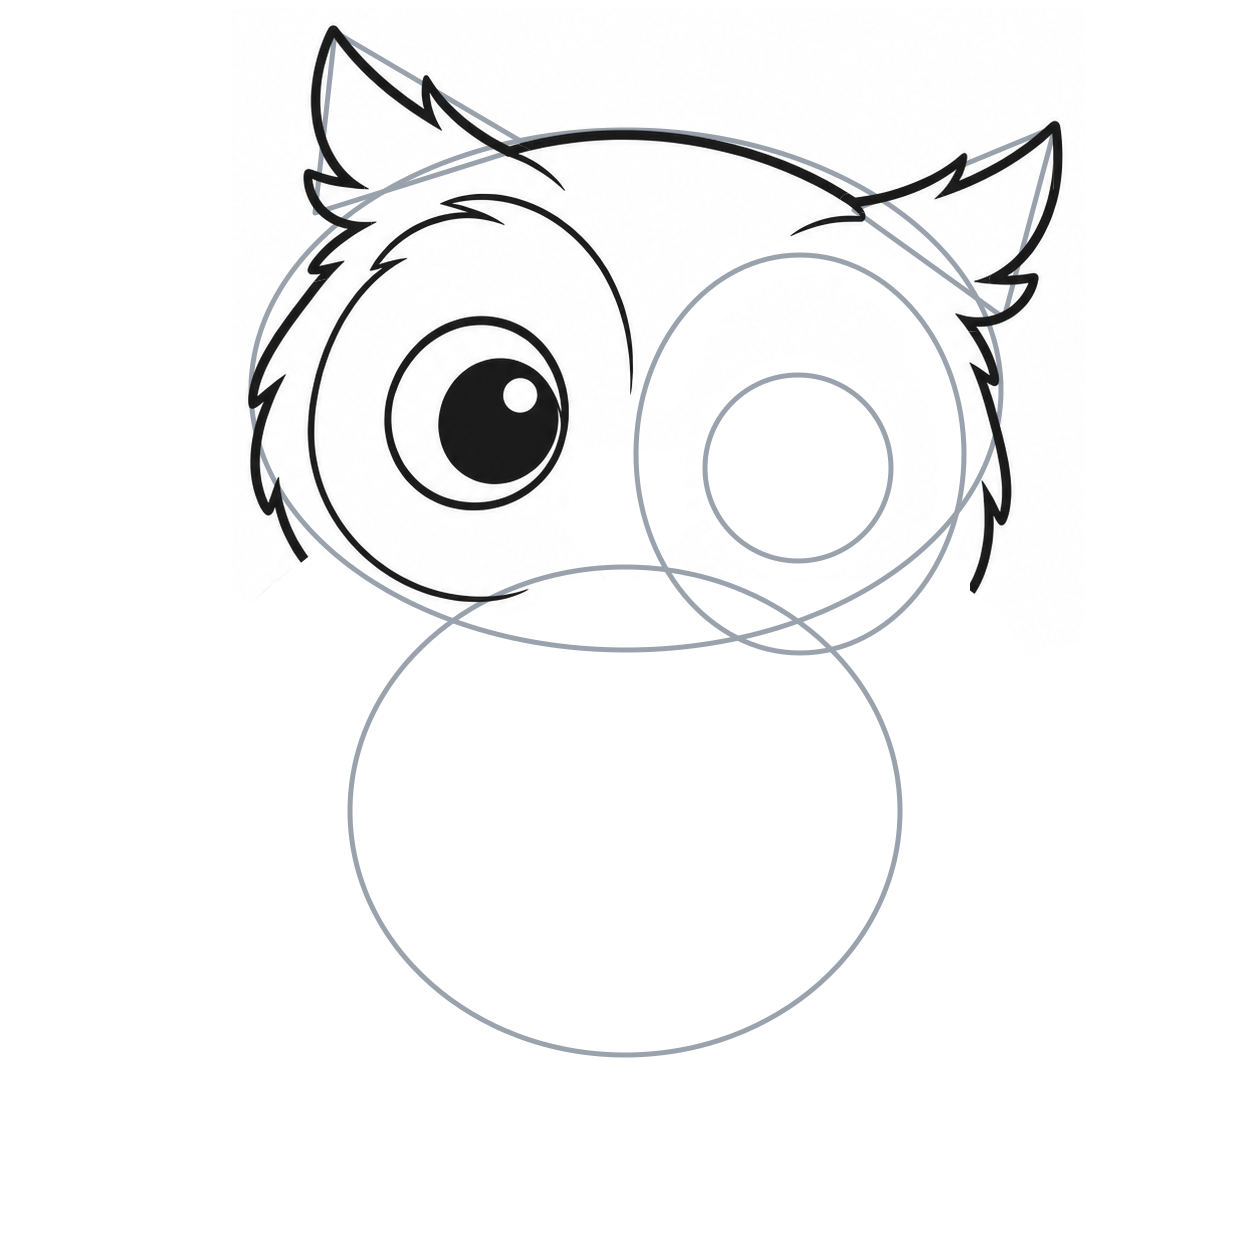
9. Place the second face patch
- Erase only the first patch and eye guides.
- Add matching oval-and-circle guides on the right, slightly lower than the first pair to follow the head tilt.
Match the sizes before adding the second patch’s feather points.
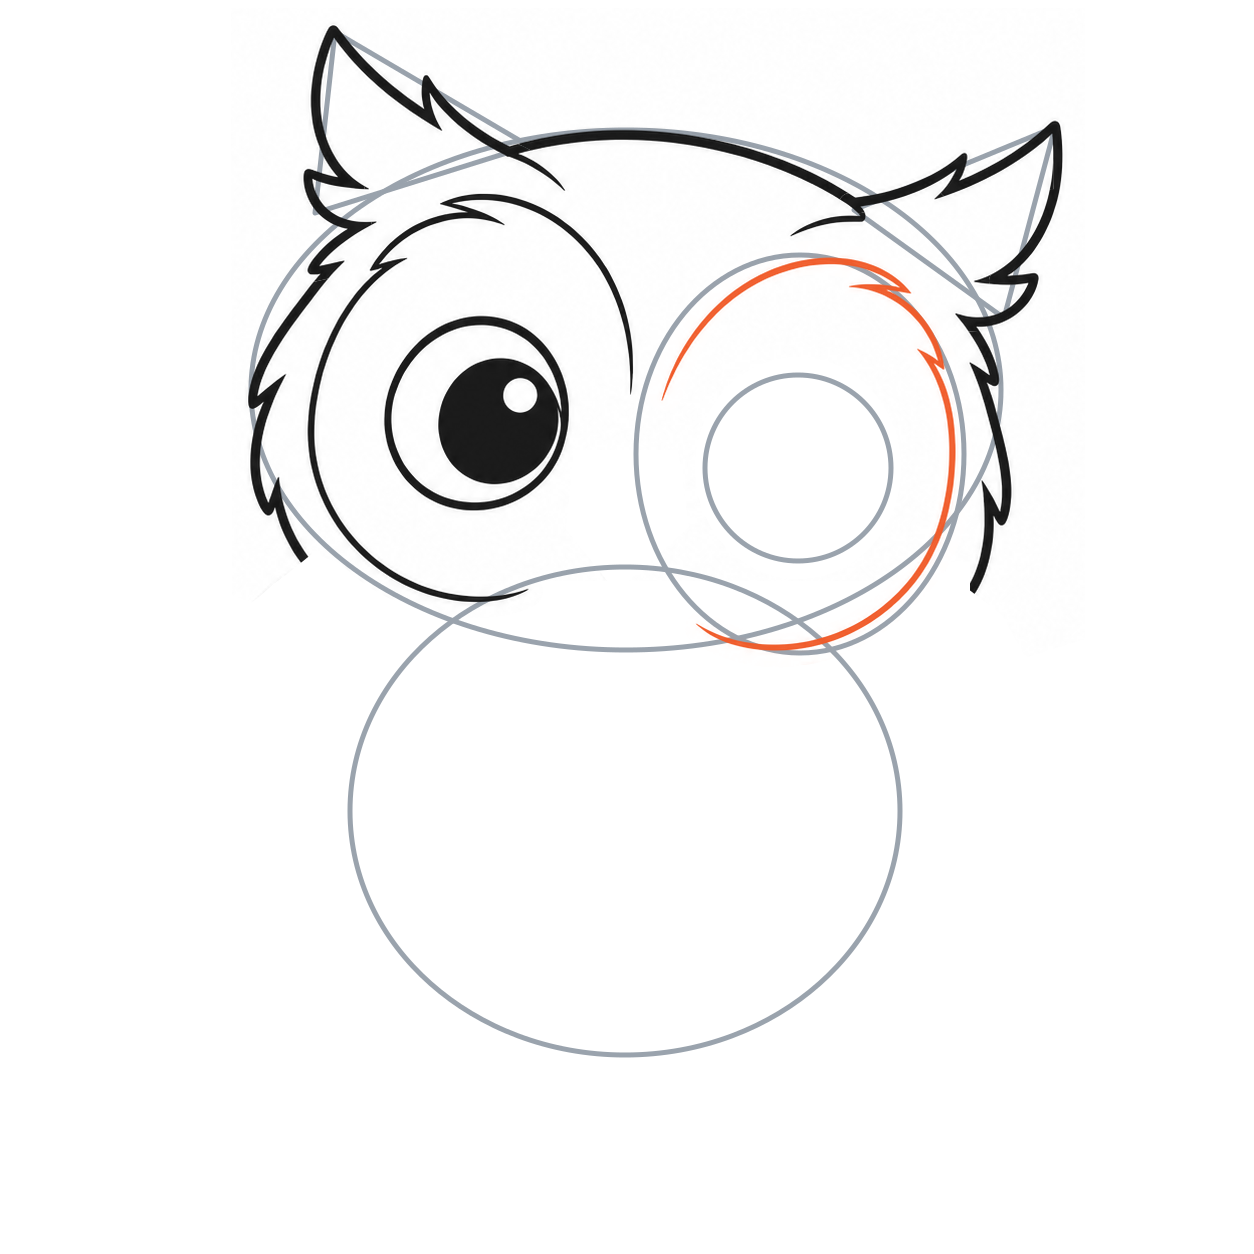
10. Shape the second face patch
- Curve around the right patch guide from its upper inside edge, over the top and down the outside.
- Add the small upper feather points, then turn beneath the eye and stop before the center.
The two patches leave a clear space between them for the beak.
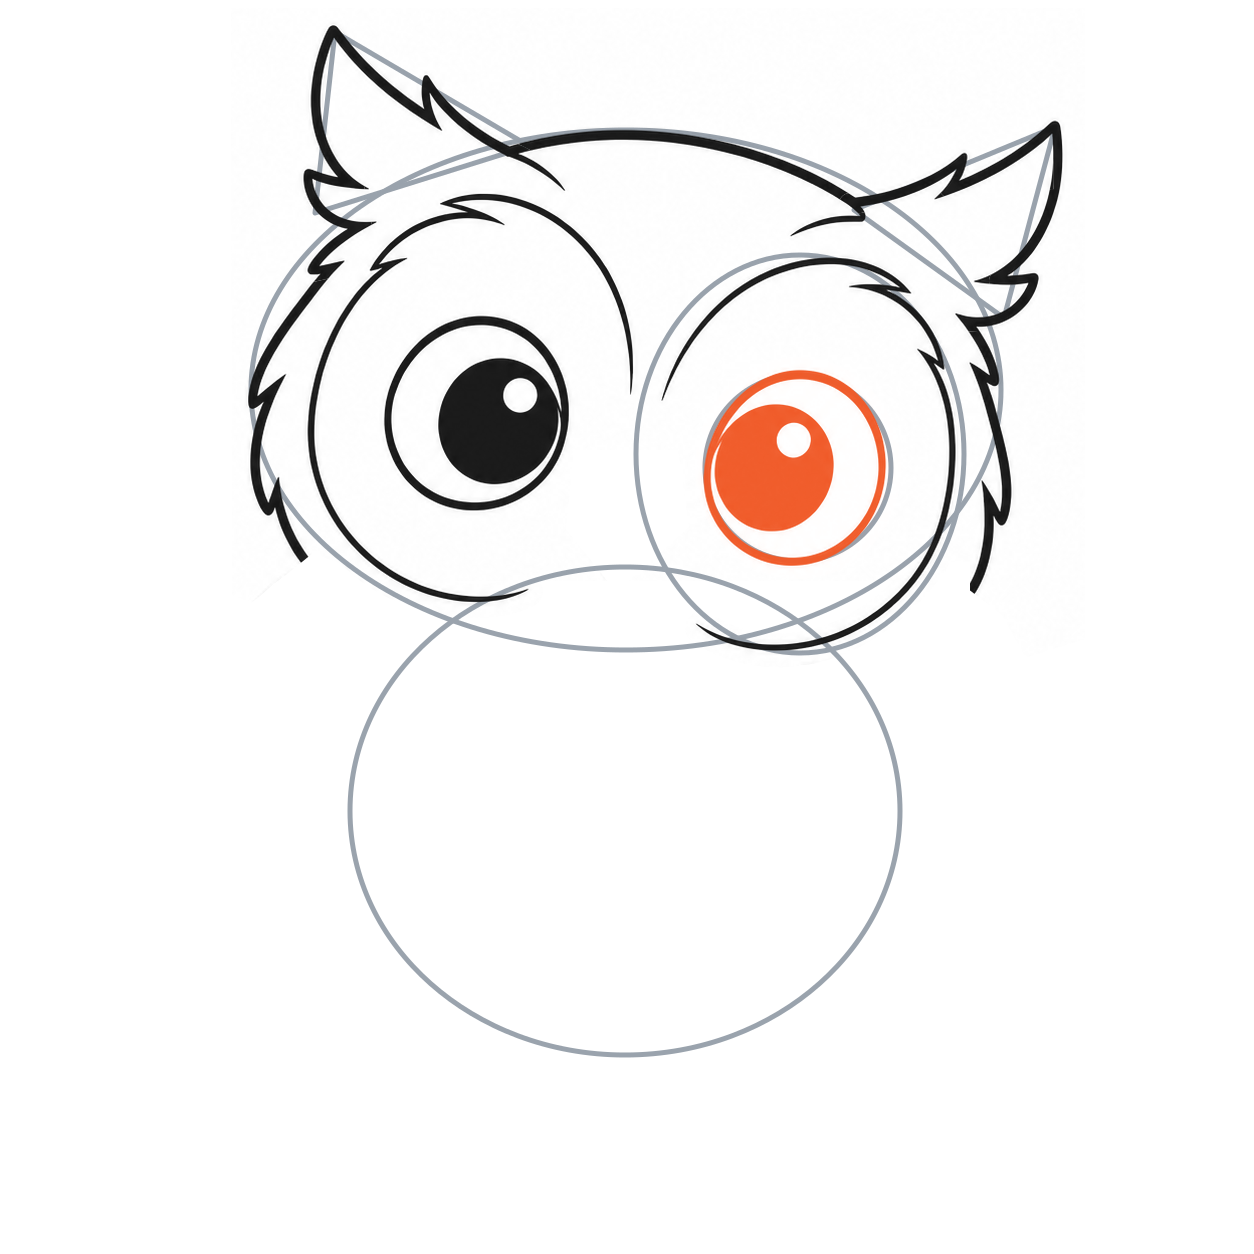
11. Finish the other eye
- Complete the circle inside the right patch.
- Place the dark pupil toward the middle of the face, leaving its small highlight white.
Keep the pictured inward pupil positions and the slight difference in eye height.
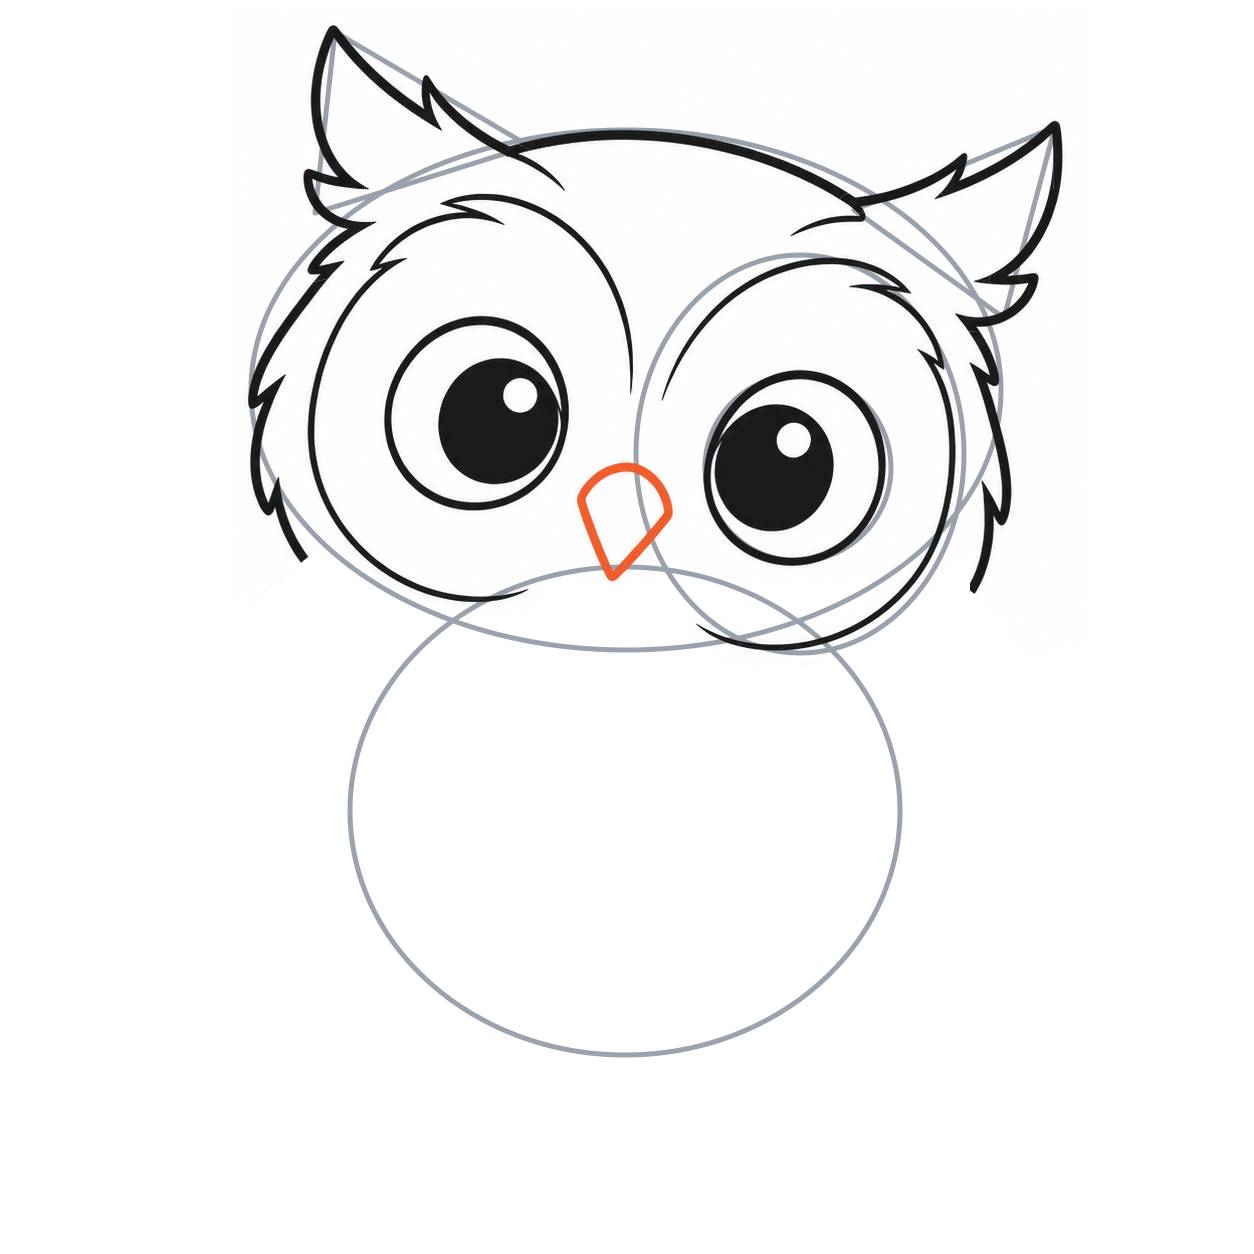
12. Add the beak between the eyes
- Between the eyes, just below their centres, draw a small rounded triangle pointing down.
- Make it about half an eye’s width and keep it clear of both eye circles.
The lower point sits in the open space between the face patches.
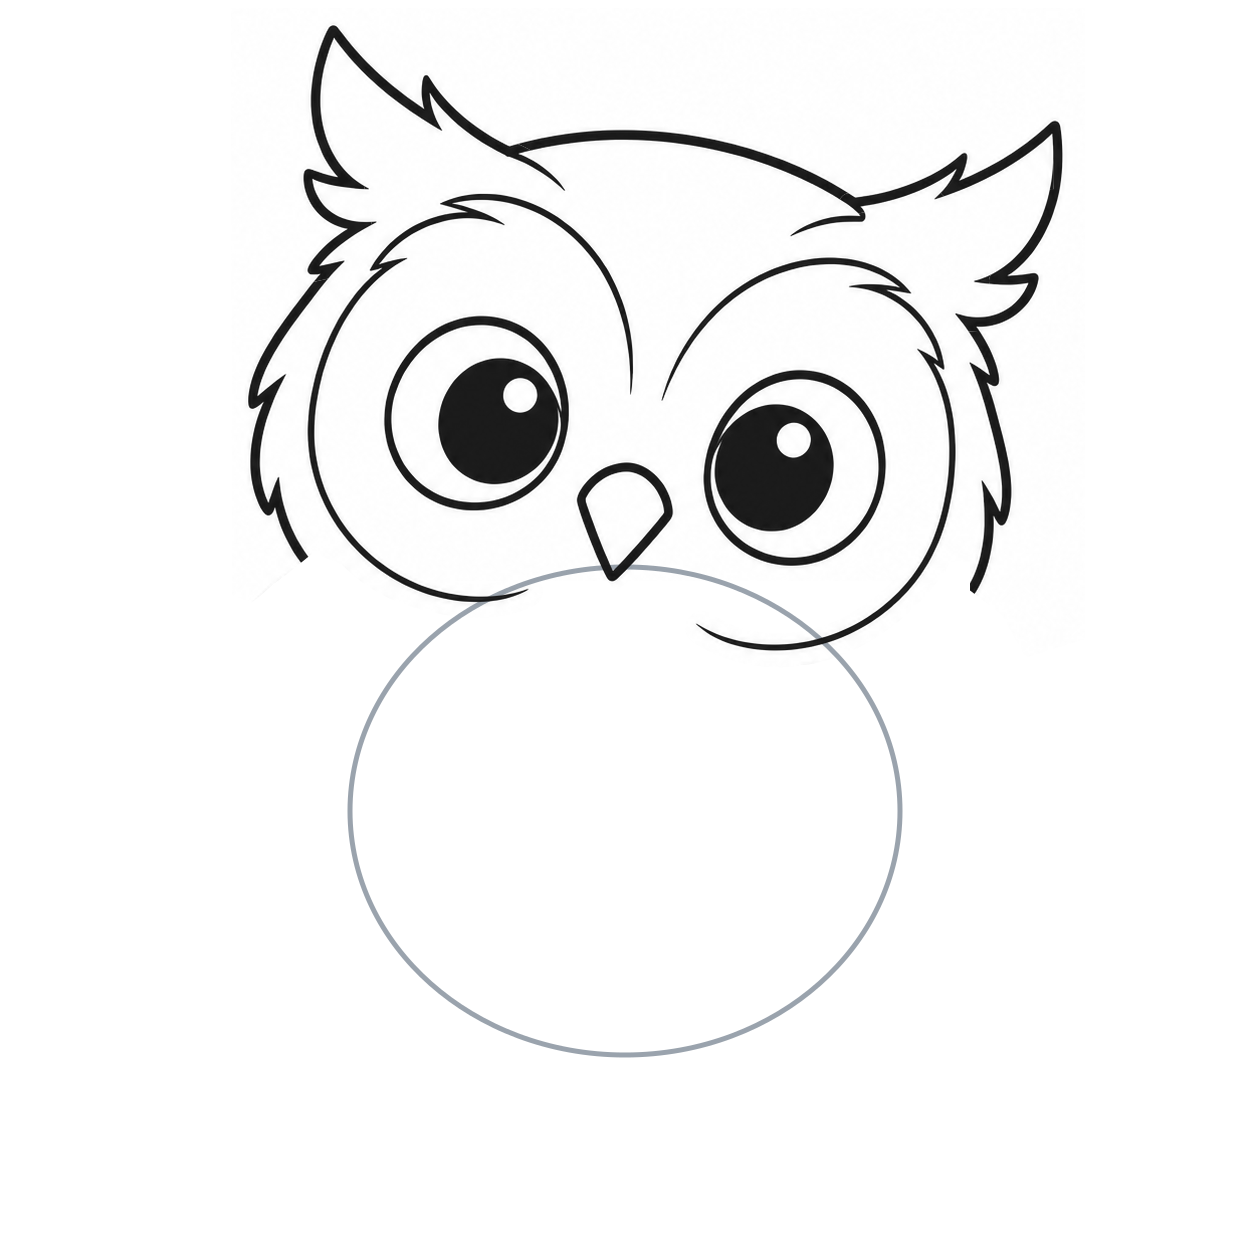
13. Clear the finished head guides
- Erase the gray right patch, eye circle, head oval and tuft wedges.
- Keep every black cheek, tuft, patch, eye and beak line.
- Leave the body oval for the next parts.
Only temporary gray marks disappear.
Draw the owl’s wings and body
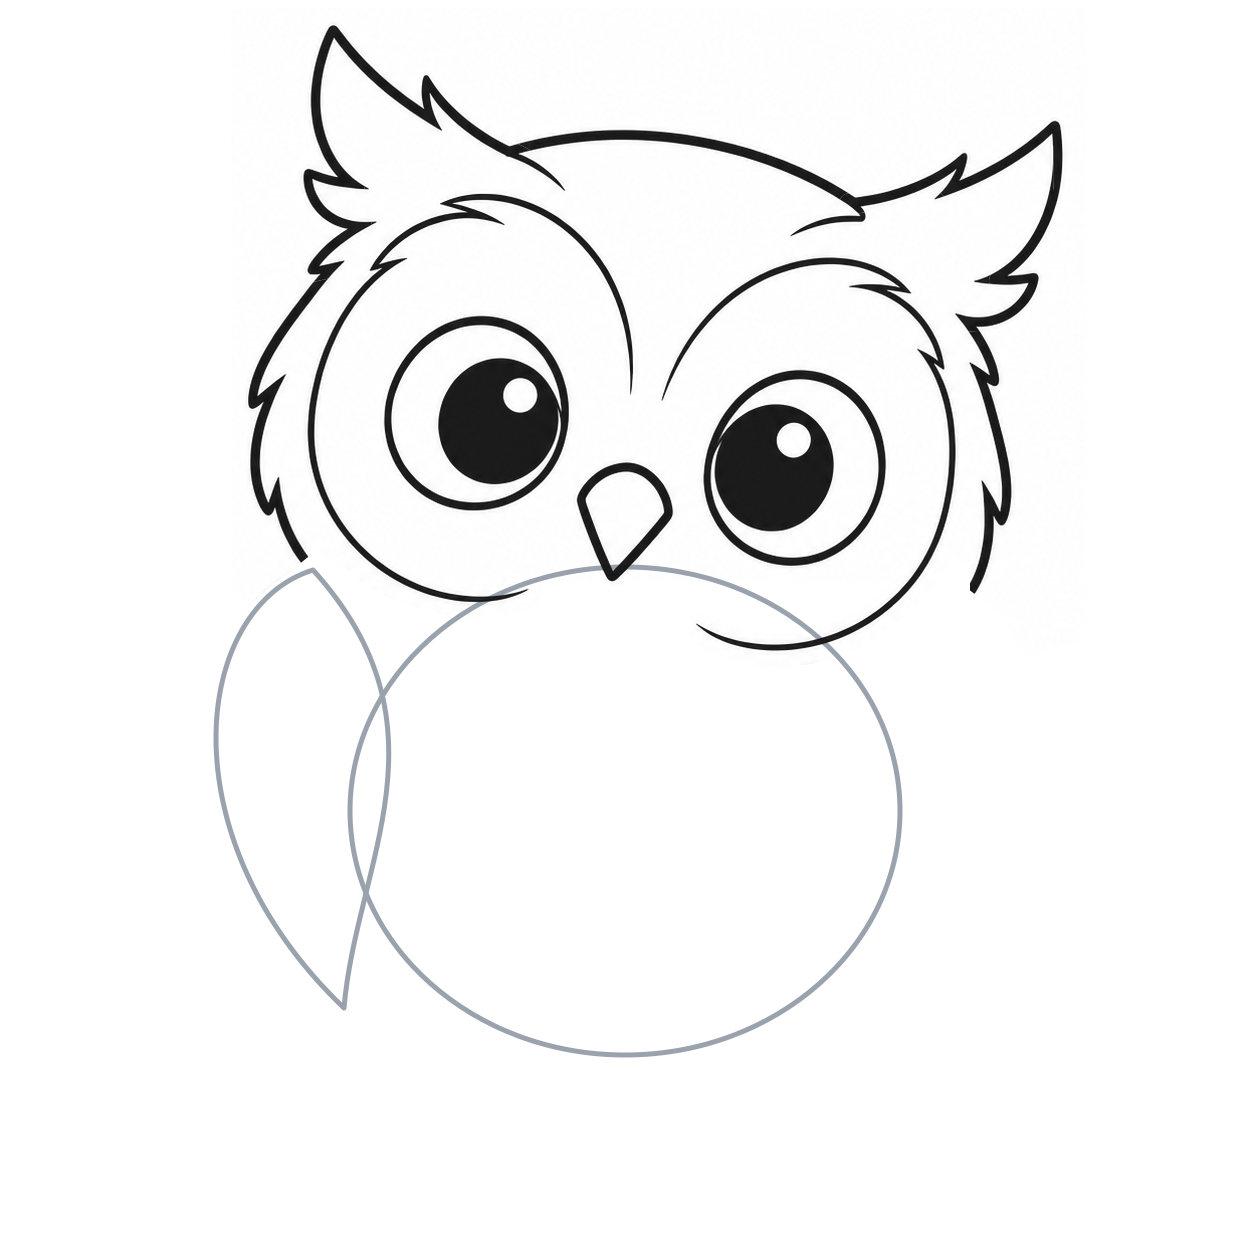
14. Place the first wrapping wing
- At the left shoulder beneath the head, lightly draw a long leaf shape.
- Bow its outer edge outward and bring its pointed end down beside the lower body oval.
- Its inner edge curves back to the shoulder.
The wing is about as tall as the visible body; its tip stays beside the body, not beneath the feet.
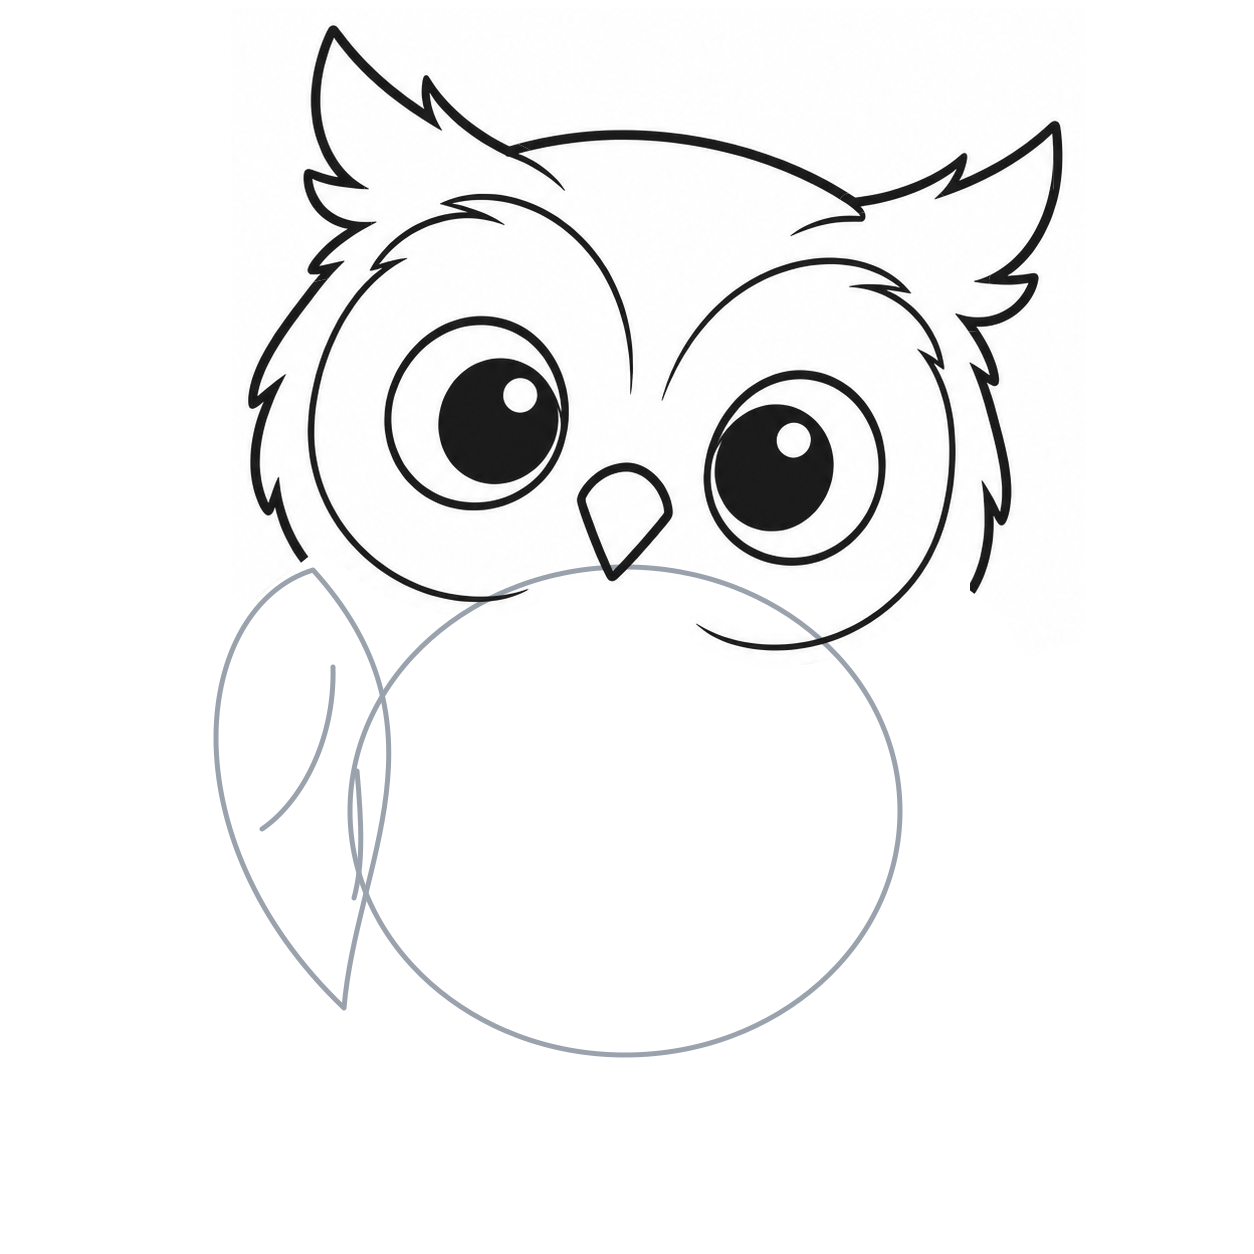
15. Locate the first wing overlap
- Inside that leaf, add a long light curve from its upper inner side toward the outer edge halfway down.
- Add a shorter light curve near the pointed lower end.
- These divide the wing into overlapping feather shapes.
The curves guide the overlap; they do not cross outside the leaf.
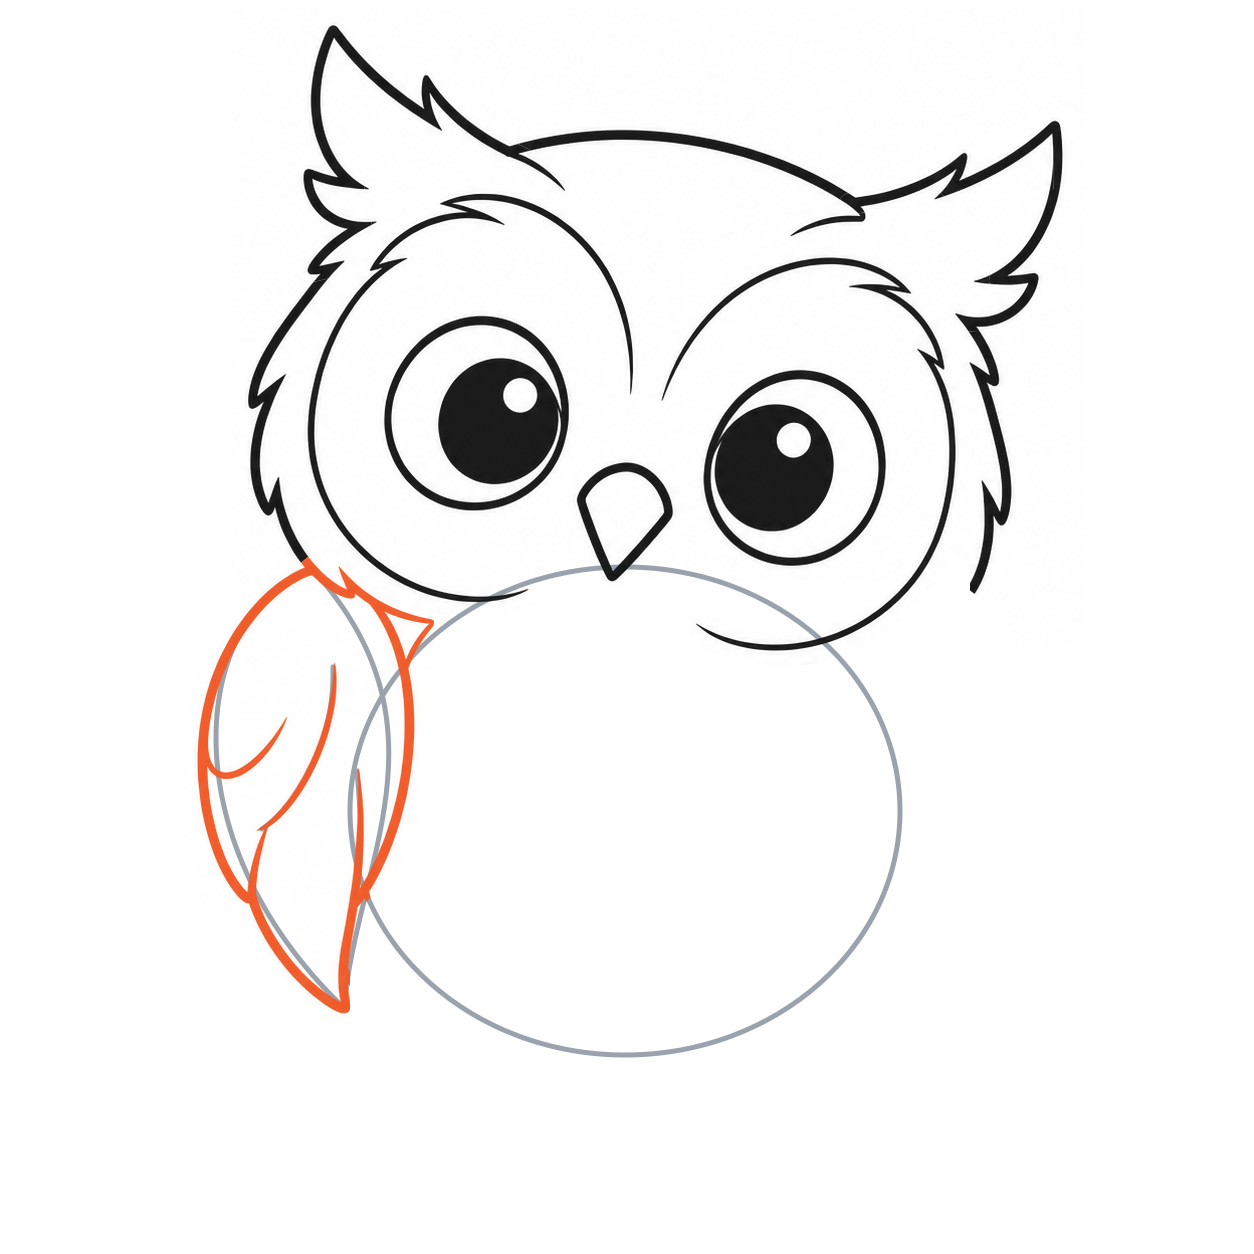
16. Turn the first wing into kept curves
- Begin at the shoulder and round the outer wing down toward its point.
- Return along the inner edge.
- At the overlap marks, turn one curved feather edge into the next.
- Add the short upper curl and the inner lower curve.
Each inner curve stops at its feather edge or tapers inside the wing; no line crosses the body.
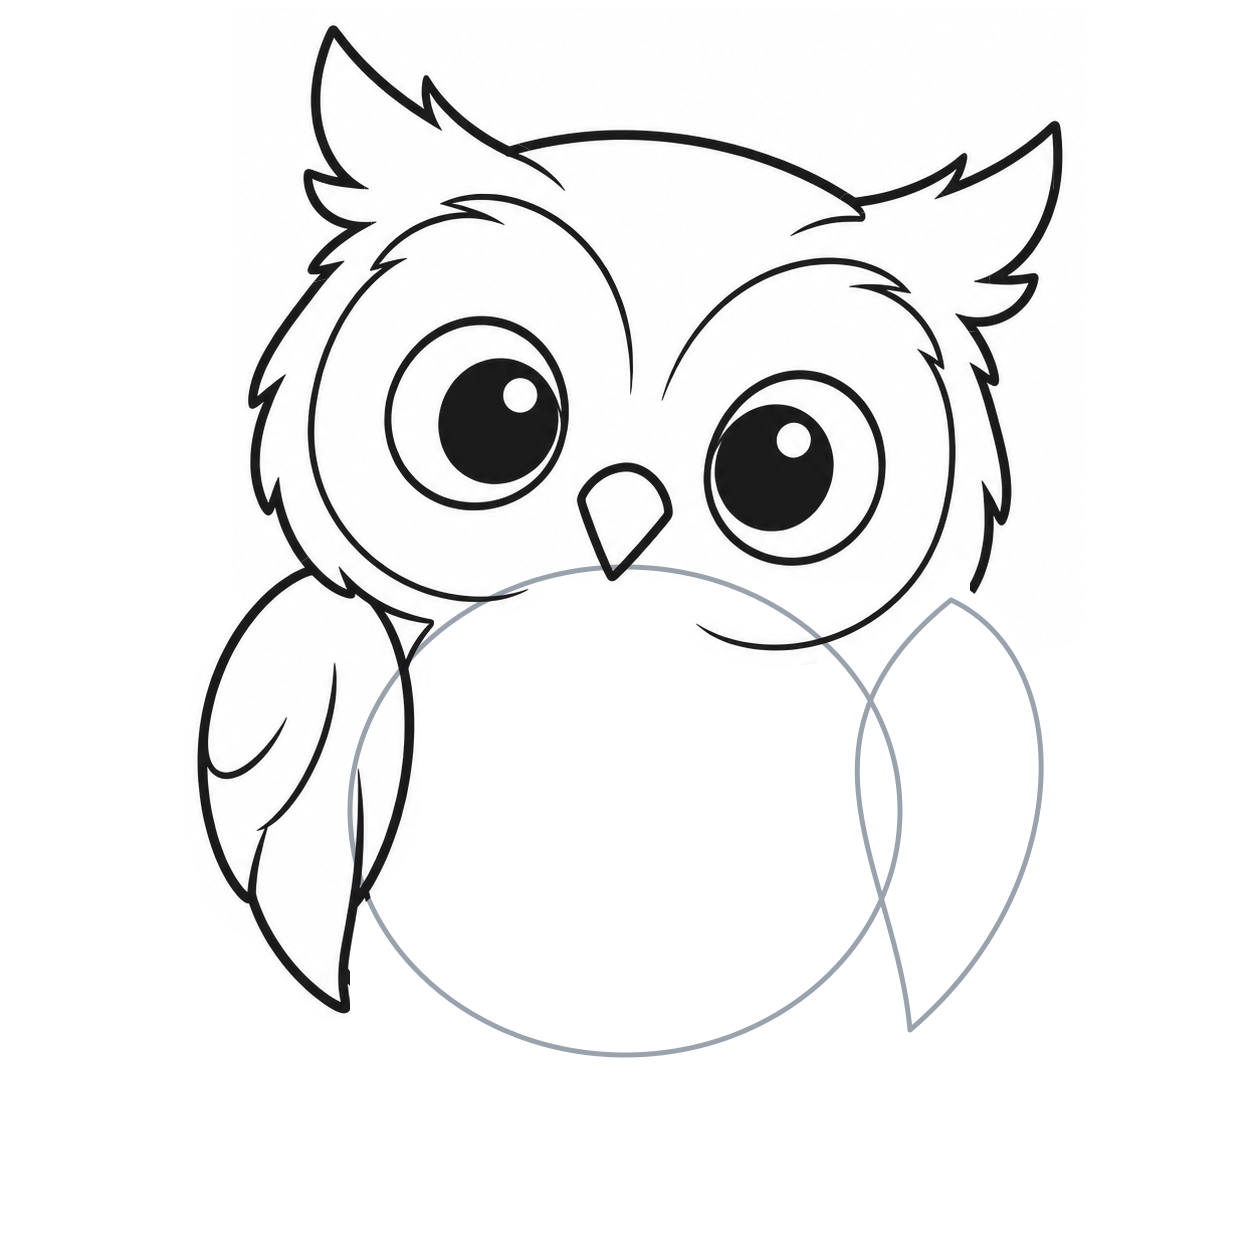
17. Place the other wing
- Erase only the left wing’s gray leaf and overlap marks.
- Add a matching leaf at the right shoulder, with its point beside the lower body.
- Let it wrap inward in the opposite direction.
Keep the first wing complete while placing its partner.
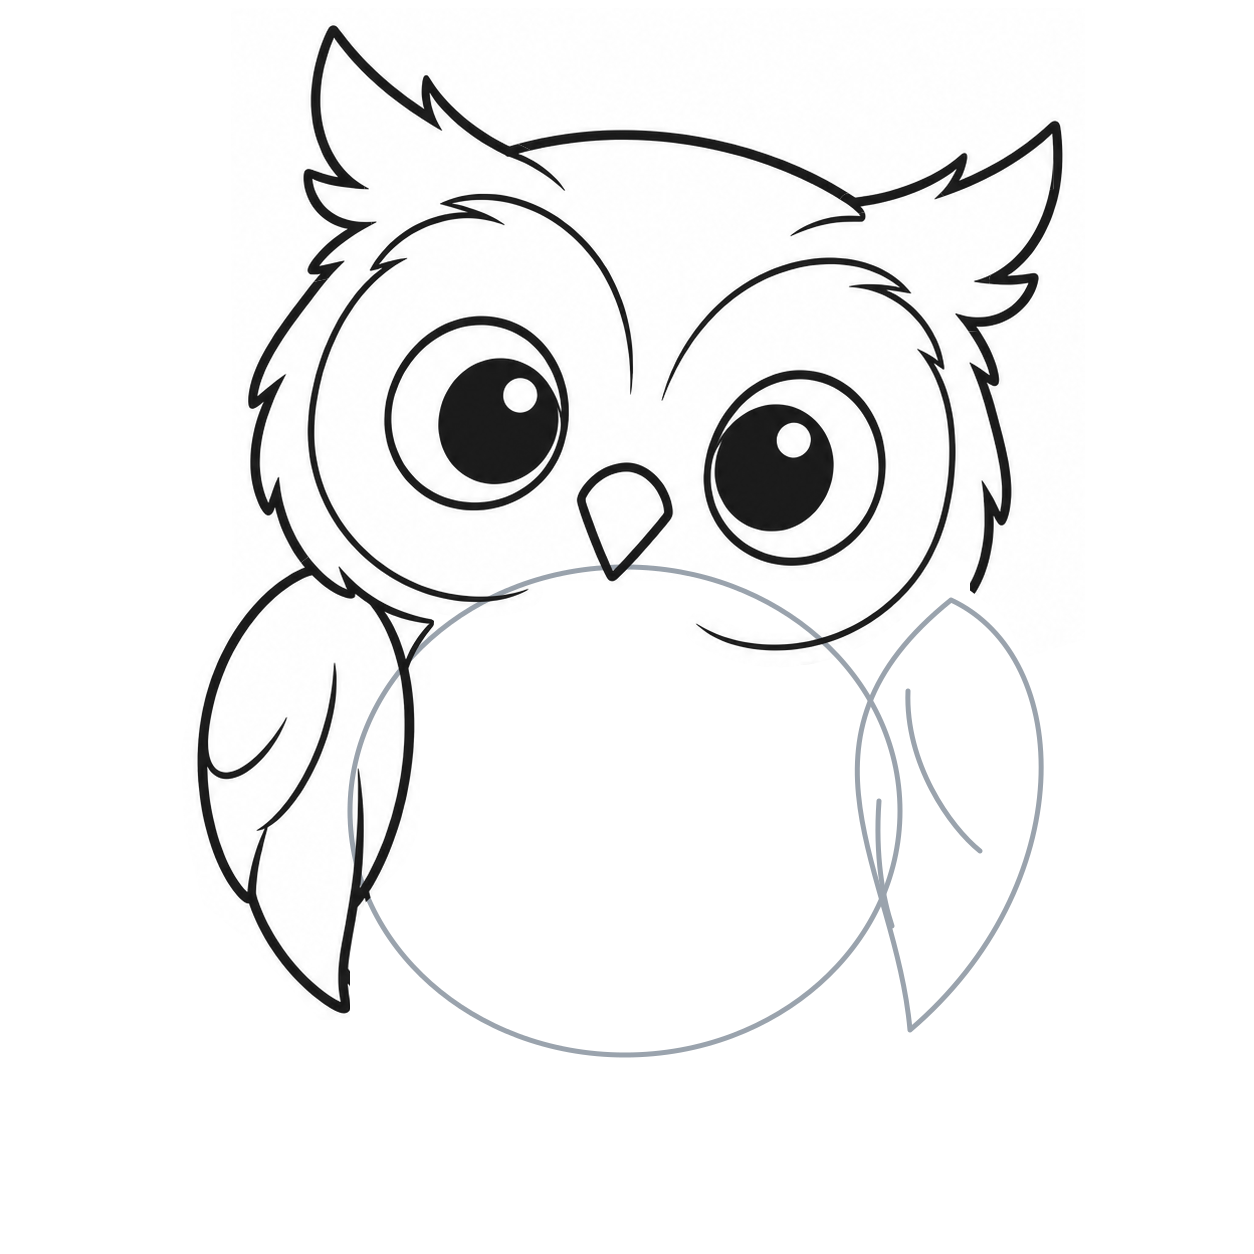
18. Locate the second wing overlap
- Add the matching long and short light curves inside the right leaf.
- Let them bend toward the outer edge, reversing the first wing’s direction.
Both wings have room for a broad upper feather and a pointed lower feather.
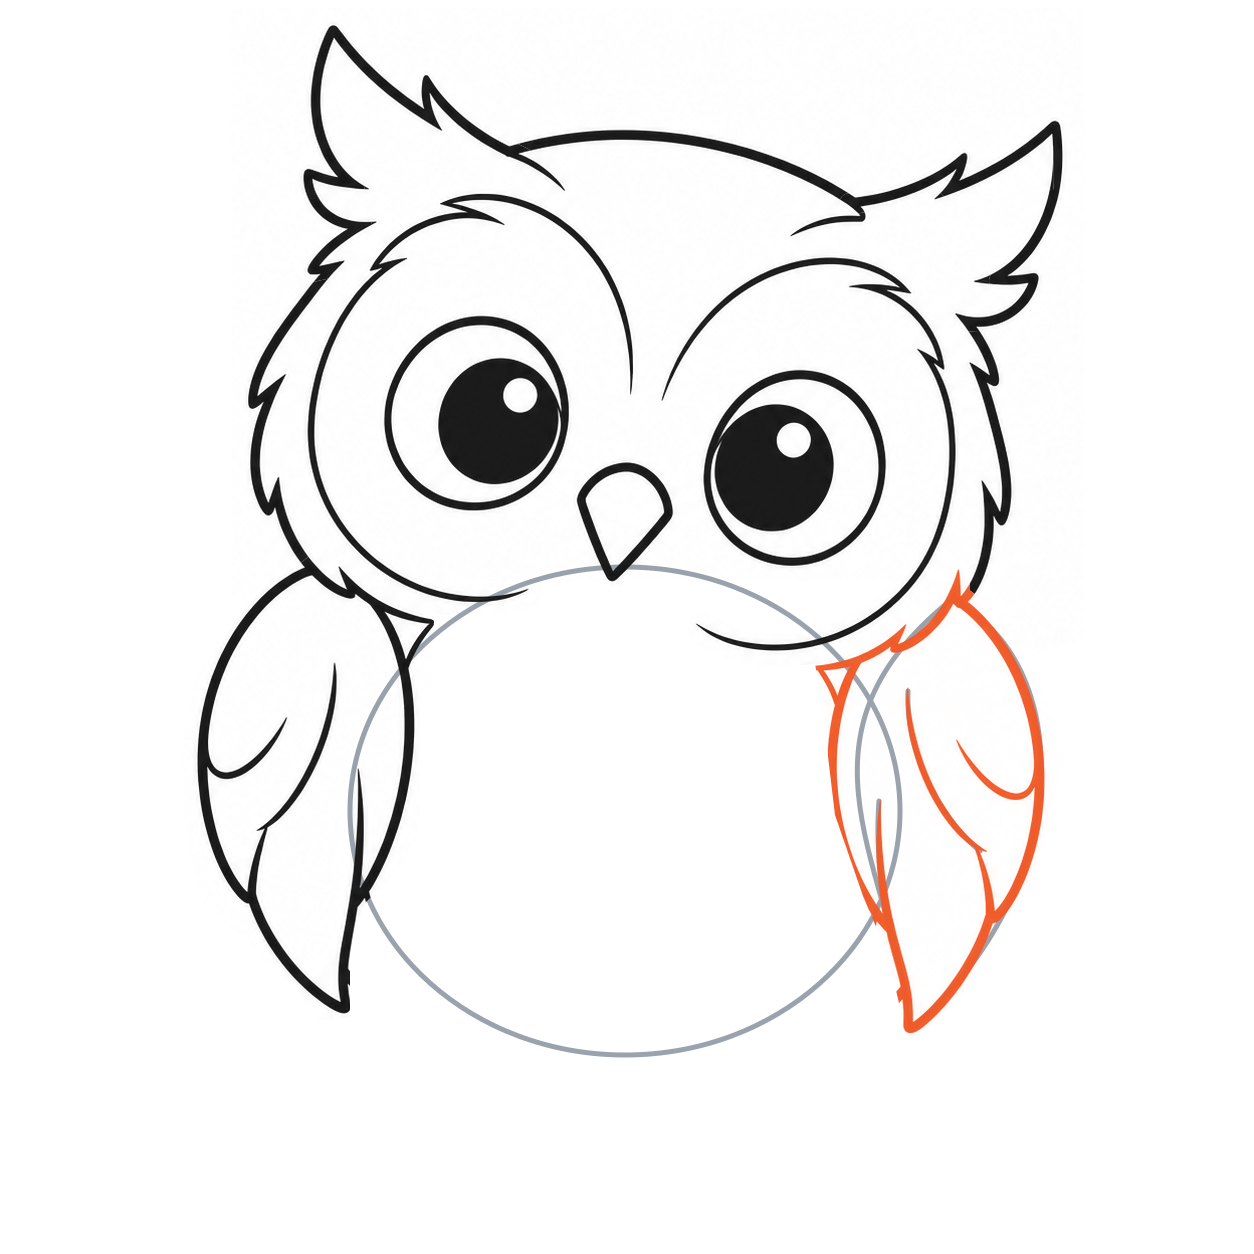
19. Finish the second wrapping wing
- Follow the right leaf from the shoulder around its outer curve and pointed end.
- Use the light overlap marks to join its curved feather edges.
- Add the short upper curl and inner lower curve.
Finish the whole wing before adding the body or chest details.
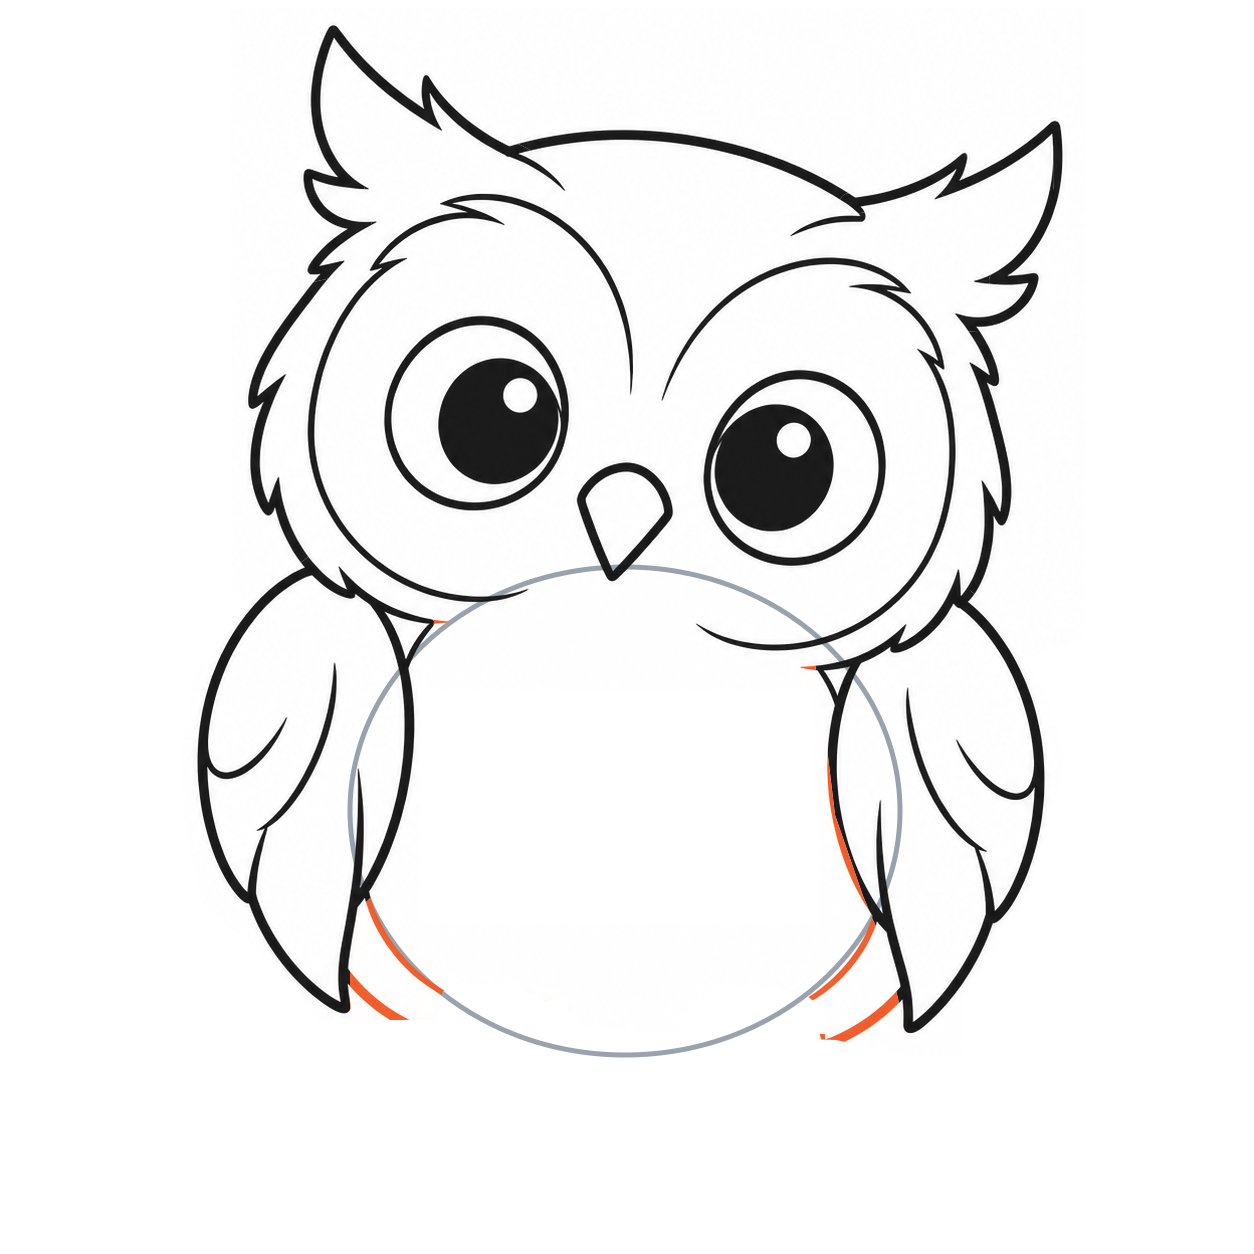
20. Join the body between the wings
- Erase the right wing’s gray marks.
- Follow the visible parts of the body oval between and below the wings.
- Stop at each wing edge and leave the two foot positions open along the bottom.
- Add the short shoulder joins beneath the face.
The body joins the wings; hidden lines behind them stay undrawn.
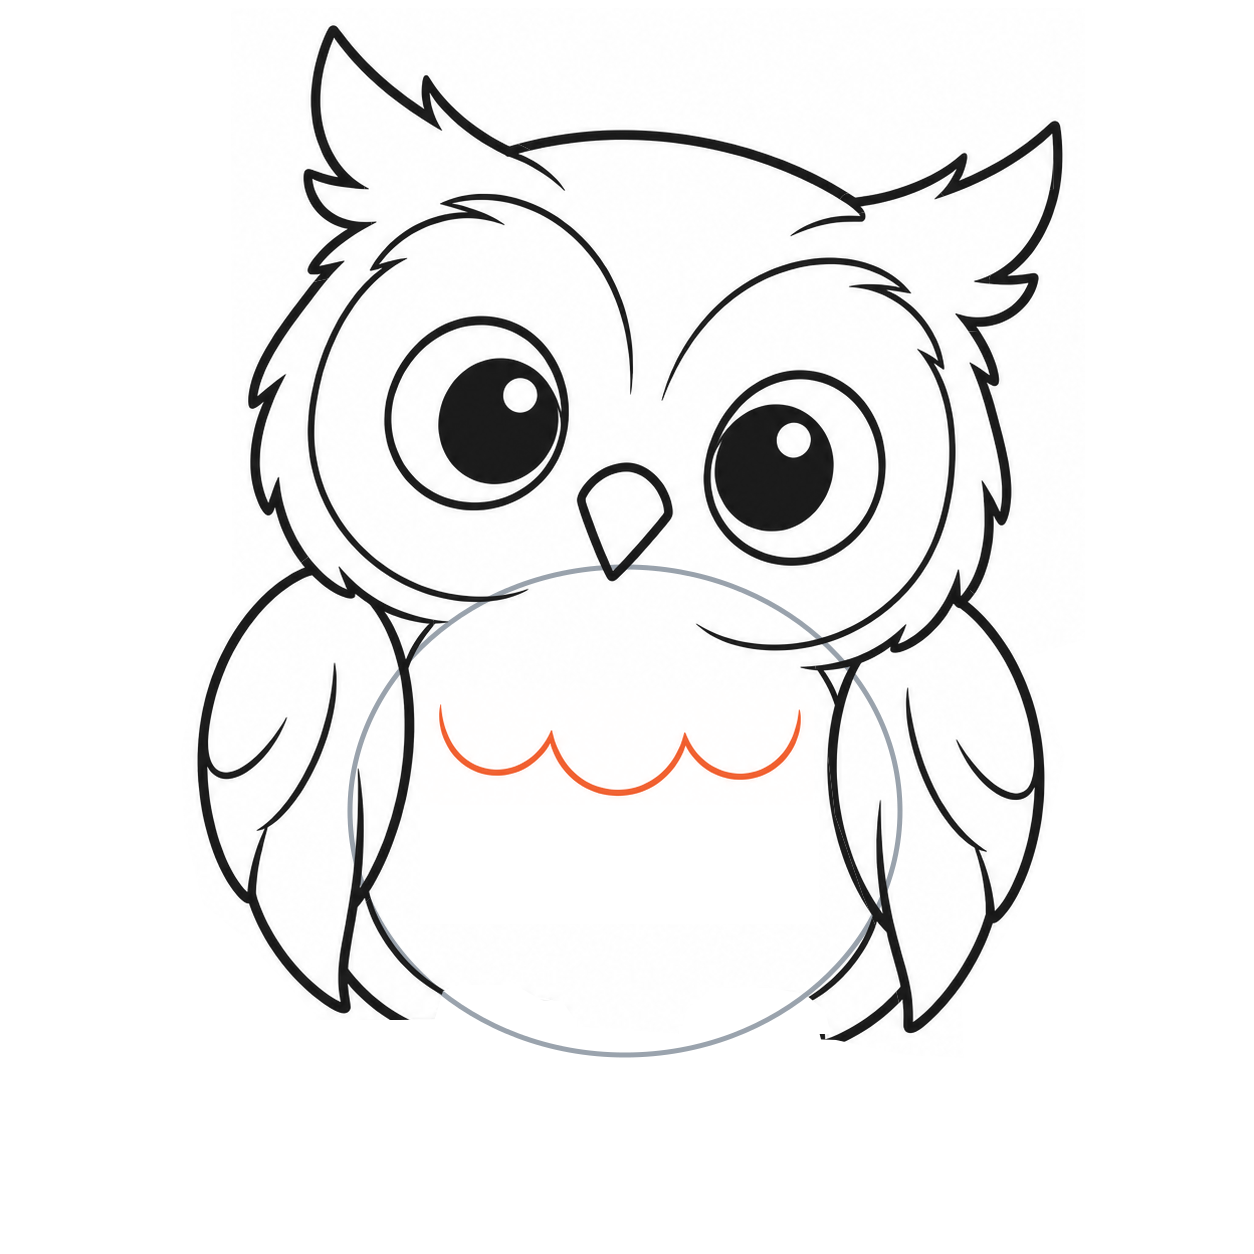
21. Add one complete chest feather row
- Across the upper belly, draw three broad joined U-shaped scallops from left to right.
- Begin inside the left wing and stop before the right wing.
Keep this row complete and leave room below for another.
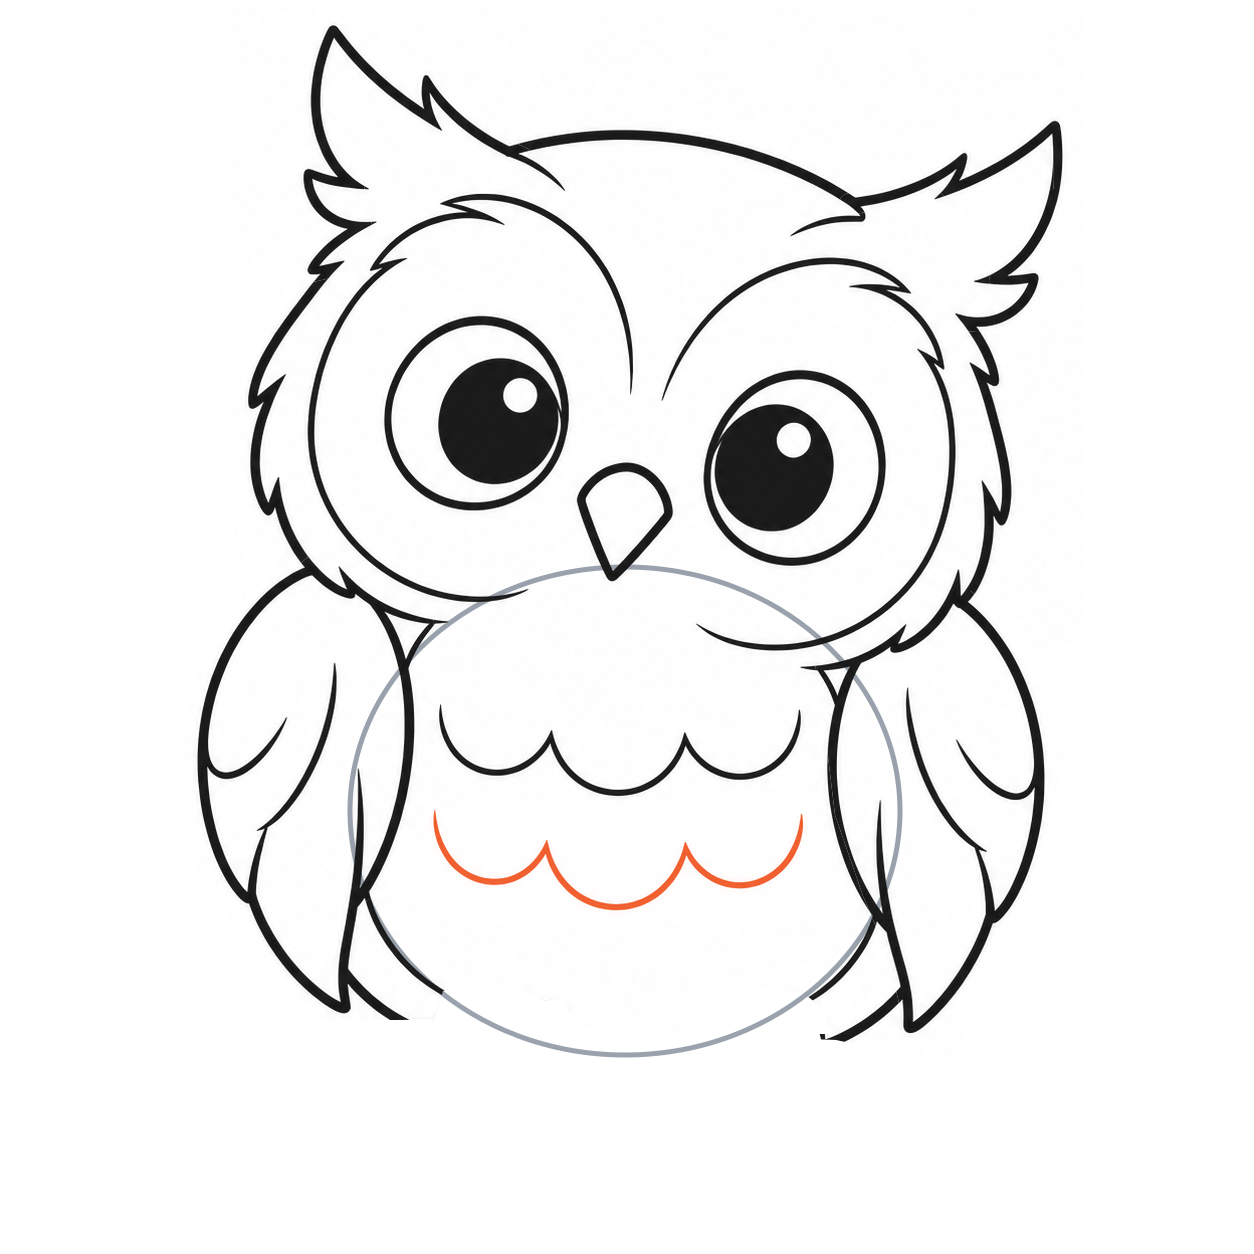
22. Repeat the chest row
- Add a matching row of three joined scallops below the first, leaving a clear strip of white space between them.
The rows decorate the body without changing its outline.
Draw the owl’s feet and branch
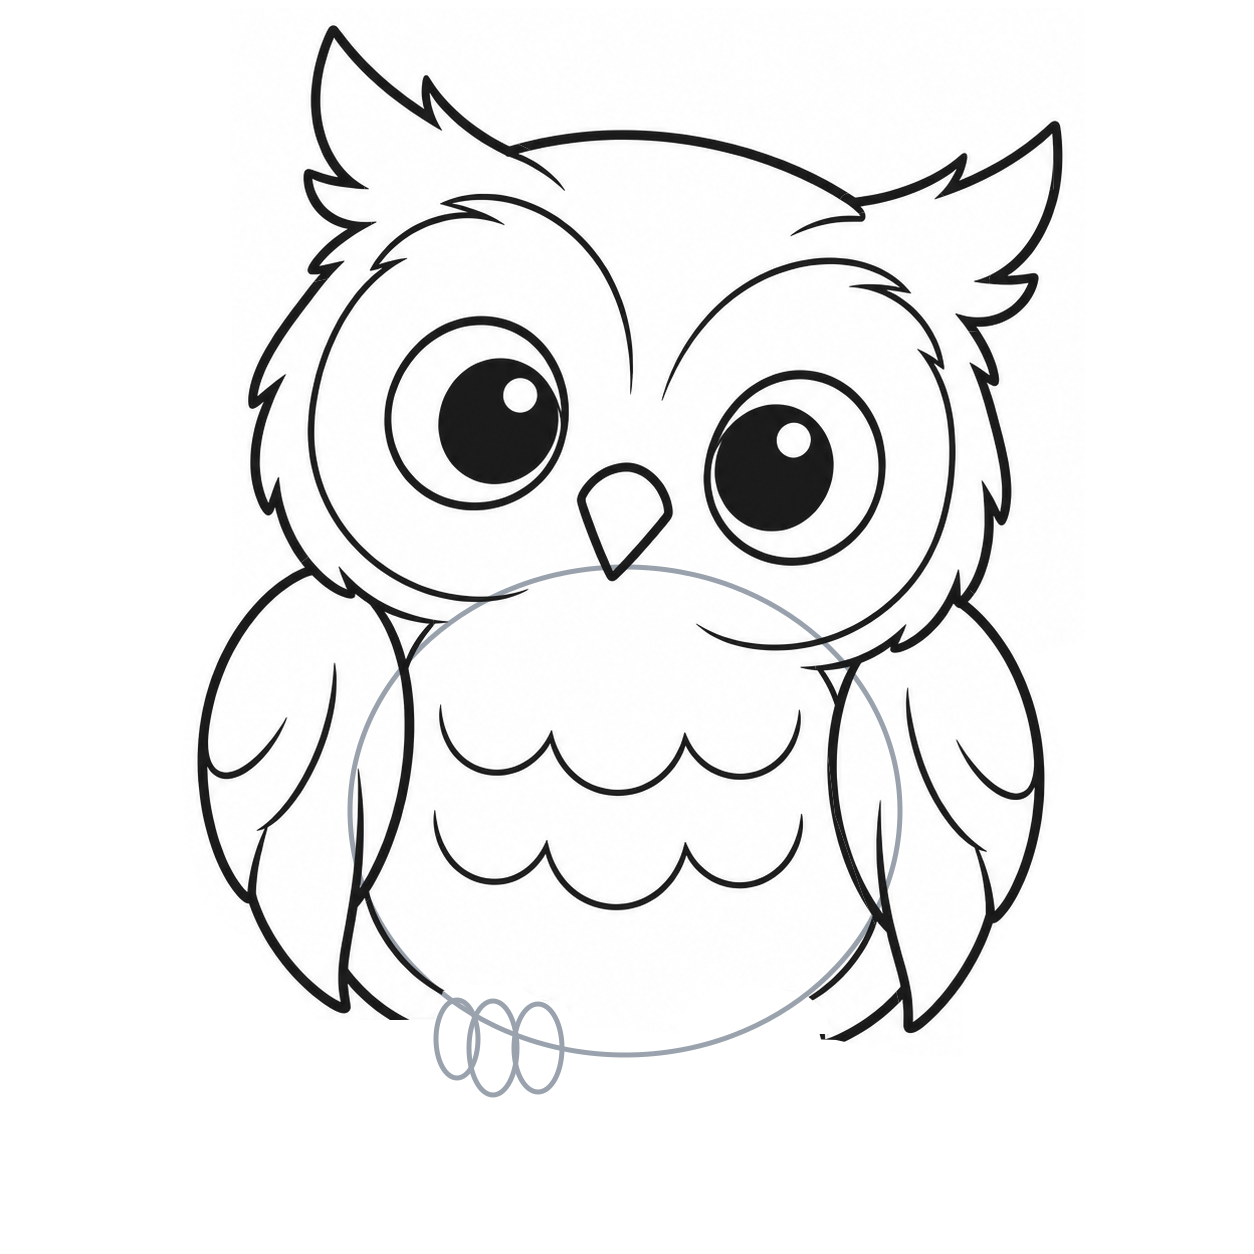
23. Place the first gripping foot
- Along the lower-left part of the body oval, lightly draw three narrow, overlapping upright ovals.
- Let their tops touch the body and their lower ends hang beneath it.
The whole foot is a little narrower than one eye.
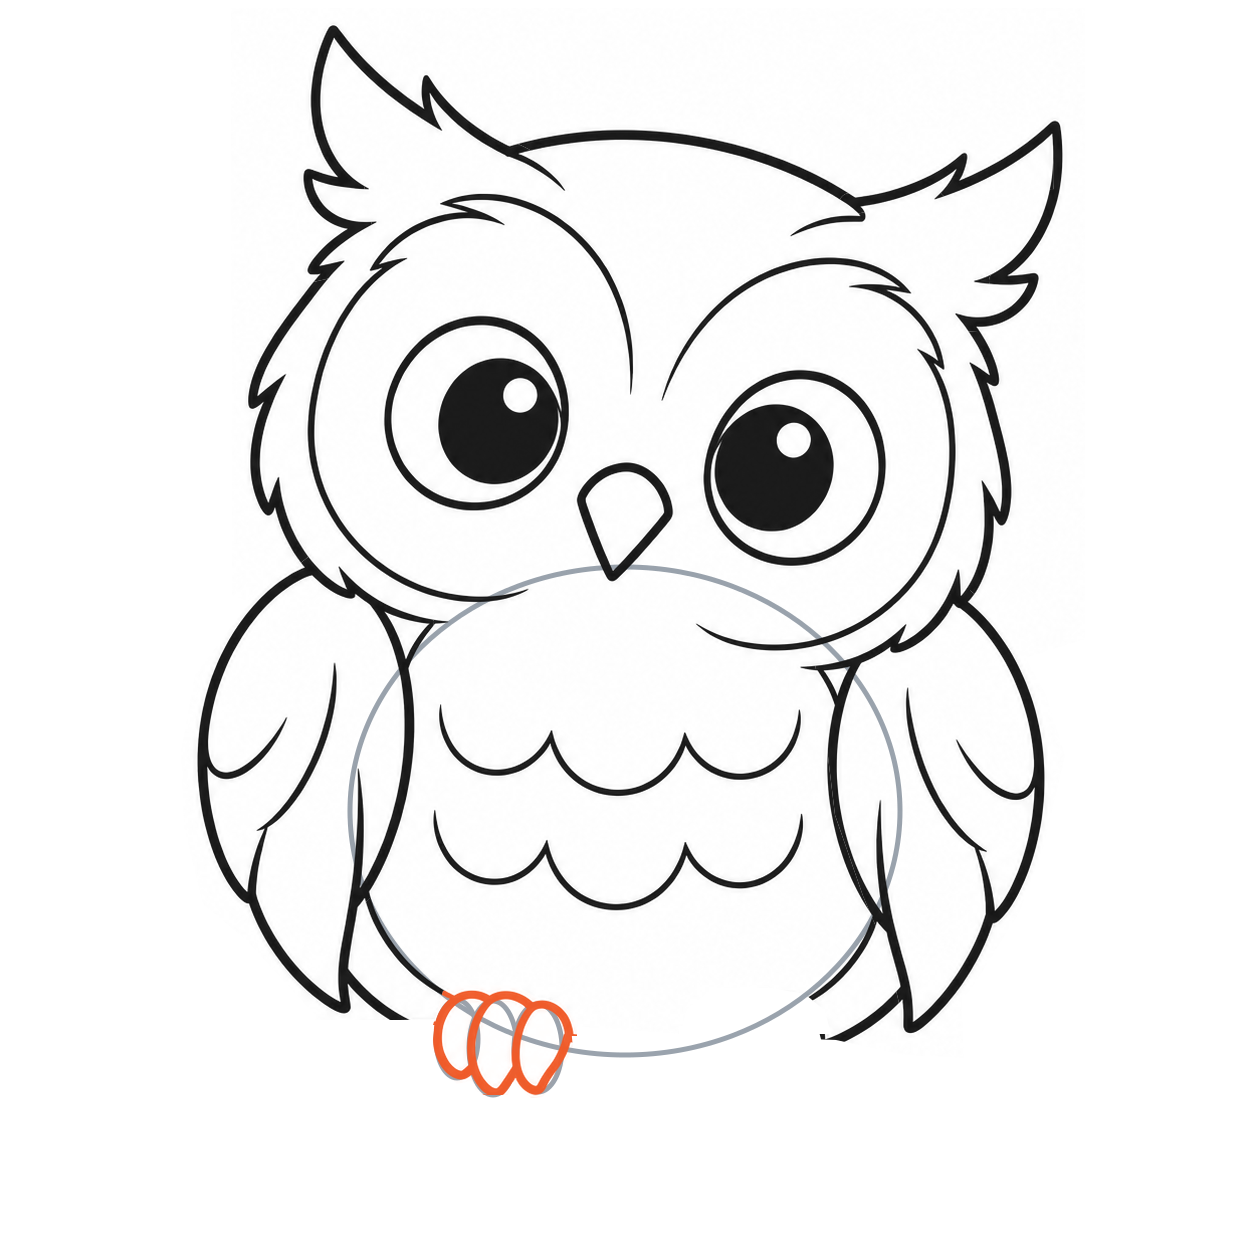
24. Finish the first foot
- Round the three toes along those ovals, keeping their lower tips distinct.
- Stop shared edges where one toe overlaps the next instead of drawing through it.
Complete all three toes before adding the other foot or the branch.
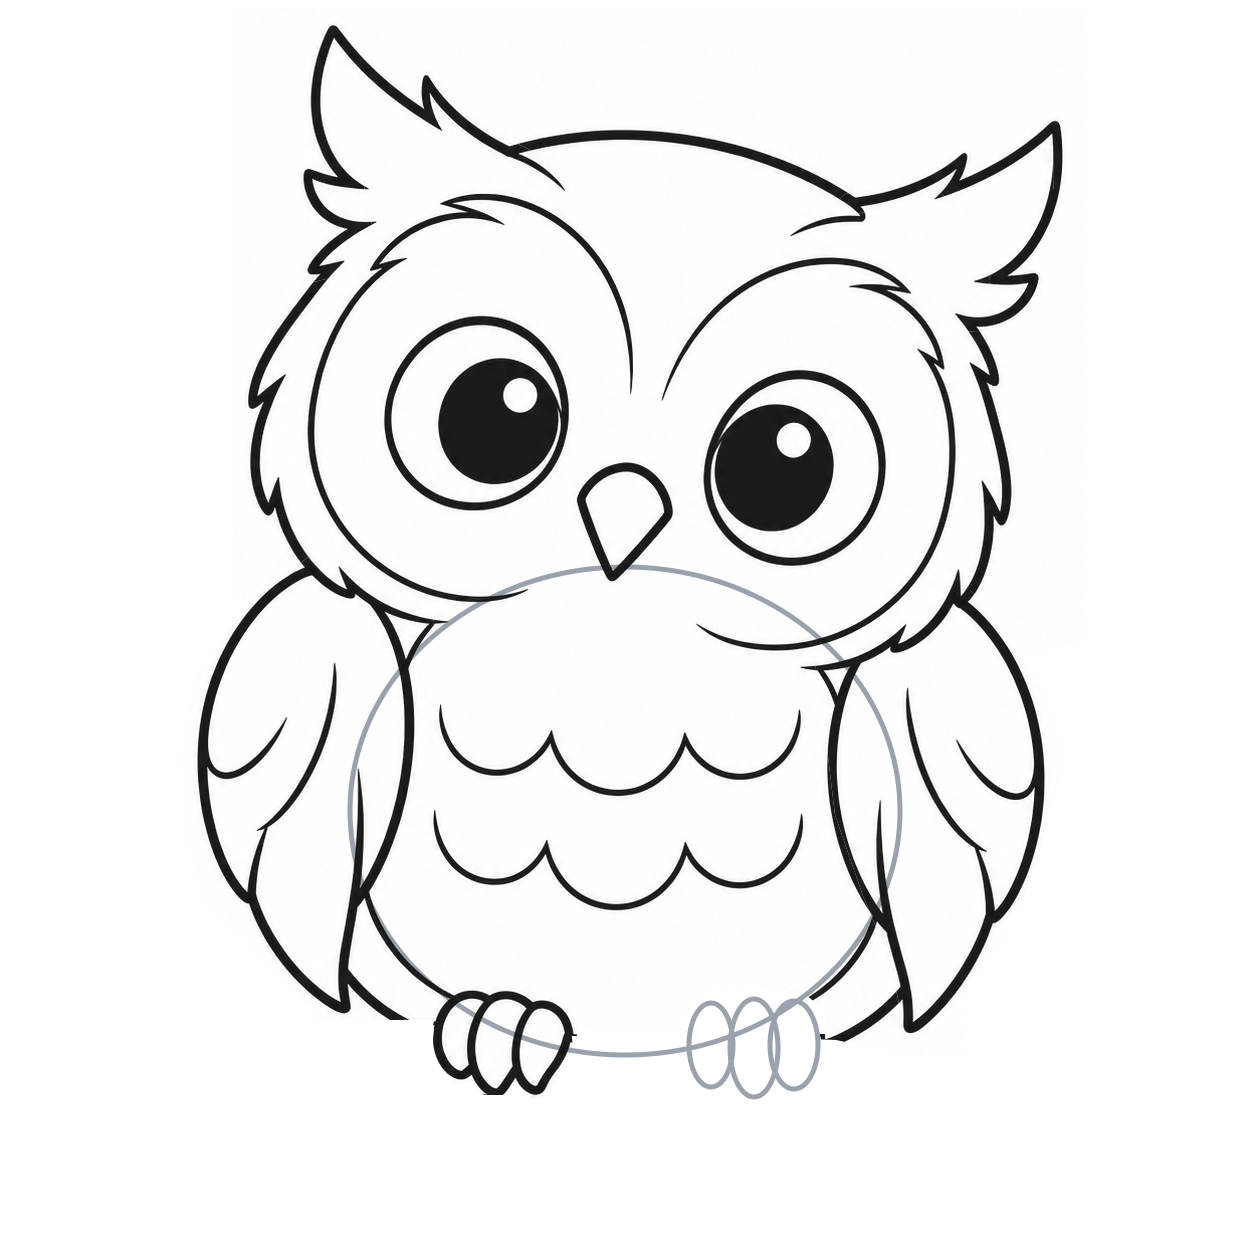
25. Place the other foot
- Erase only the first foot’s gray ovals.
- Place three matching ovals on the lower-right body, leaving about one foot-width between the two groups.
Both feet hang to the same level.
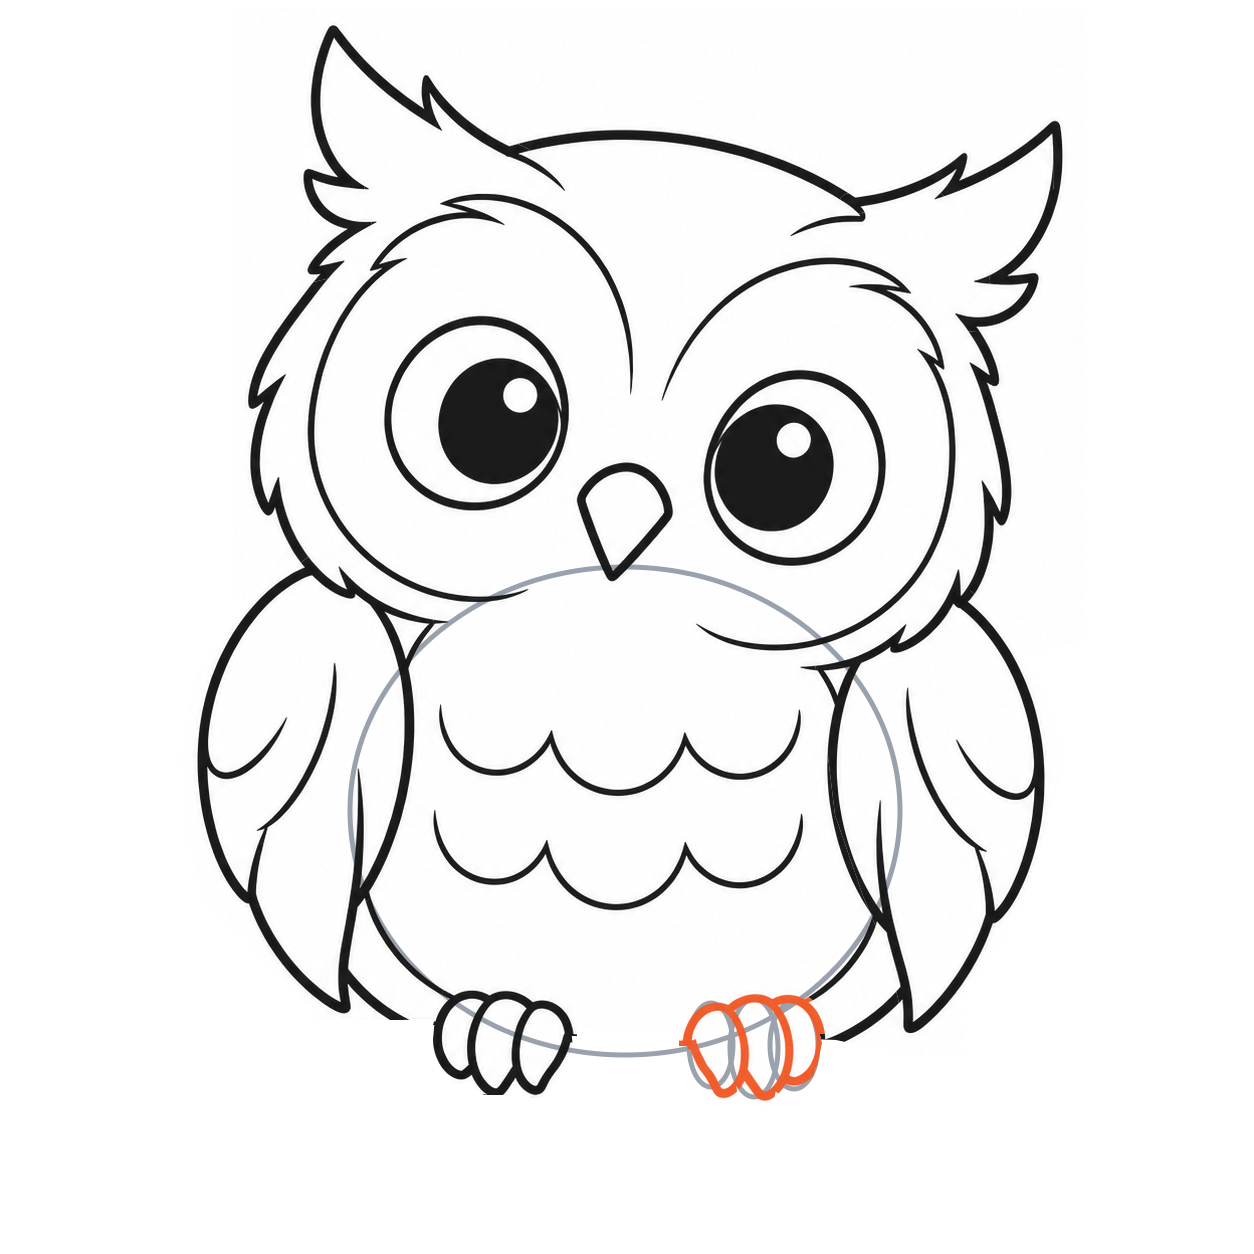
26. Finish the second foot
- Curve the three right toes around their guides.
- Preserve their shared edges and rounded tips, matching the first foot’s grip.
There are two complete groups of three toes.
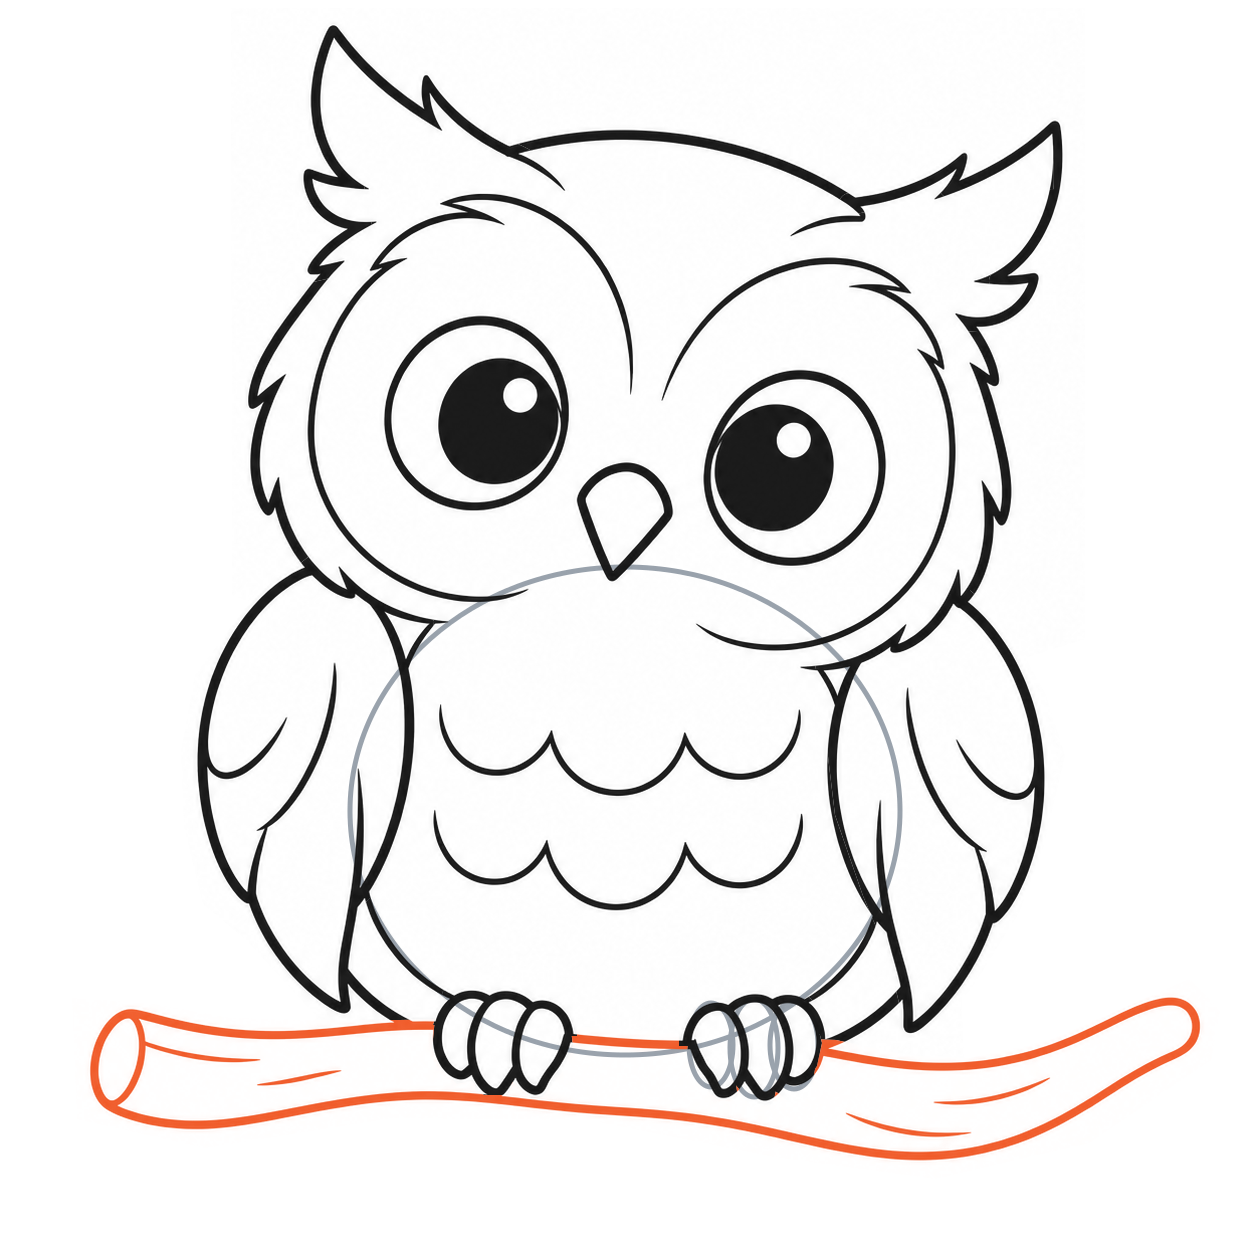
27. Draw the branch behind the feet
- Draw a gently bending branch beneath the owl.
- Run its upper edge up to each foot, stop at the toes, and continue on the other side.
- Add a lower edge, rounded ends and a few short wood curves.
The toes stay in front; no branch line passes through them.
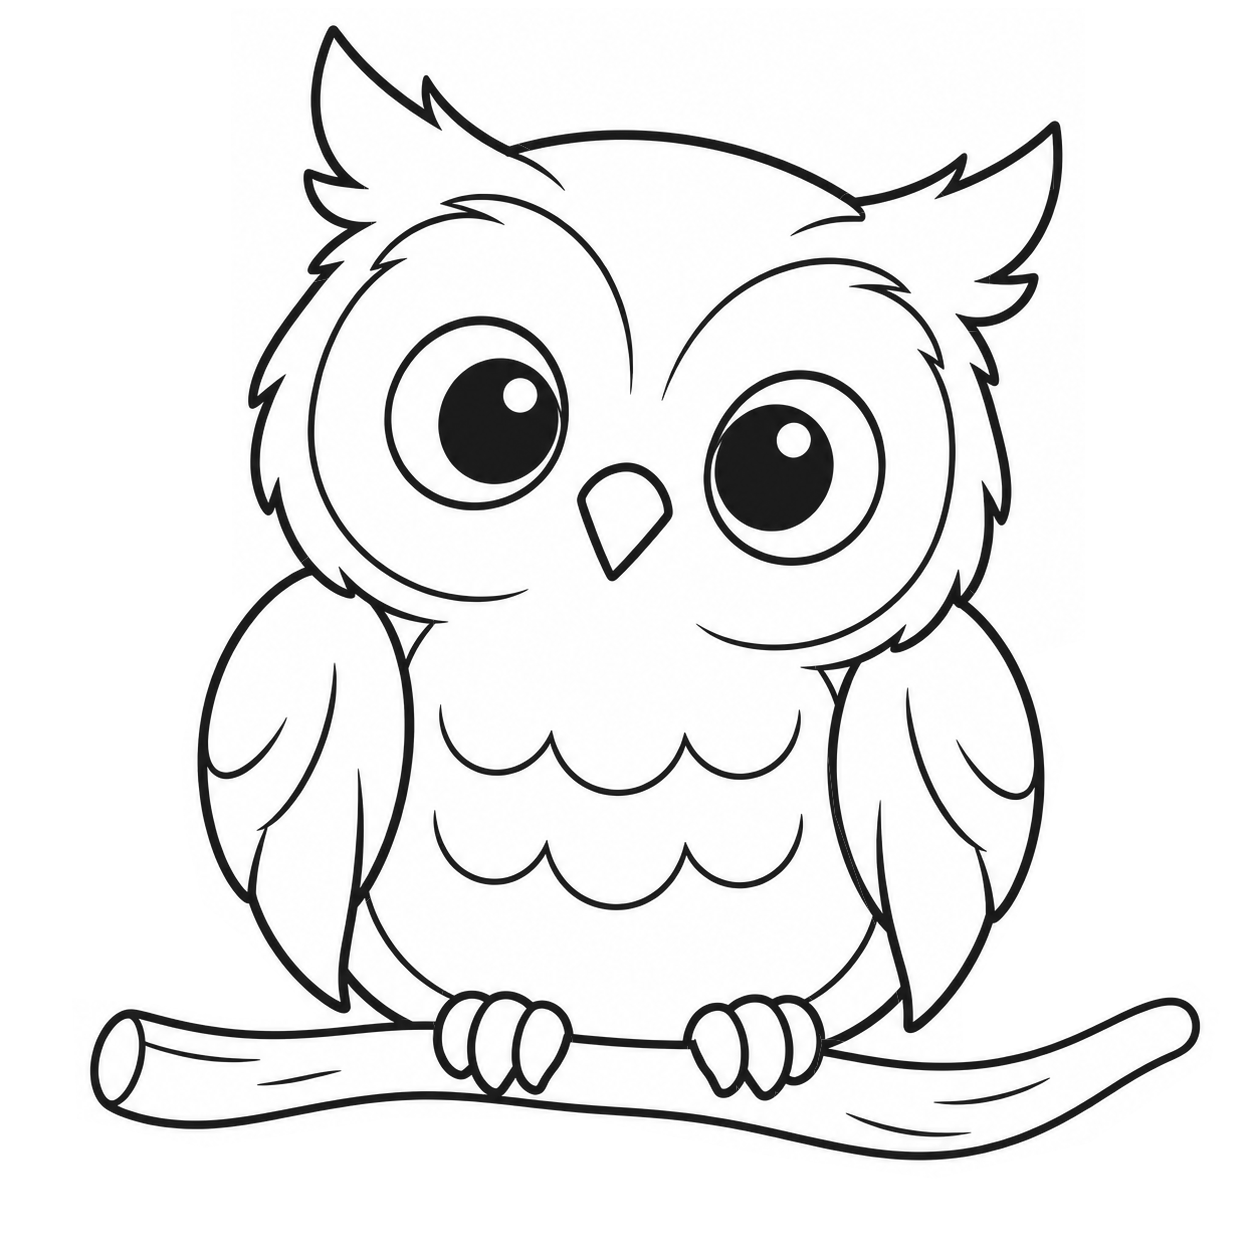
28. Remove the last gray guides
- Erase the body oval and the three right-foot ovals.
- Keep the belly, wings, feet and branch exactly where they were drawn.
The owl is grounded on its branch and no gray marks remain.
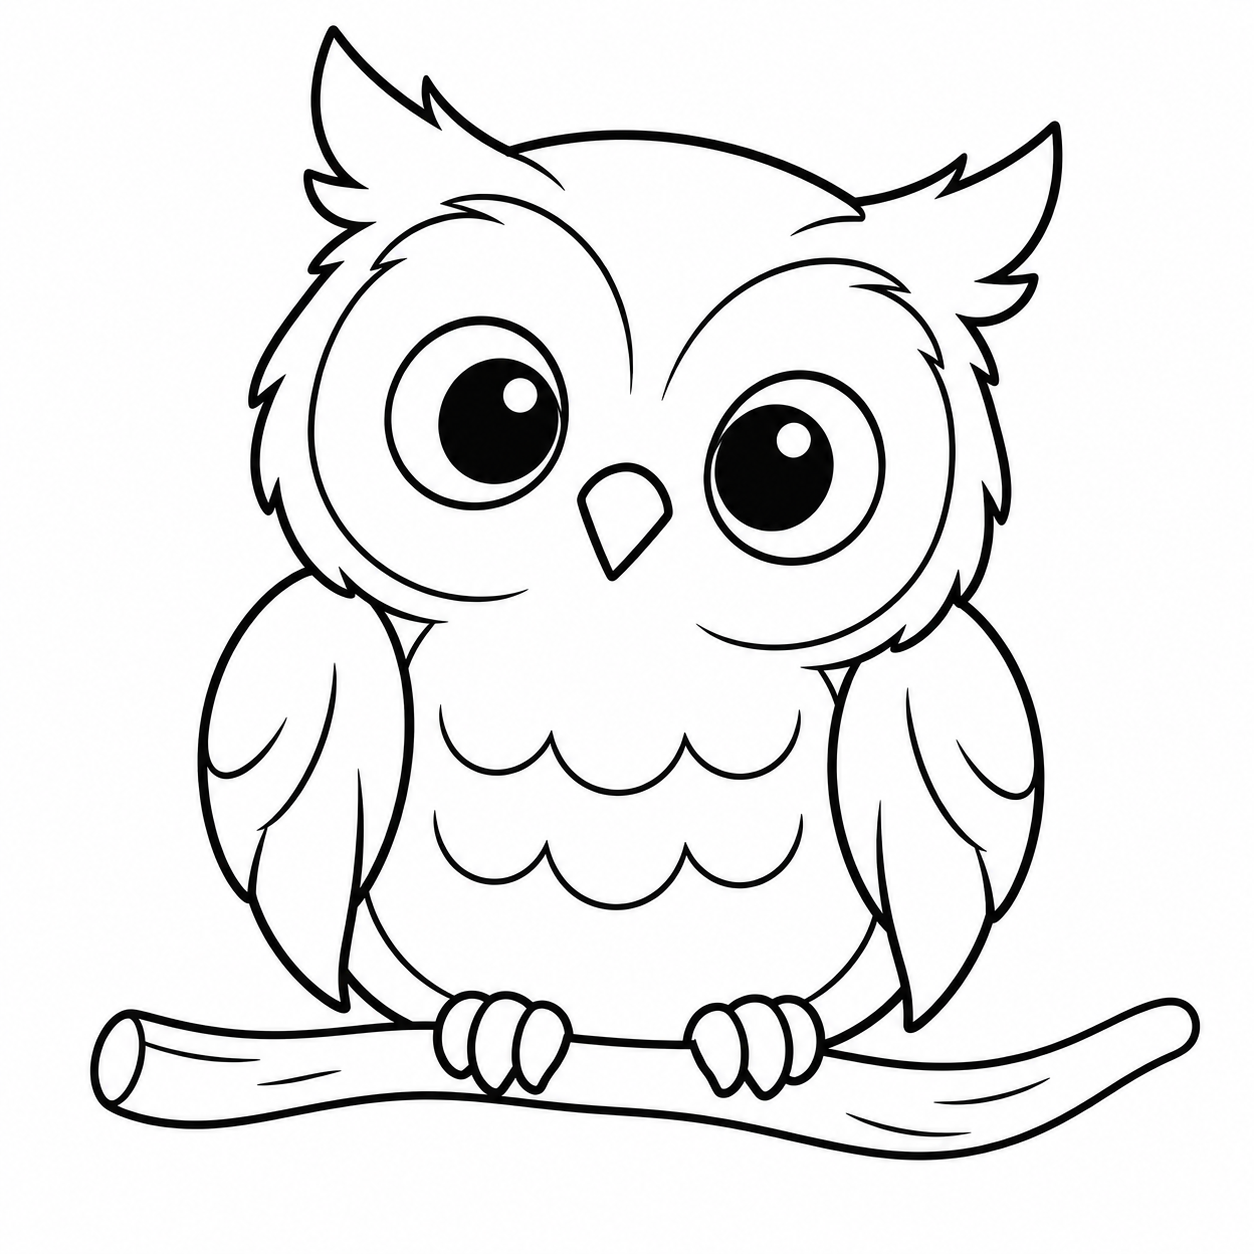
29. Check the complete perched owl
- Check the two face patches, inward pupils, wrapping wings and gripping feet.
- Keep the finished contours and both chest rows.
- Coloring is optional.
The finished shape and expression match the master.
FREE OWL DRAWING GUIDES
Find your favorite way to draw
Enjoy the full walkthrough, keep a handy one-page reminder, or follow the pictures on your phone. Every option is free—choose what suits your drawing time.
One-page reference
A little practice, one handy sheet.
Keep the key stages beside your sketch. Use it after the full lesson for repeat practice.
Complete lesson
A friendly guide from start to finish.
Follow every picture and instruction at your own pace. Keep the full walkthrough beside your drawing.
Phone guide
Your drawing companion, on screen.
See one large picture at a time, with every instruction included. No guide to print.
The one-page reference supports the detailed lesson and repeat practice. Choose the complete lesson or phone guide for every beginner instruction.
Free pages · No signup
Free owl coloring pages
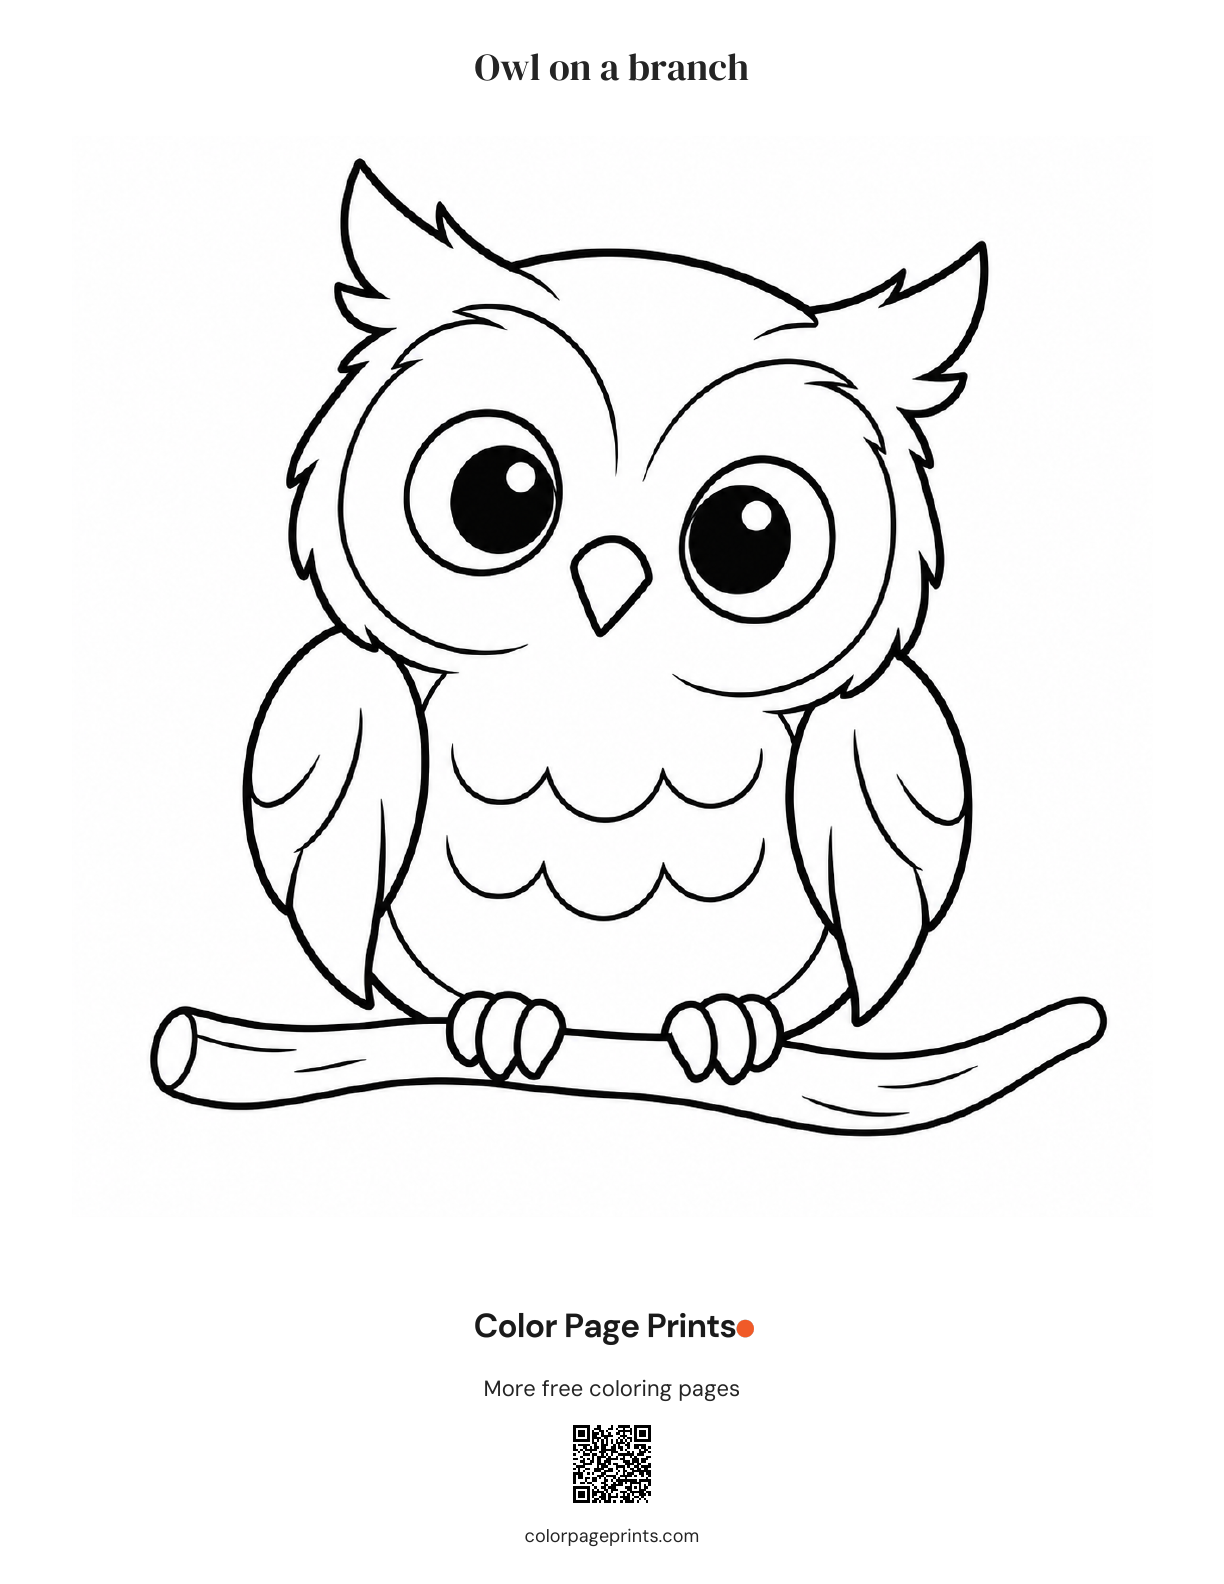
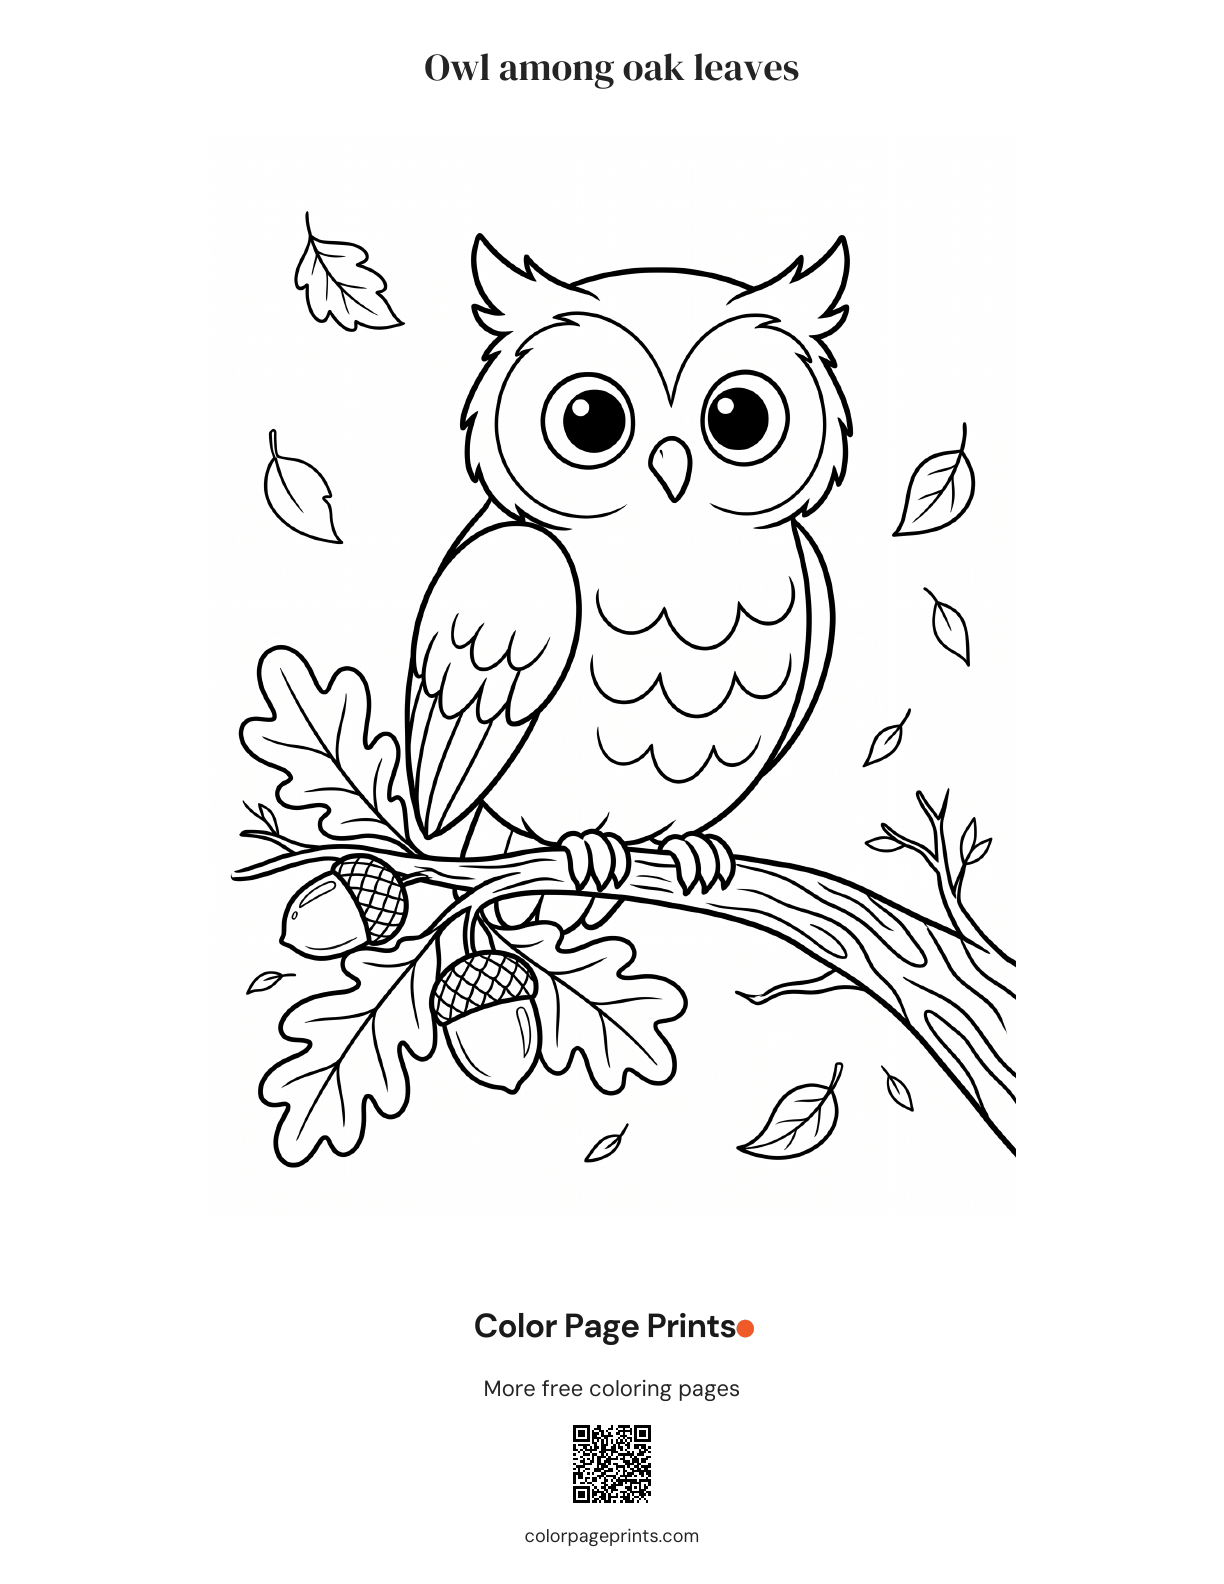
Choose an owl on a bare branch or one among oak leaves and acorns. Both designs include free US Letter and A4 PDFs.
Browse free pages →