Free drawing lesson · medium
How to draw a puppy
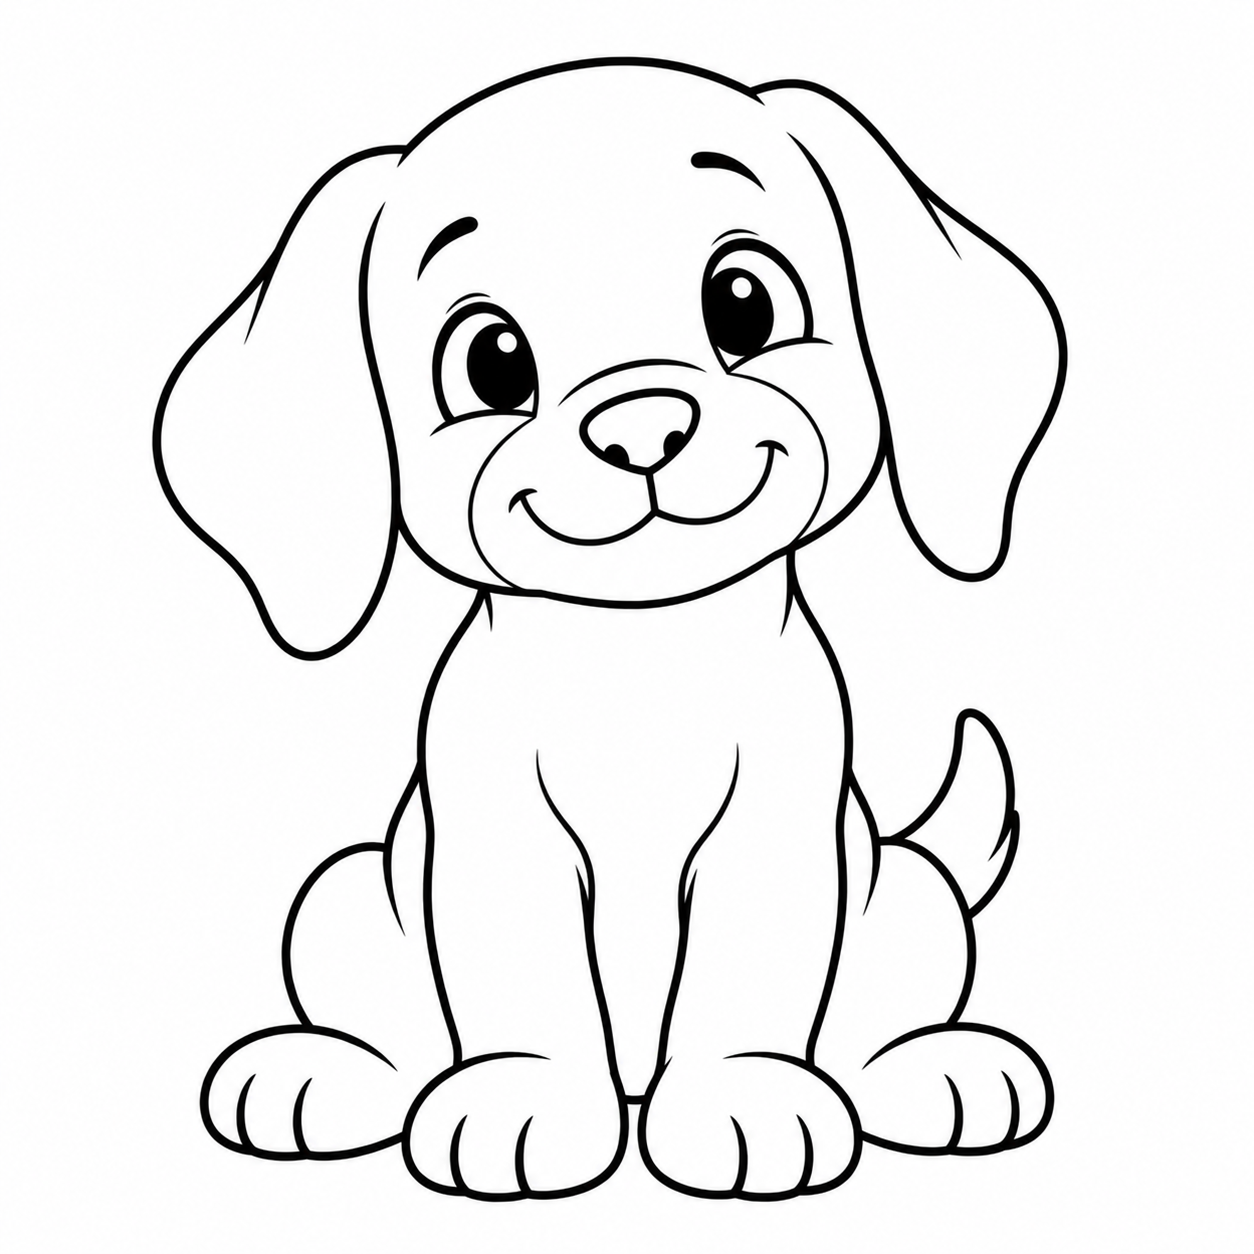
Build a sitting puppy from a tilted head oval, a narrower body and four rounded paws.
25 picture steps · 14 pages per complete PDF · No signup
Compare the three free guides ↓Finished drawing
Puppy drawing tips
- Leave room for the whole puppy. Place the tilted head near the top and leave space beside it for the ears and below it for four paws.
- Keep the front paws in front. Stop each hidden back-paw edge at the front leg. If a line crosses a front paw, erase only that hidden part.
- Make it yours. Choose colours for the ears, muzzle and body, or keep the puppy in line art.
Puppy drawing skills · Medium
- Follow the head’s tilt. The right ear and eye sit a little higher; do not force both sides level.
- Round the ear scaffolds. Follow the outer bend and low rounded end, then return to the head.
- Try another puppy. After the full lesson, place the head and body from memory, then check the pictures for the paw overlaps.
Puppy printing help
- Choose US Letter for 8.5 × 11 inch paper.
- Choose A4 for 210 × 297 mm paper.
- Print at actual size on matching paper. Use “Fit to page” if your printer needs more margin.
- Choose the guide for your drawing time. The complete Letter and A4 lessons each have 14 pages. The repeat-practice reference is one page; the complete phone guide has 26 screen pages.
Review all 25 pictures
Place the head, ears and muzzle

1. Place the large head
- Draw a light oval near the top of the page, tilted slightly so its right side is higher.
- Make it a little taller than it is wide and leave room on both sides for floppy ears.
Keep the head oval light enough to erase.
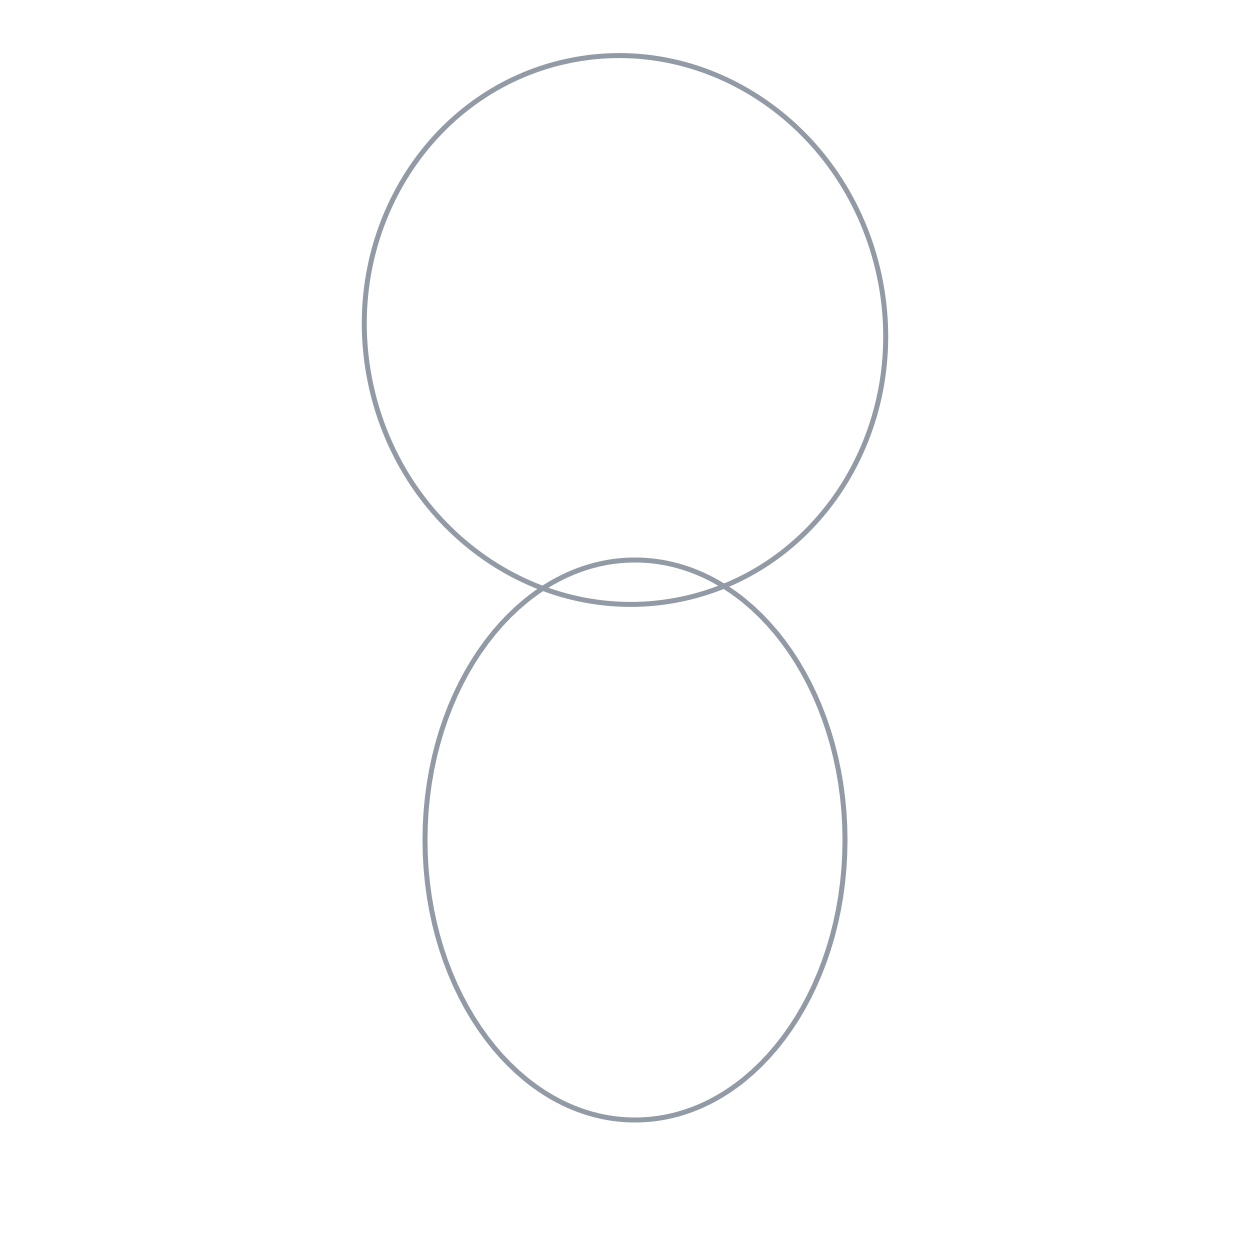
2. Place the seated body
- Below the head, add a tall oval about the same height but only four-fifths as wide.
- Let its top overlap the bottom of the head a little; leave space below for broad paws.
The body sits under the head, not beside it.
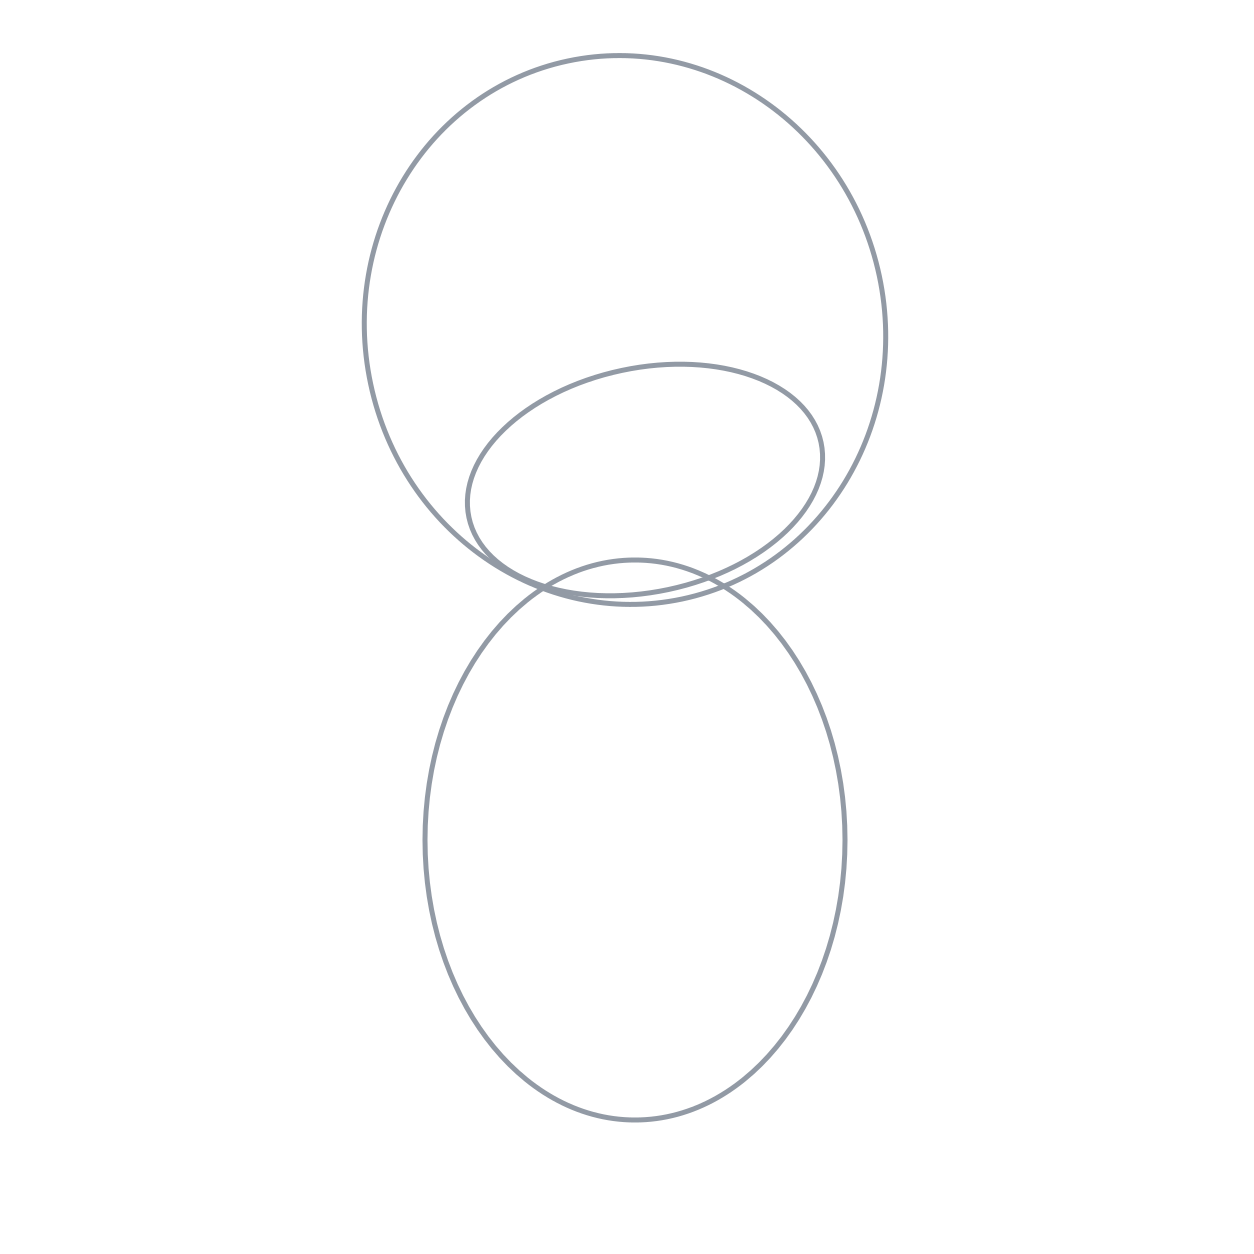
3. Place the broad muzzle
- Inside the lower part of the head, draw a wide light oval about two-thirds of the head’s width.
- Tilt it with the head.
- Its bottom rests close to the head’s lower edge.
Leave space above the muzzle for two eyes.
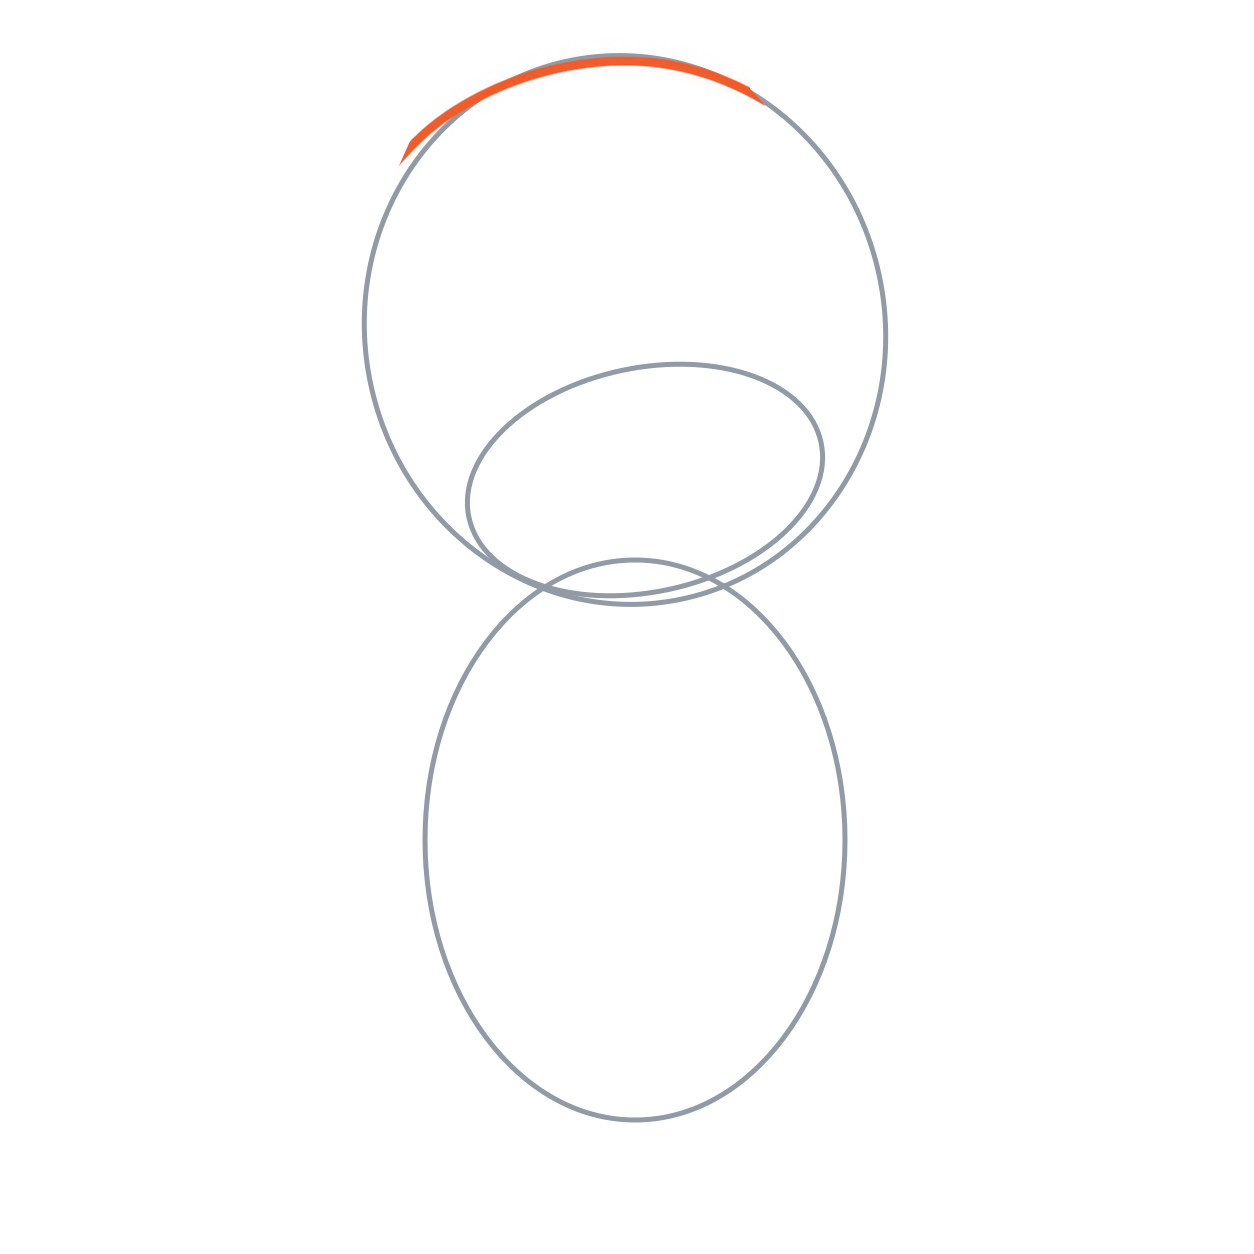
4. Draw the curved head top
- Follow the upper part of the head oval with a broad arch.
- Stop at the upper sides where the ears will join; leave the gray side and lower guides in place.
Keep both ear joins open.
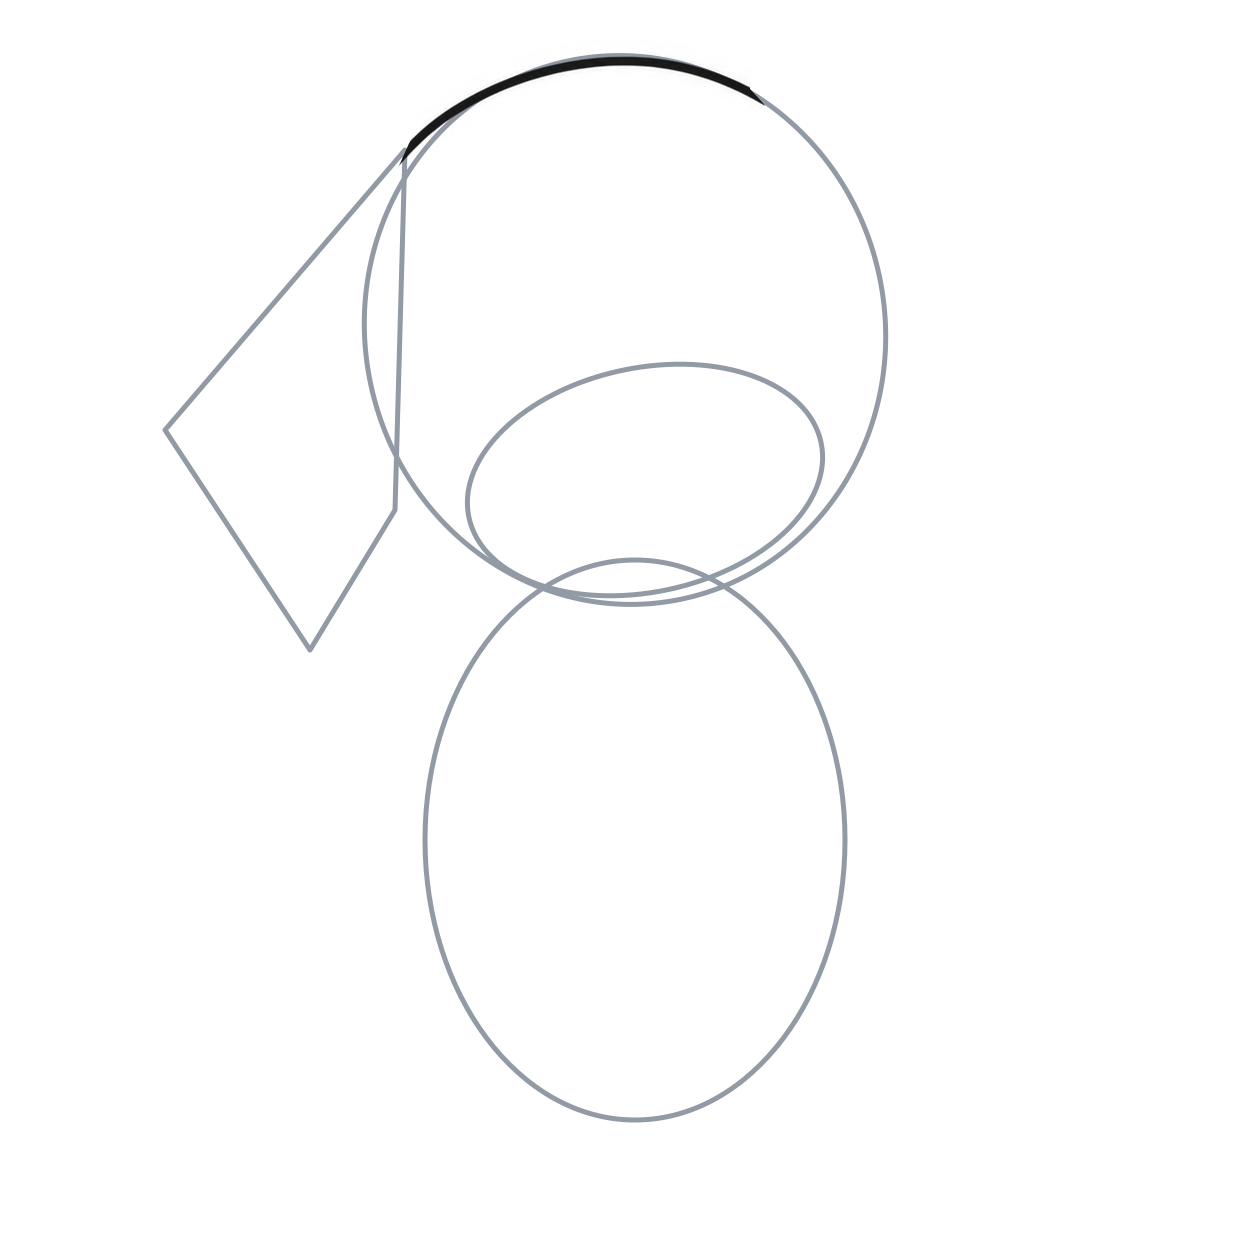
5. Plan the first hanging ear
- Mark its top on the head’s upper-left side, an outer bend to the left, a rounded bottom just below the chin, and an inner join beside the cheek.
- Connect these lightly into a long hanging shape.
The ear hangs beside the face rather than across it.
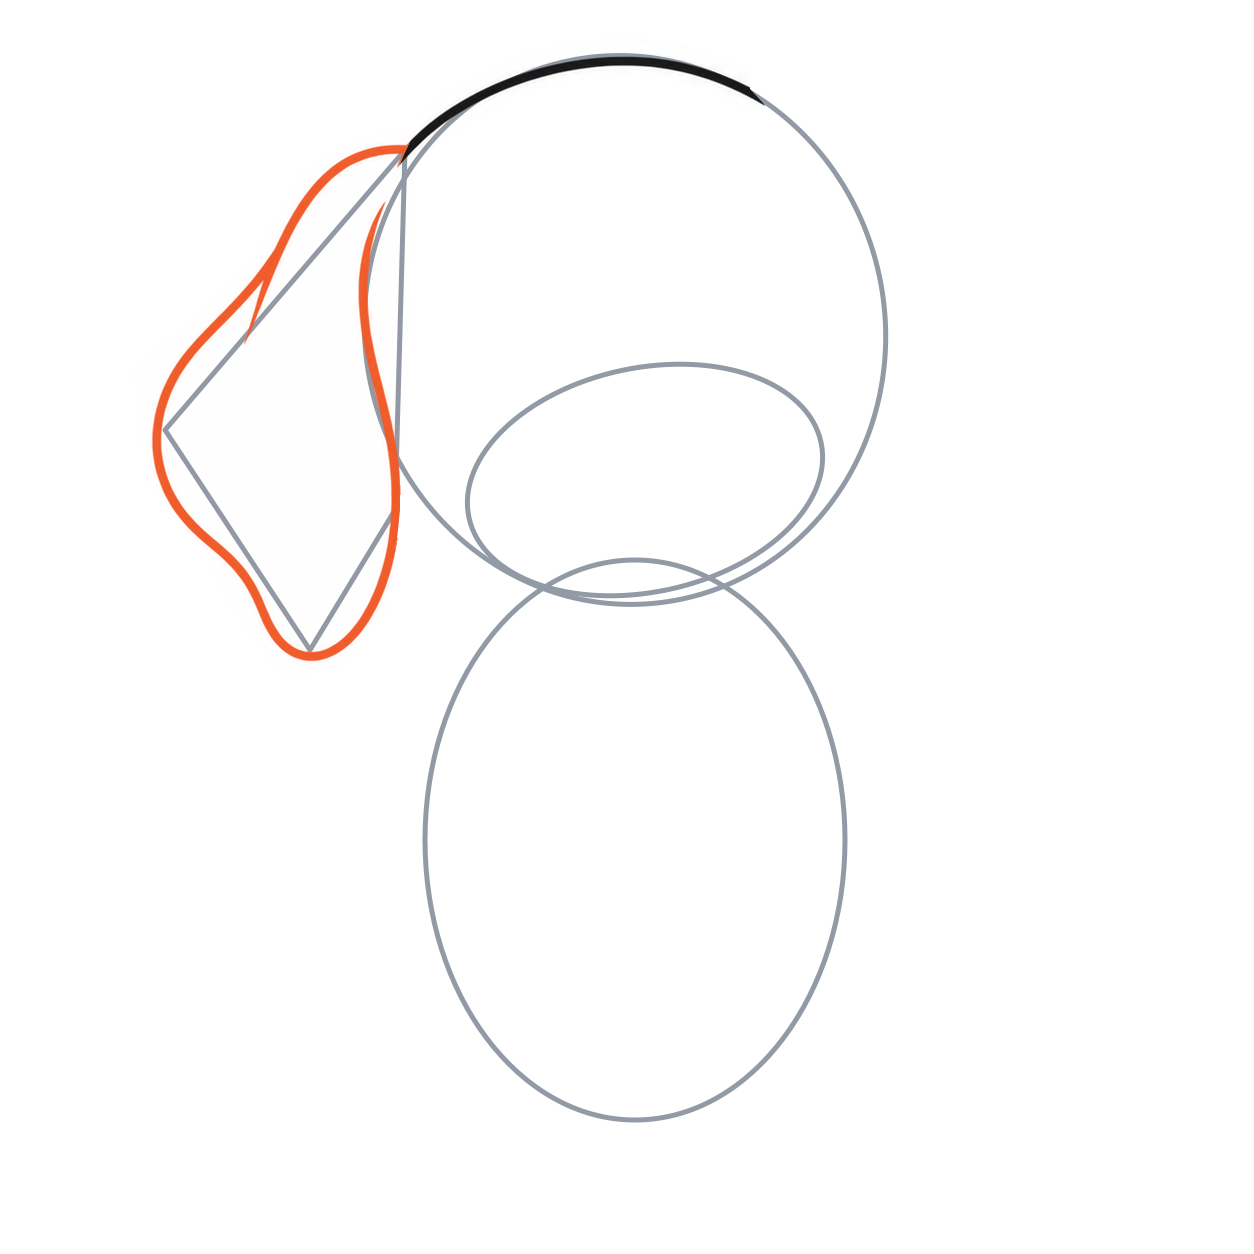
6. Round the first ear and add its fold
- From the top join, curve through the outer bend and around the low rounded end.
- Bring the inner side back toward the head.
- Add the short inward fold near the upper outer bend.
Keep the bottom soft and rounded; stop both ends at the head.
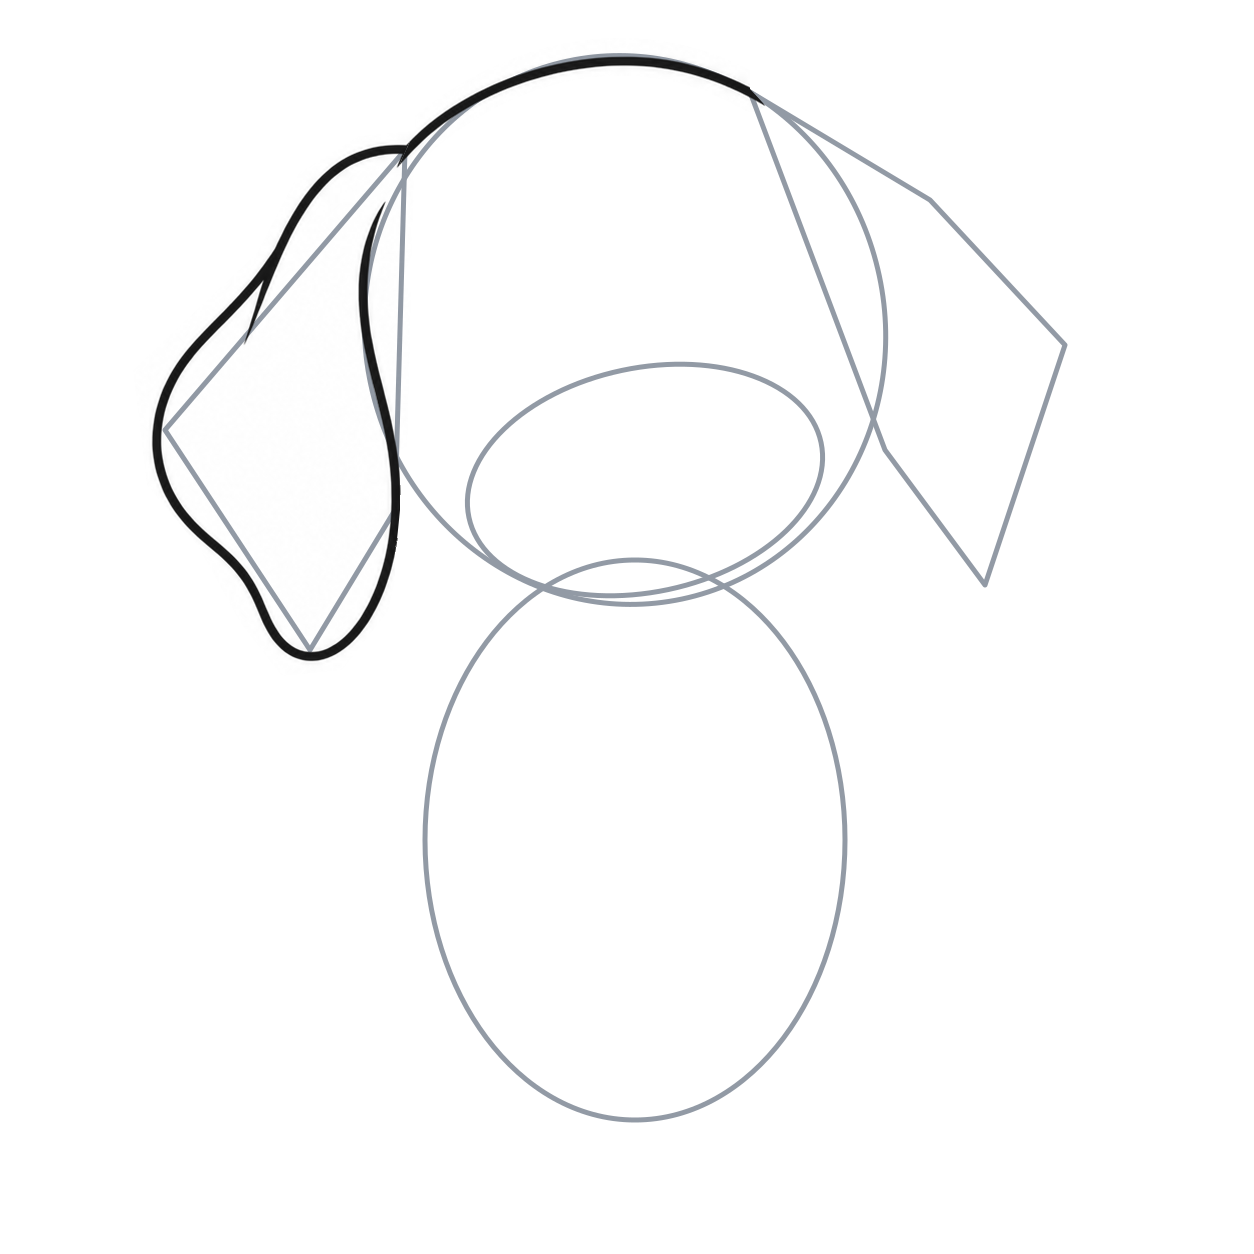
7. Place the other ear
- Use the same four-part idea on the right: top join, outside bend, rounded low end and inner cheek join.
- This ear starts higher because the head tilts.
Its bottom is a little higher than the left ear’s bottom.
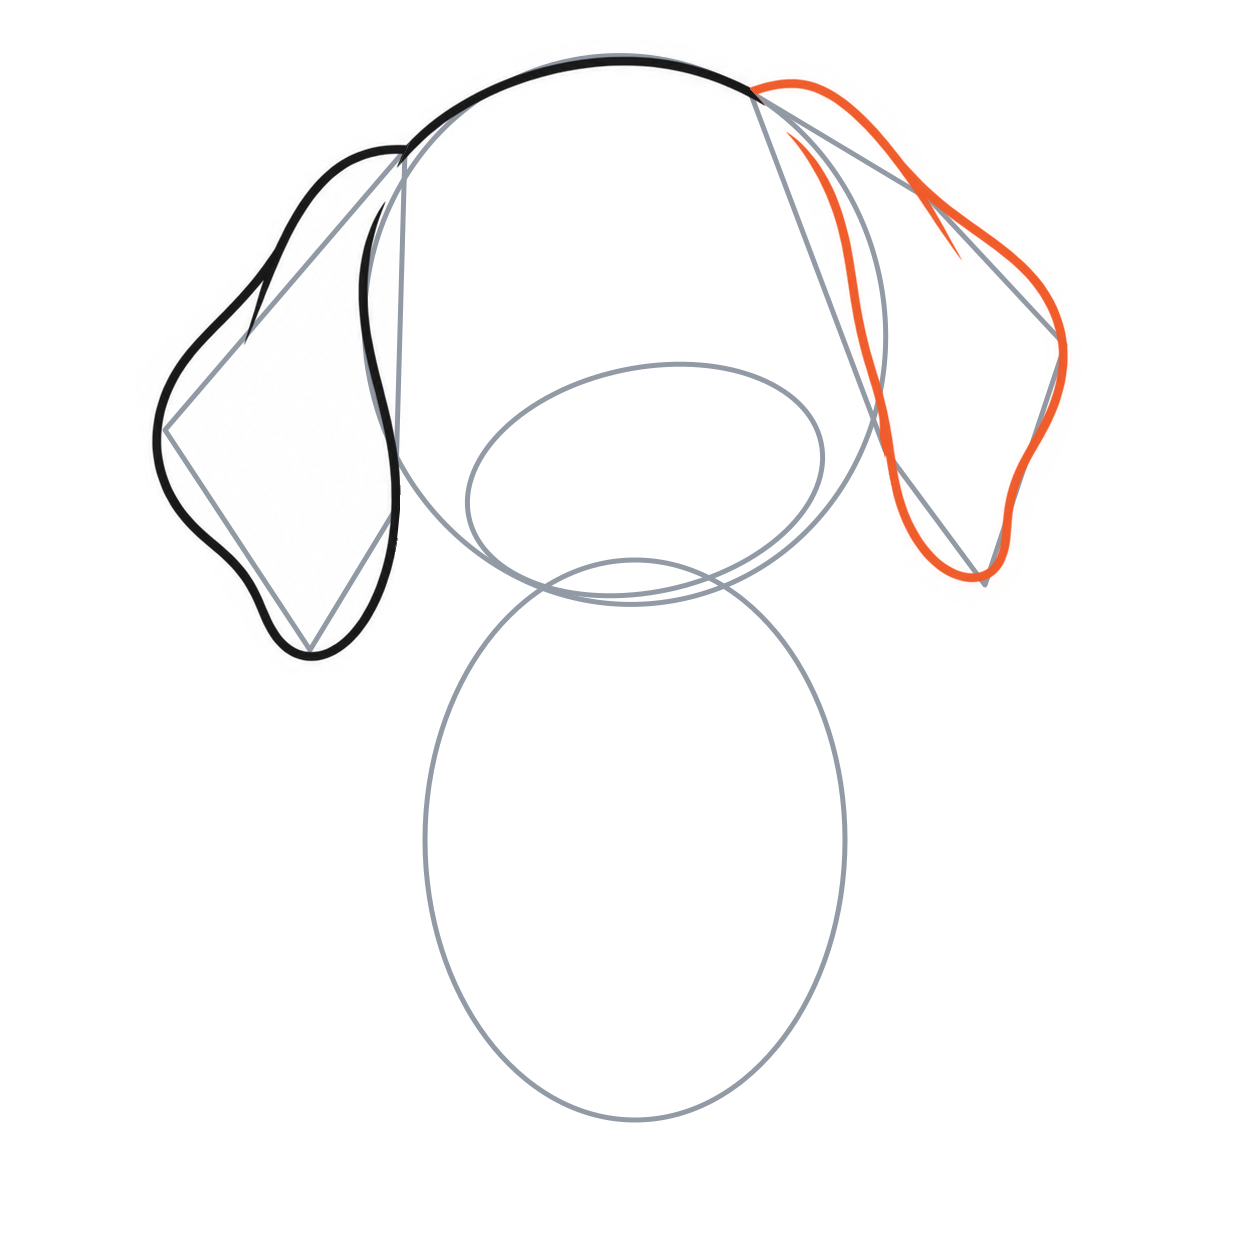
8. Round the second ear
- Curve around the right scaffold, rounding its bends and bottom.
- Bring the inner edge up beside the face and add its short upper fold.
The inner ear edge leaves room for the cheek.
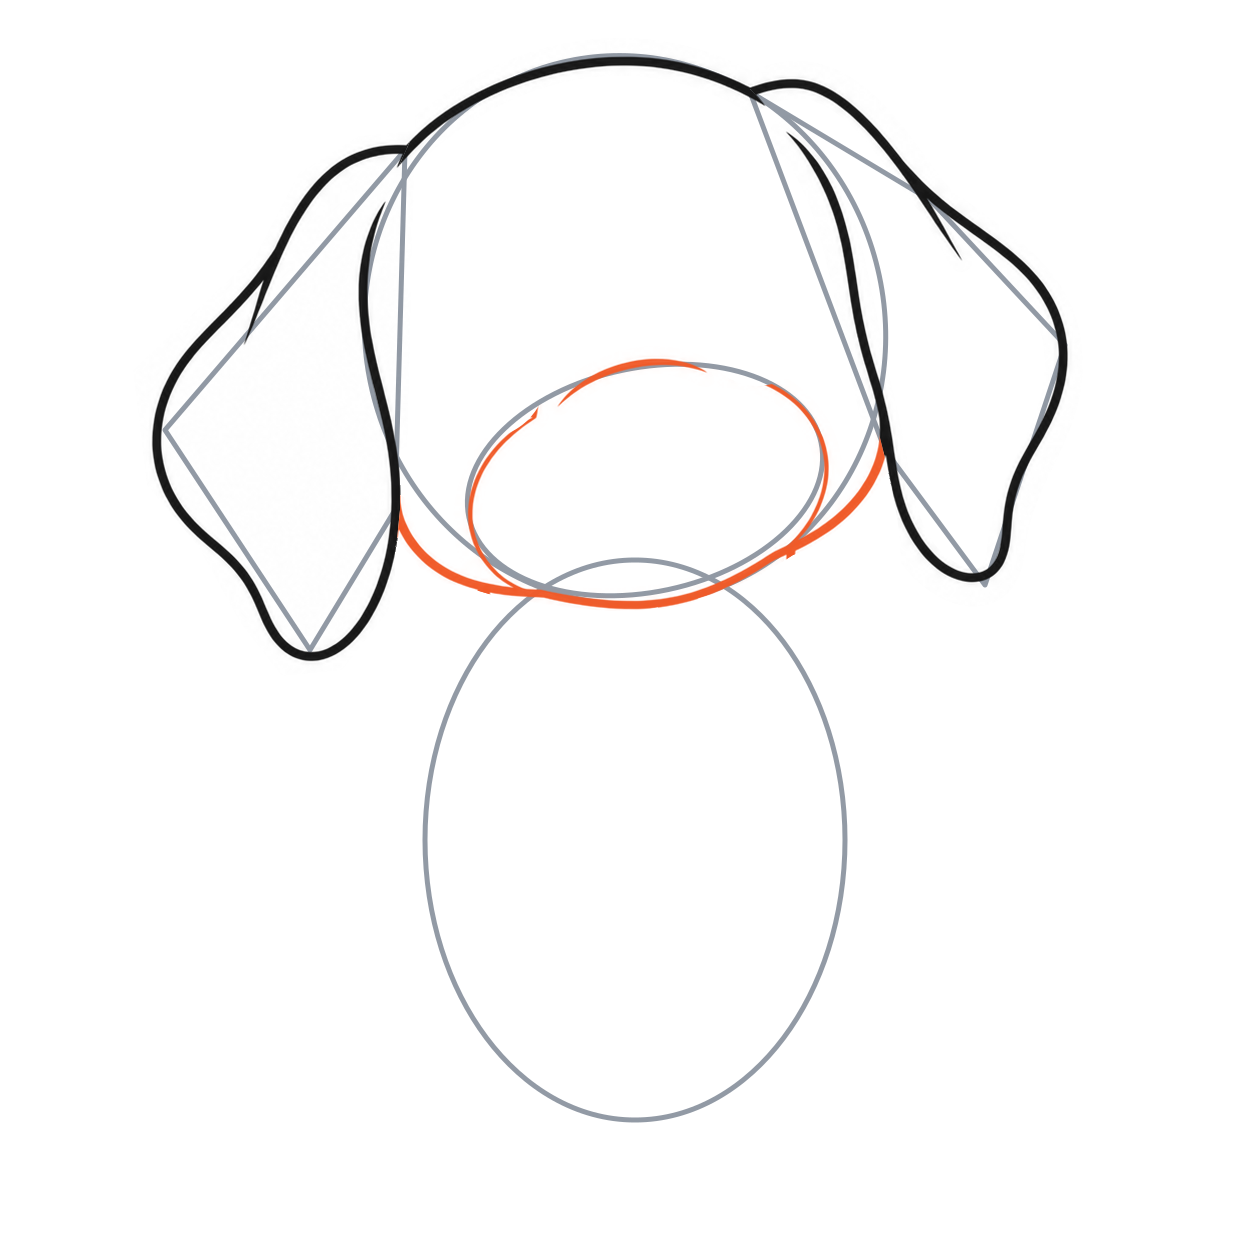
9. Round the cheeks and muzzle
- Join the lower sides of the head with a broad curved chin.
- Around the small muzzle oval, draw two side curves and a short top arc.
- Leave the small gaps below the future eyes.
The muzzle stays inside the head and meets the lower cheek line.
Draw the eyes and finish the face
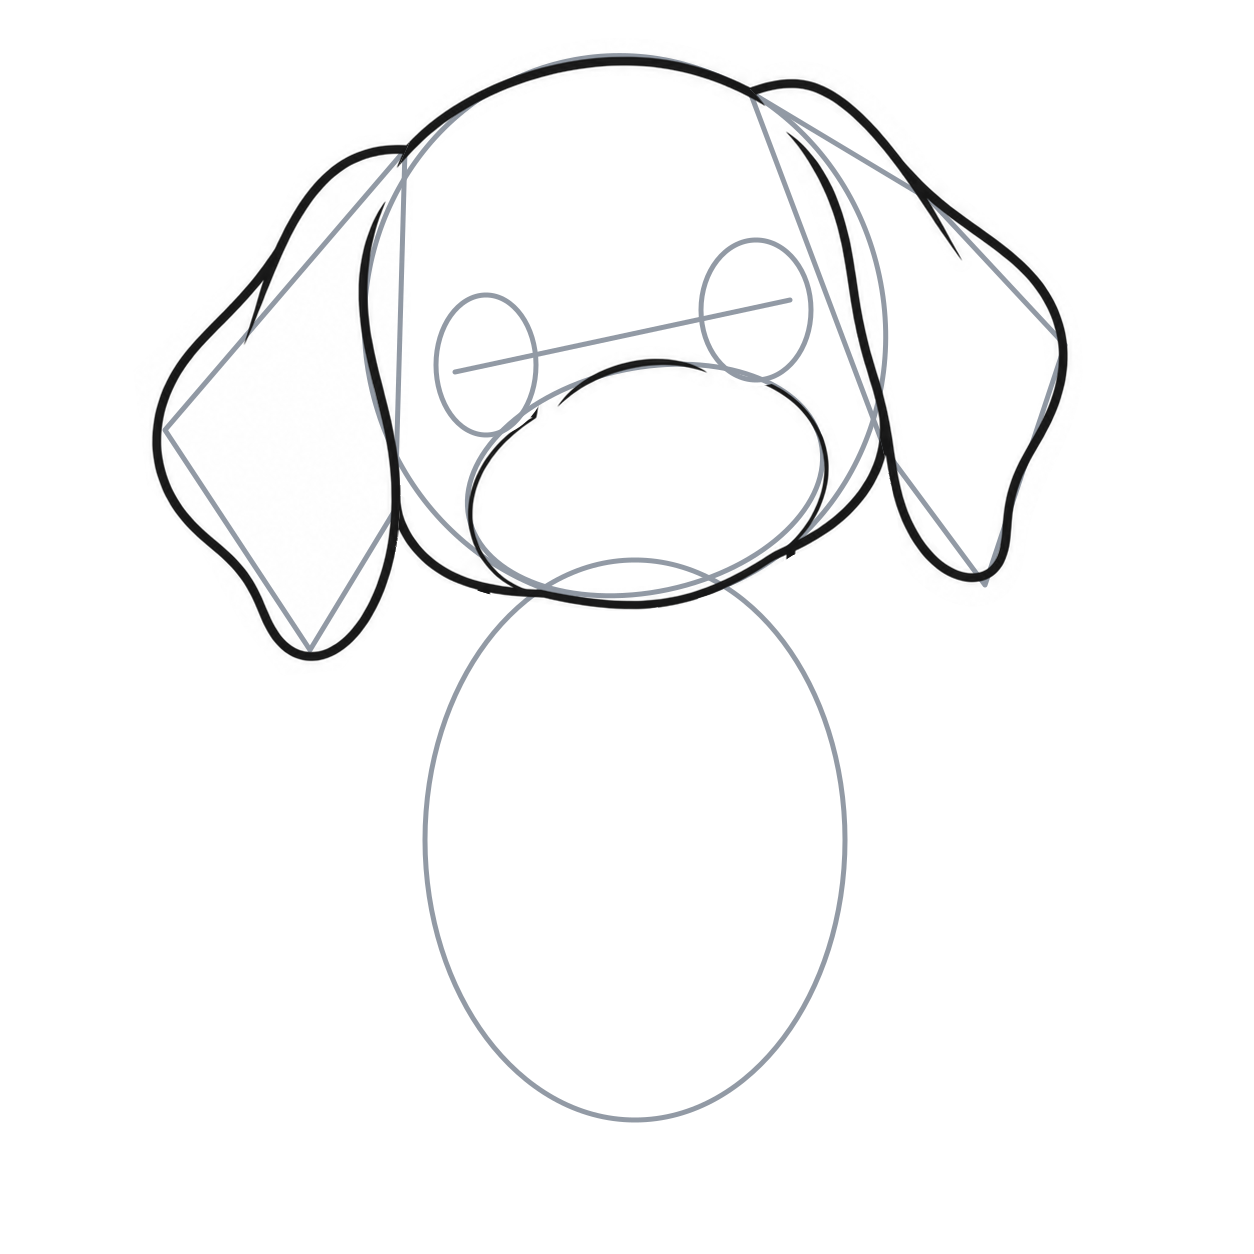
10. Place the eyes on the tilt
- Draw a light rising line above the muzzle.
- Place an upright oval at each end, with the right one higher.
- Keep the two eye ovals about one muzzle-width apart from outside edge to outside edge.
Each eye sits above a side of the muzzle.
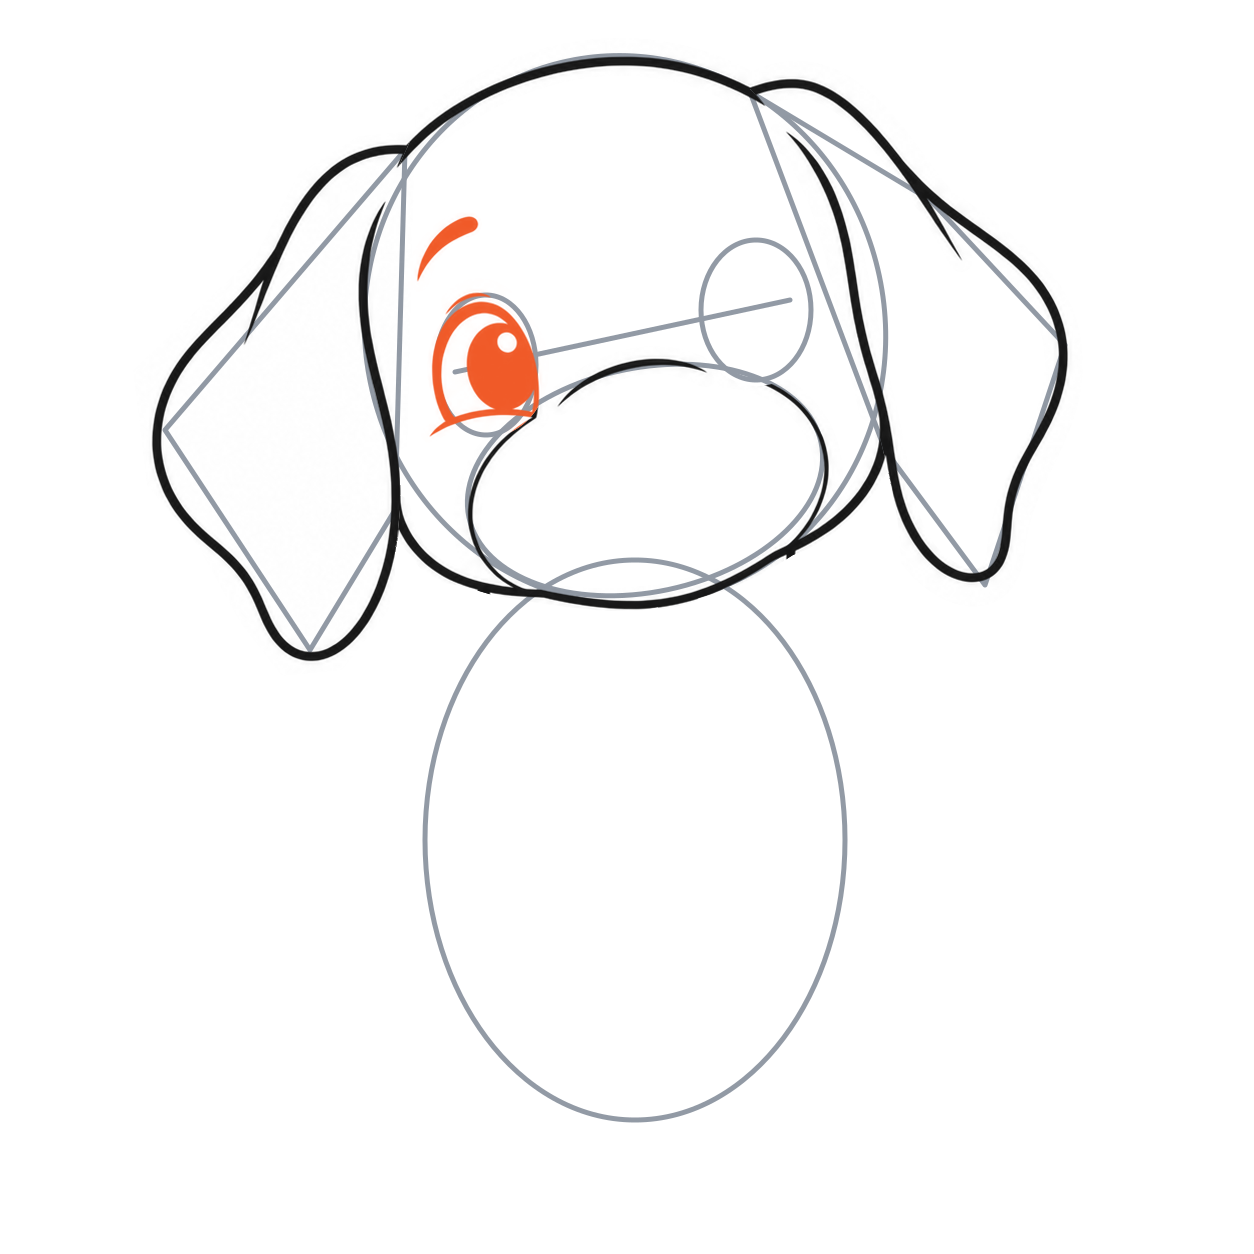
11. Make the first complete eye
- Round the left eye’s upper arch and add its short lower edge.
- Draw an oval pupil inside and fill around a small white highlight.
- Add the small lid curve and a curved eyebrow above.
Keep the highlight white and the eyebrow separate.
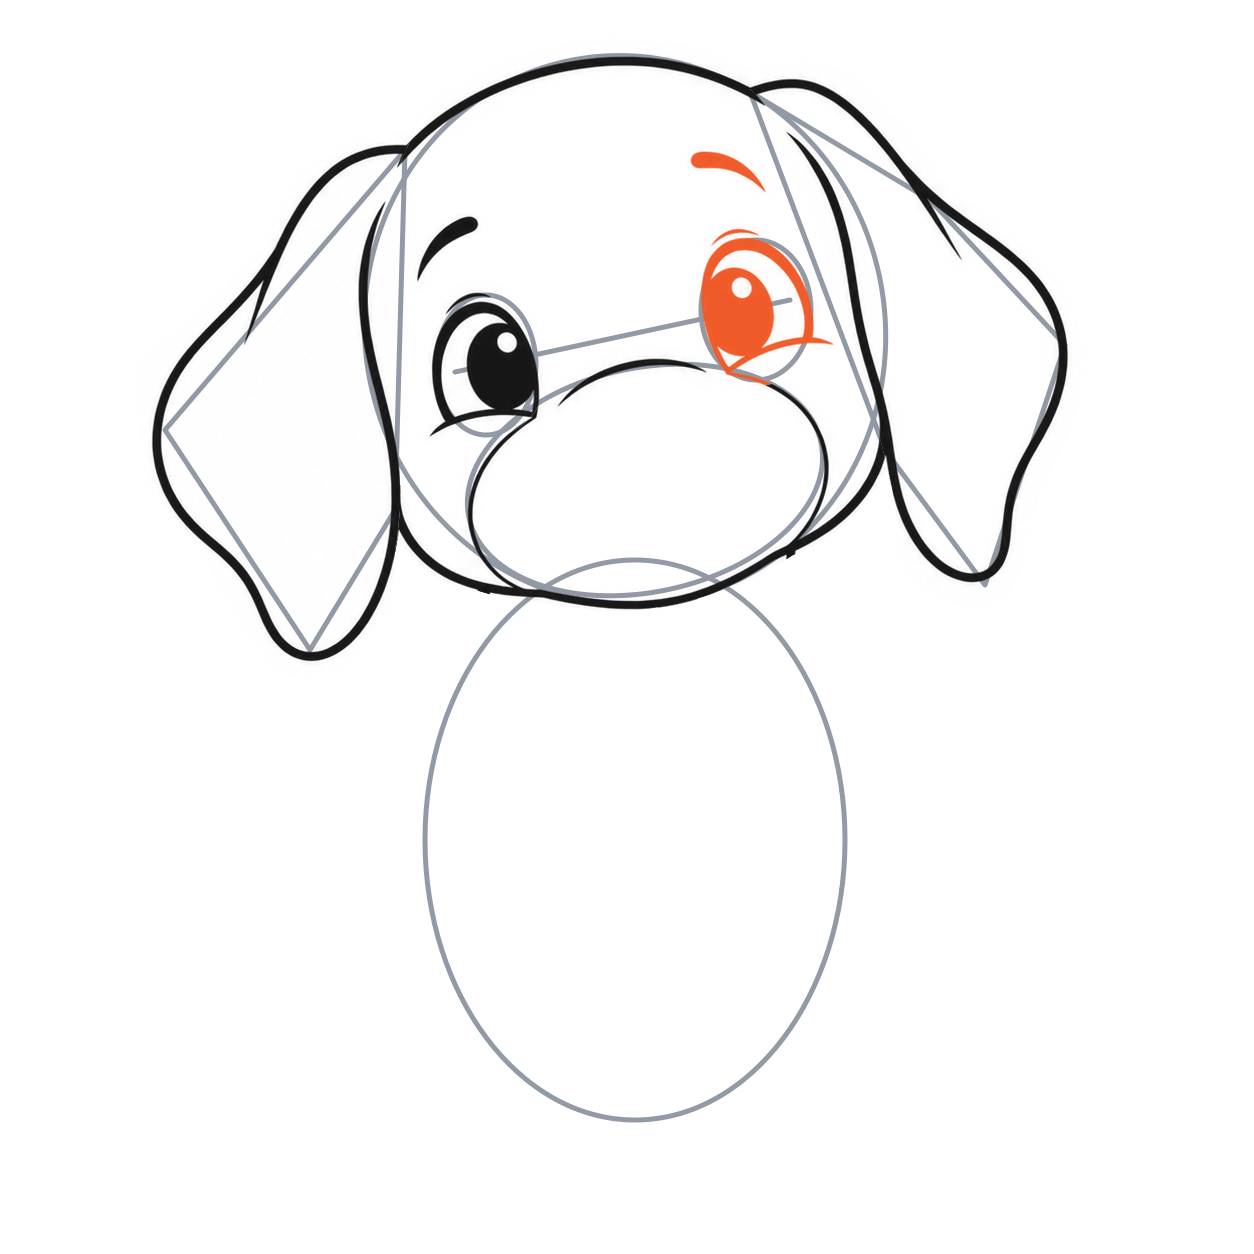
12. Repeat the eye on the right
- Repeat the arch, lower edge and oval pupil around the higher guide.
- Leave a white highlight, then add its lid curve and eyebrow.
Follow the head’s tilt instead of forcing both eyes level.
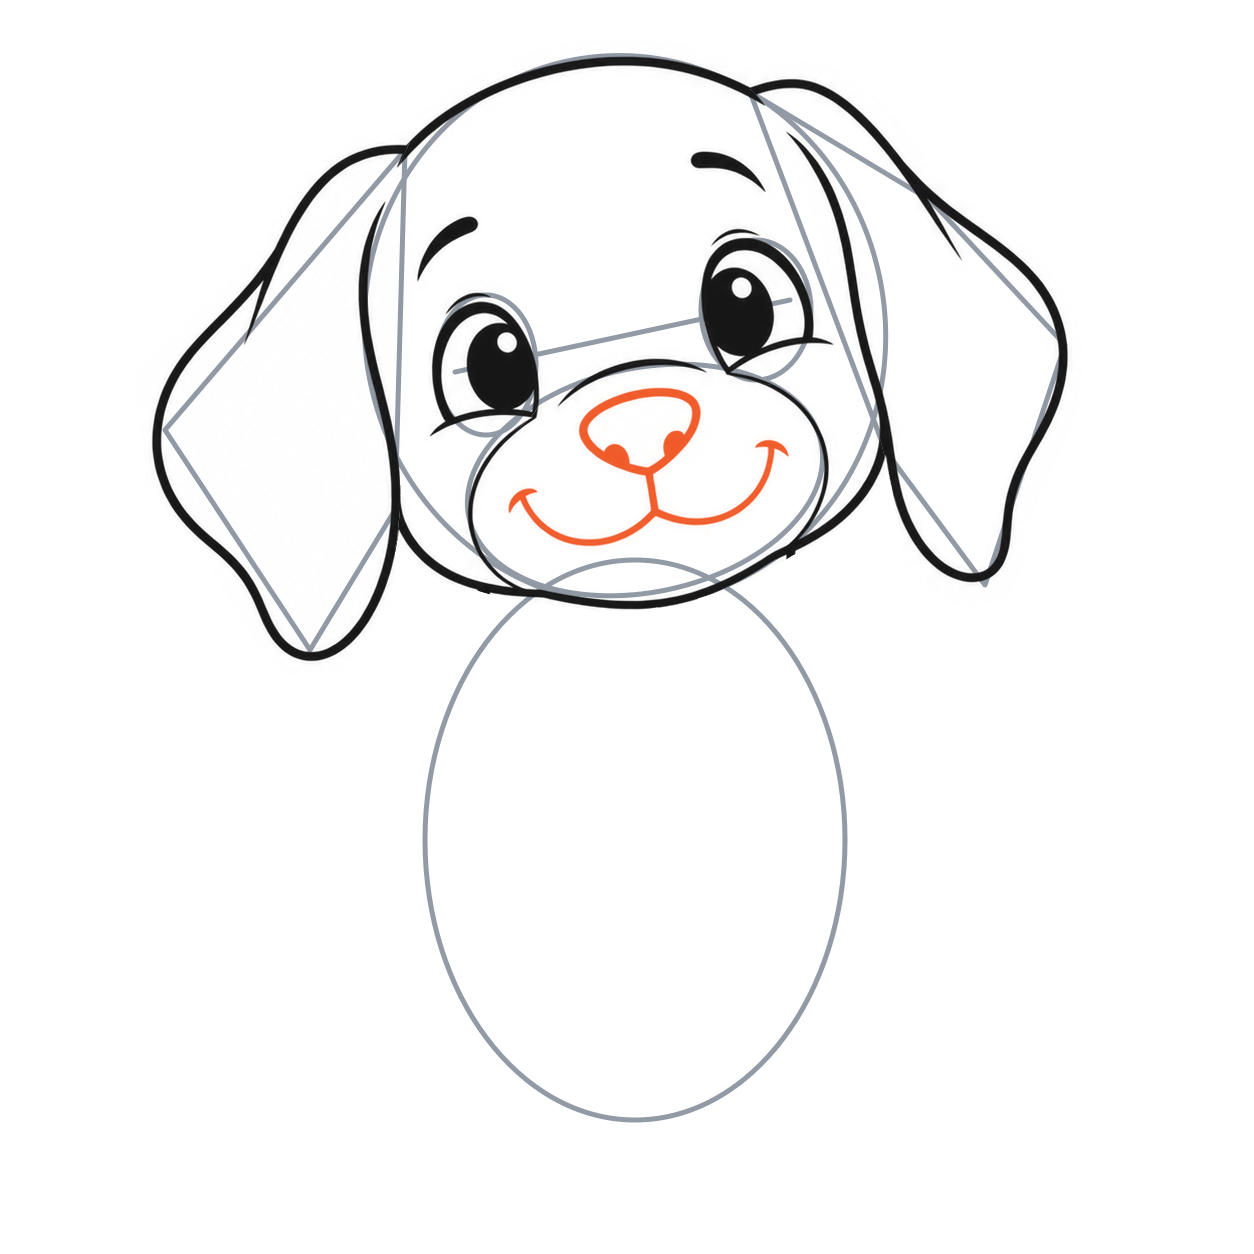
13. Place the nose and smile
- Centre a small rounded triangle in the muzzle’s upper half and darken its two lower corners.
- From its bottom point, draw a short line down and two smiling curves.
- Finish each smile end with a small corner mark.
The nose line meets the middle of the smile.
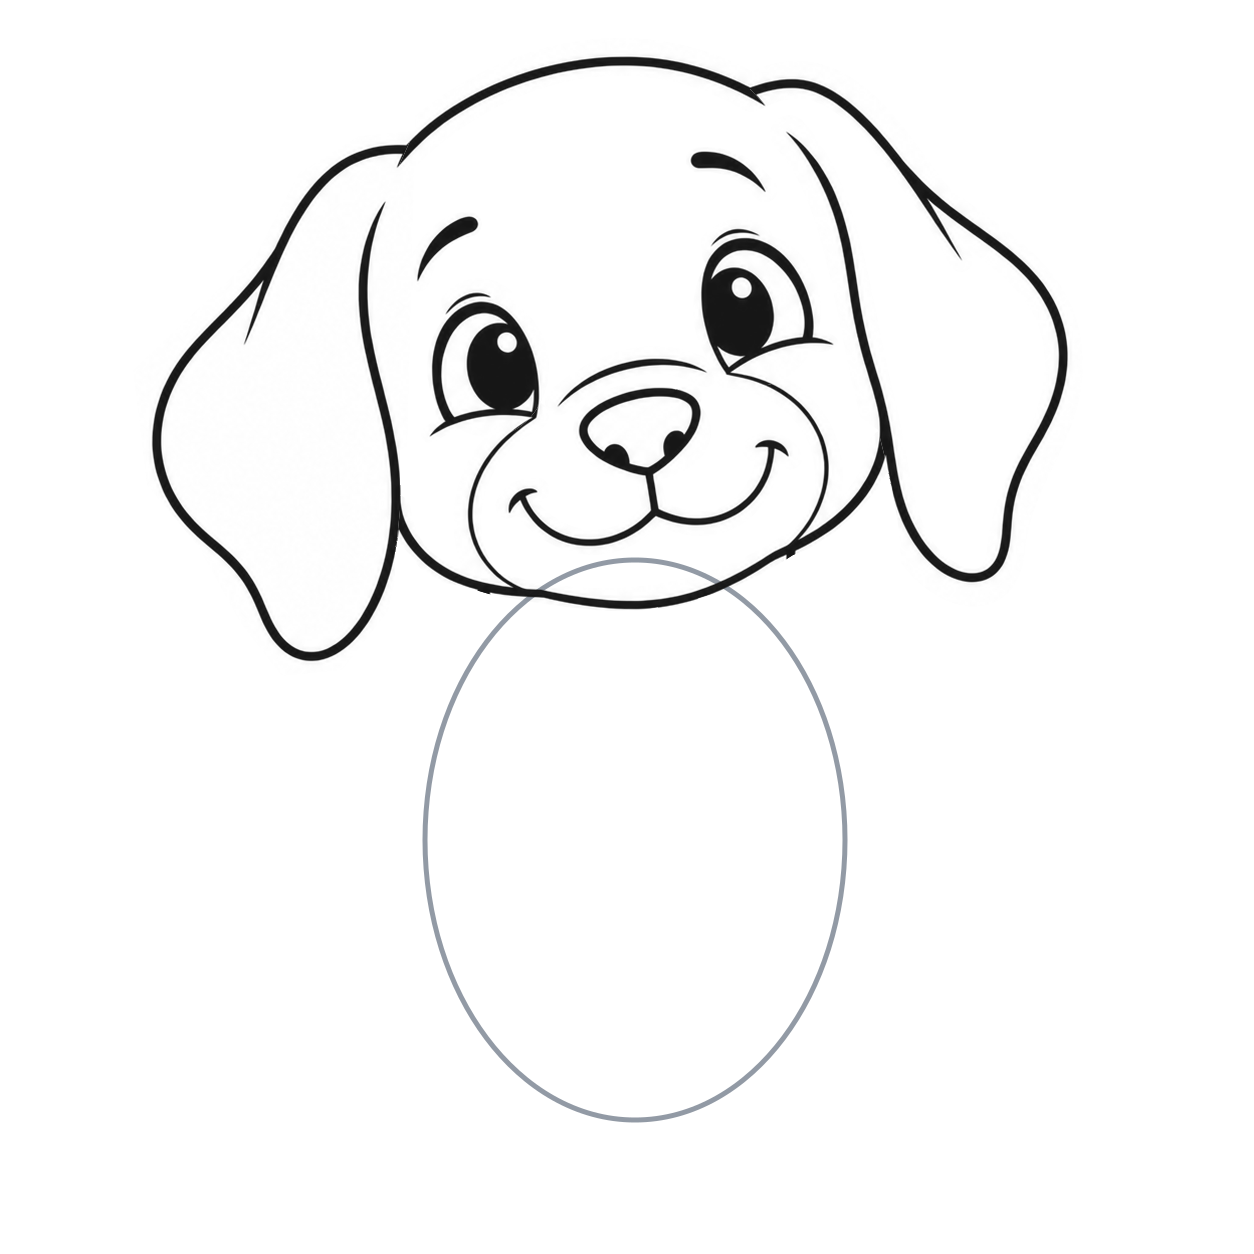
14. Erase the face guides
- Erase the head oval, muzzle oval, ear scaffolds, eye ovals and sloping eye line.
- Keep every dark face and ear mark.
- Leave the light body oval for the seated pose.
Gray face guides disappear; the finished expression stays.
Build the body and four paws
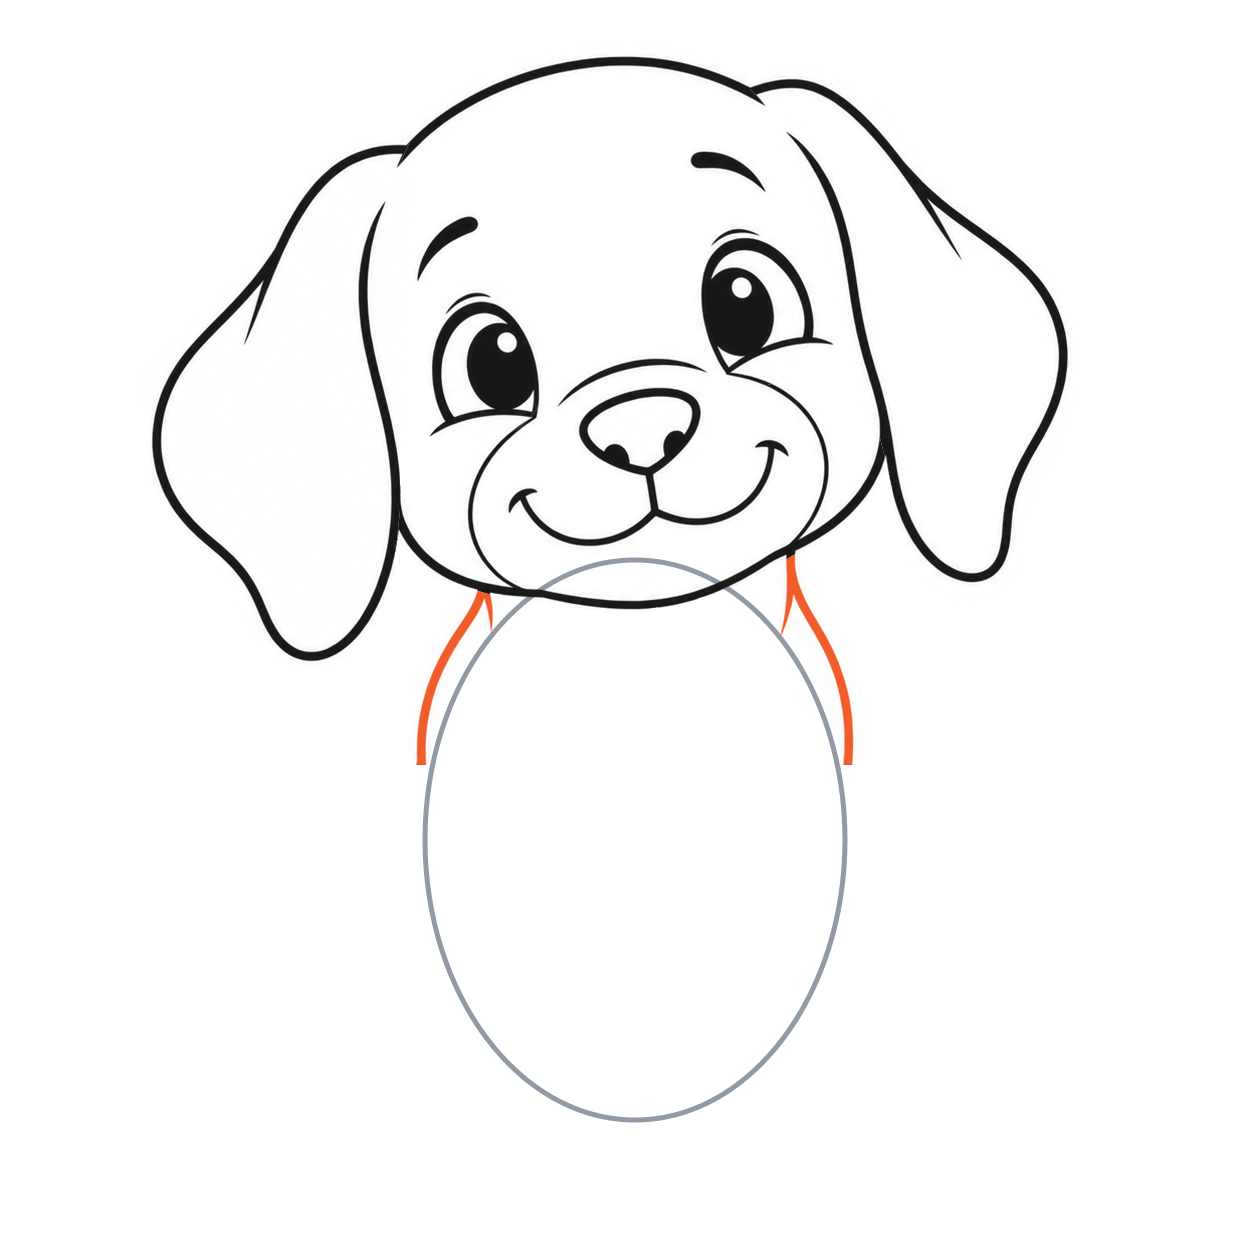
15. Shape the chest
- Begin below each cheek and follow the upper sides of the body oval downward.
- Stop around the oval’s middle, where the front legs will continue.
- Add the two short folds beside the neck joins.
Do not close the lower body oval in black.
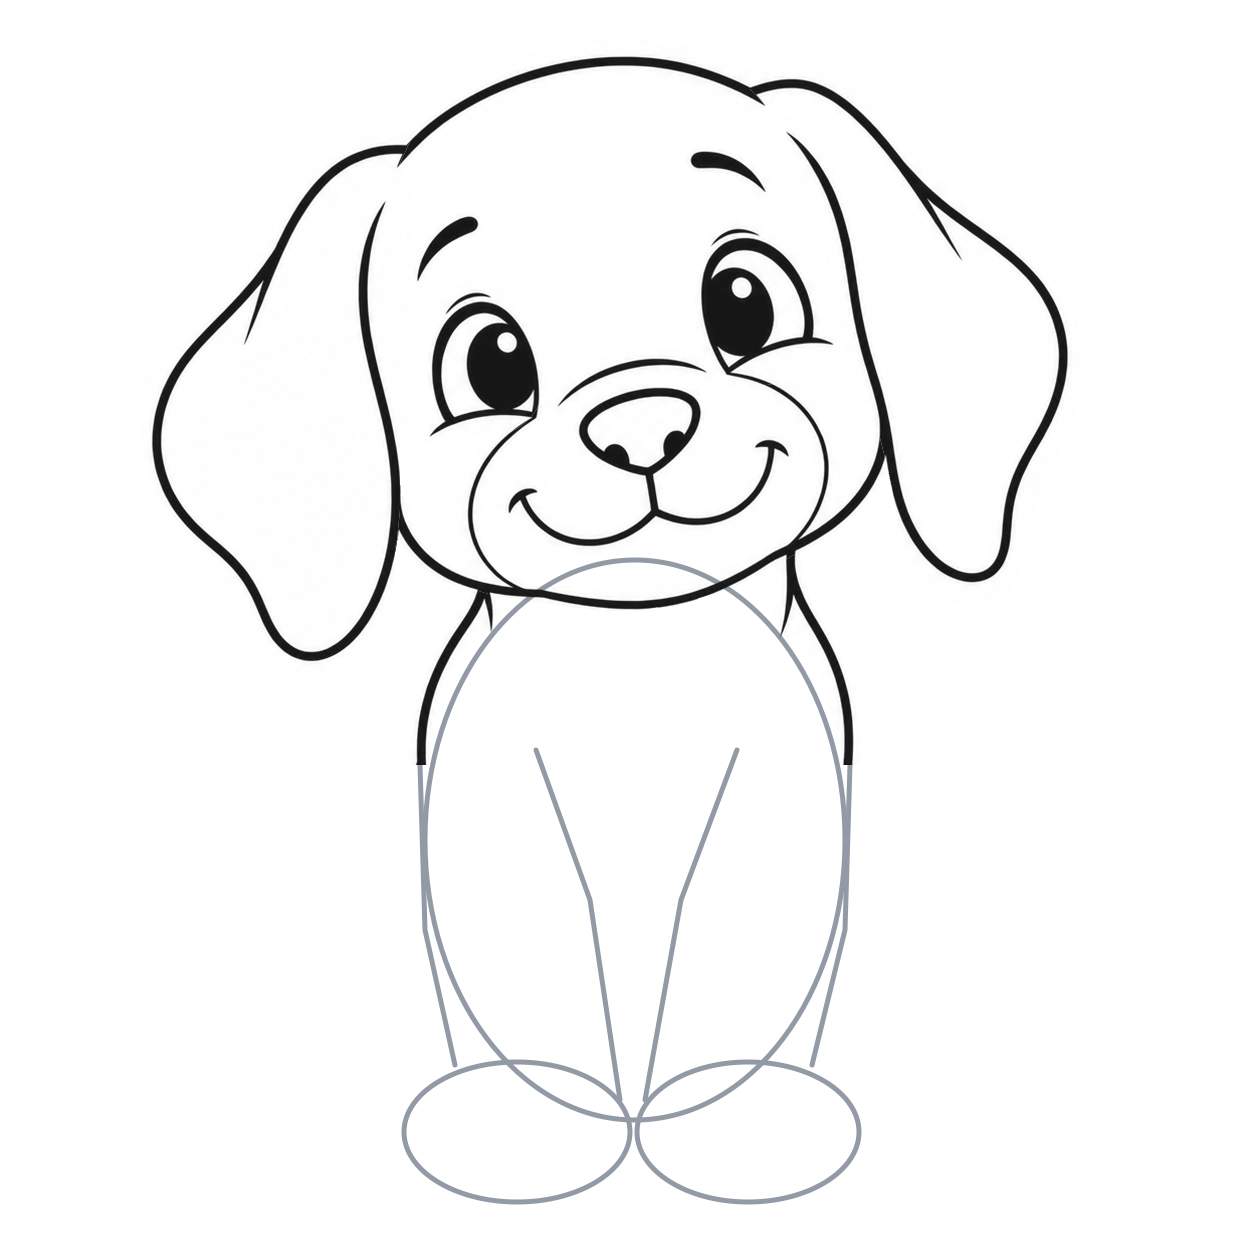
16. Place the front legs and paws
- Mark two broad, low paw ovals side by side below the body.
- Each is about half the body’s width.
- Lightly connect the chest sides and two inner starting points to the paw tops with tapering bent lines.
Keep a narrow gap between the paw ovals.
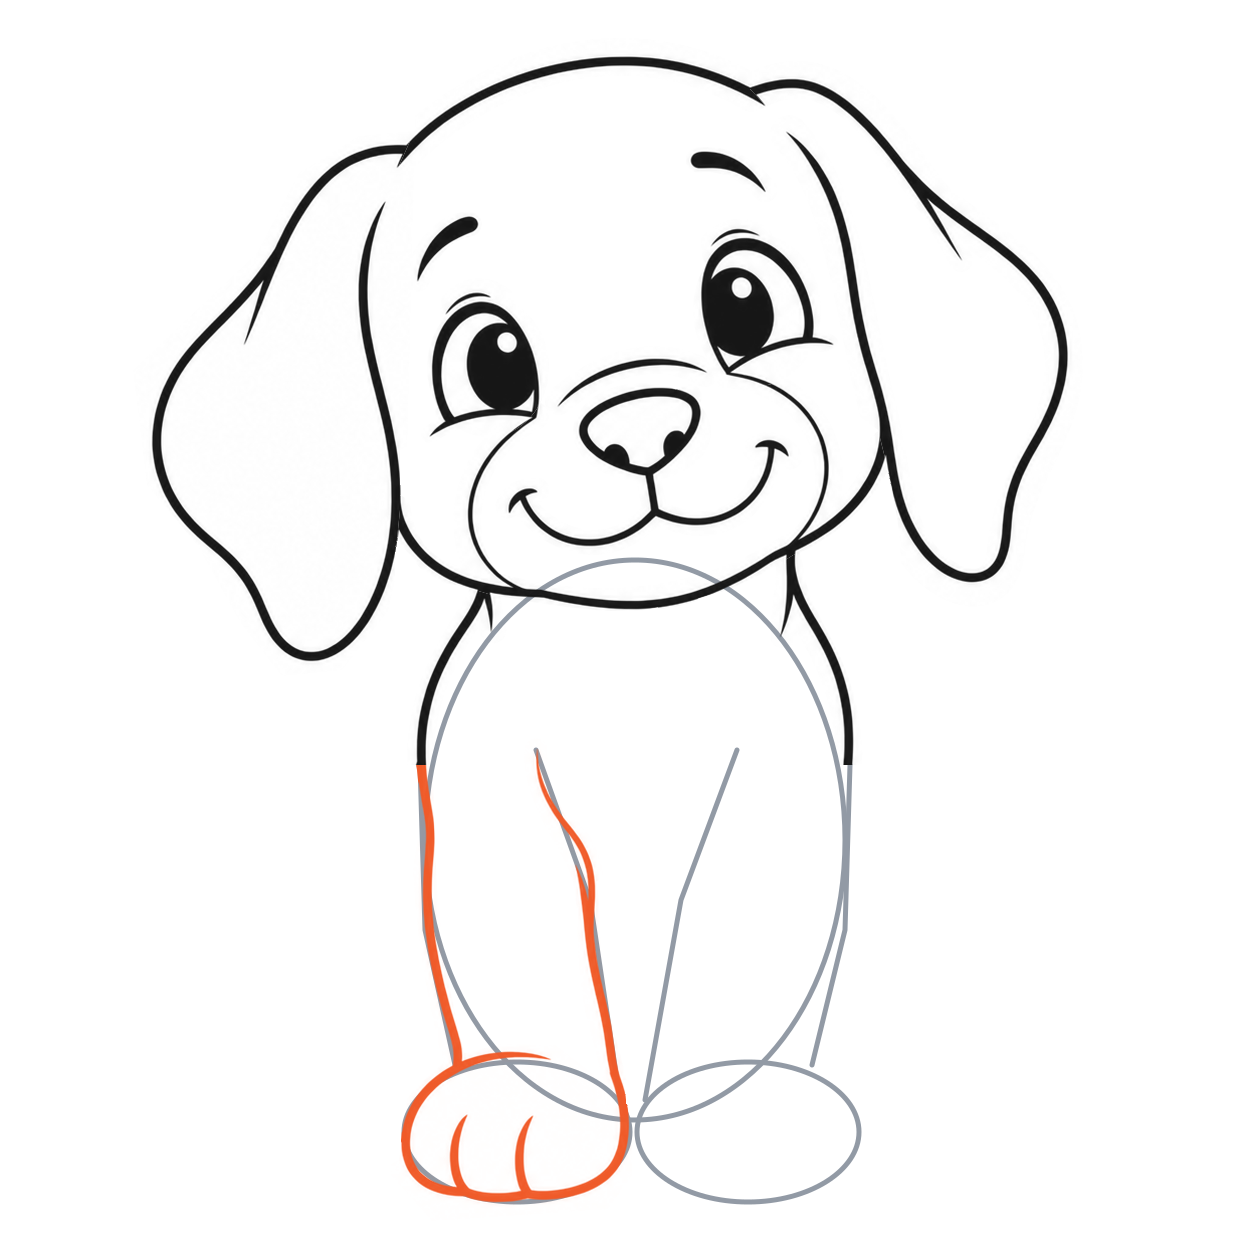
17. Build one complete front leg and paw
- From the left chest, curve down the outside guide to the paw.
- Round its sides and bottom, then return up the inner leg toward the chest.
- Keep the small inner leg fold and add two short toe curves rising from the paw’s bottom.
The paw is closed, and both toe curves stop inside it.
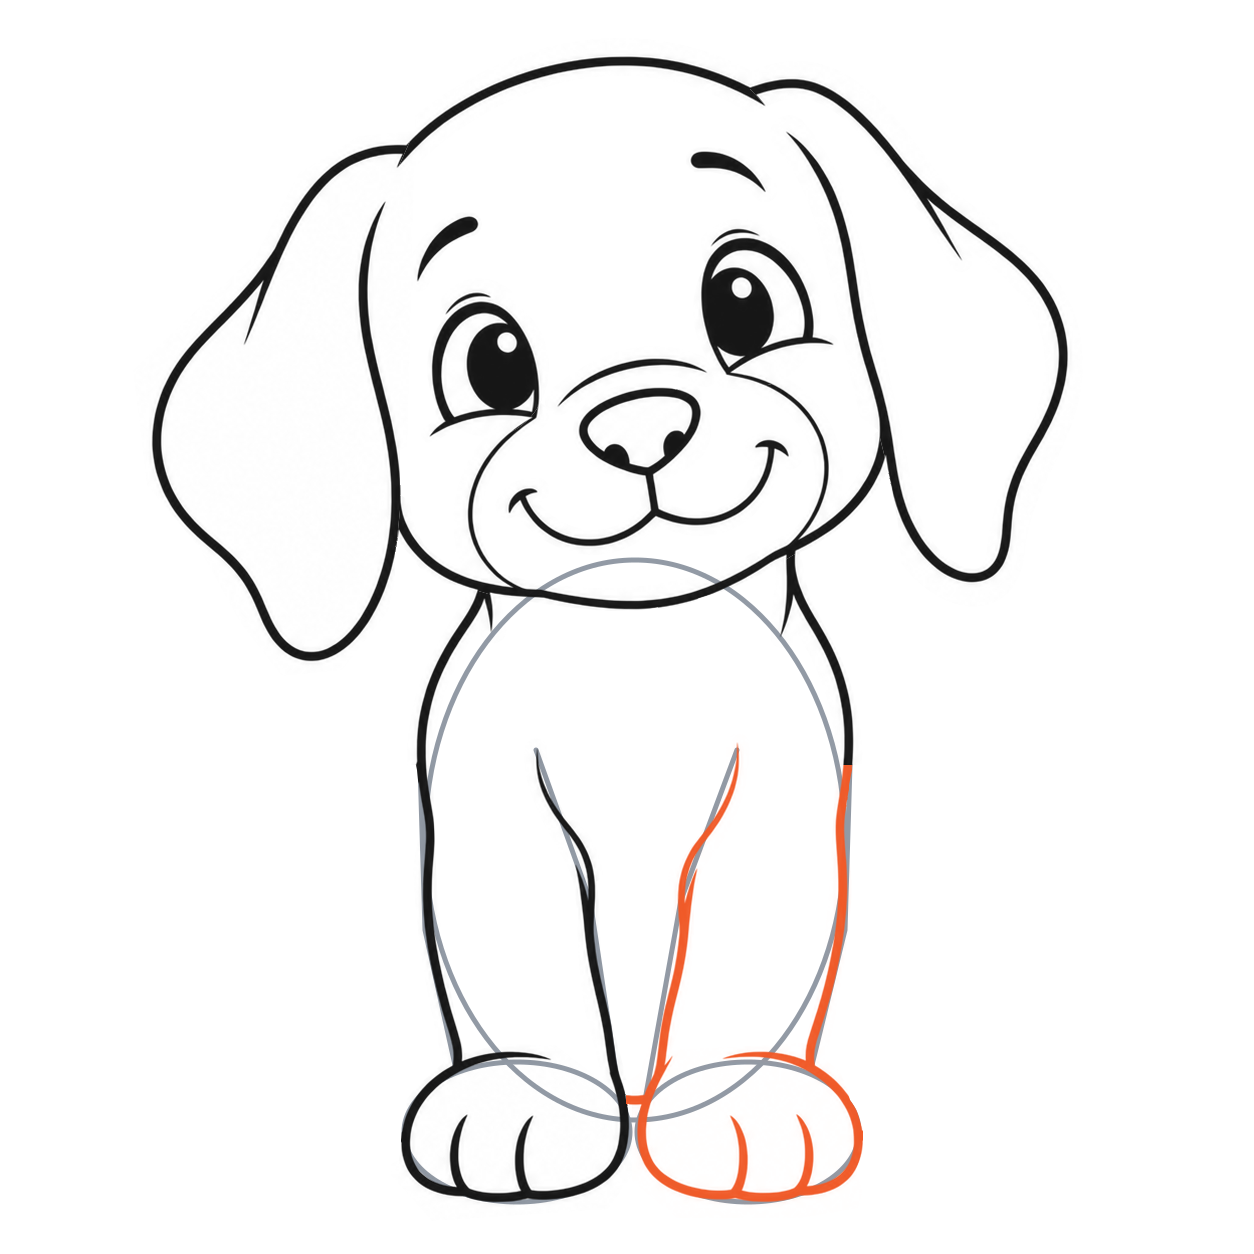
18. Build the second front leg and paw
- Repeat on the right, using the same low oval and tapering leg construction.
- Add its inner fold and two toe curves.
- Join the legs with the short visible body line above the gap between the paws.
Keep the two front paws separate.
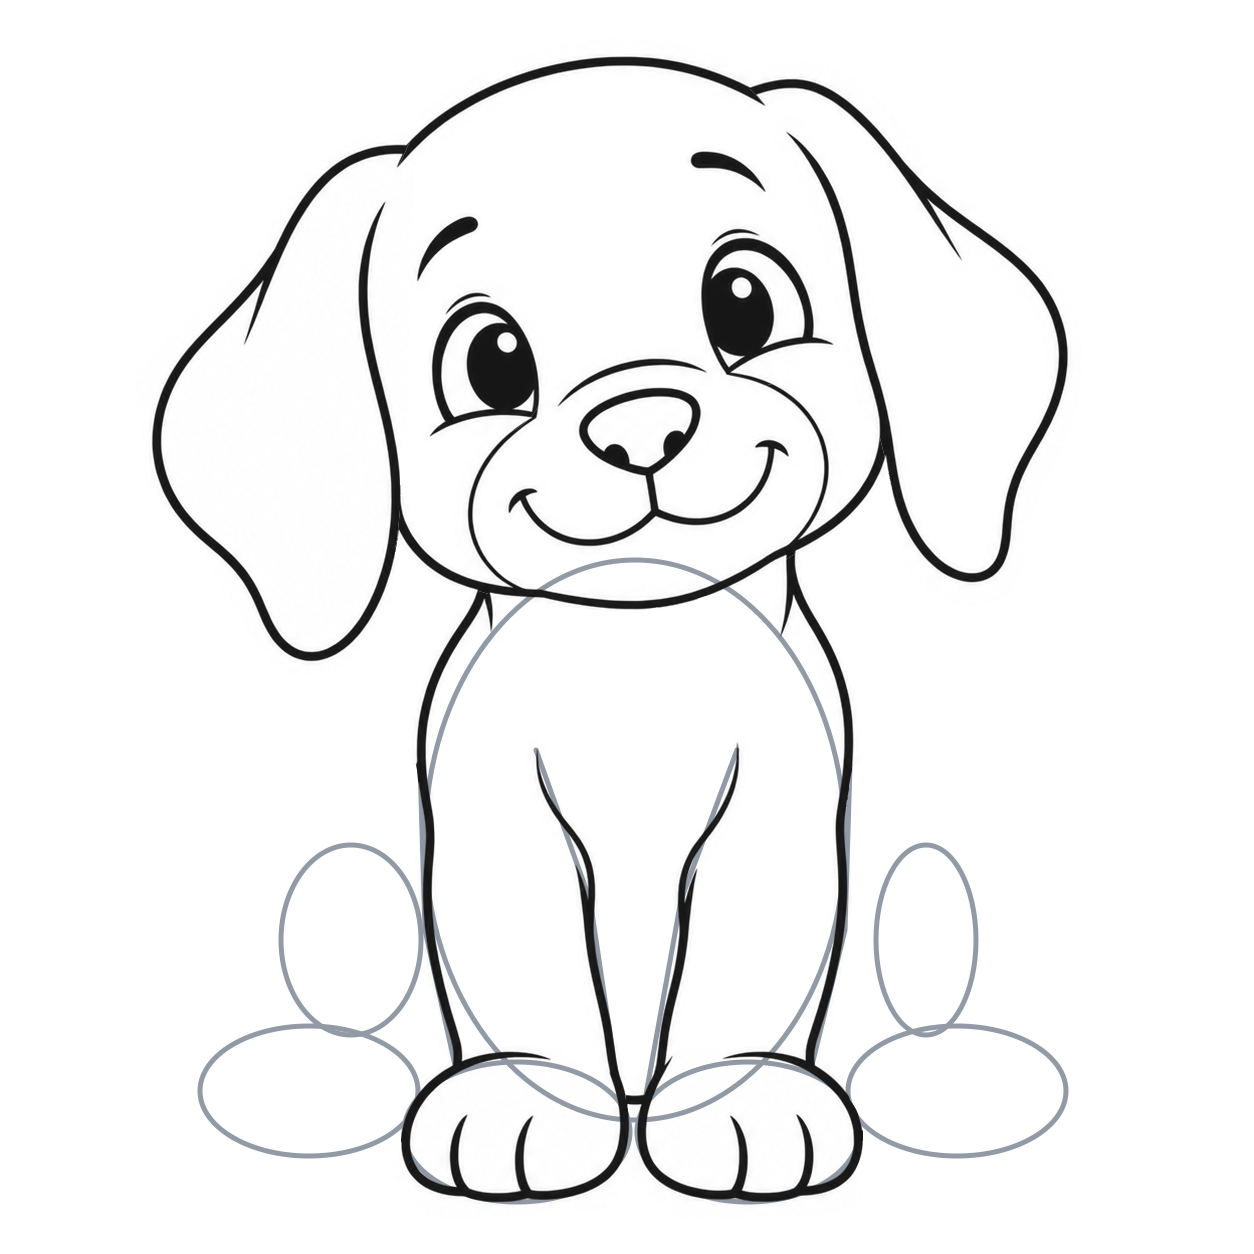
19. Place the haunches and back paws
- Add slim haunch ovals outside the lower body, then low paw ovals beneath them.
- Their bottoms sit slightly higher than the front paws.
- Let each back paw’s inner end overlap a front paw guide.
The front paws will hide those overlapping inner ends.
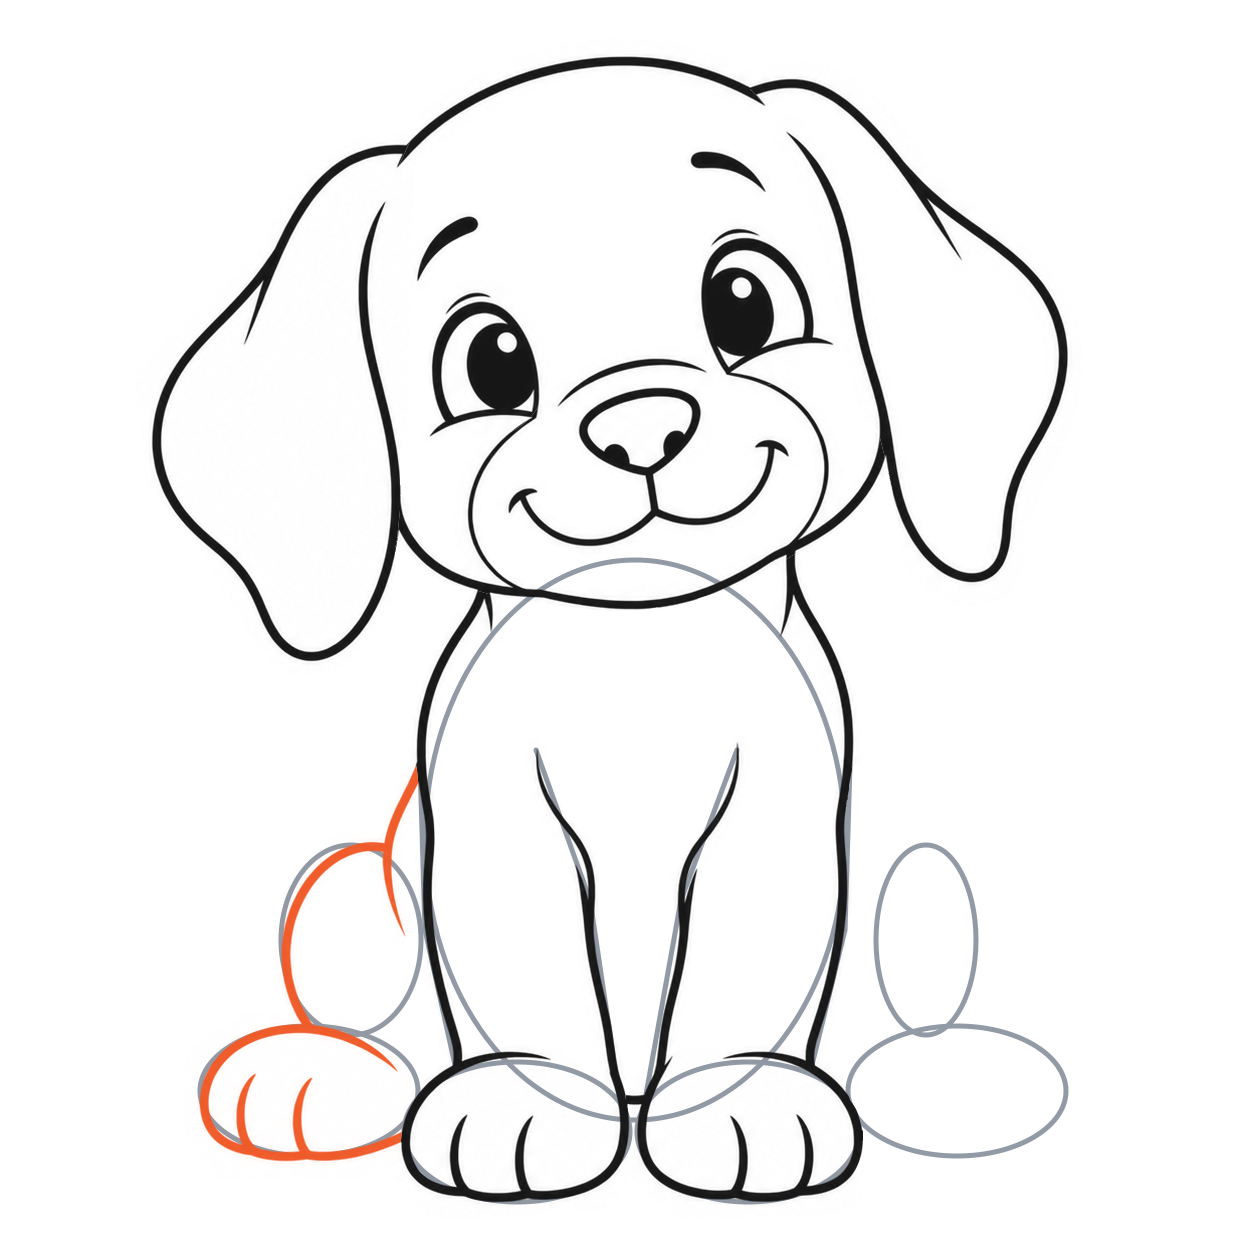
20. Build the left back leg
- Round the left haunch beside the body and curve down to its paw.
- Draw only the paw edge visible outside the front leg; stop at that black edge.
- Add the short haunch fold and two toe curves.
Do not draw a hidden line through the front paw.
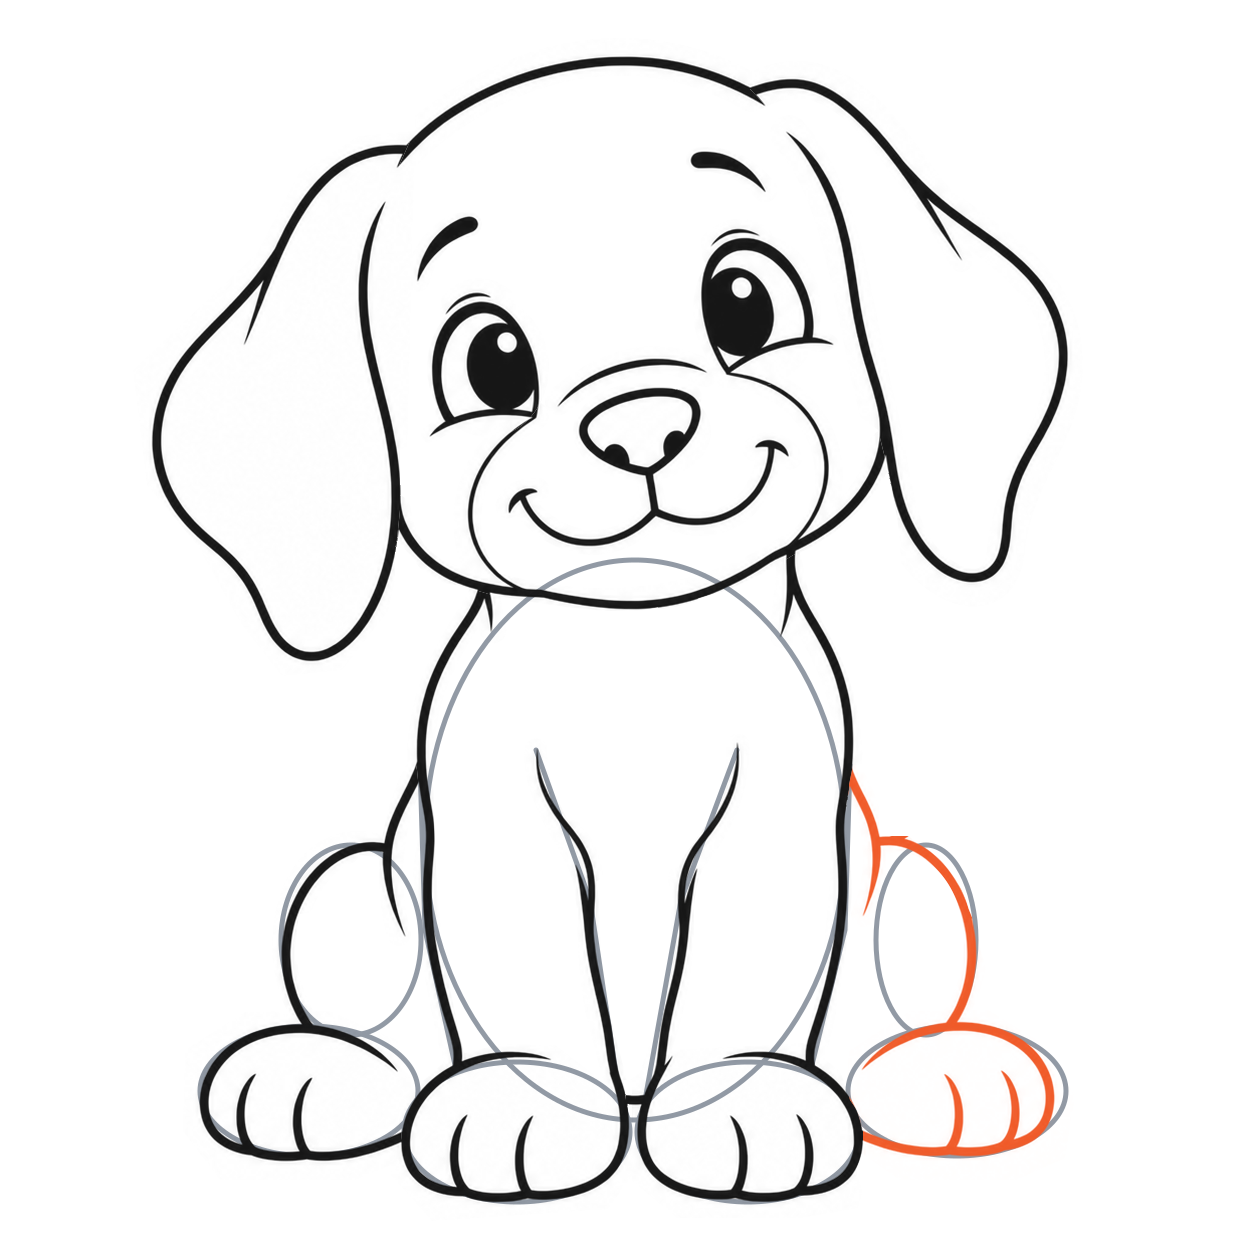
21. Build the right back leg
- Repeat the rounded haunch and low paw on the right.
- Stop the hidden paw edge at the front leg, then add its short haunch fold and two toe curves.
Count four paws, with the back pair slightly higher.
Draw the tail and erase the body guides
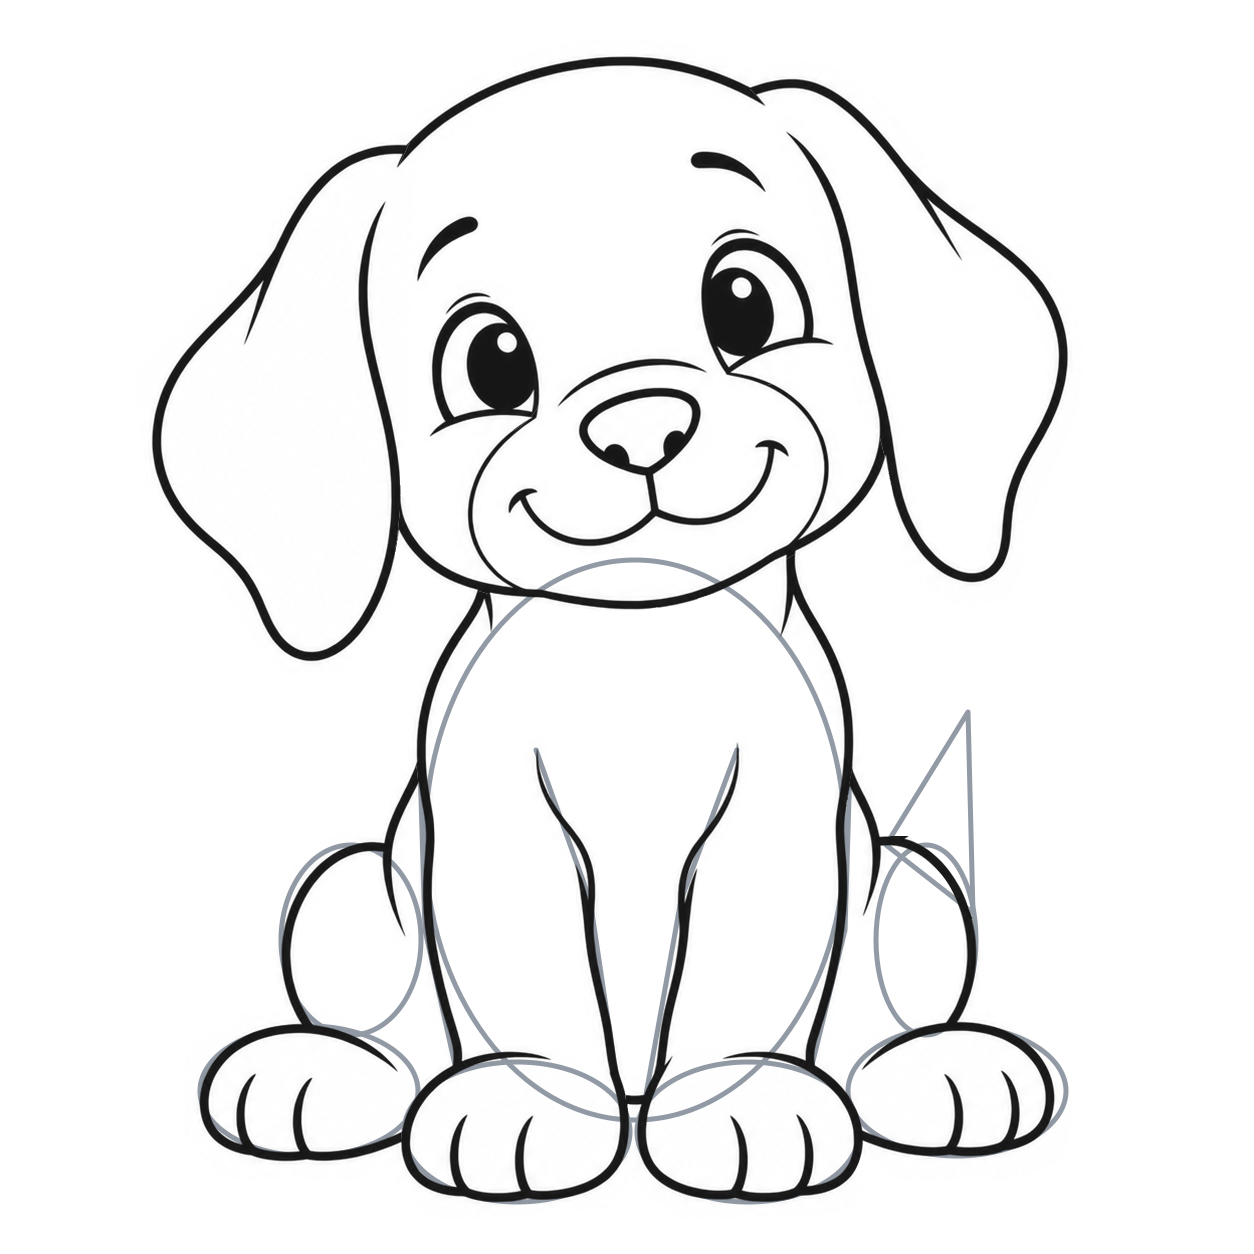
22. Place the raised tail
- Behind the right haunch, mark two joins and a tip about one paw-height above them.
- Connect the three points lightly to show the tail’s upward direction.
The lower tail join stays behind the haunch.
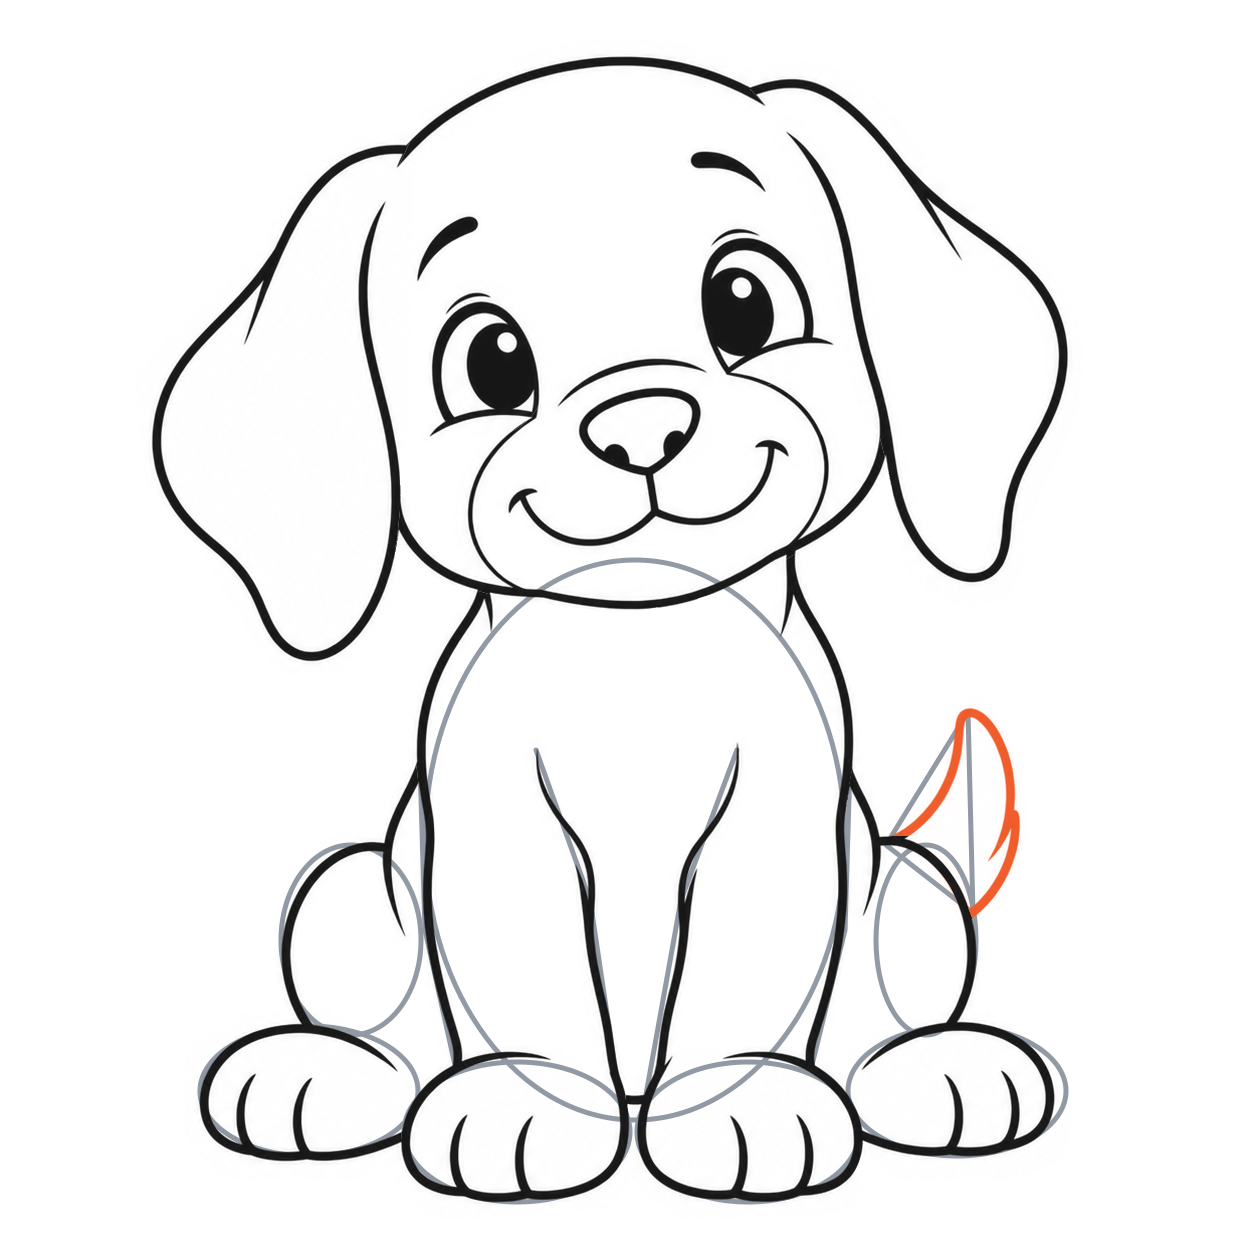
23. Round the tail
- From the upper haunch join, curve up to the tail tip.
- Round it softly, bow the outside edge to the right and return to the lower join.
- Add the short inner tip crease.
Both tail edges meet the haunch; no line crosses the leg.
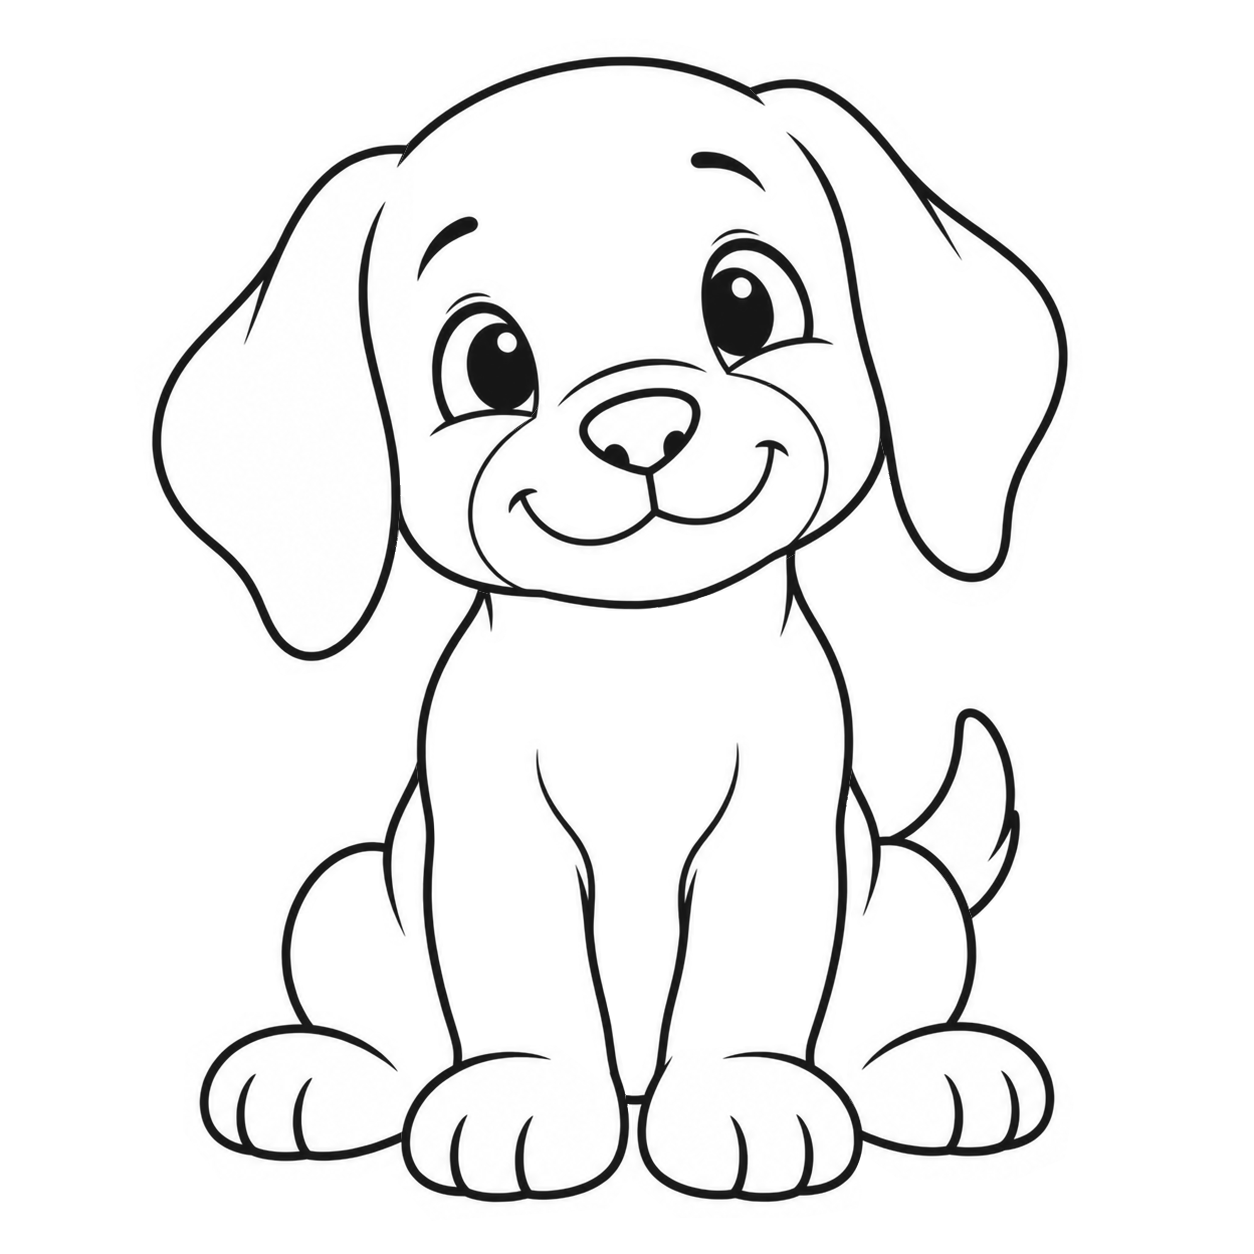
24. Erase the body guides
- Erase the body oval, bent leg lines, all paw and haunch ovals, and the tail scaffold.
- Keep the complete black legs, four paws, folds, toe curves and tail.
Only gray construction marks disappear.
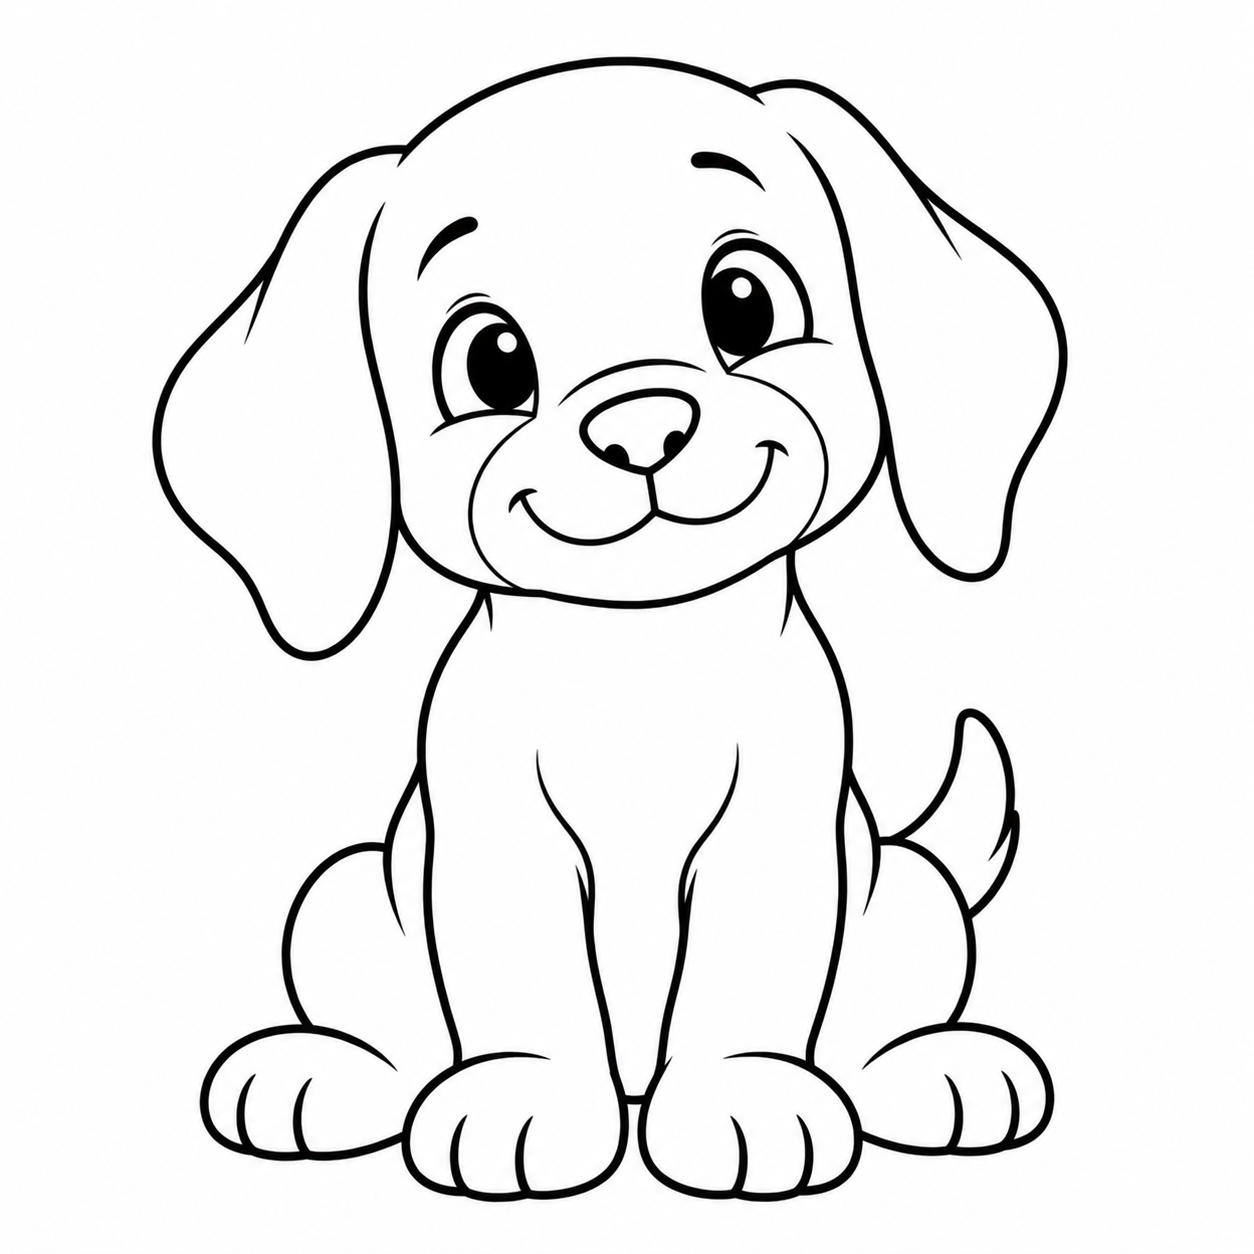
25. Check the sitting puppy
- Check the tilted smiling face, two floppy ears, four separate paws and raised tail.
- Keep the full seated body; colouring is optional.
The back paws remain behind the front paws.
FREE PUPPY DRAWING GUIDES
Find your favorite way to draw
Enjoy the full walkthrough, keep a handy one-page reminder, or follow the pictures on your phone. Every option is free—choose what suits your drawing time.
One-page reference
Keep the key checkpoints beside your sketch.
Six checkpoints for repeat practice after the full lesson. Use the complete lesson or phone guide for every beginner instruction.
Complete lesson
Keep every picture beside your drawing.
All 25 picture steps, the finished example and a practice page. Choose the PDF for your paper; both contain the same complete lesson.
Phone guide
Follow every picture on your screen.
All 25 accepted pictures, instructions and checkpoints, one picture at a time. Includes a cover; no printing needed.
The one-page reference supports the detailed lesson and repeat practice. Choose the complete lesson or phone guide for every beginner instruction.
Free pages · No signup
Free puppy coloring pages
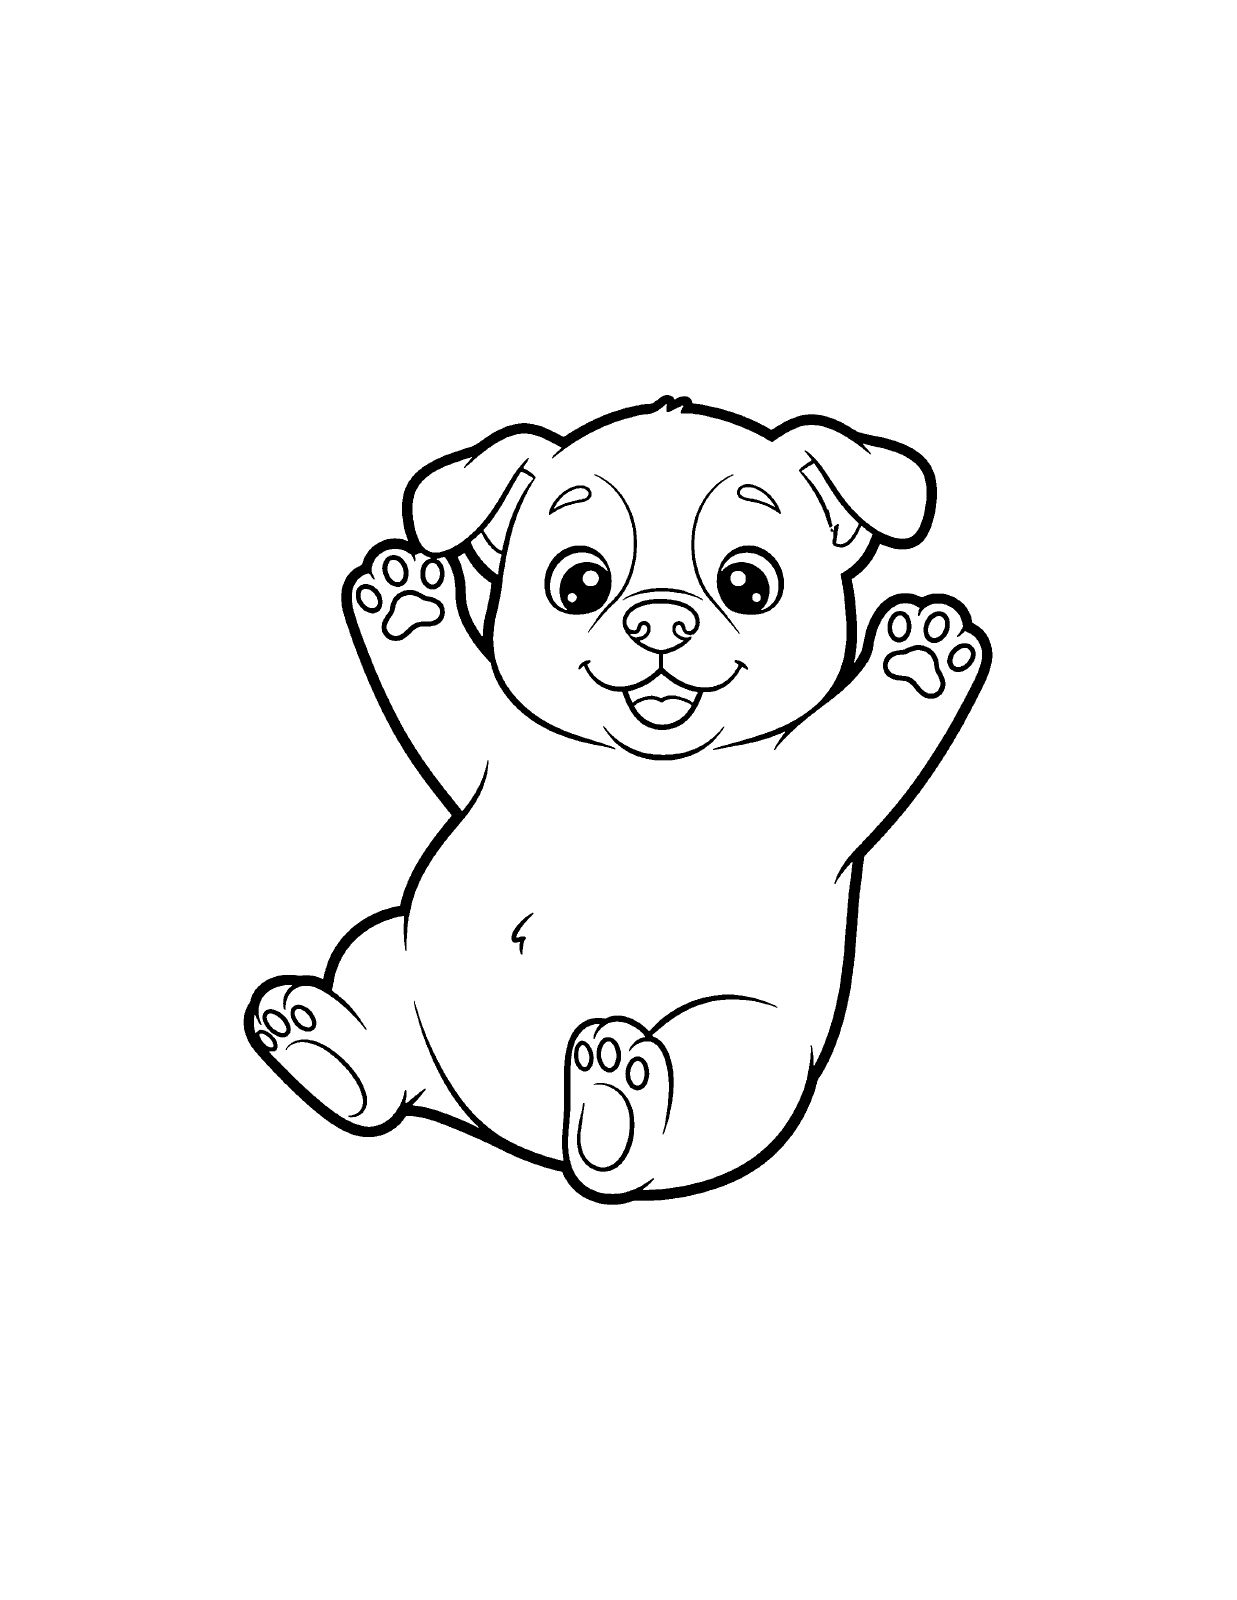
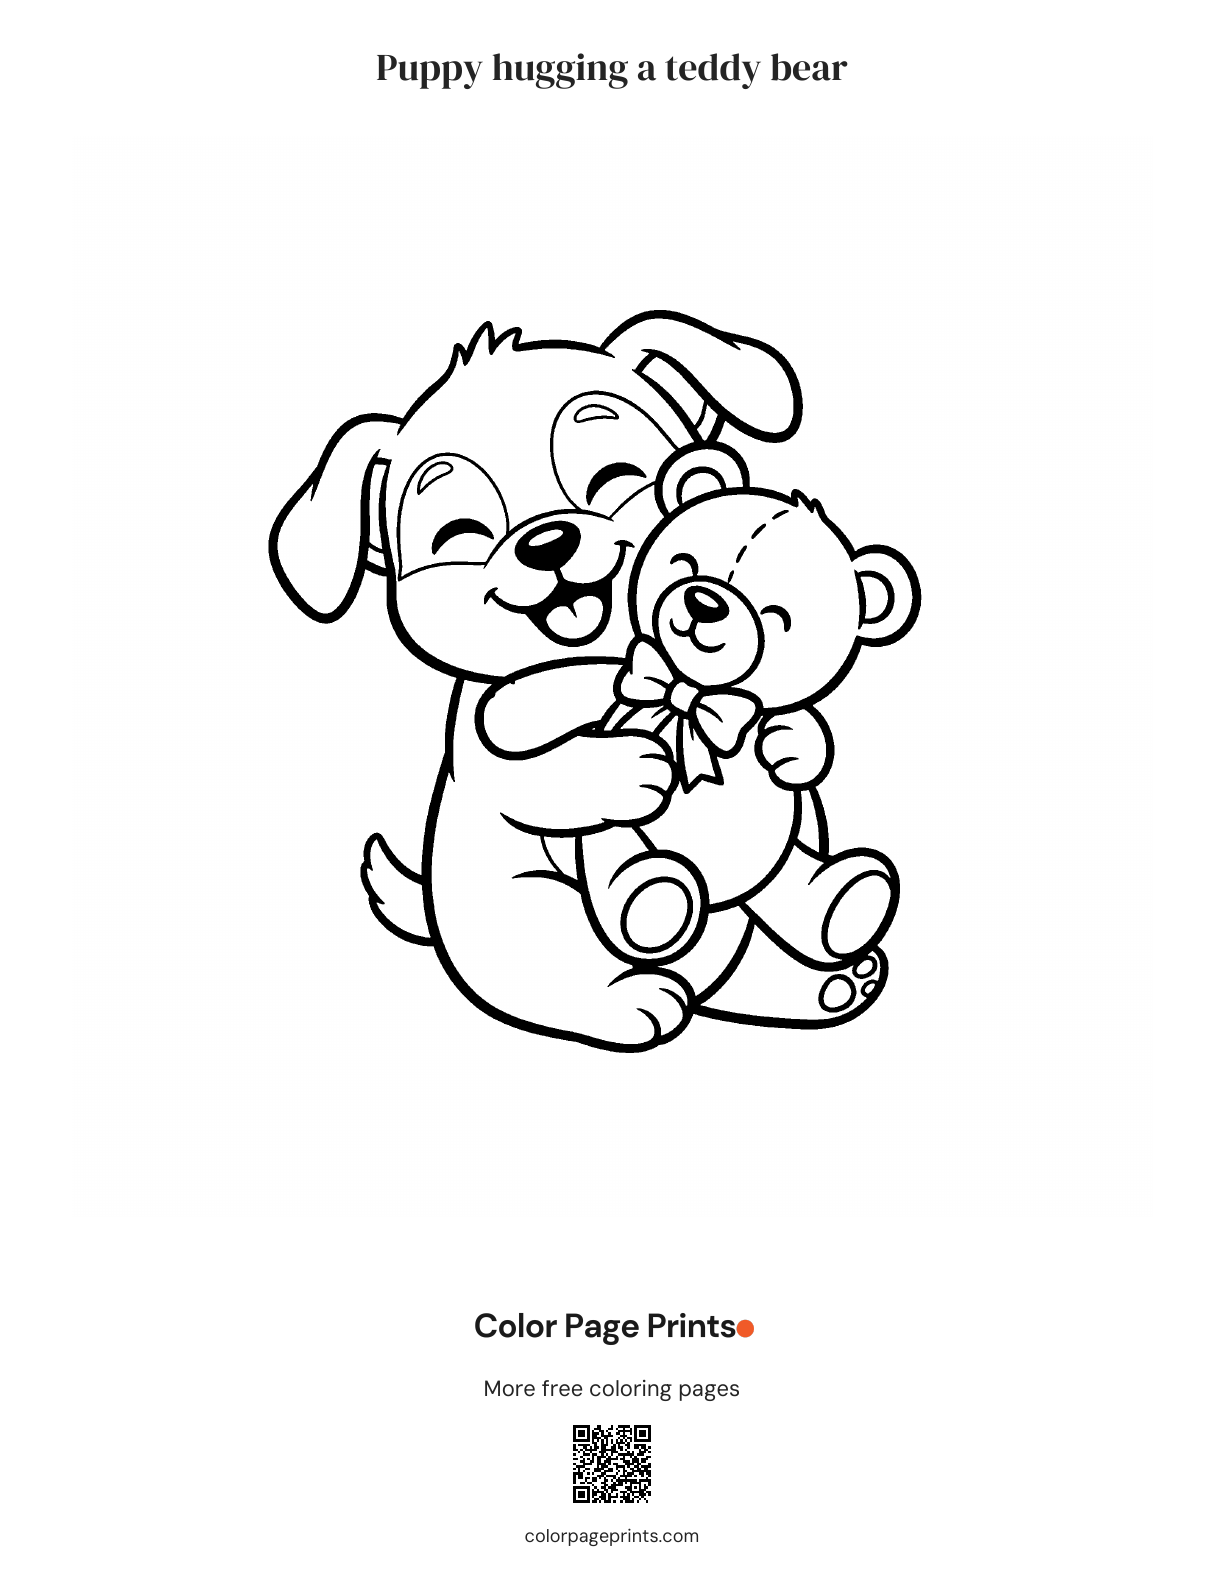
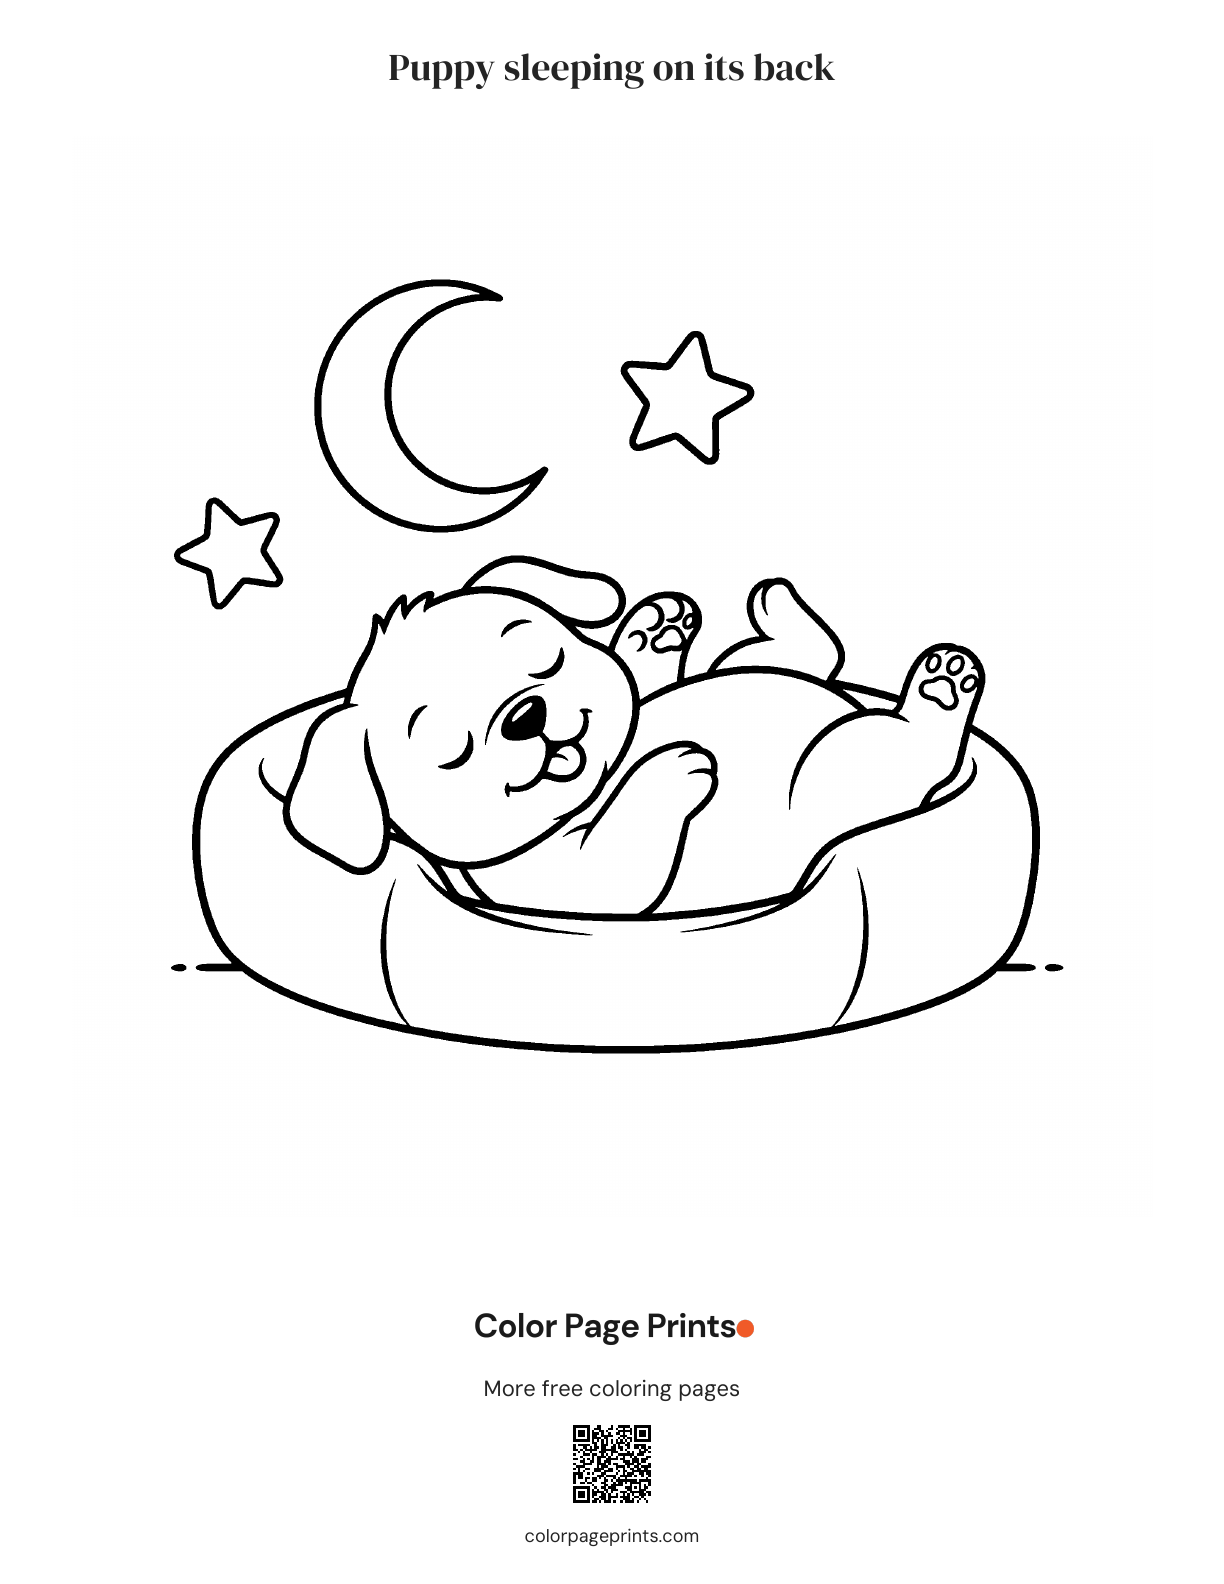
Choose a puppy picture to open its printable page. No signup is needed.
Browse free pages →