
Free drawing lesson · 5 construction goals
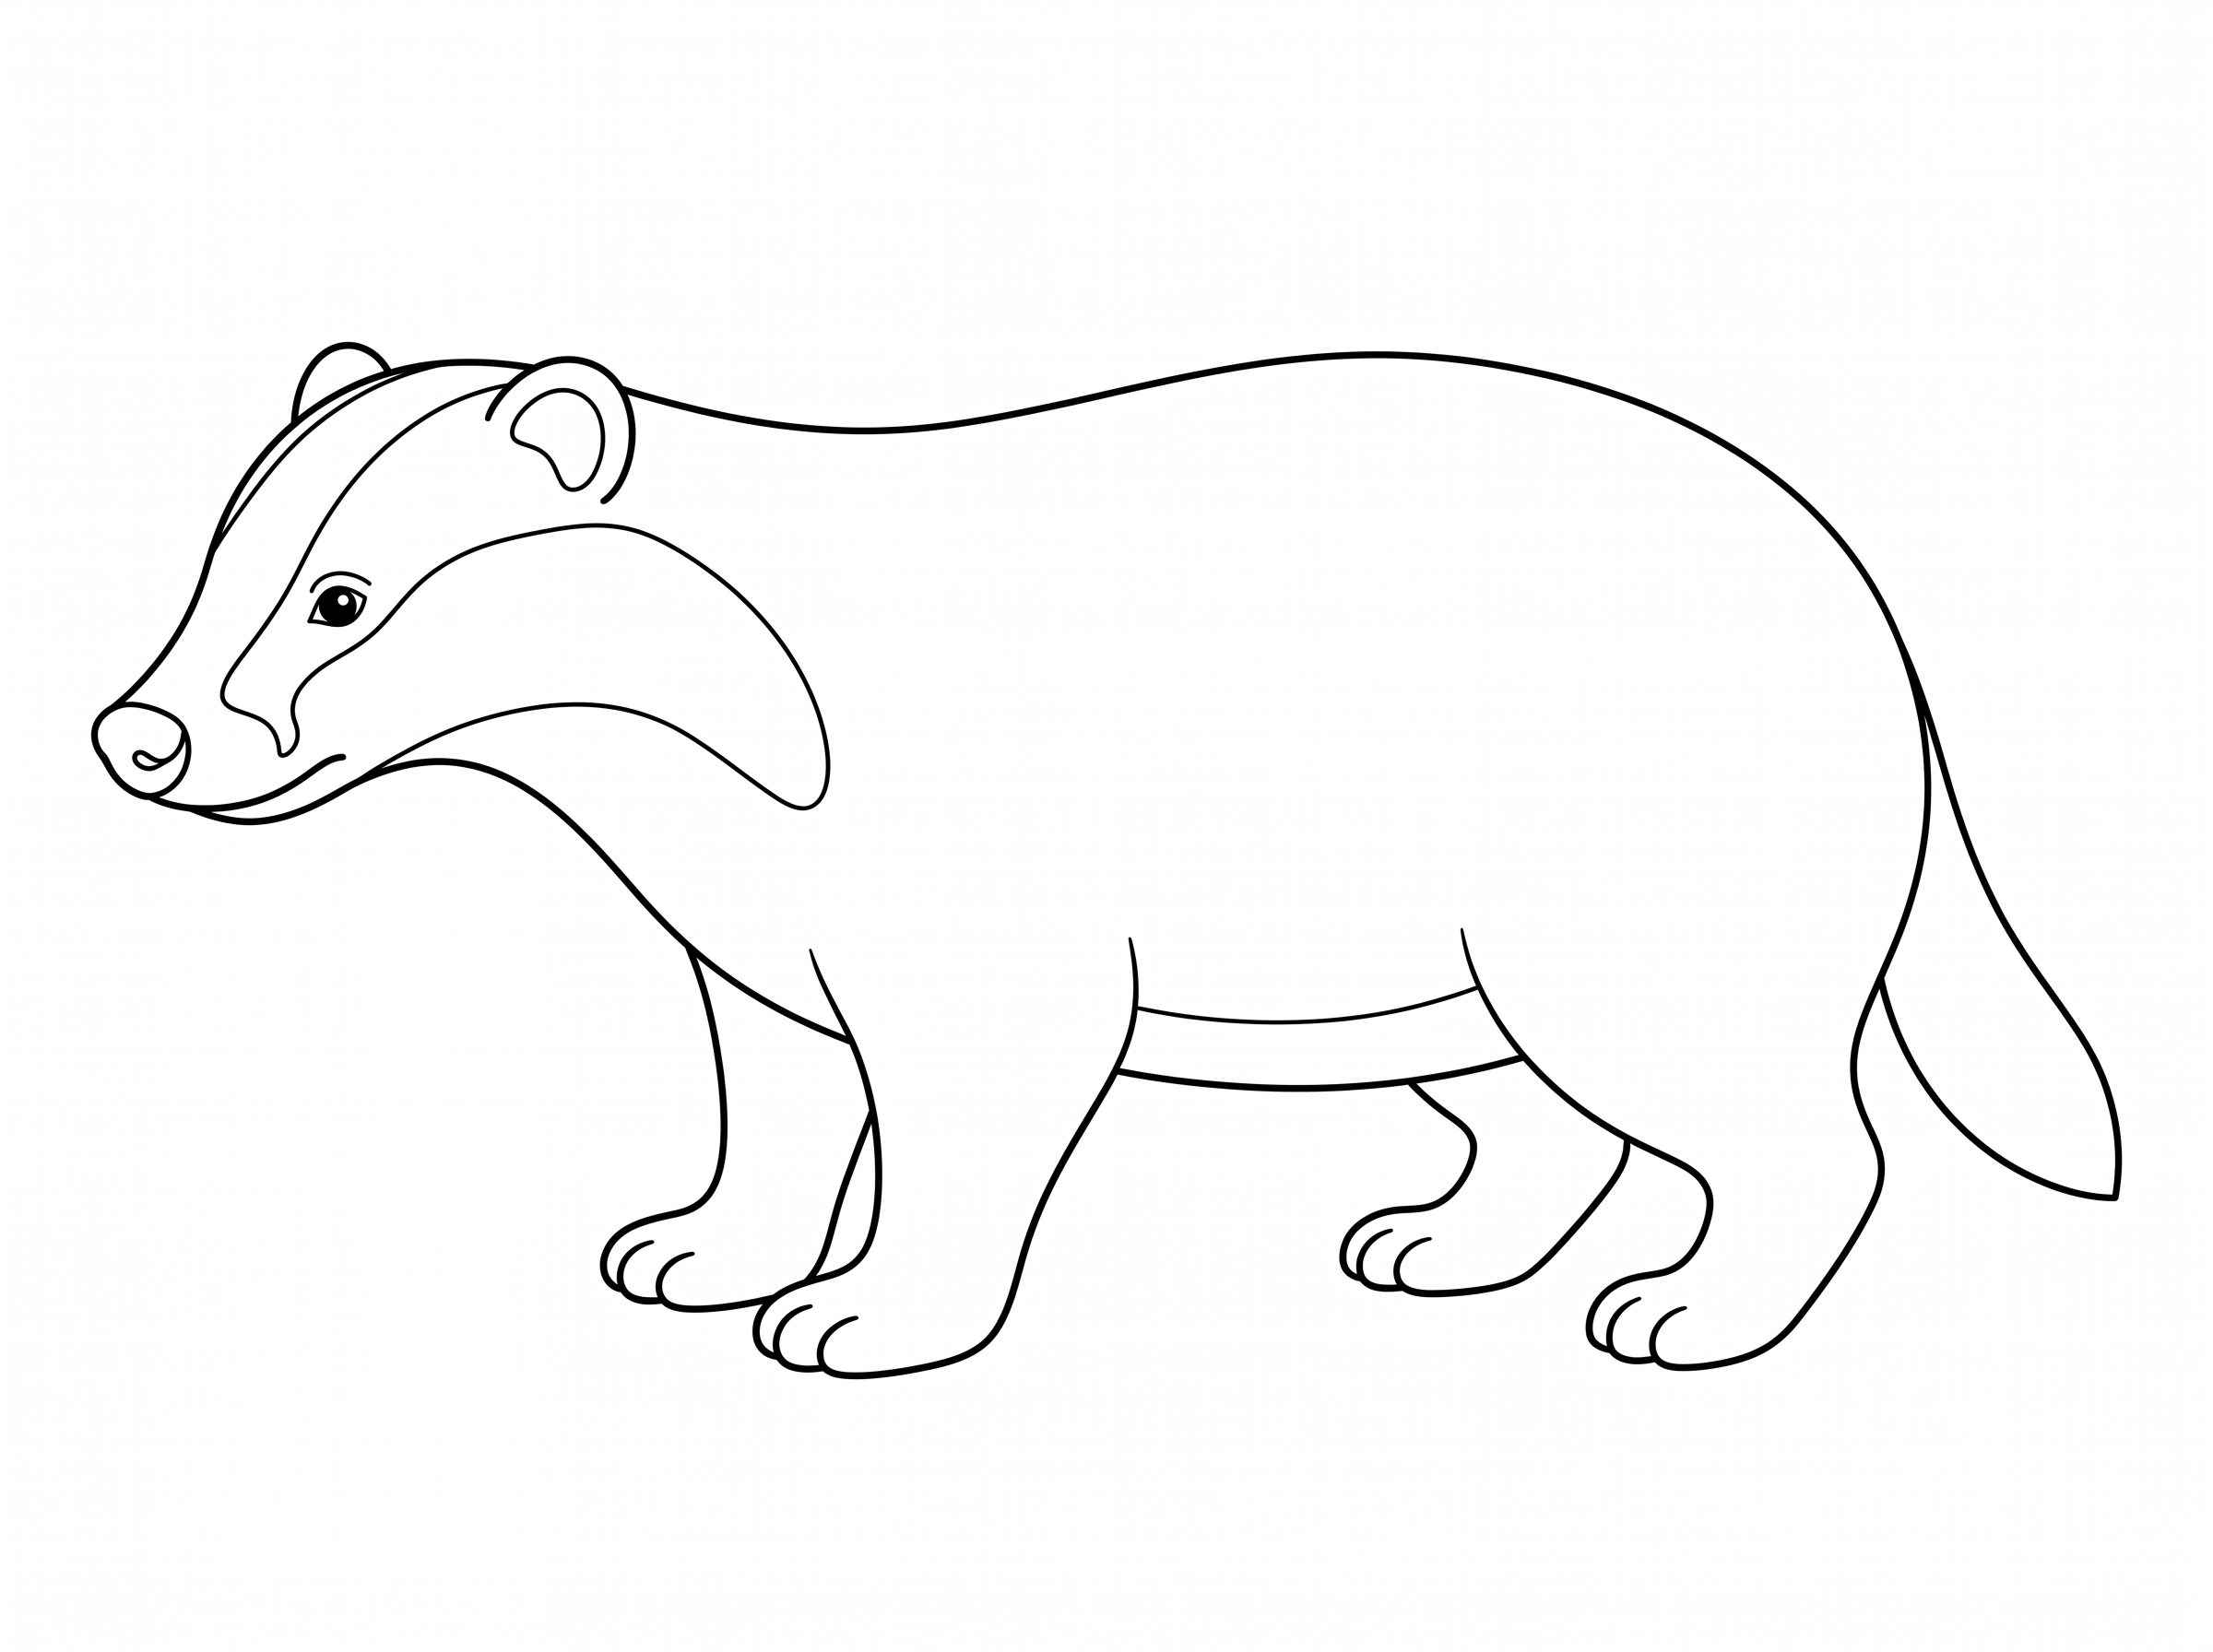
How to Draw a Badger, Step by Step
Build a standing badger from overlapping ovals and light guides. Follow five goals to connect the muzzle, shape four legs, add the tail and place the face bands. Each picture shows a smaller action or an exact guide to erase.
HardBent rear legs and tapered face bands need carefully placed turns and controlled curves.
You will practise: connecting bent legs and shaping face bands while keeping visible edges at overlaps.
Choose paper or screen.
The full lesson is free. Use a pencil, plain paper and an eraser. Follow the pictures below, print the lesson, or use the phone PDF with larger text.
Use the one-page reference for repeat practice. Follow the detailed lesson for every construction action, including the leg overlaps and face-band turns.
No email or purchase is needed. Drawing with a child? Read one instruction together, then leave time to try it. There is no video for this lesson.
Jump to a construction goal
Optional repair helpBuild your badger one part at a time.
Gray dashed lines are light guides; black solid lines stay. Orange solid lines show what to add or reshape. Green dashed lines mark the named guides to erase. Labels and arrows are helpers, not drawing marks. Open any picture for a closer look, then use Back to return to the lesson.
Goal 1 of 5
Join the head, muzzle and chest
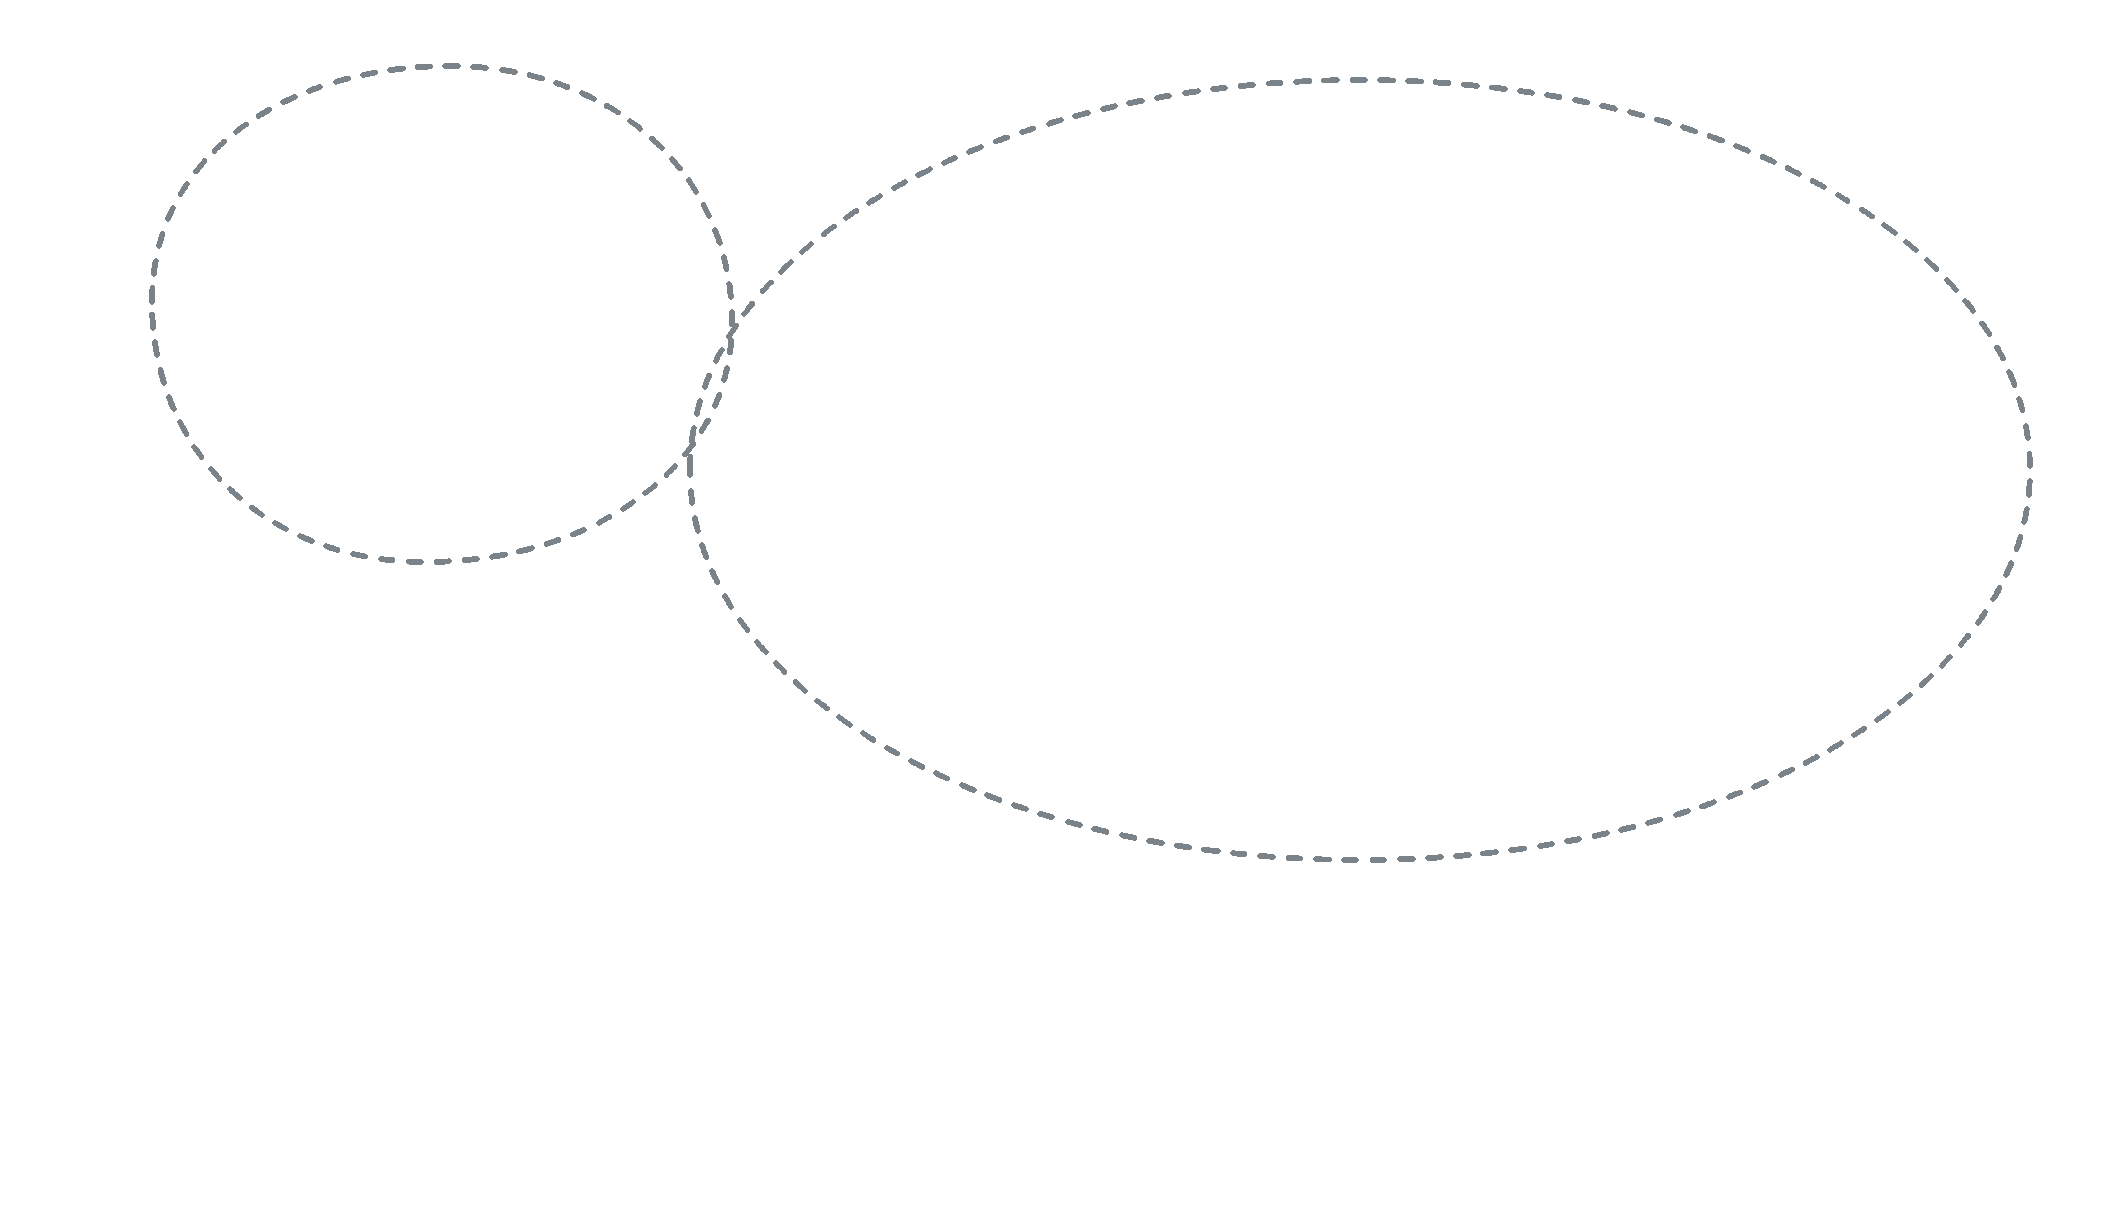
Place the large shapes
Draw a body oval twice the head's width and slightly taller; overlap the head's lower-right edge with the body's upper-left edge. Leave one head-height below for the legs.
Enlarge this picture ↗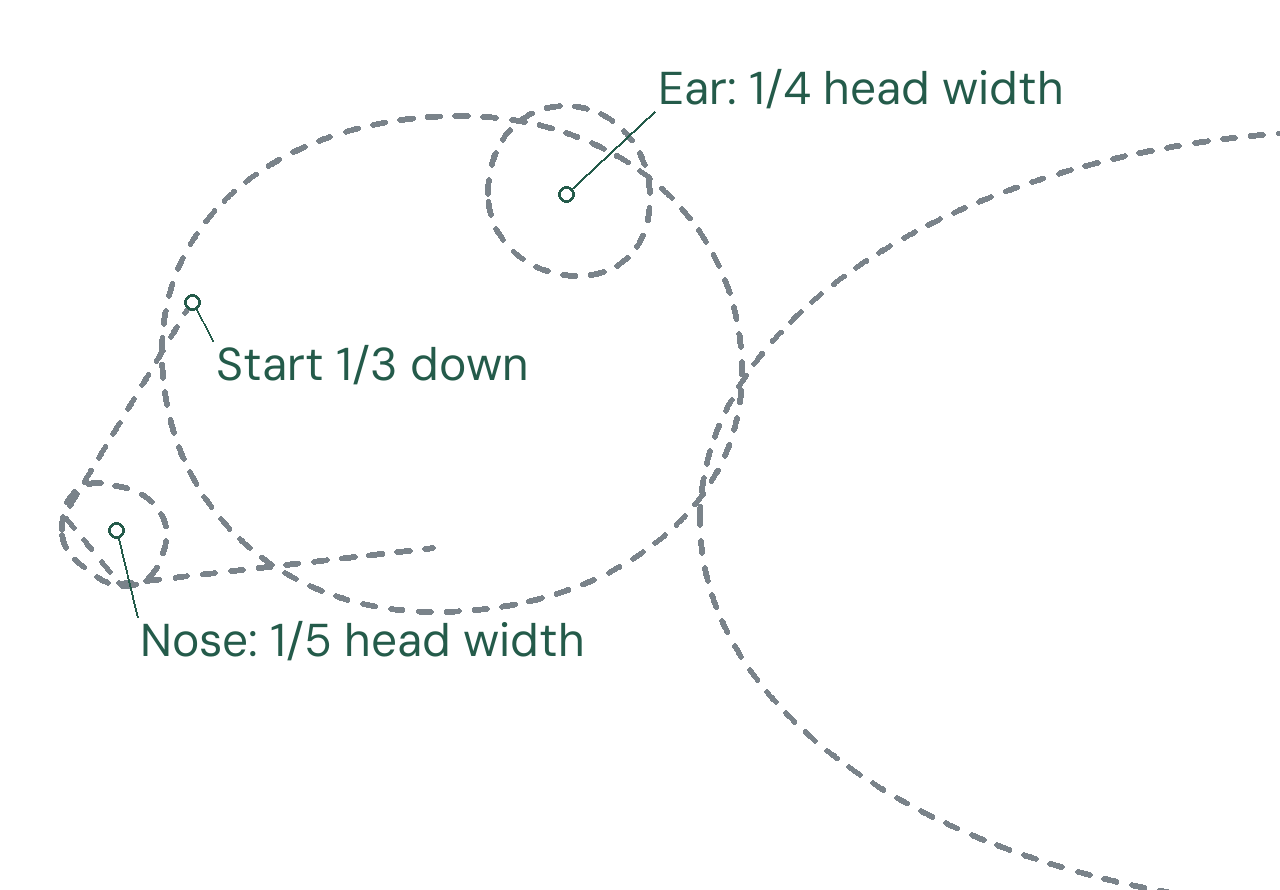
Place the muzzle, nose and ear guides
Add the muzzle wedge, nose oval and ear oval at the labeled positions.
Enlarge this picture ↗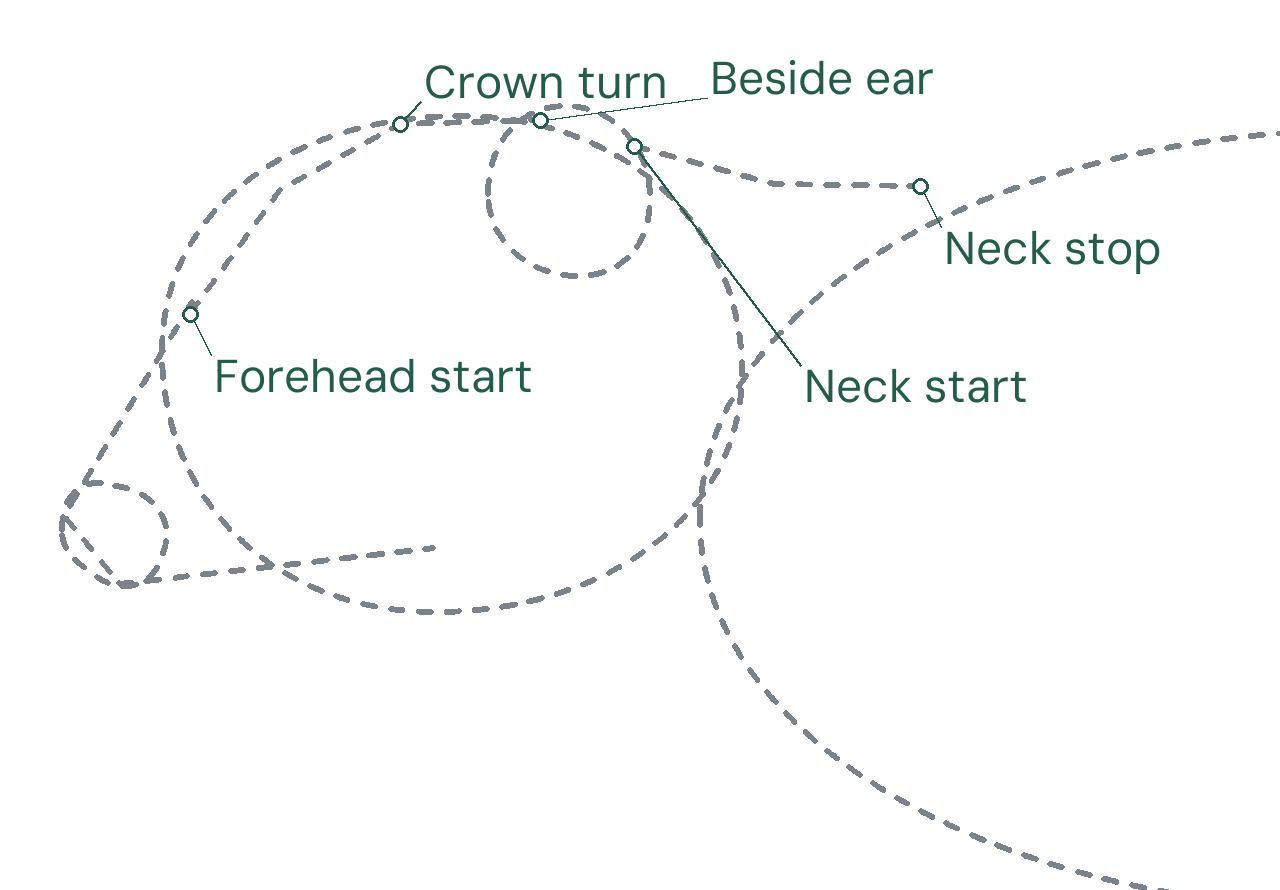
Mark the crown and top-neck turns
Mark the crown turn above the head and the neck stop above the body; join the labeled points with light straight lines.
Enlarge this picture ↗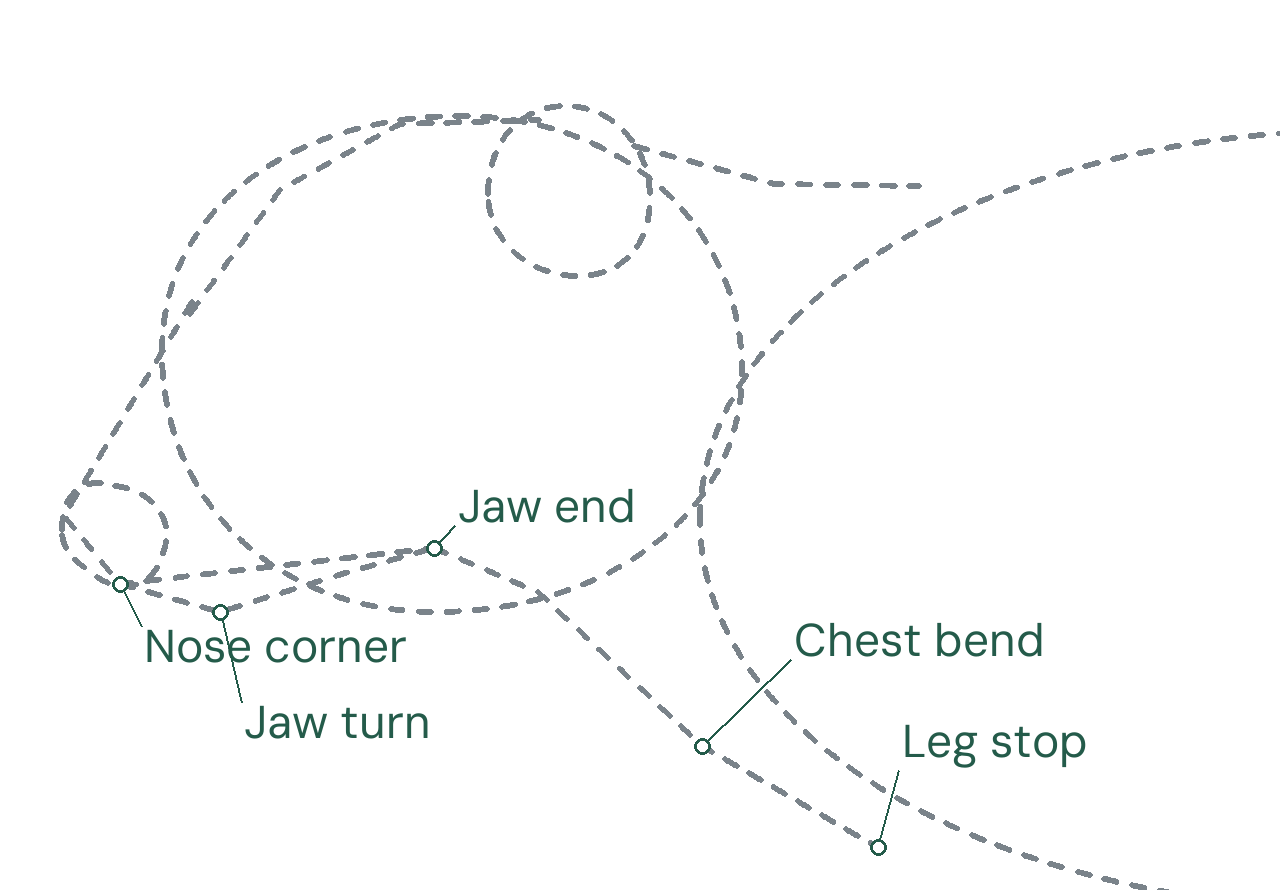
Locate the jaw and chest before drawing
Place the jaw turn below-left of the head and the chest bend below-right, then join the labeled points lightly. Set the leg stop just below the body oval.
Enlarge this picture ↗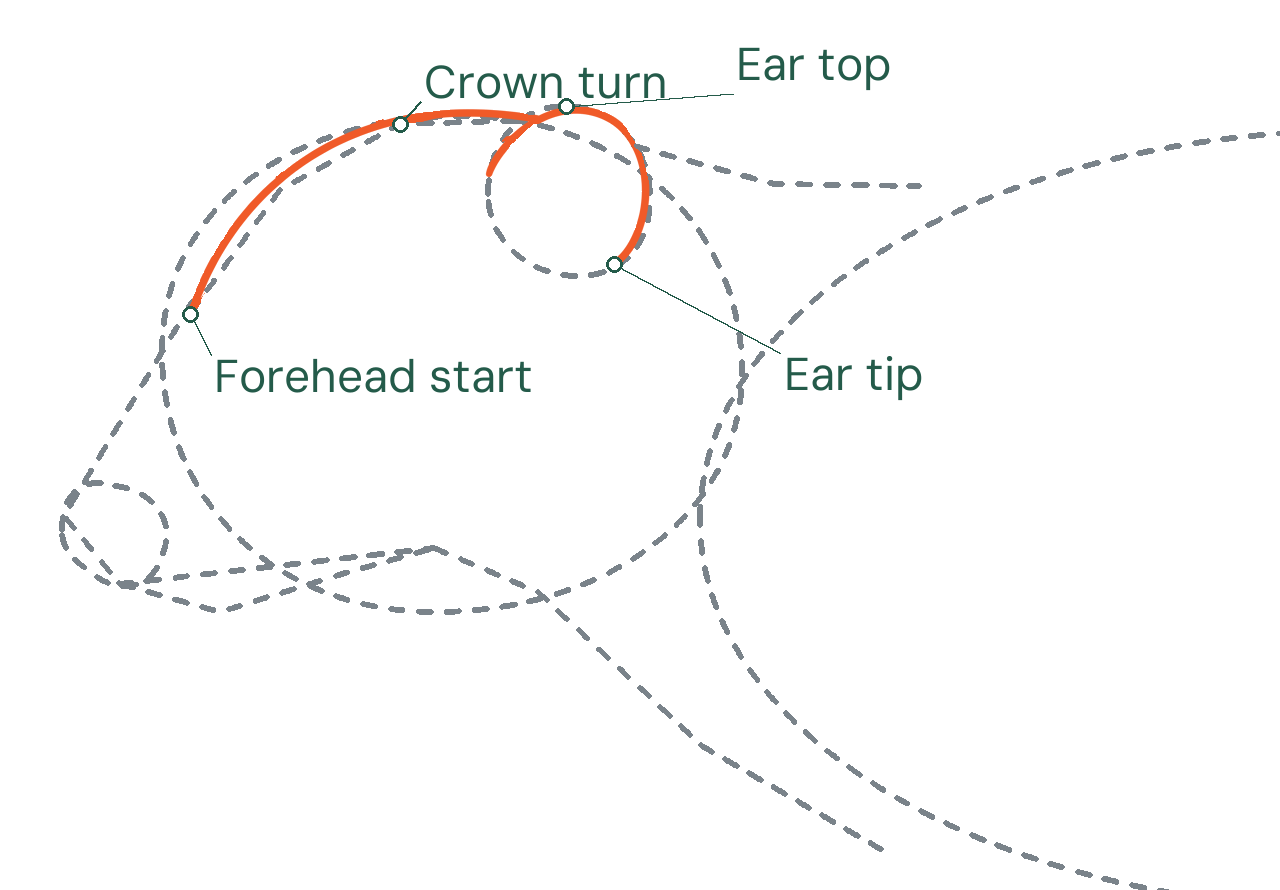
Round the forehead and near ear
Curve through the forehead marks to the ear, then round the ear oval down to its tip.
Enlarge this picture ↗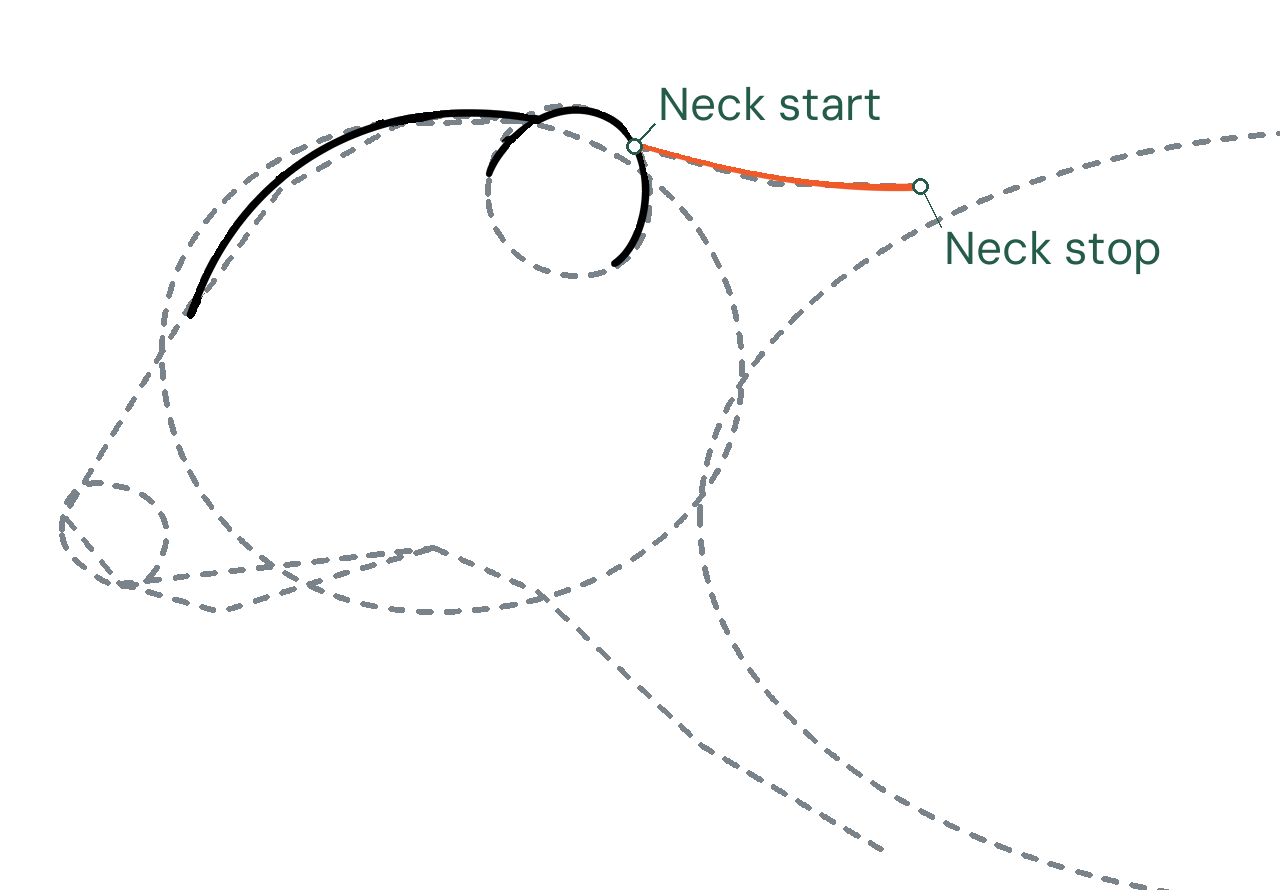
Join the head to the top of the body
Curve from the ear to the neck stop with a shallow dip.
Enlarge this picture ↗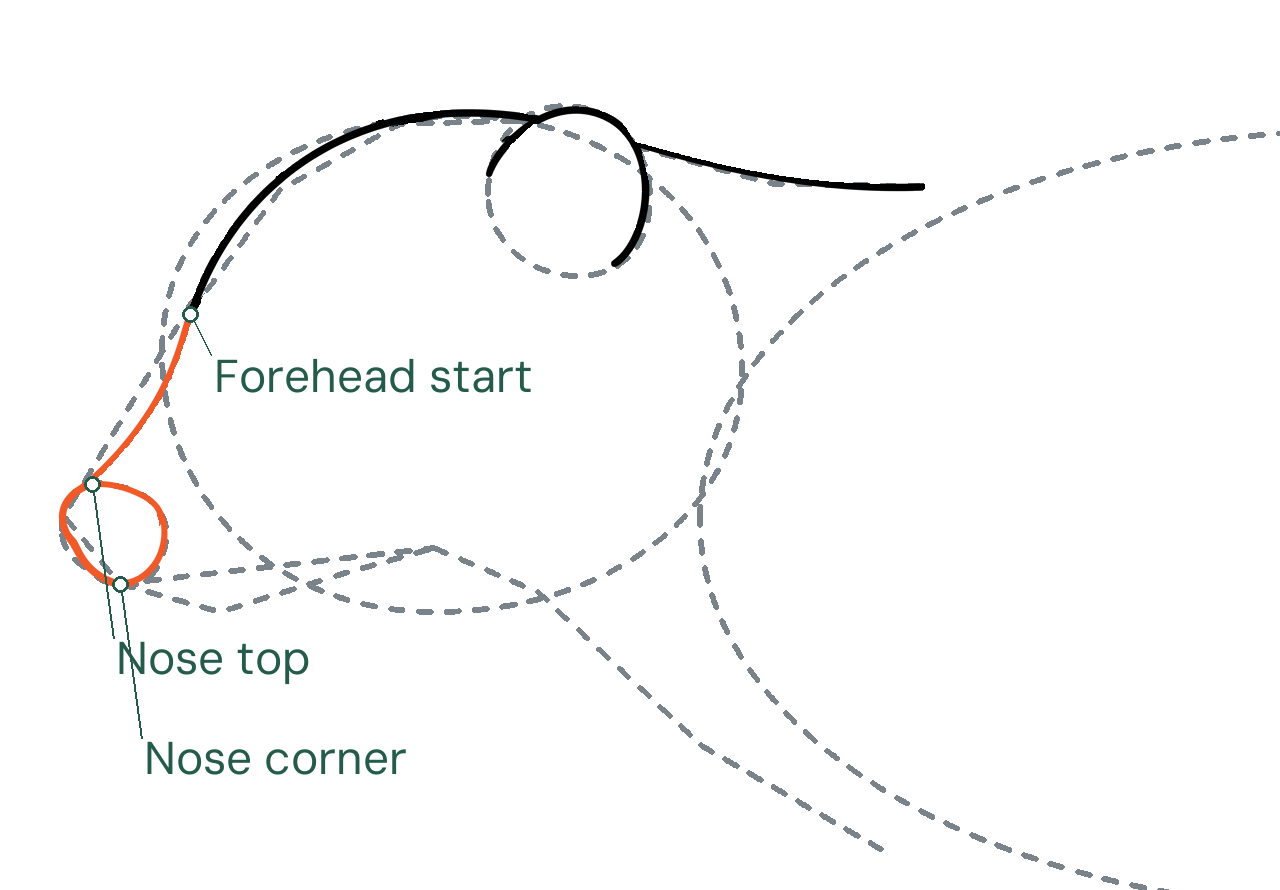
Extend the muzzle and round the nose
Extend the muzzle to the nose, then round and close the small nose oval.
Enlarge this picture ↗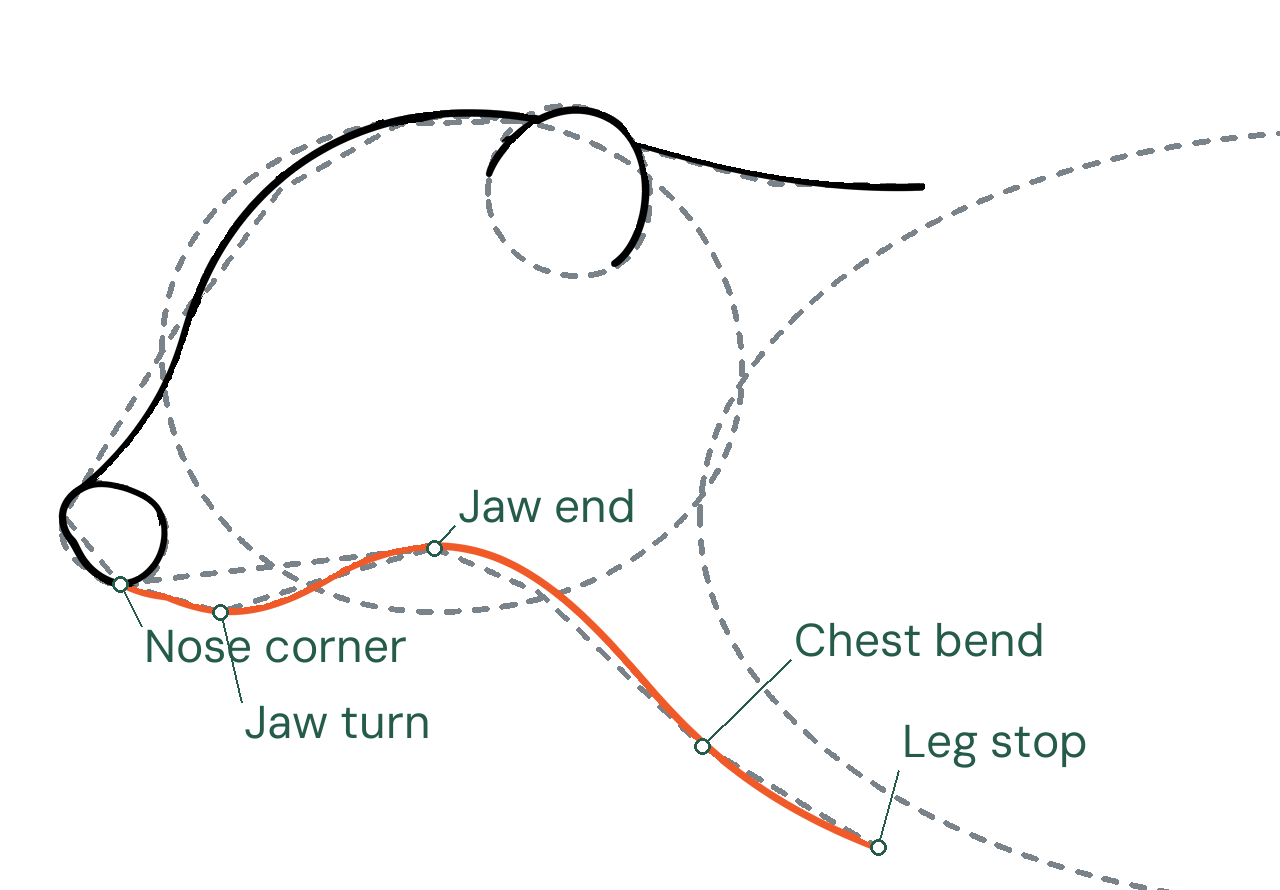
Connect the jaw and chest
Curve from the nose corner through the jaw turn and jaw end, then continue through the chest bend to the leg stop.
Enlarge this picture ↗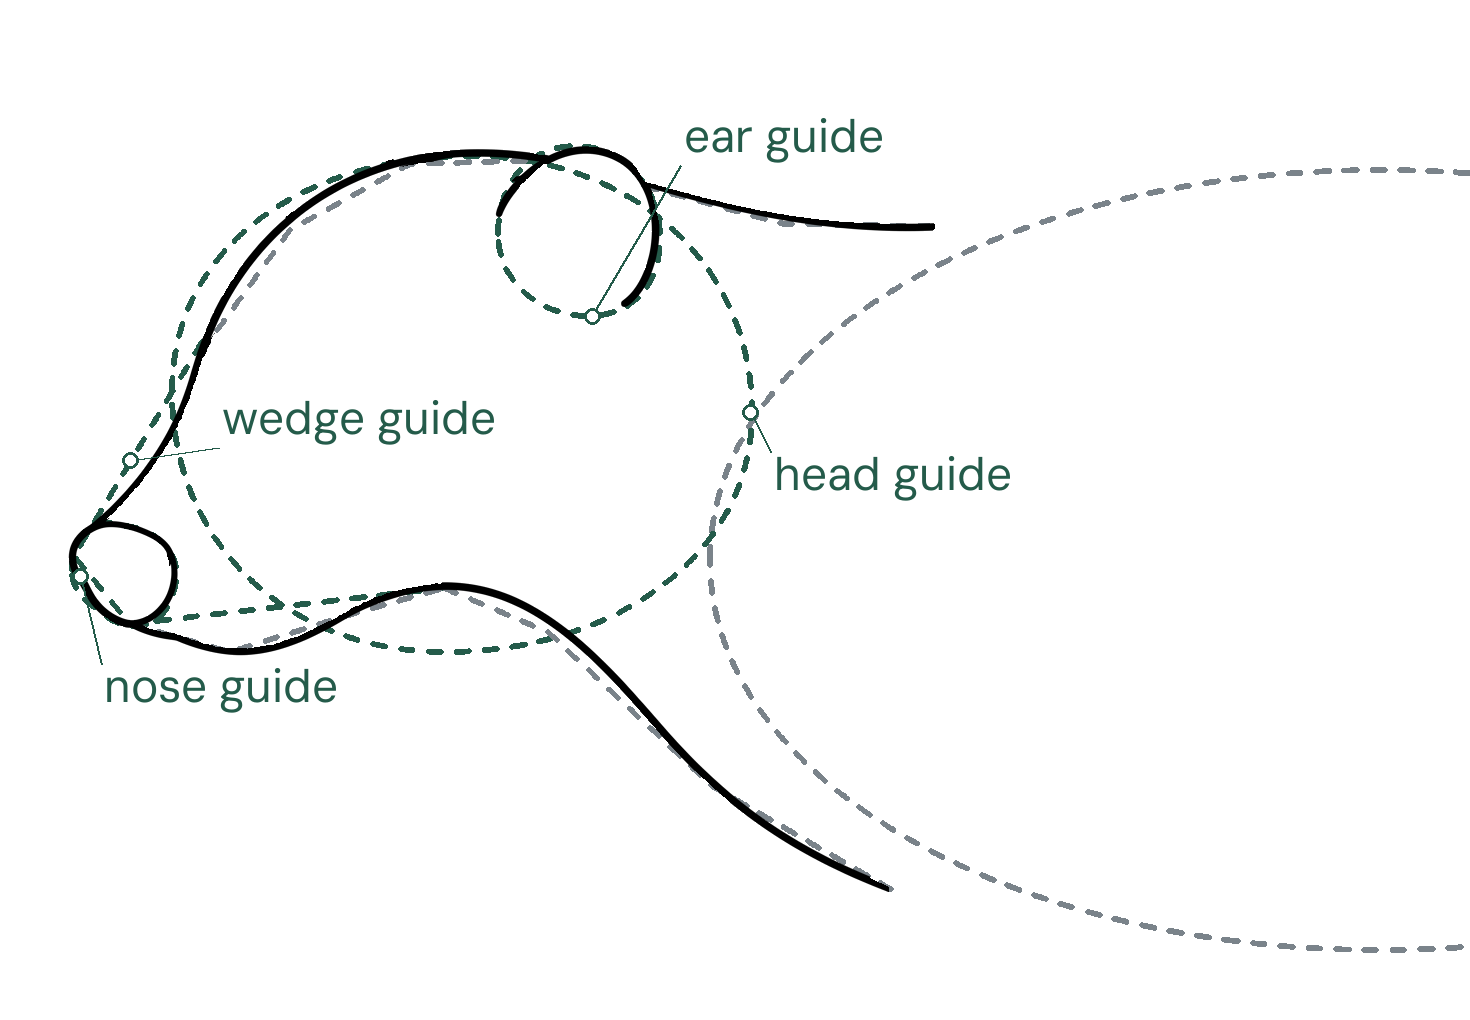
Mark the four shape guides
Mark the four labeled shape guides for erasing; keep the black outline and body oval.
Enlarge this picture ↗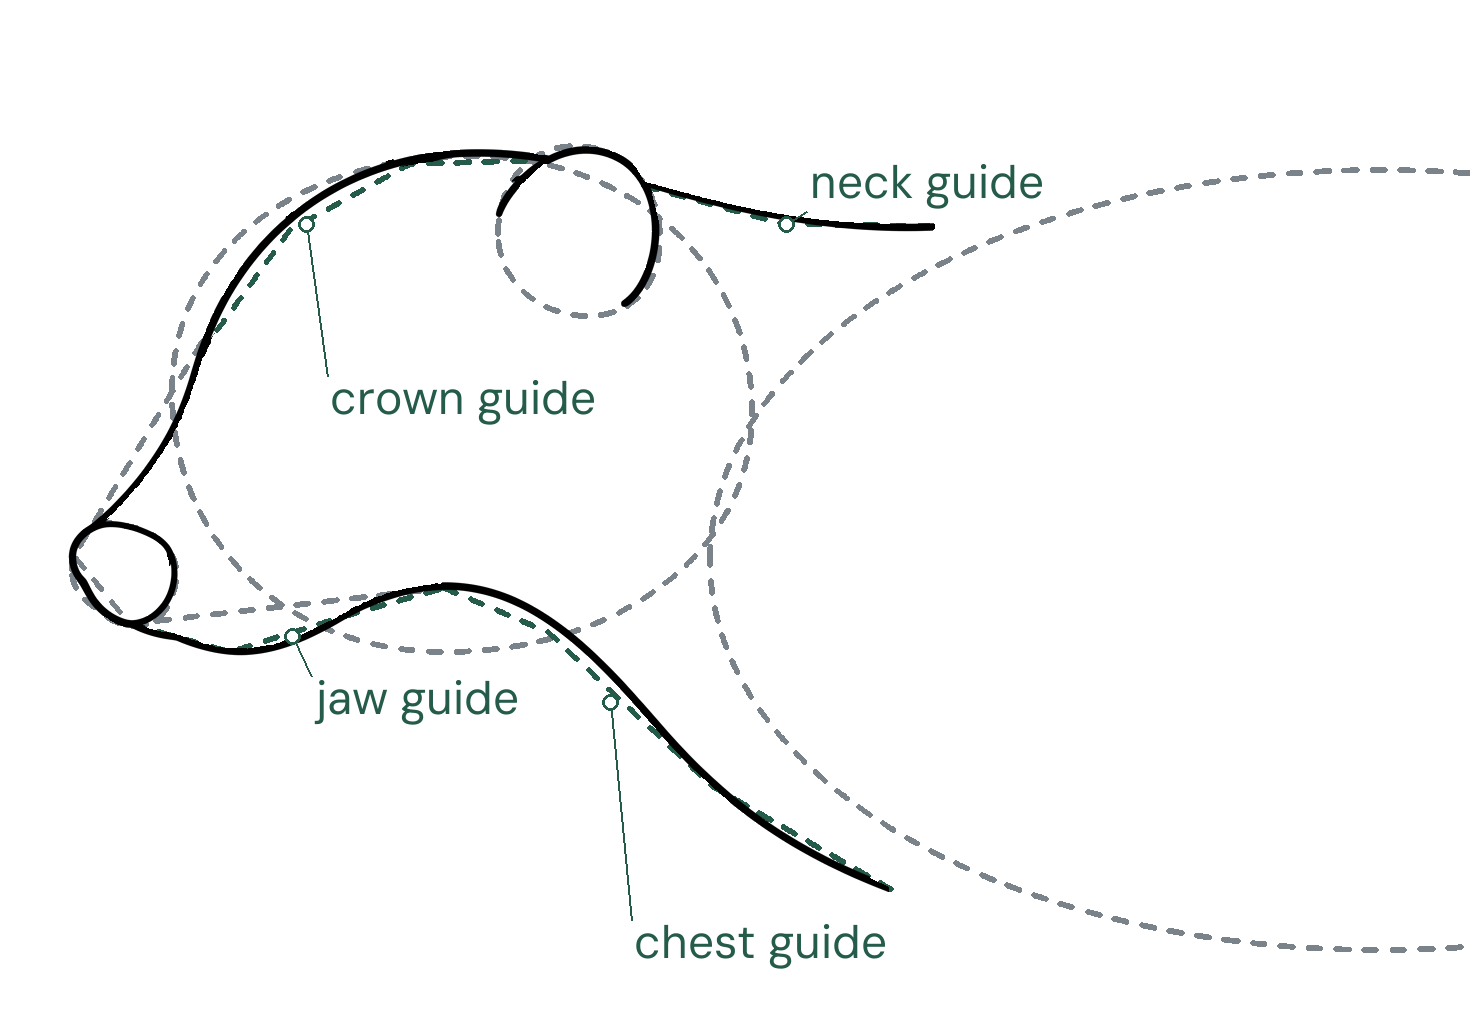
Mark the four direction guides
Mark the four labeled direction guides, then erase all eight head guides.
Enlarge this picture ↗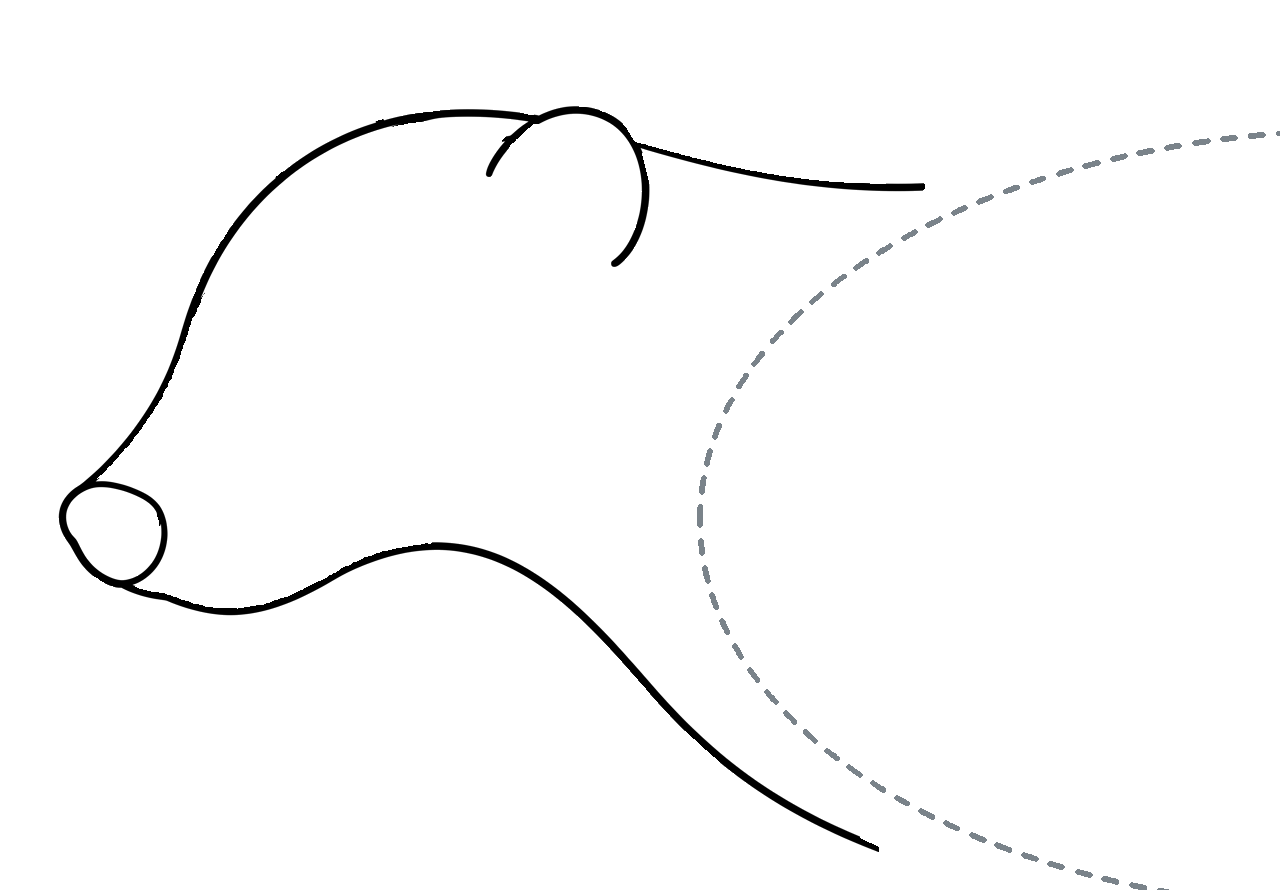
Keep the joined head and chest
Keep the joined head and chest, with only the body oval still light.
Enlarge this picture ↗Check: Keep the muzzle joined to the head and the chest joined to the neck; erase only the marked head and muzzle guides.
Goal 2 of 5
Build the front legs and keep both belly contours
Find this part on your drawing.
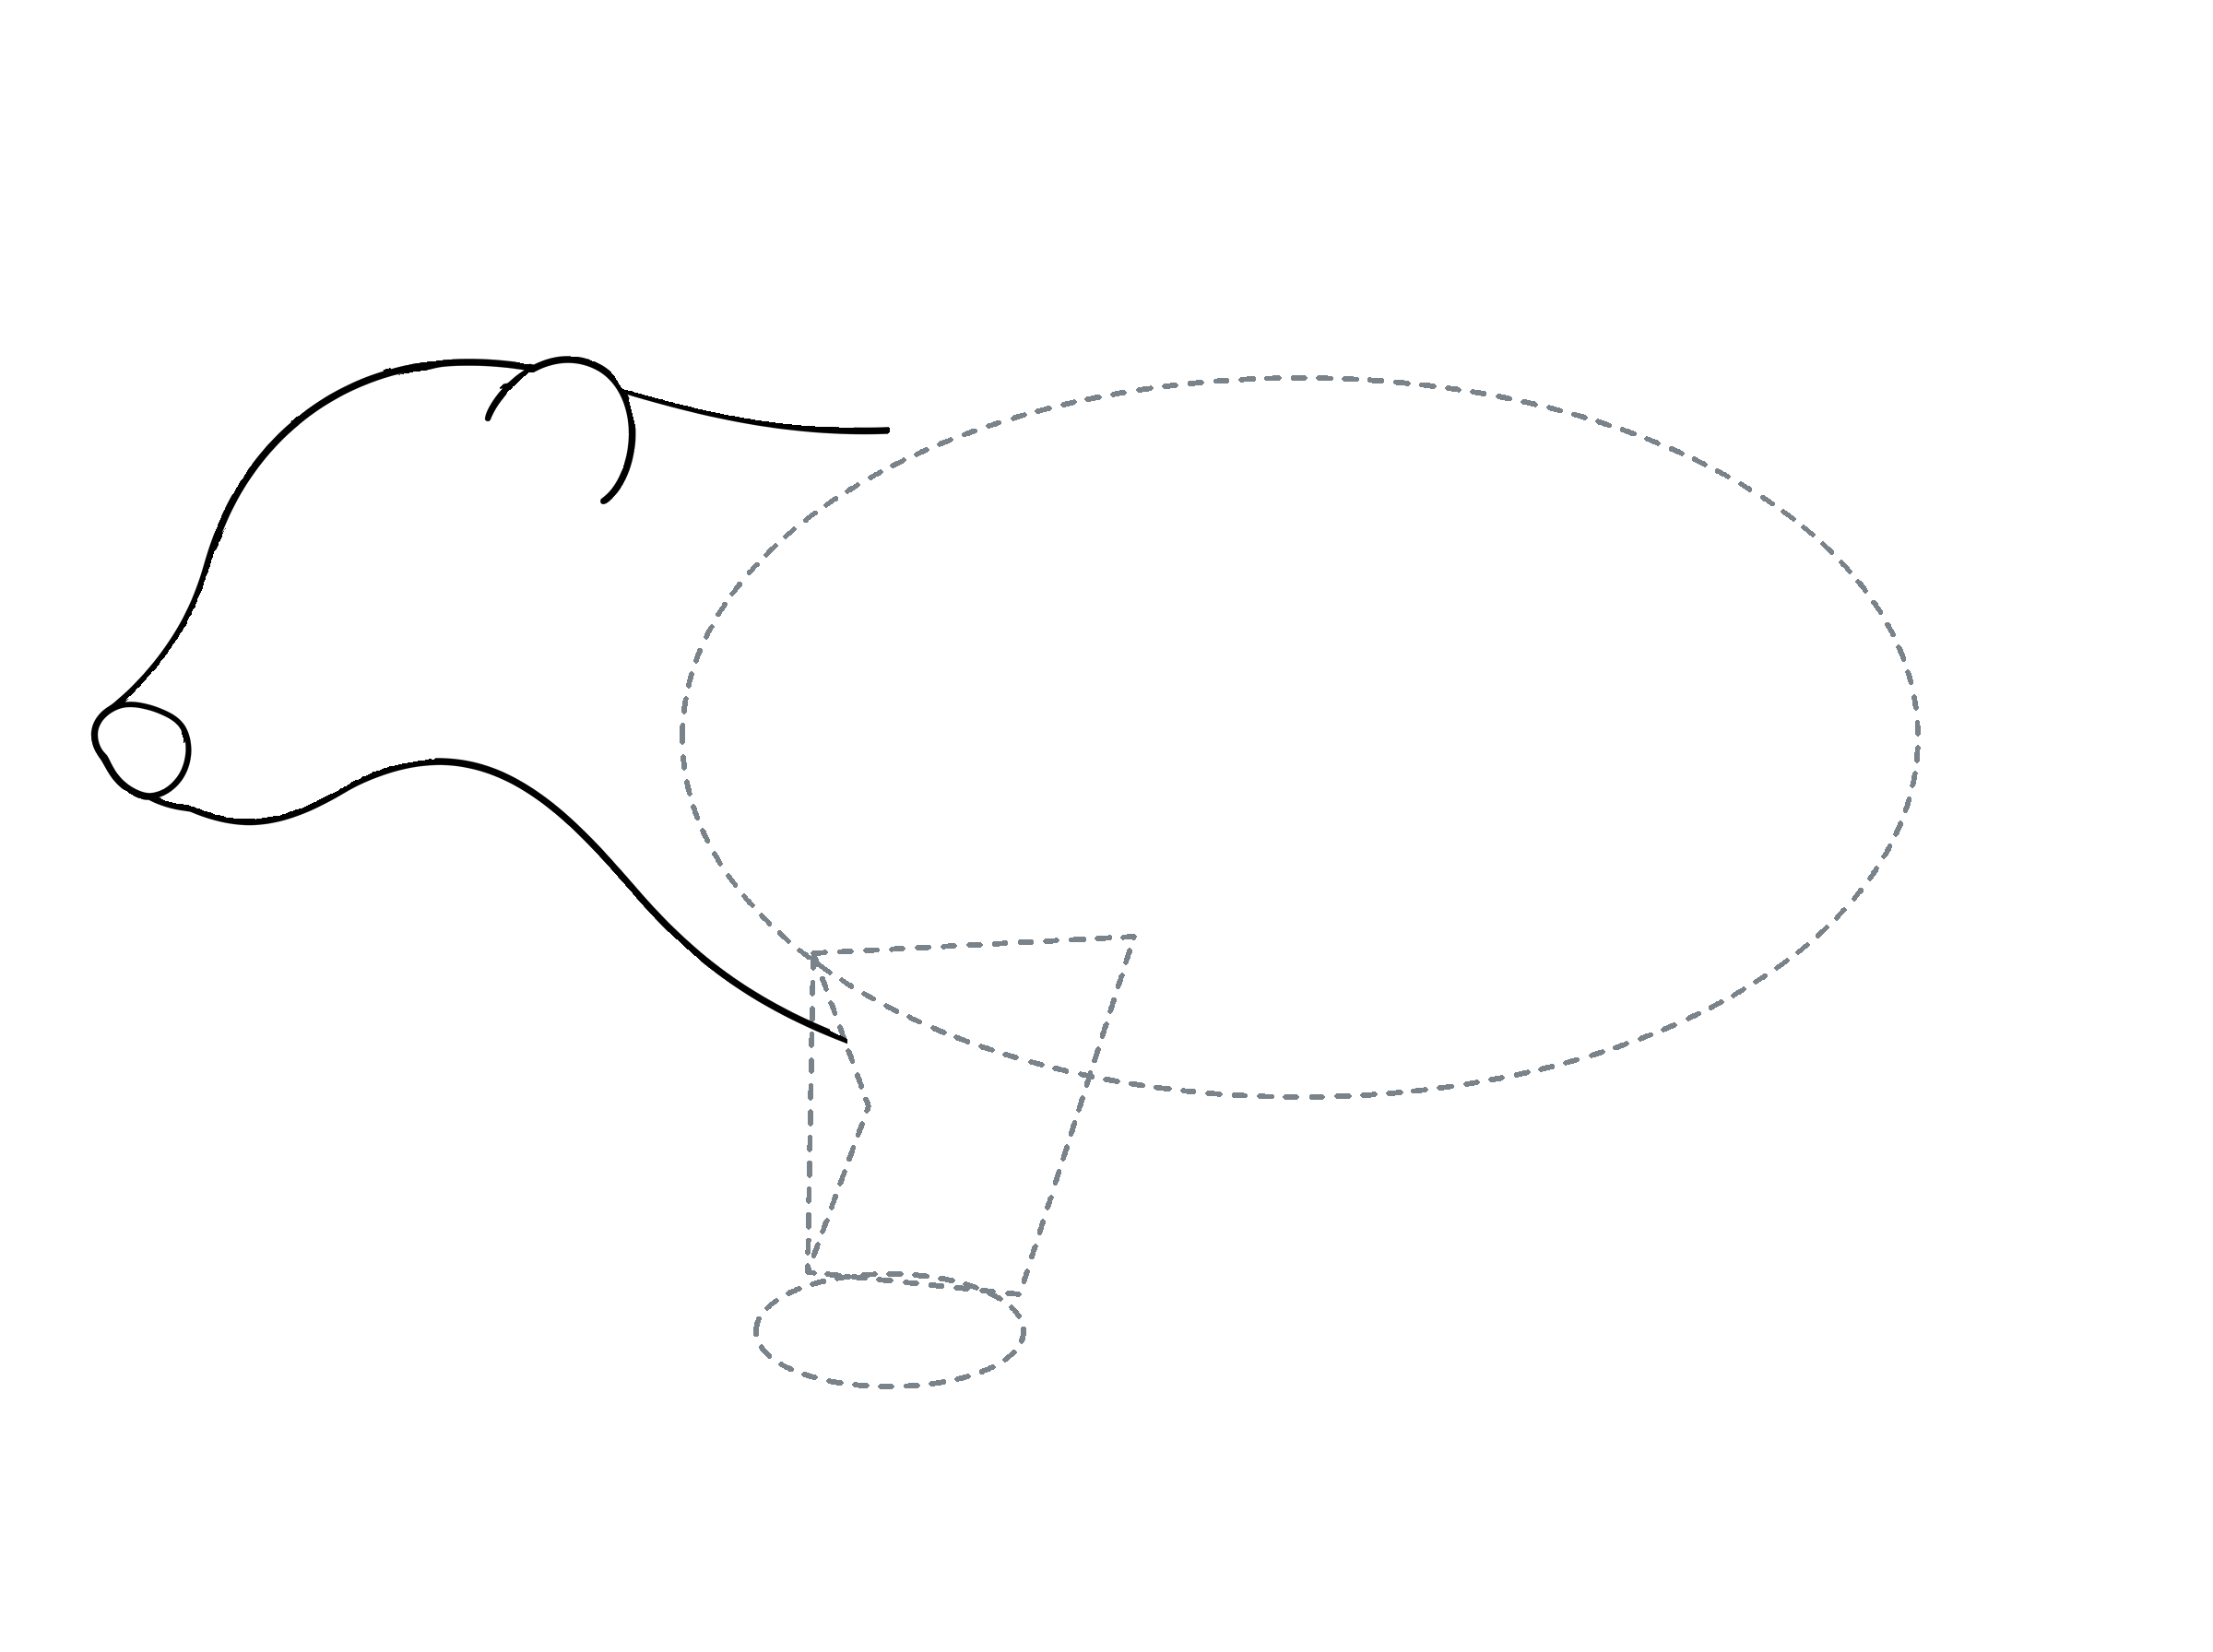
Locate the front legs
Use the whole view to locate this part, then follow the close-up pictures below.
Enlarge this picture ↗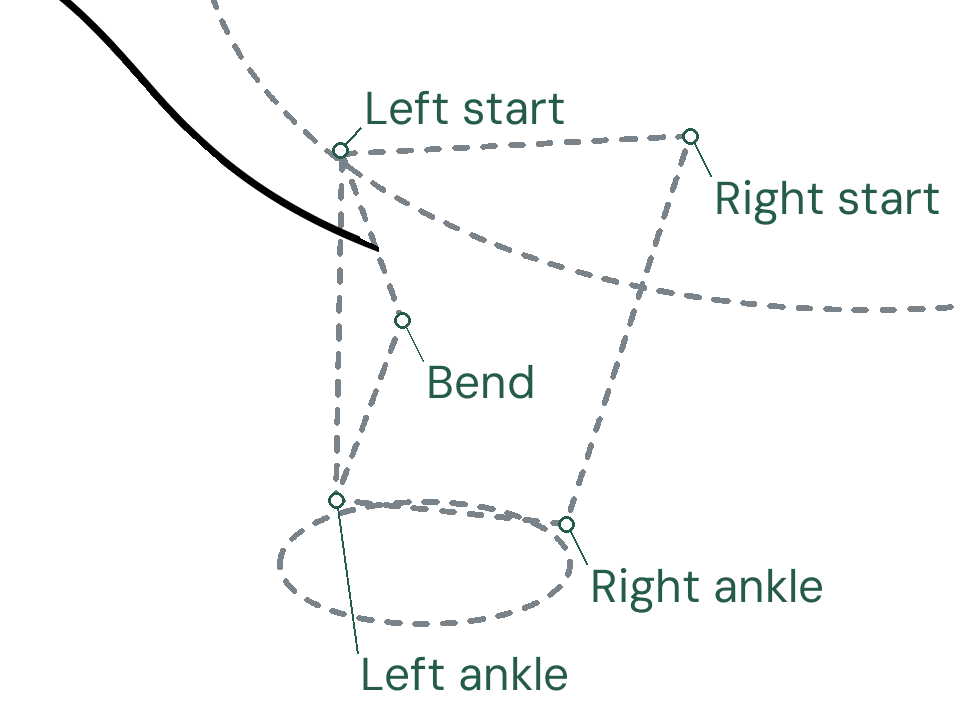
Place the near leg and rounded foot
Set the left start above-left of the chest stop; make the frame just over half a head-width wide. Add a foot oval four-fifths as wide.
Enlarge this picture ↗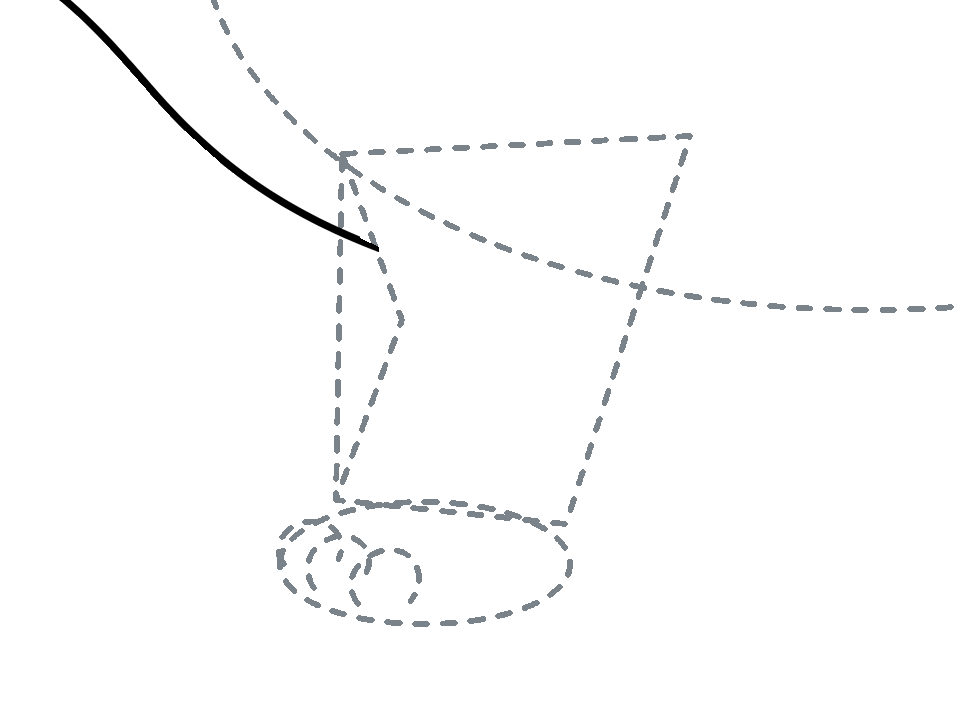
Place the three toe-rounding guides
Add three small toe guides, each one-quarter of the foot's width, stepping down-right from its front edge.
Enlarge this picture ↗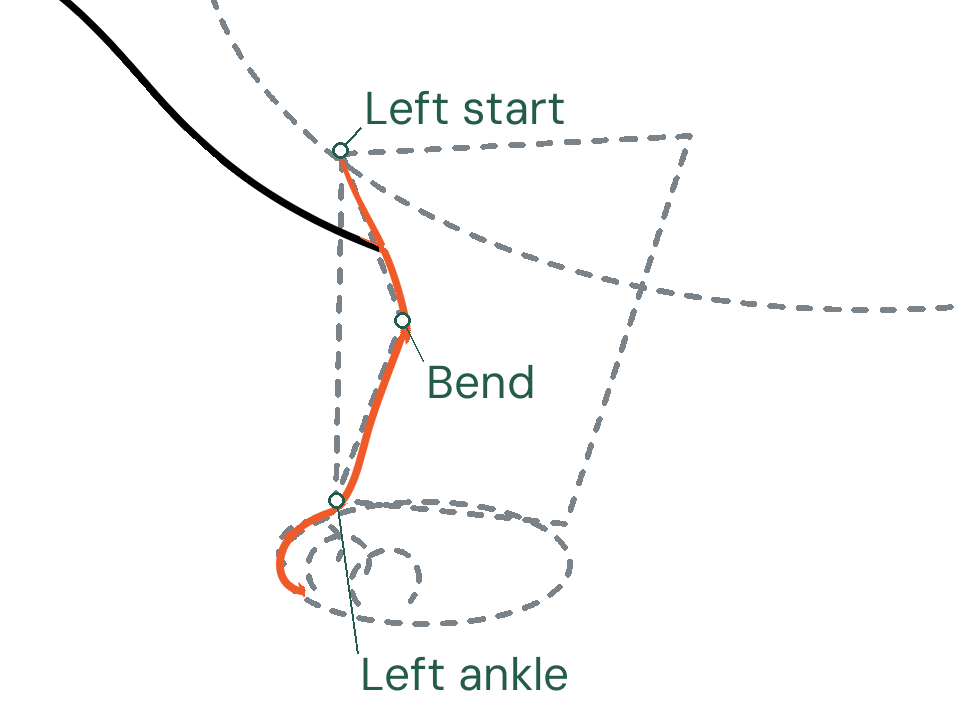
Connect the first side and toe
Follow the left-side bend to the ankle, round the first toe guide, and stop.
Enlarge this picture ↗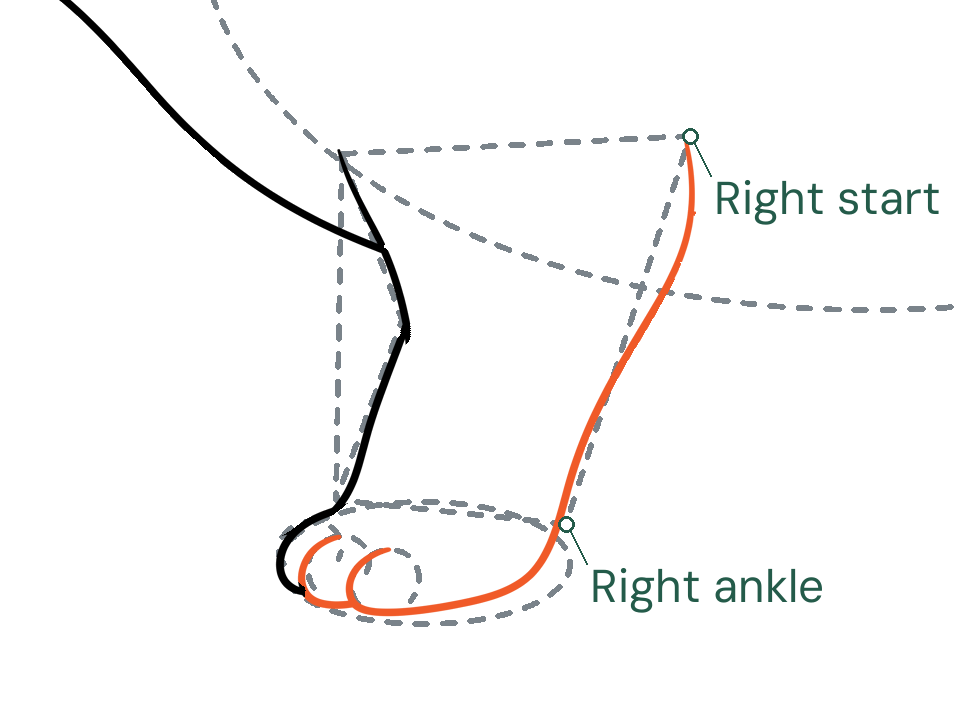
Complete the near foot
Curve the right side down to the ankle and around the foot; repeat the toe turn twice.
Enlarge this picture ↗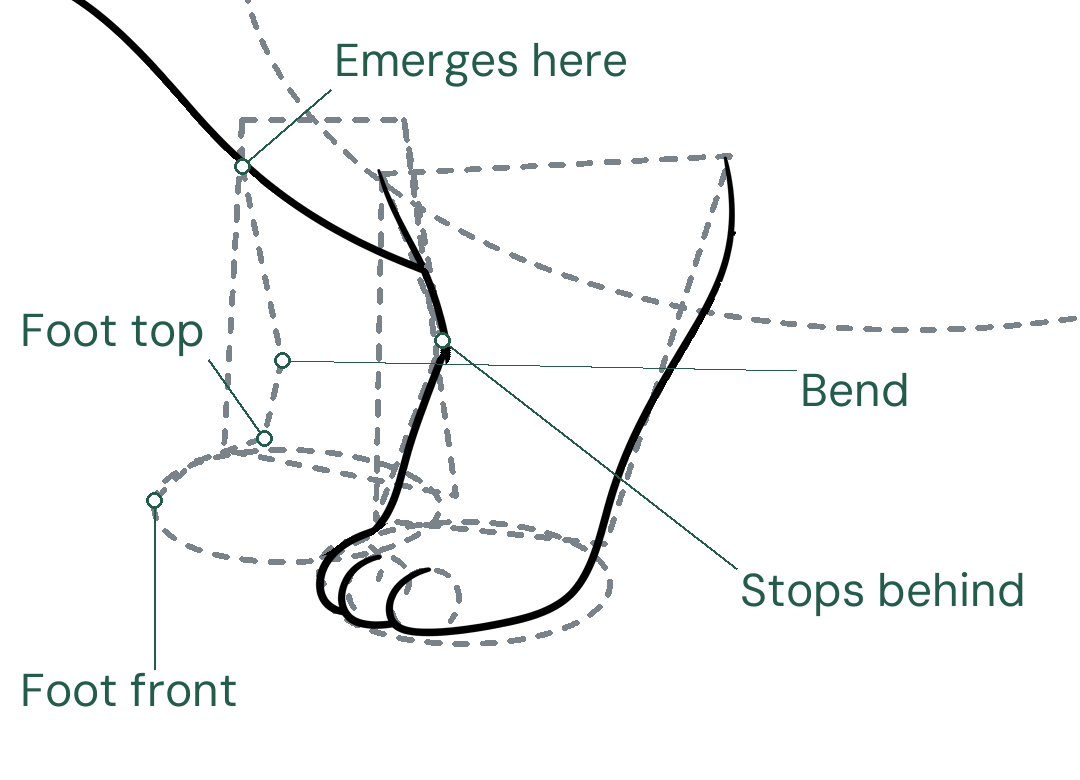
Place the far front leg behind
Place the far foot above-left, with its right tip below the near-leg bend. Add the frame with the bends level, then join the labeled foot points lightly.
Enlarge this picture ↗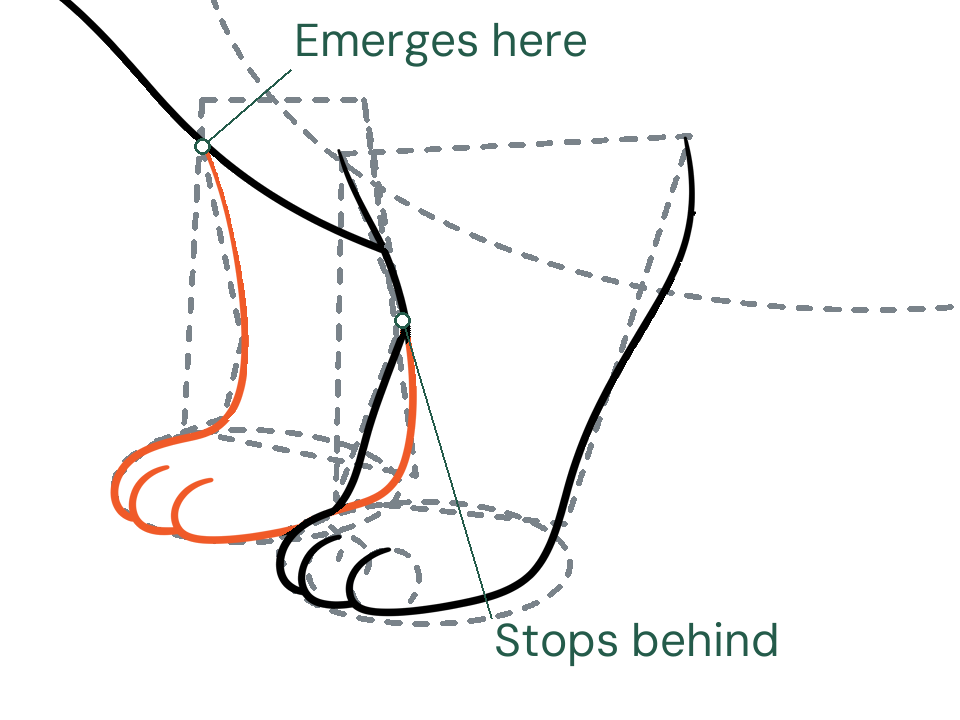
Round the far leg and stop behind
Round the far leg and repeat the three toes, then curve back to the marked stop. Keep the near leg in front.
Enlarge this picture ↗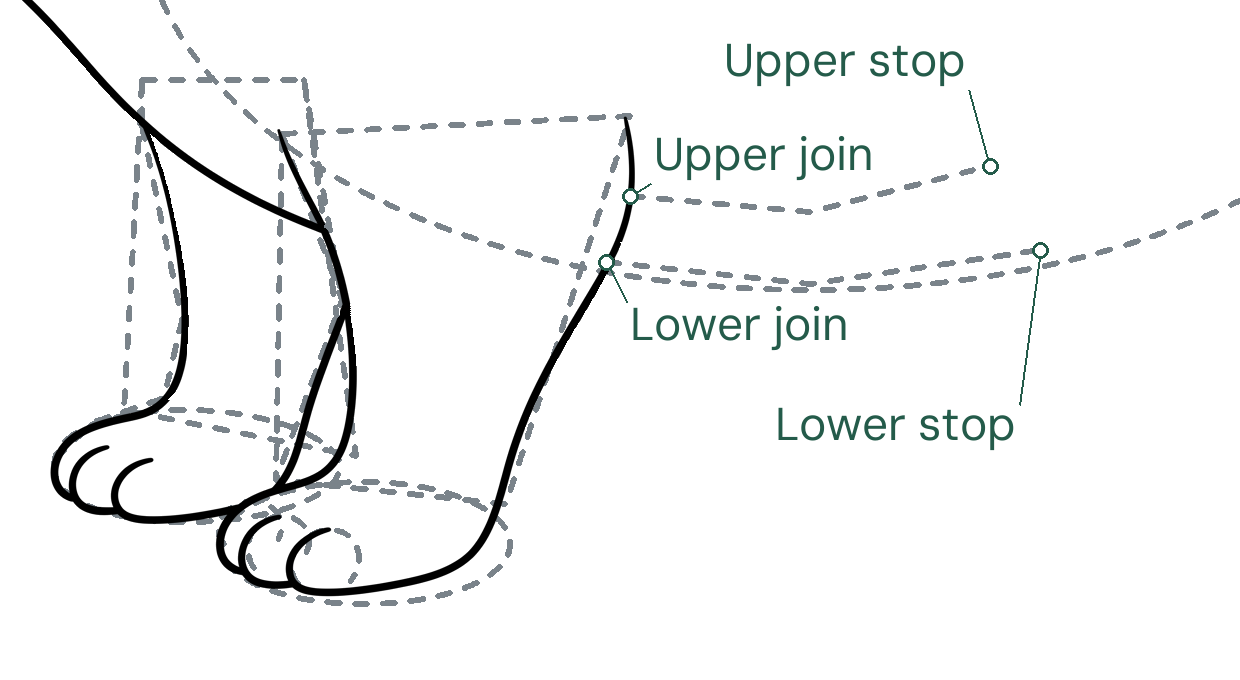
Mark both belly connections
Place the upper stop one head-width right and slightly higher; place the lower stop a nose-height below and farther right. Join each pair through a low midpoint.
Enlarge this picture ↗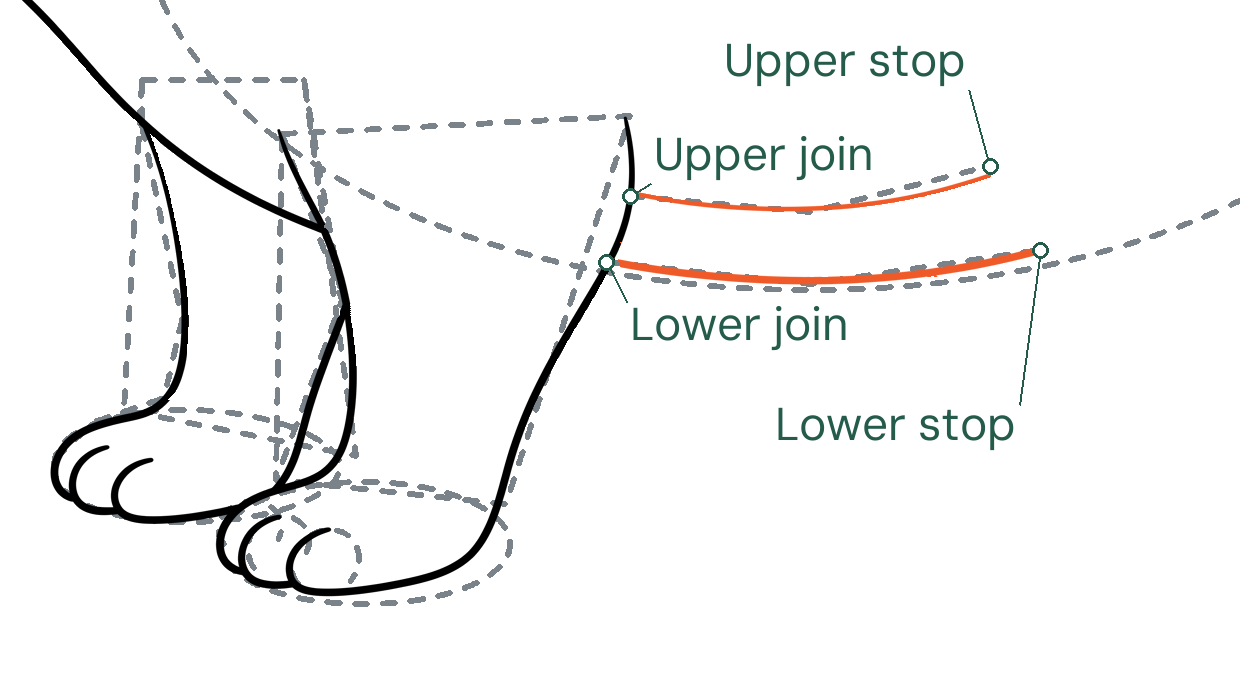
Draw both belly curves
Draw two shallow curves between the matching joins and stops, leaving a clear band between them.
Enlarge this picture ↗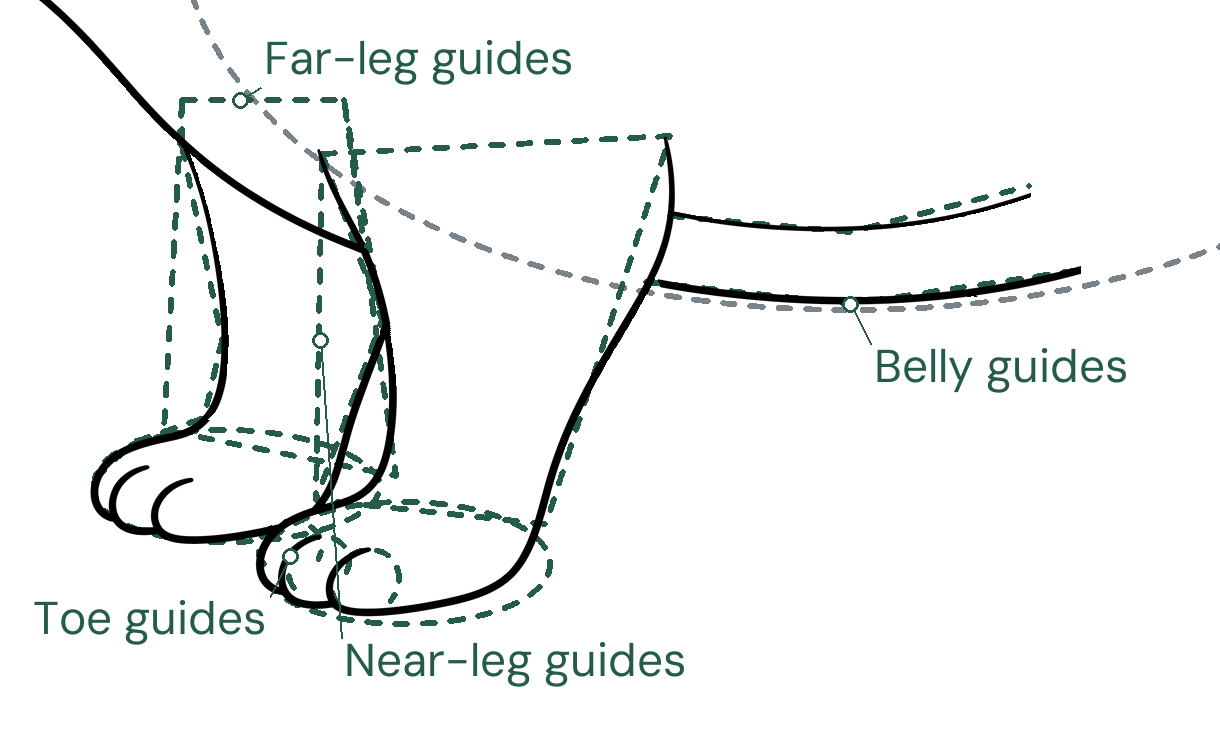
Mark the temporary leg guides
Erase the labeled leg, toe and belly guides; keep the body oval and finished lines.
Enlarge this picture ↗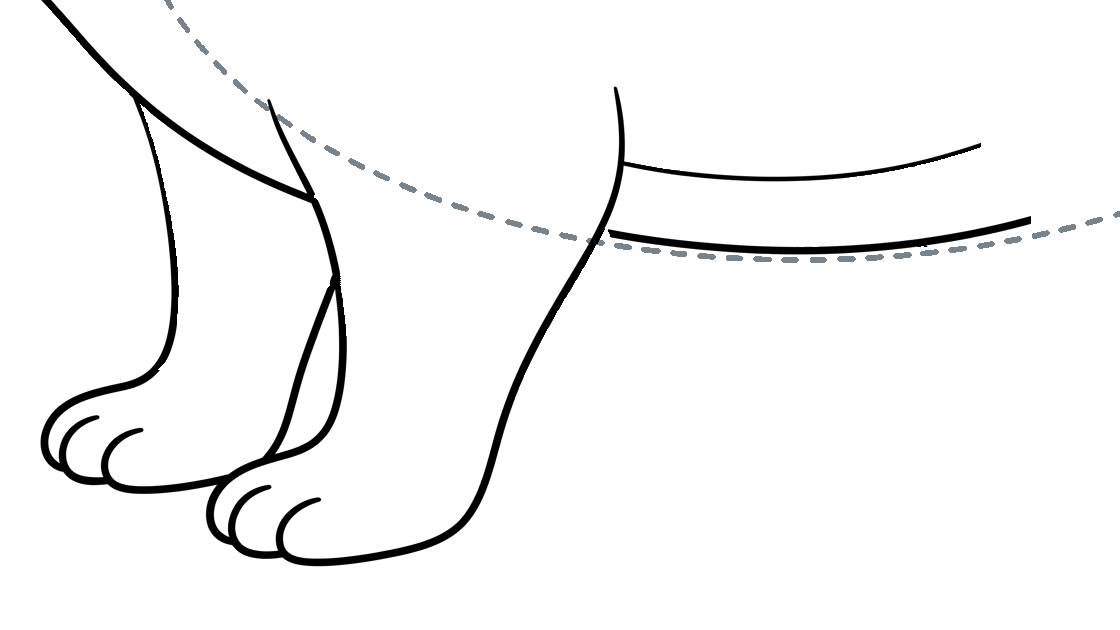
Check the two front legs
Keep both feet and belly curves, with the near leg in front and the body oval still light.
Enlarge this picture ↗Check: Keep both belly edges and the visible edges of each front leg; remove the hidden line above the far leg.
Goal 3 of 5
Build the body and rear legs
Find this part on your drawing.
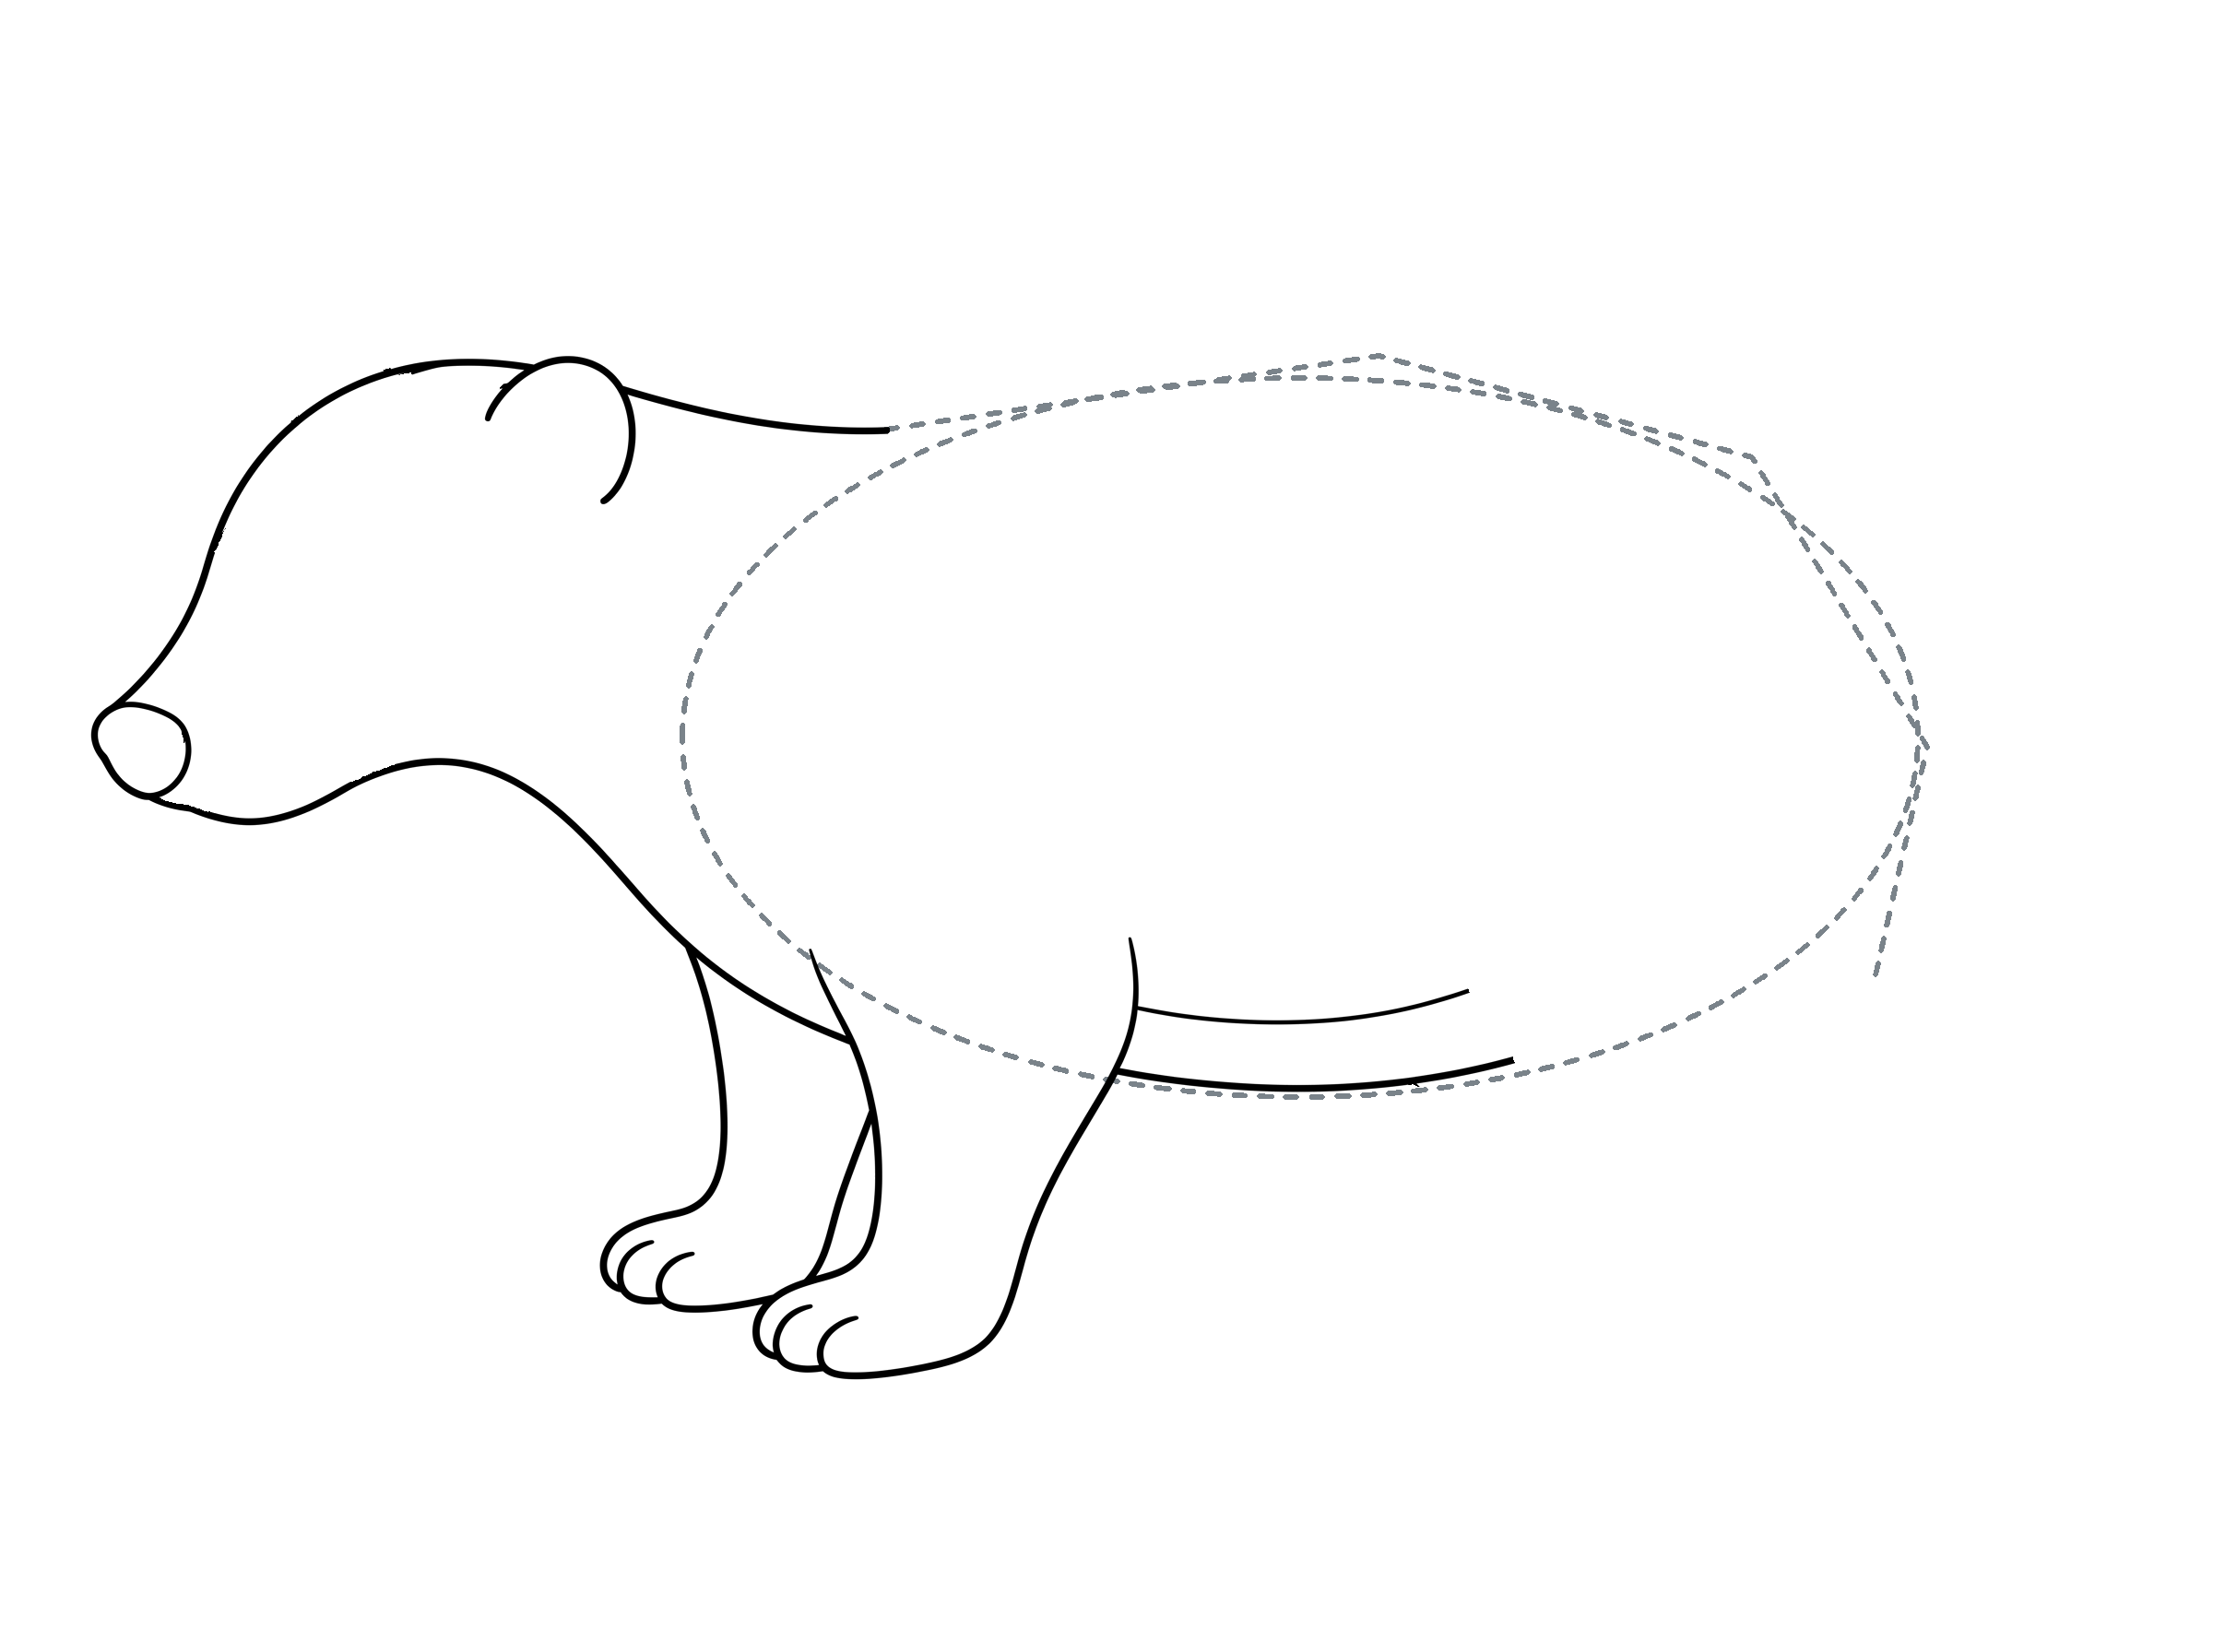
Locate the body and rear legs
Use the whole view to locate this part, then follow the close-up pictures below.
Enlarge this picture ↗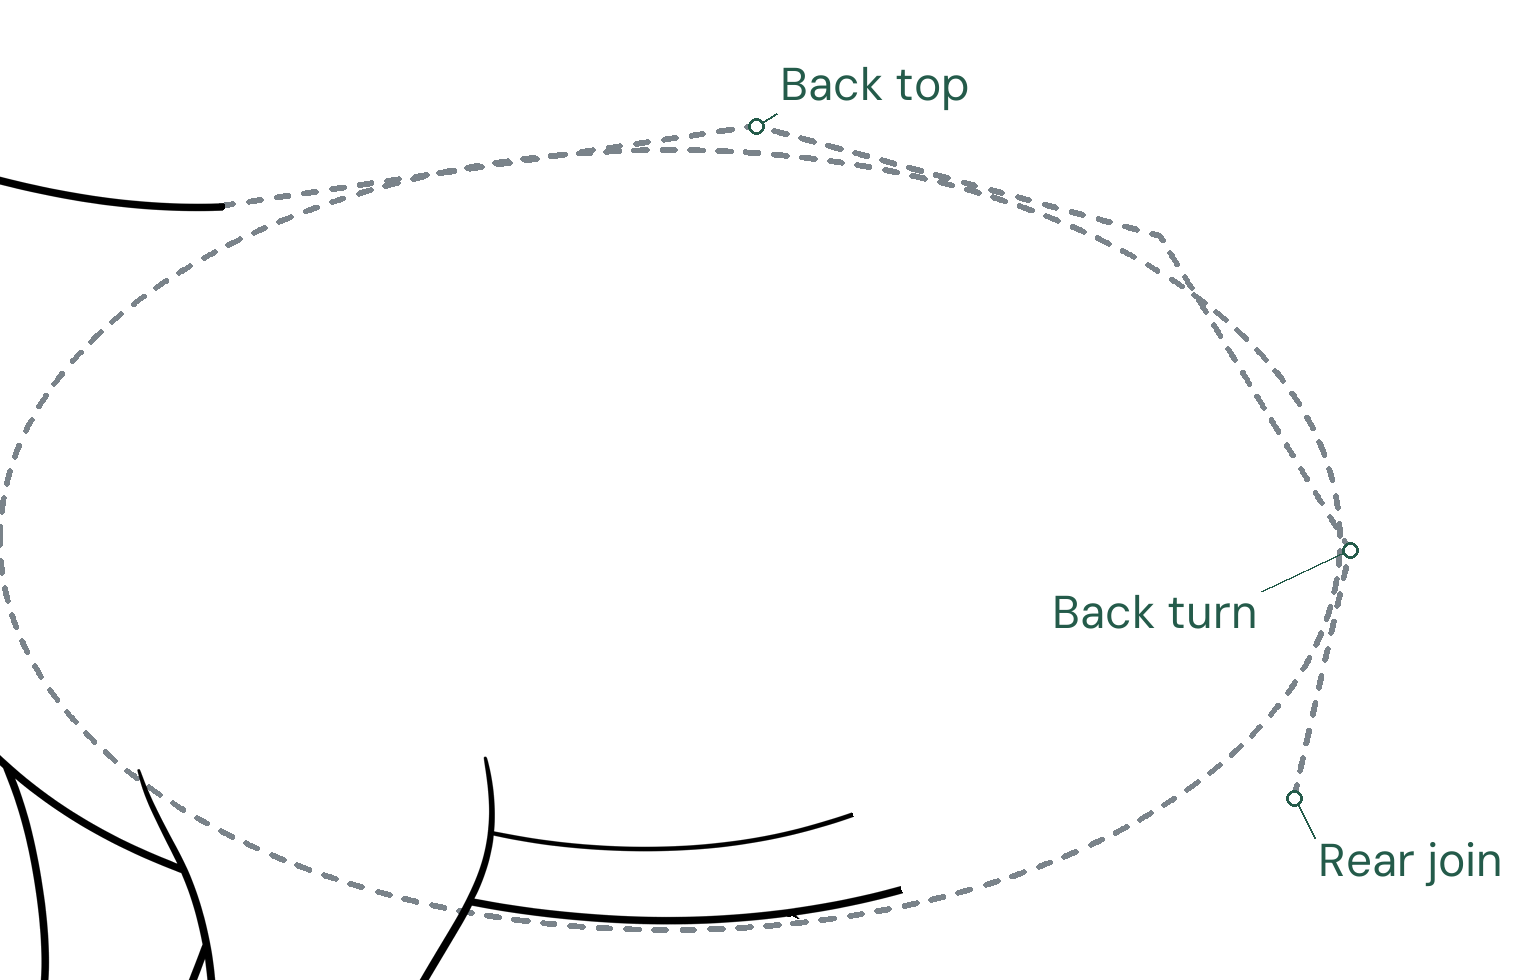
Place the back turns
Mark the back's top above the body oval and its right turn beside the oval; join these marks to the neck stop and rear join.
Enlarge this picture ↗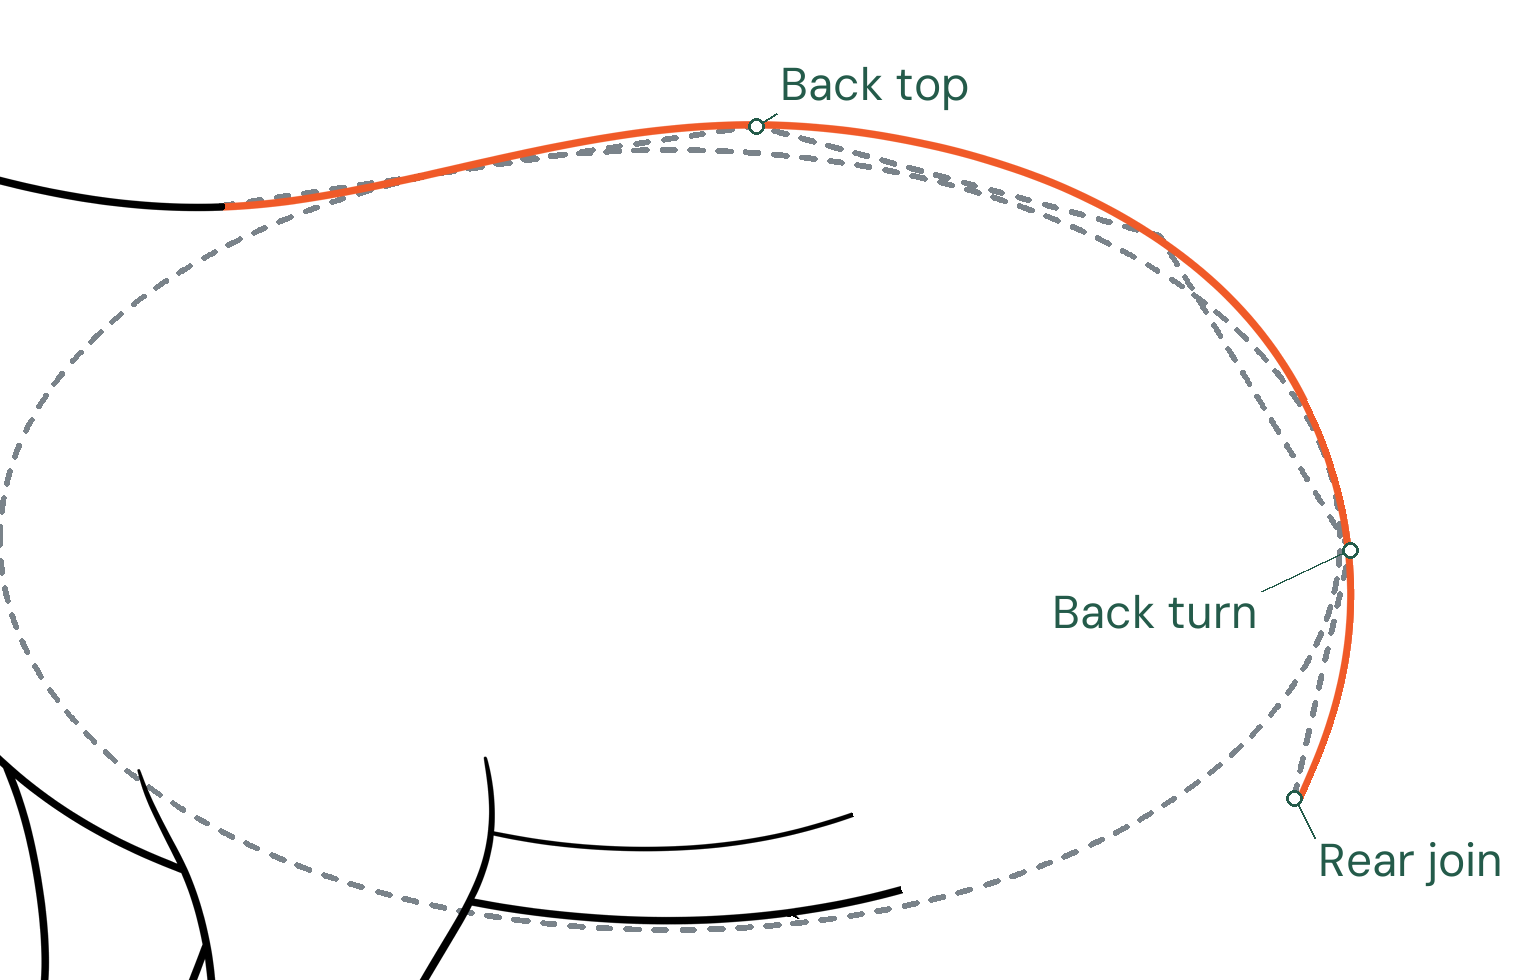
Round the back
Curve from the neck stop over the back top and around the right turn to the rear join.
Enlarge this picture ↗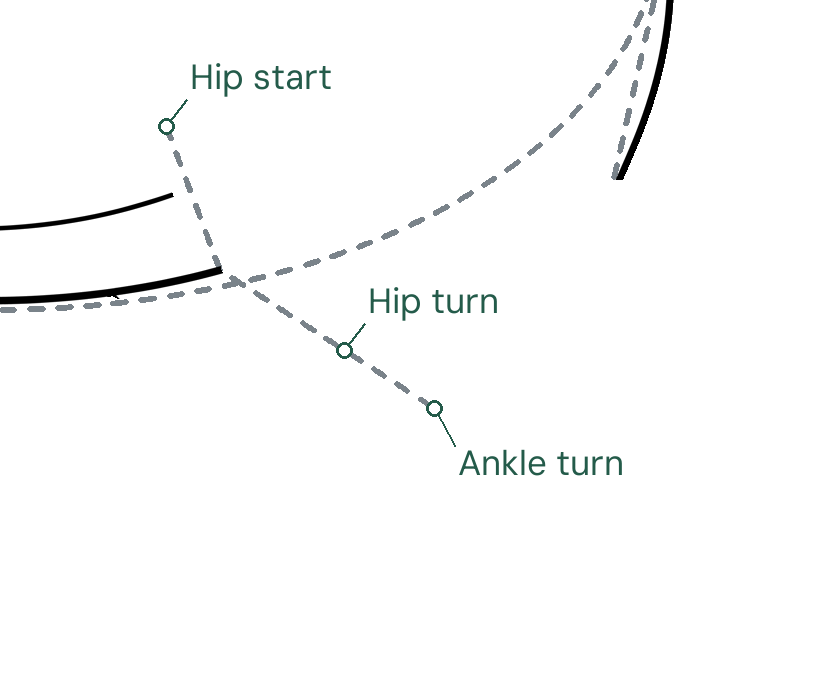
Place the near rear leg
Start the rear-leg frame above the upper belly stop; place its hip turn below the belly and its ankle turn down-right. Join these points lightly.
Enlarge this picture ↗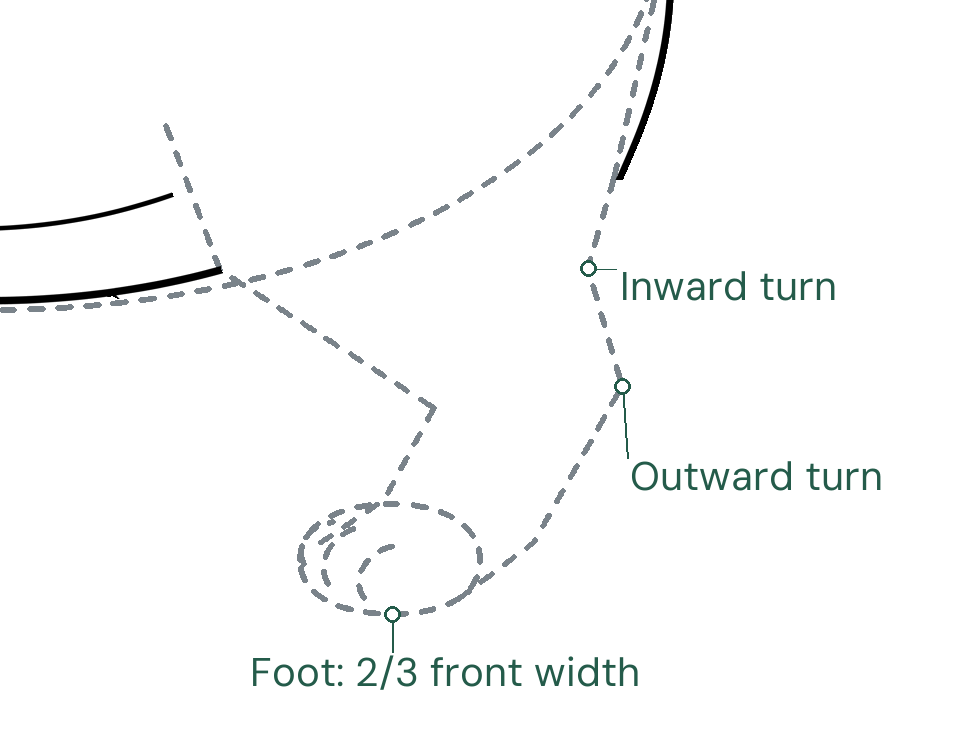
Place the other side and foot
Place the inward turn below the rear join and the outward turn level with the ankle. Add the foot oval level with the front foot and repeat three toe guides.
Enlarge this picture ↗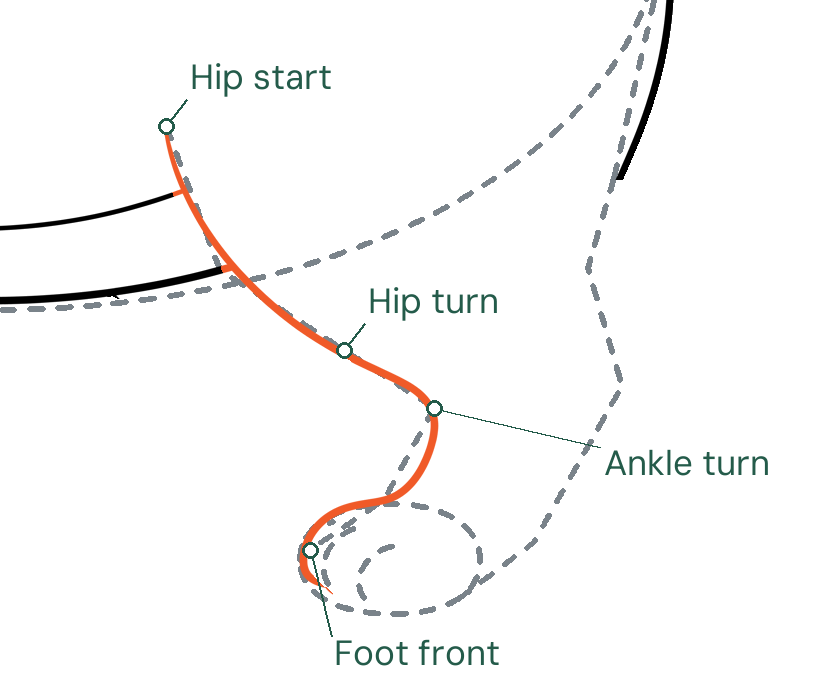
Join the hip to the first toe
Round from the hip start through the hip and ankle turns, then curve down to the first toe.
Enlarge this picture ↗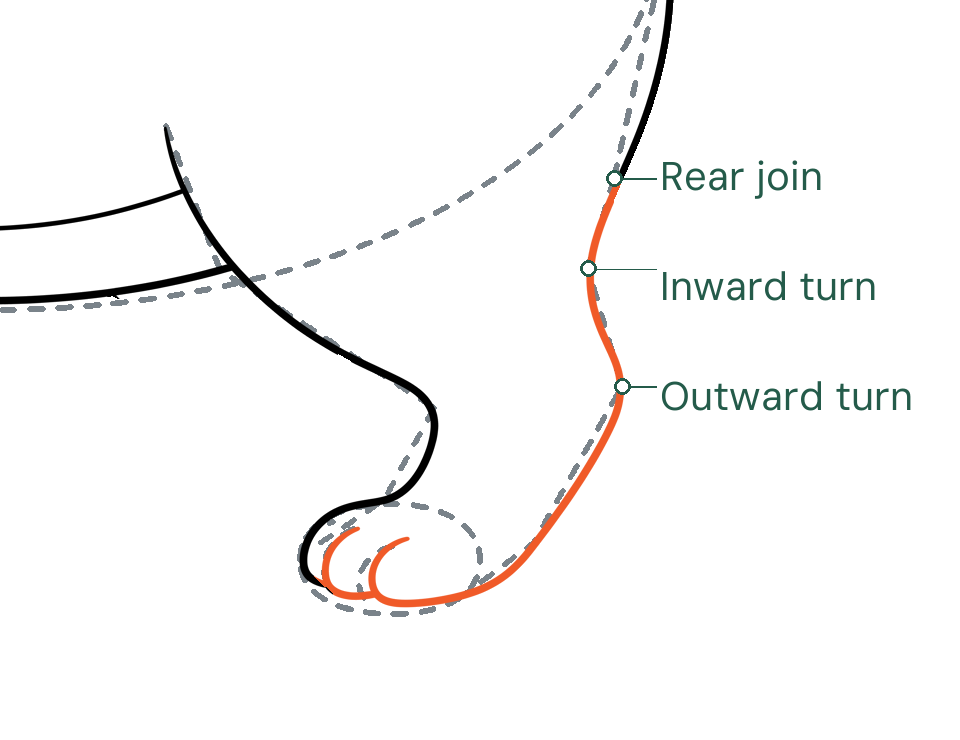
Complete the near rear foot
Curve from the rear join through the inward and outward turns to the foot; repeat the two remaining toe curves.
Enlarge this picture ↗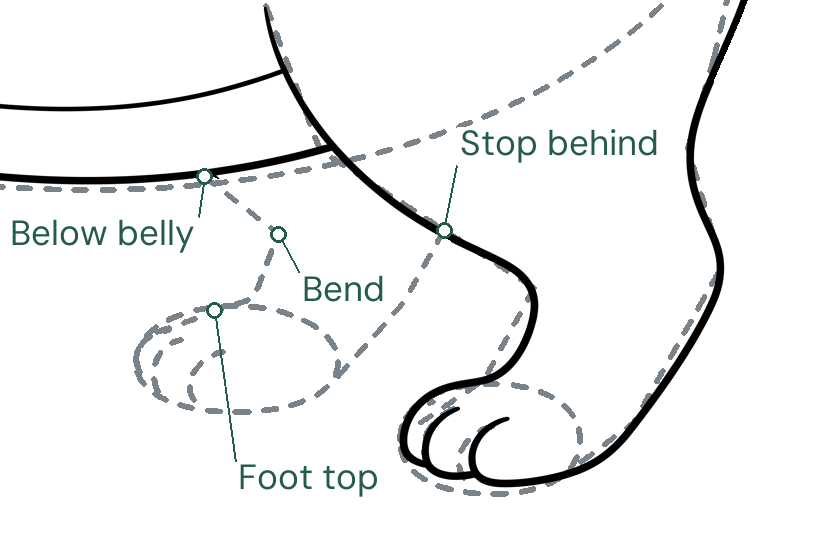
Place the far rear leg
Start below the lower belly and bend toward a smaller foot oval above-left of the near foot. End its back edge at the marked stop behind the near leg.
Enlarge this picture ↗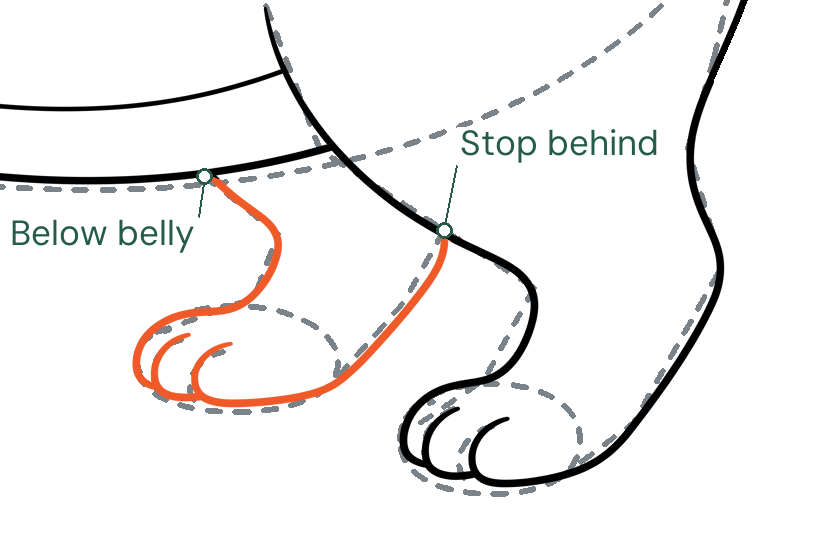
Round the far rear foot
Round the frame and repeat the three toes, then return to the stop behind the near leg.
Enlarge this picture ↗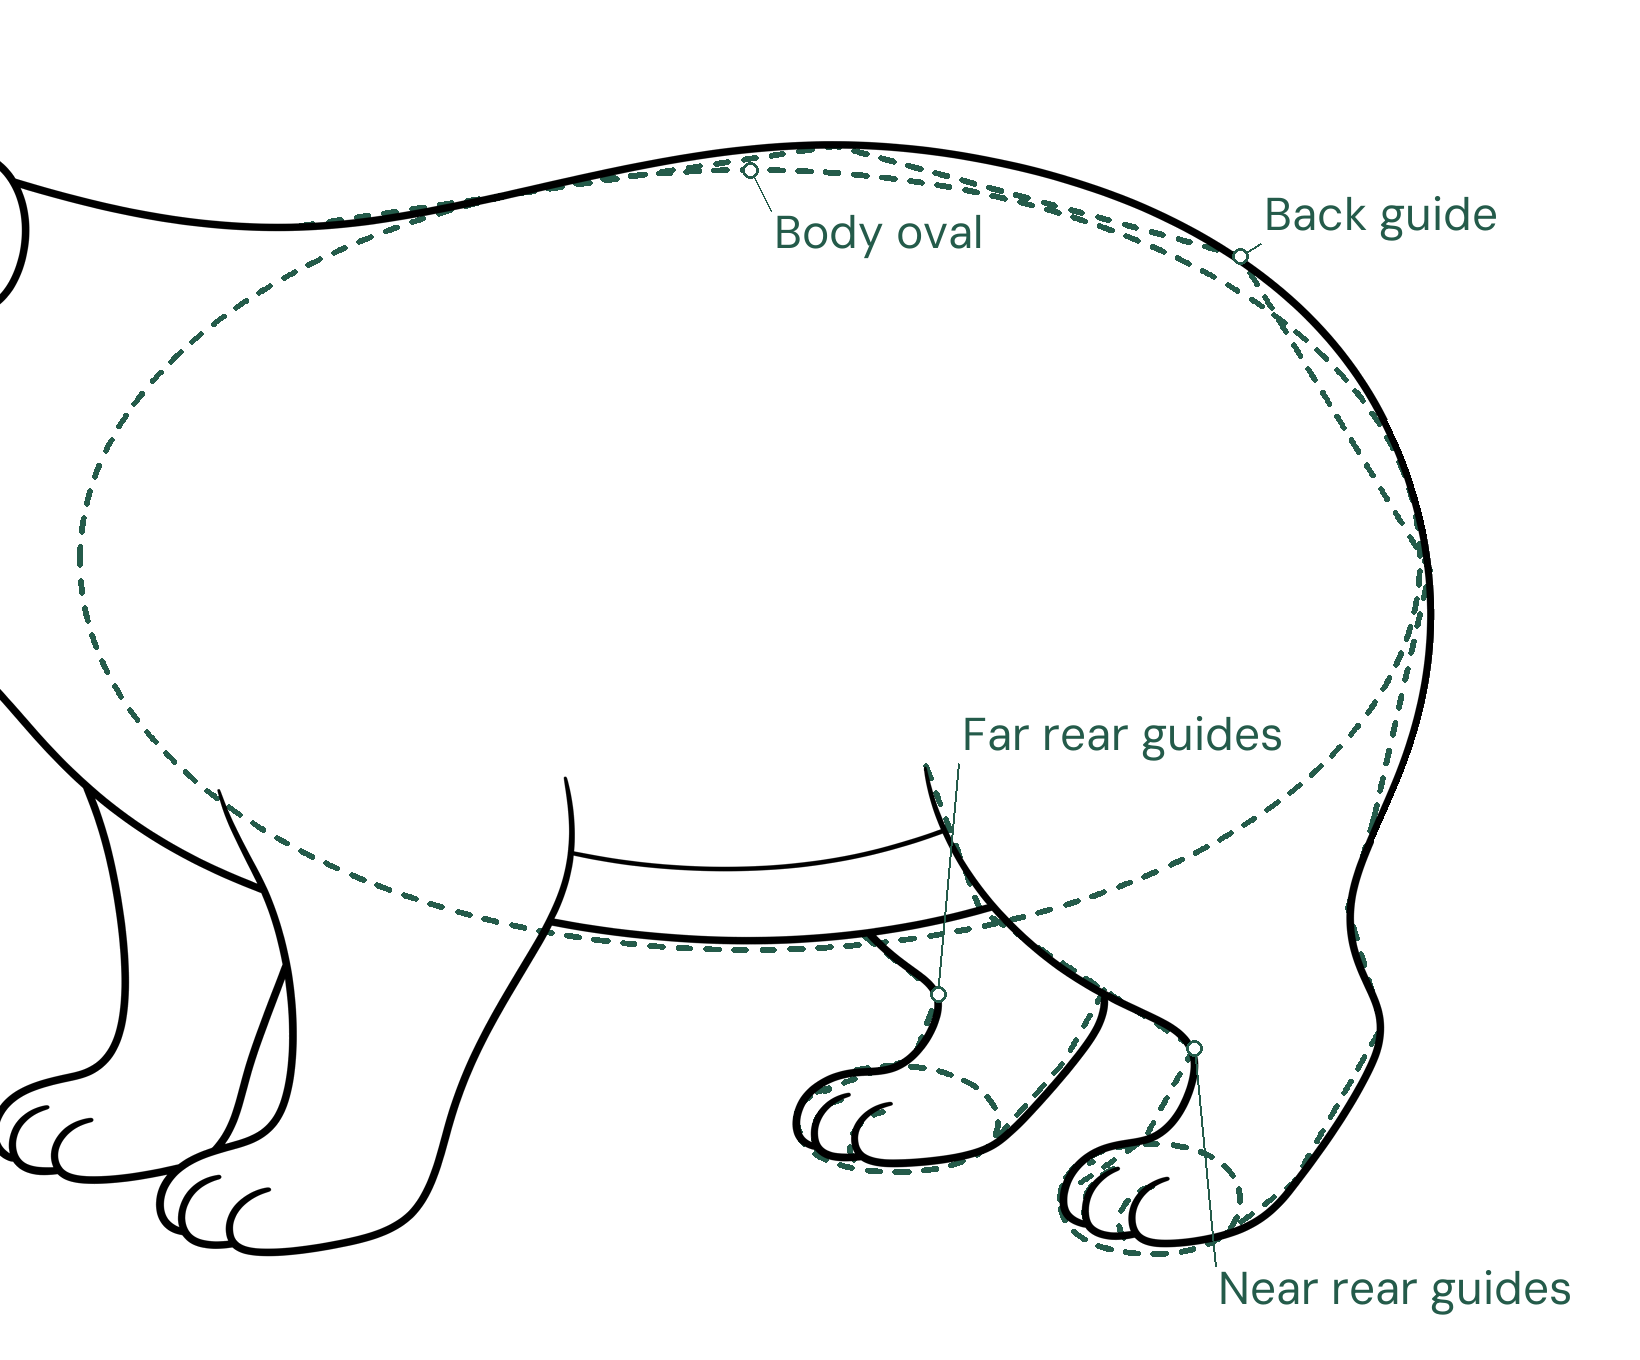
Erase the body and rear guides
Erase the labeled body, back and rear-leg guides; keep the finished back, all four feet and both belly curves.
Enlarge this picture ↗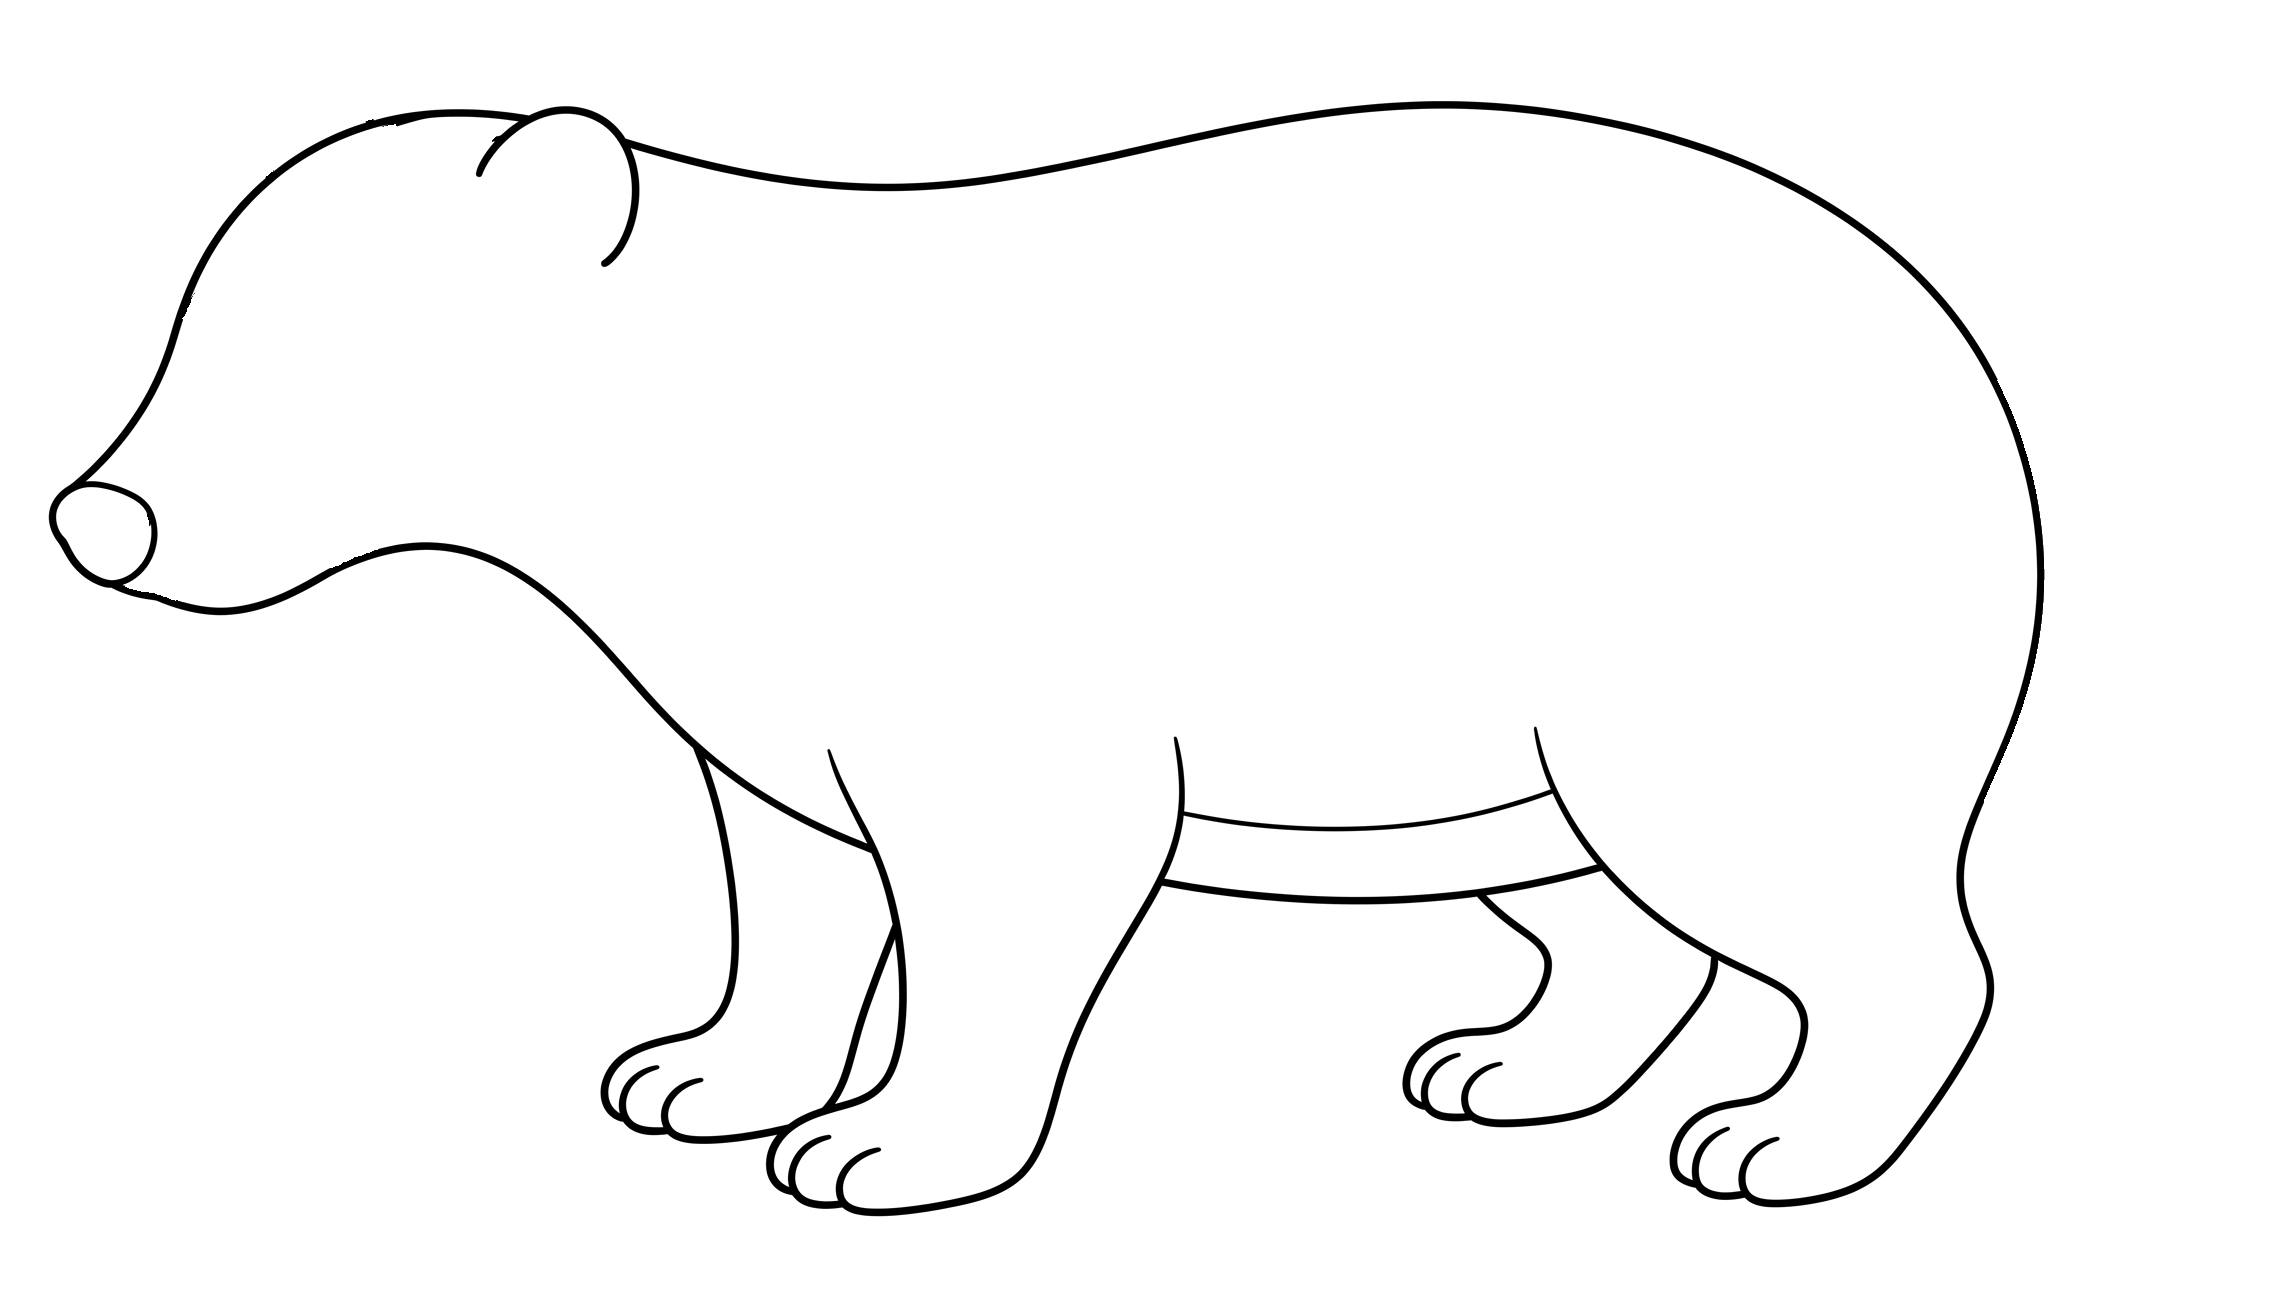
Keep the connected body
Keep the connected back and four legs, with the far legs ending behind the near legs.
Enlarge this picture ↗Check: Keep the far rear leg behind the near leg and both feet joined to their leg curves; erase the body and rear-leg guides.
Goal 4 of 5
Connect the tail
Find this part on your drawing.
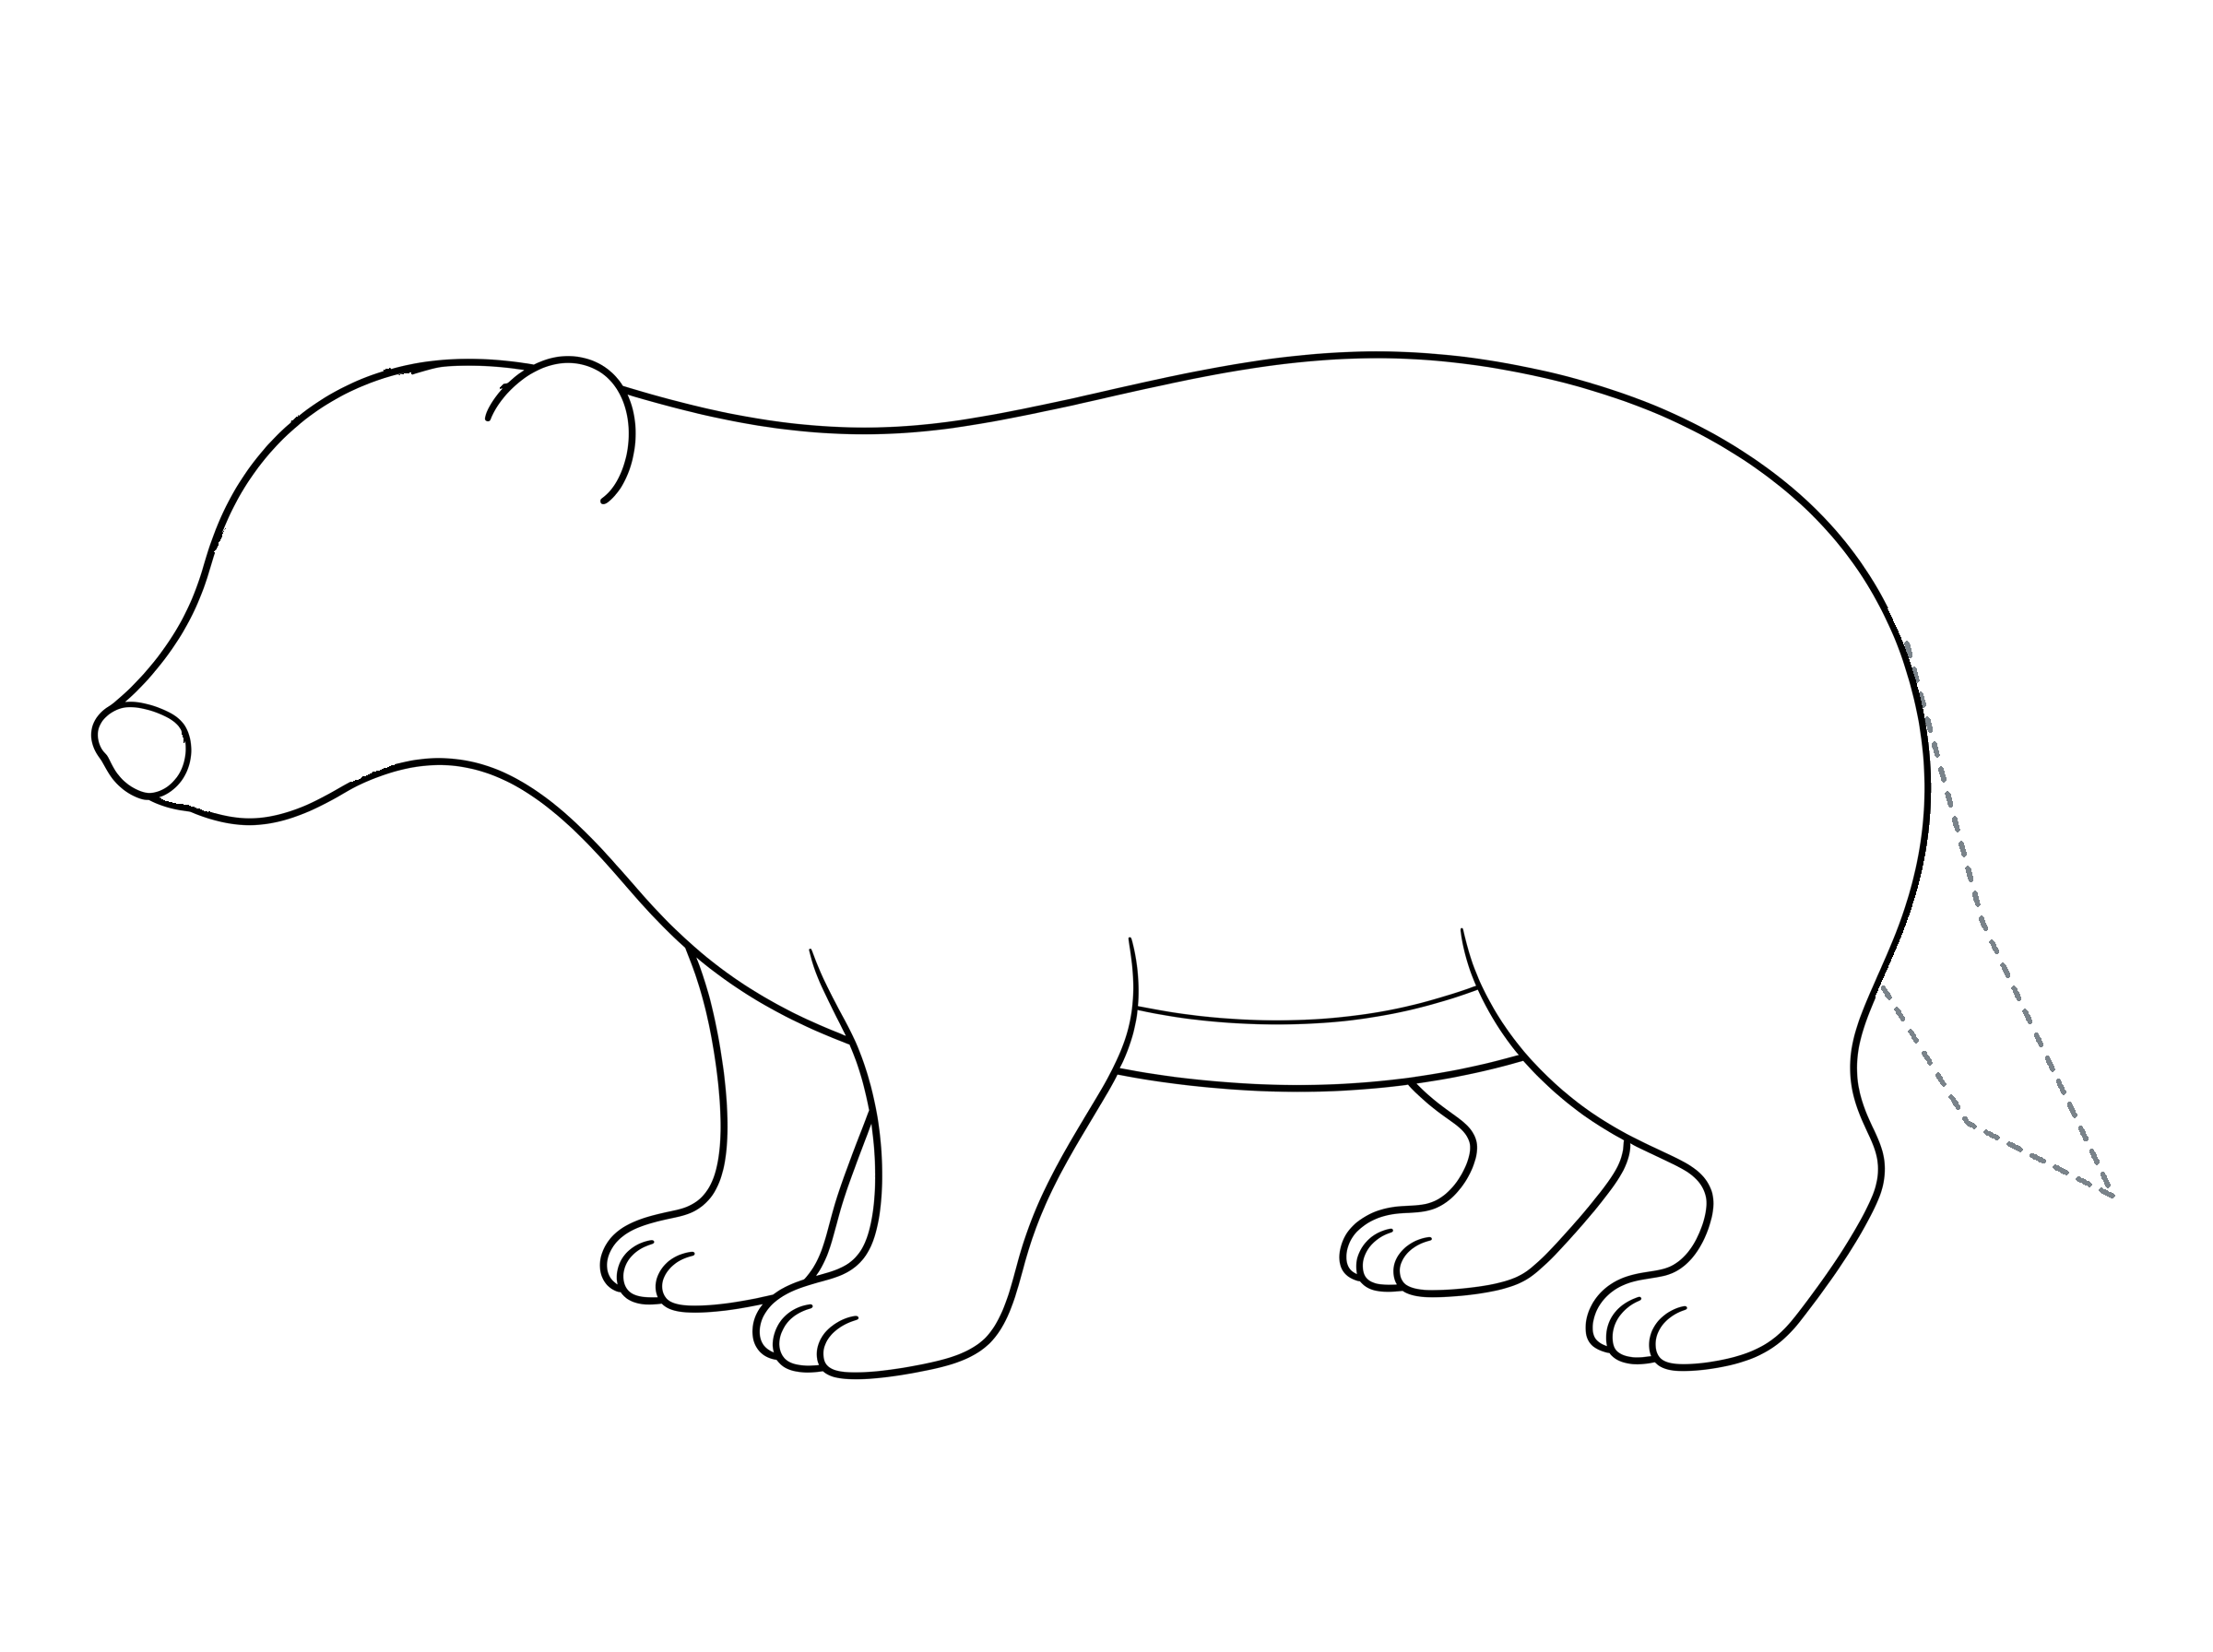
Locate the tail
Use the whole view to locate this part, then follow the close-up pictures below.
Enlarge this picture ↗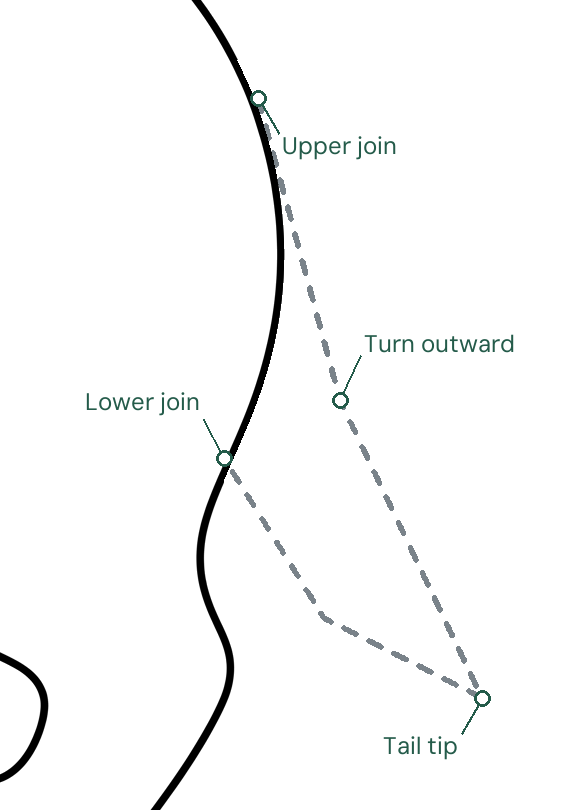
Place the tail wedge
Place the tail tip below-right of the body, level with the rear ankle; join it lightly to both marked body points.
Enlarge this picture ↗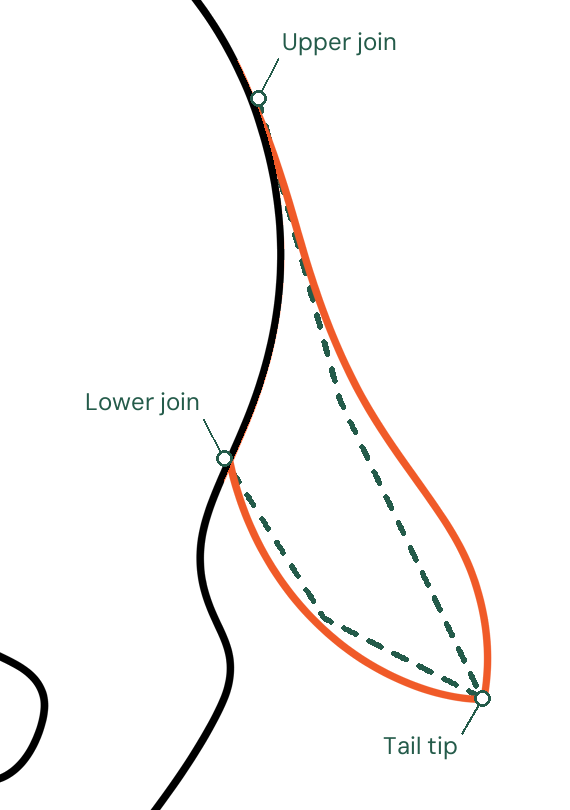
Round both tail sides
Curve outward from the upper join to the tip, then curve back to the lower join; erase the tail wedge.
Enlarge this picture ↗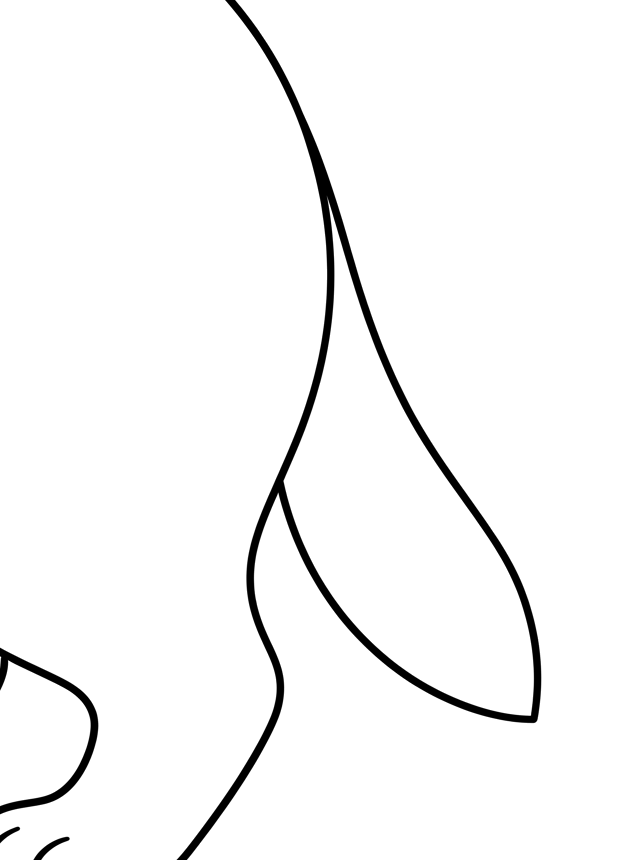
Keep the tail behind
Keep both tail edges connected behind the body.
Enlarge this picture ↗Check: Join both tail edges to the body and remove the light wedge inside the tail.
Goal 5 of 5
Build the face details
Find this part on your drawing.
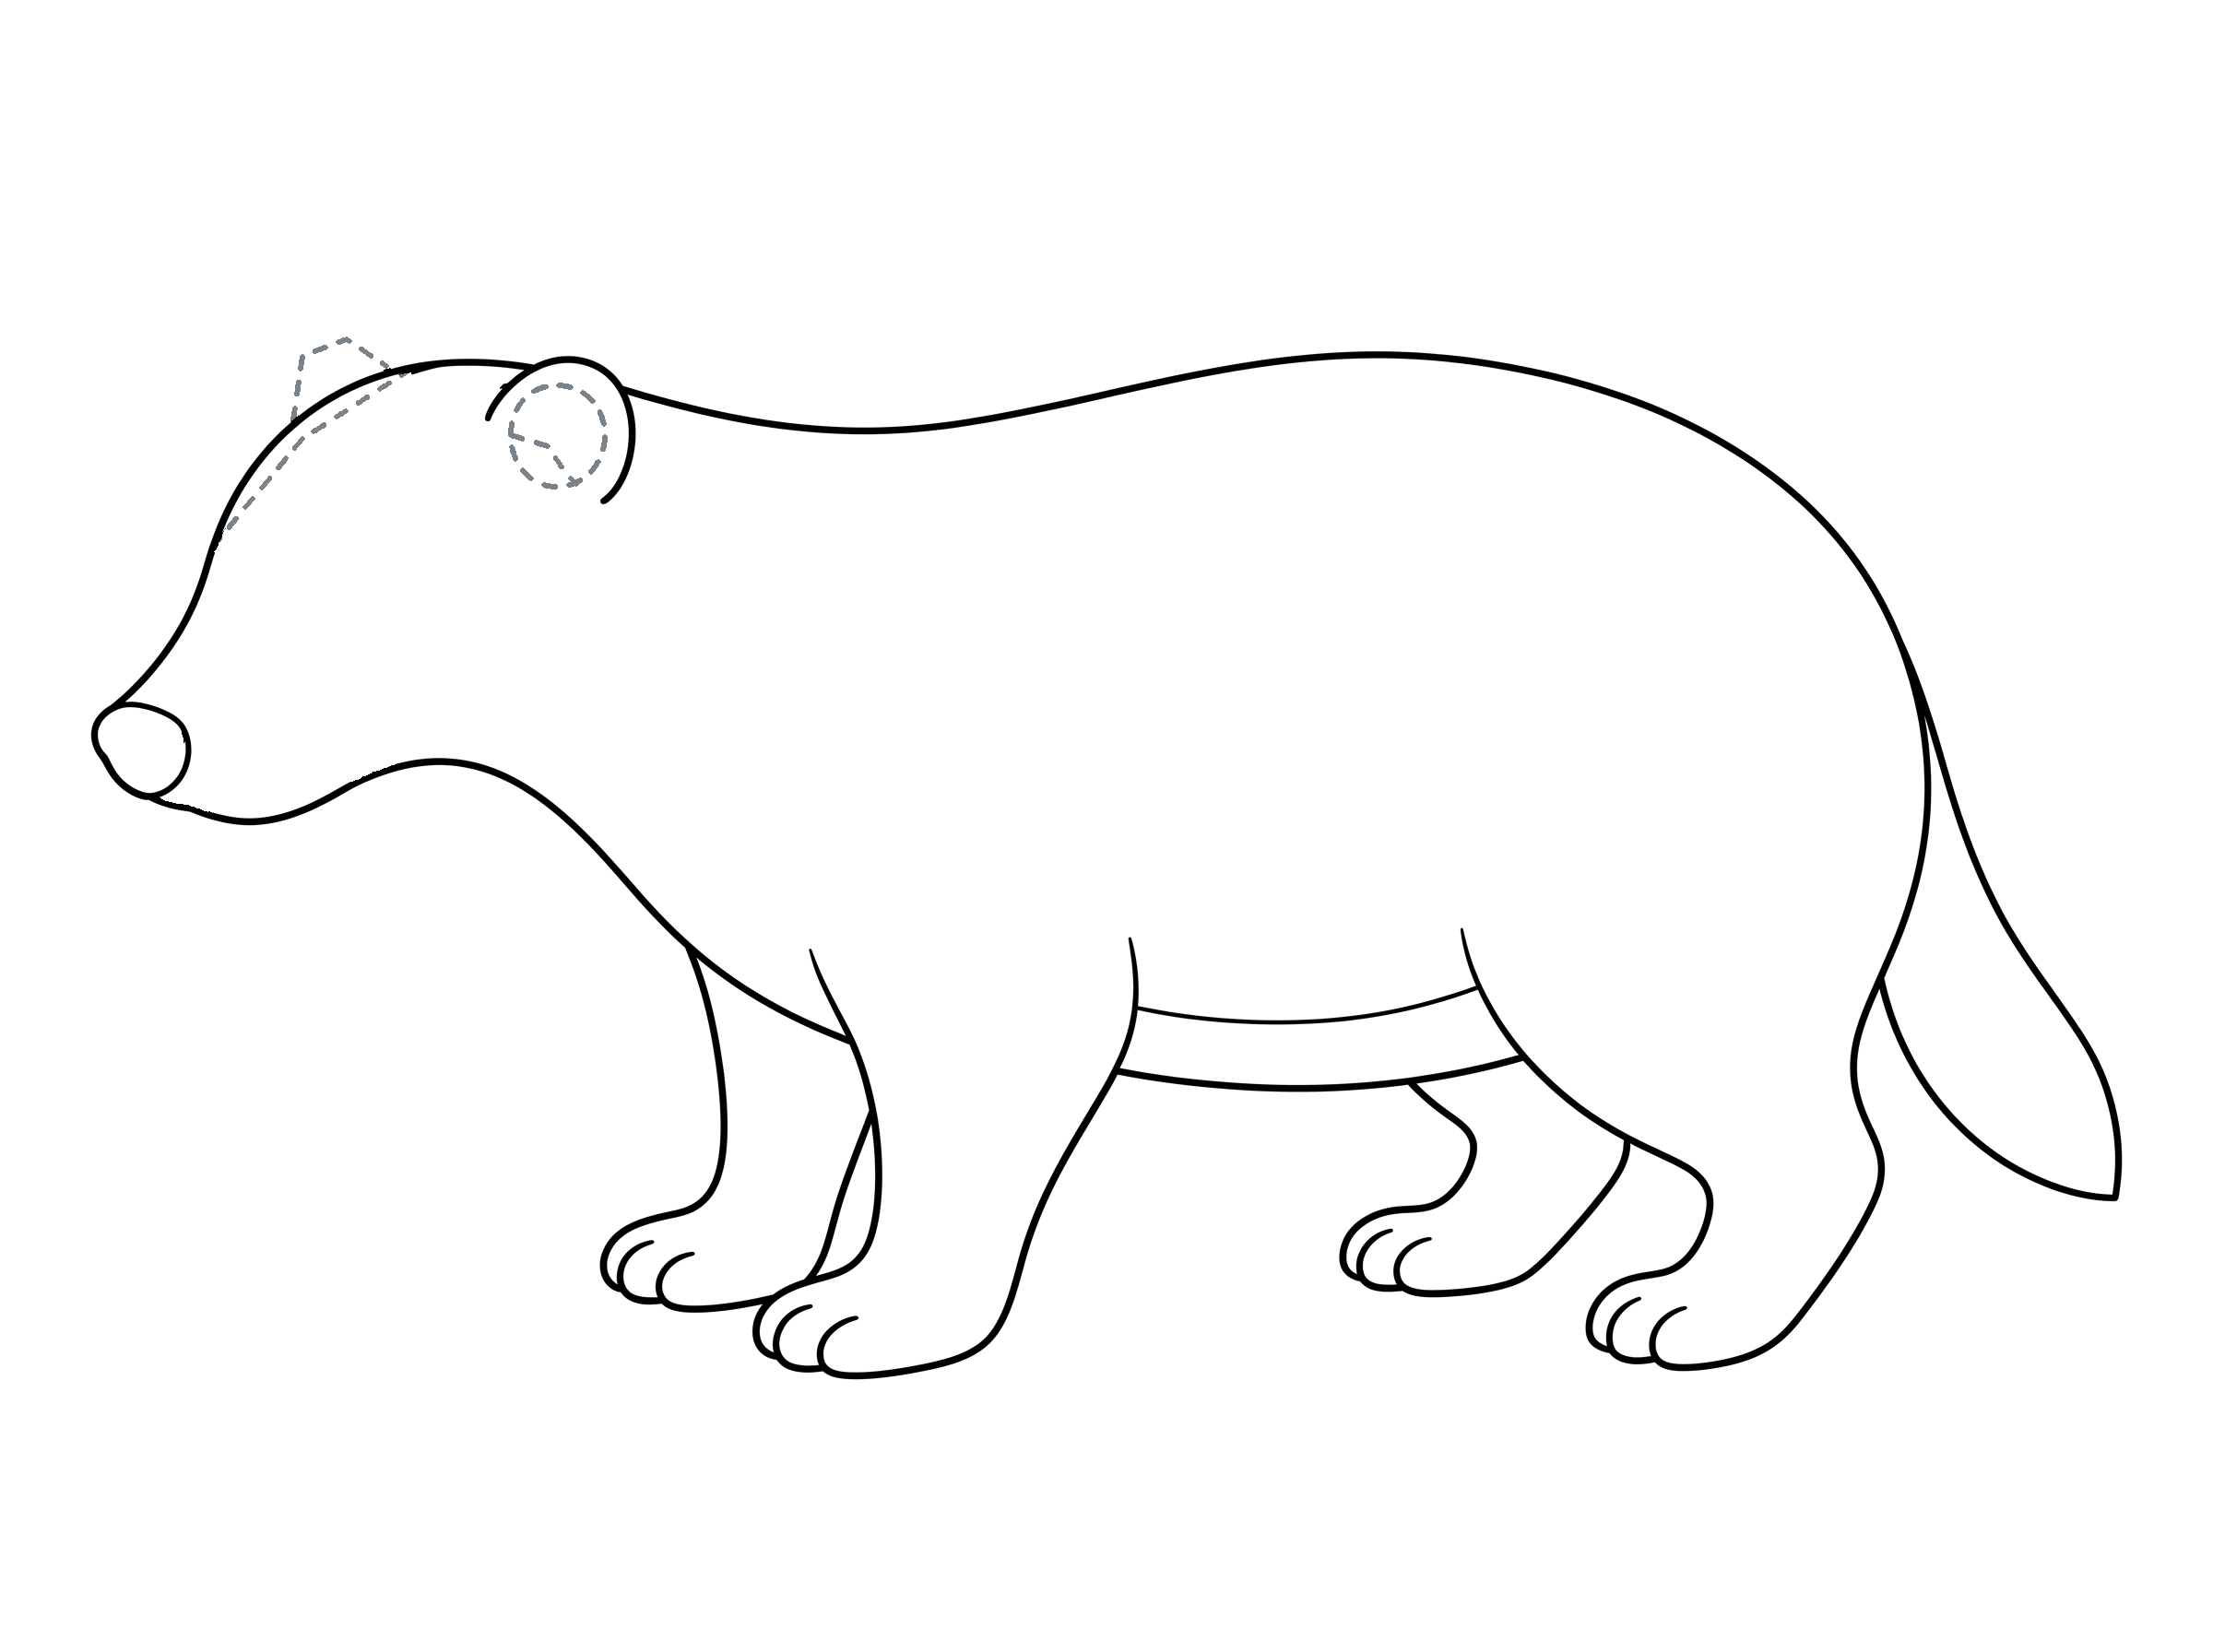
Locate the face details
Use the whole view to locate this part, then follow the close-up pictures below.
Enlarge this picture ↗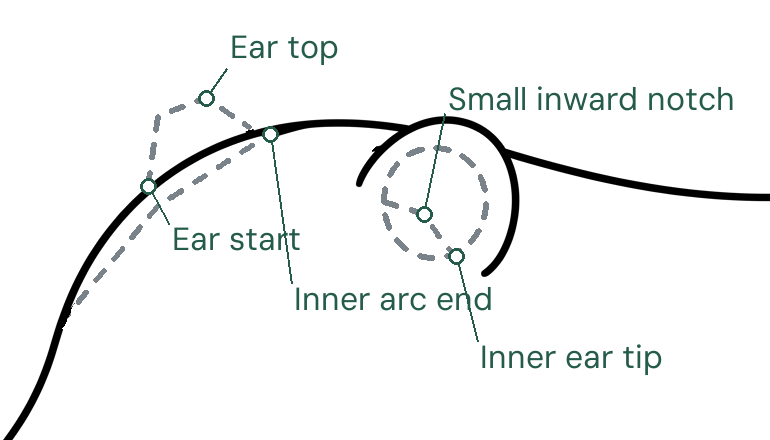
Place the two ears
Place a small cap behind the forehead and an oval inside the near ear. Mark the inner oval's inward notch and the thin forehead arc.
Enlarge this picture ↗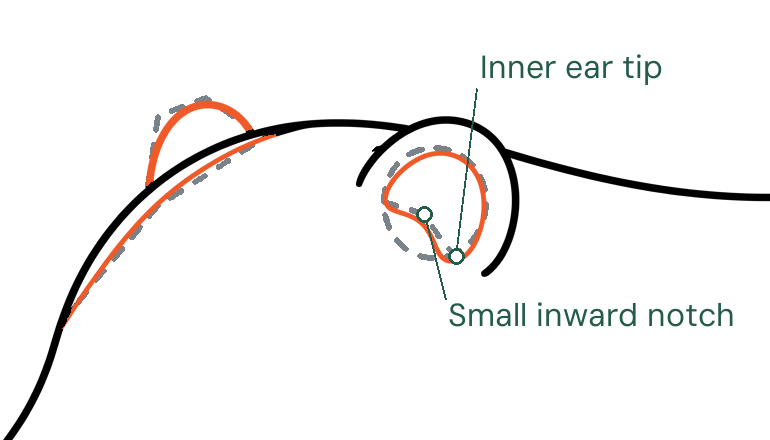
Round the ears
Round the far-ear cap and inner-ear oval, dipping inward at the notch; curve the thin arc along the forehead guide.
Enlarge this picture ↗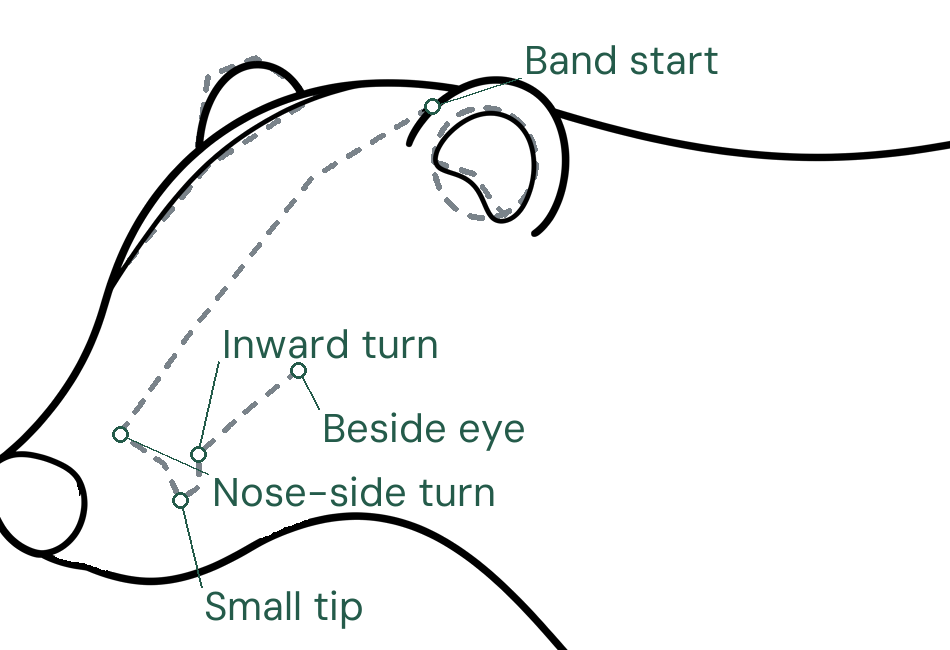
Place the nose-side band
Join the band start to the nose-side turn, small tip and inward turn, then continue to the mark beside the eye.
Enlarge this picture ↗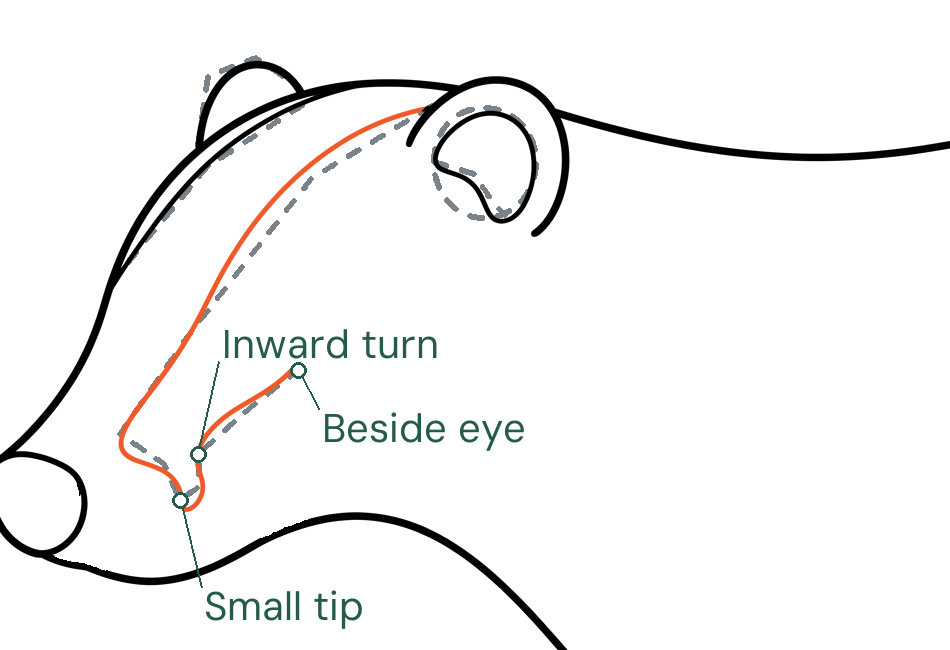
Curve the nose-side band
Curve down the guide, round the small tip and turn inward before rising beside the eye.
Enlarge this picture ↗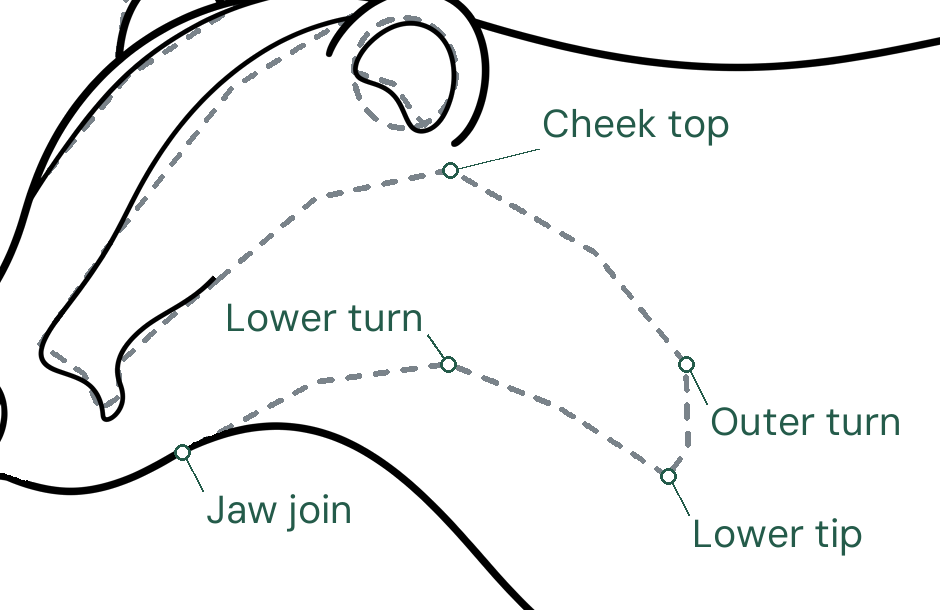
Place the cheek turns
Mark the cheek top below the ear, the outer turn to its right and the lower tip above the chest. Join the lower turn to the jaw join.
Enlarge this picture ↗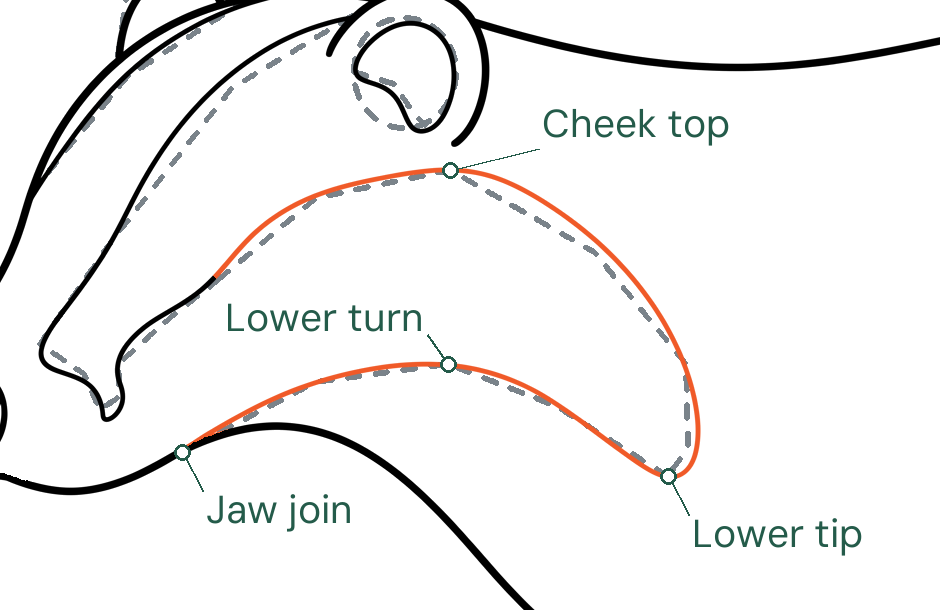
Round the cheek band
Curve over the cheek top and around the outer turn to the lower tip, then return through the lower turn to the jaw join.
Enlarge this picture ↗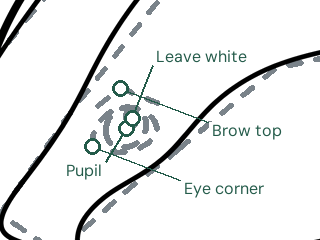
Place the eye shapes
Place a small slanted oval between the band lines; add a pupil circle and tiny white highlight inside. Mark a short brow above it.
Enlarge this picture ↗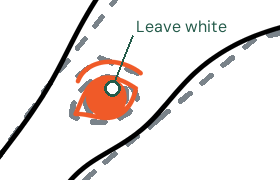
Draw the eye
Round the eye and brow, then fill the pupil while leaving the small highlight white.
Enlarge this picture ↗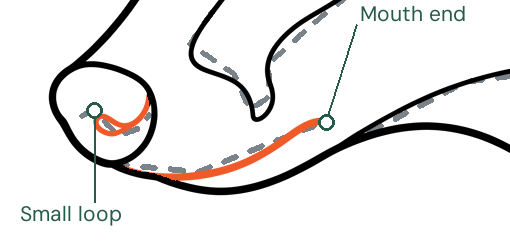
Draw the nose and mouth curves
Sketch the light nose loop and shallow mouth guide, then round them into the shown curves.
Enlarge this picture ↗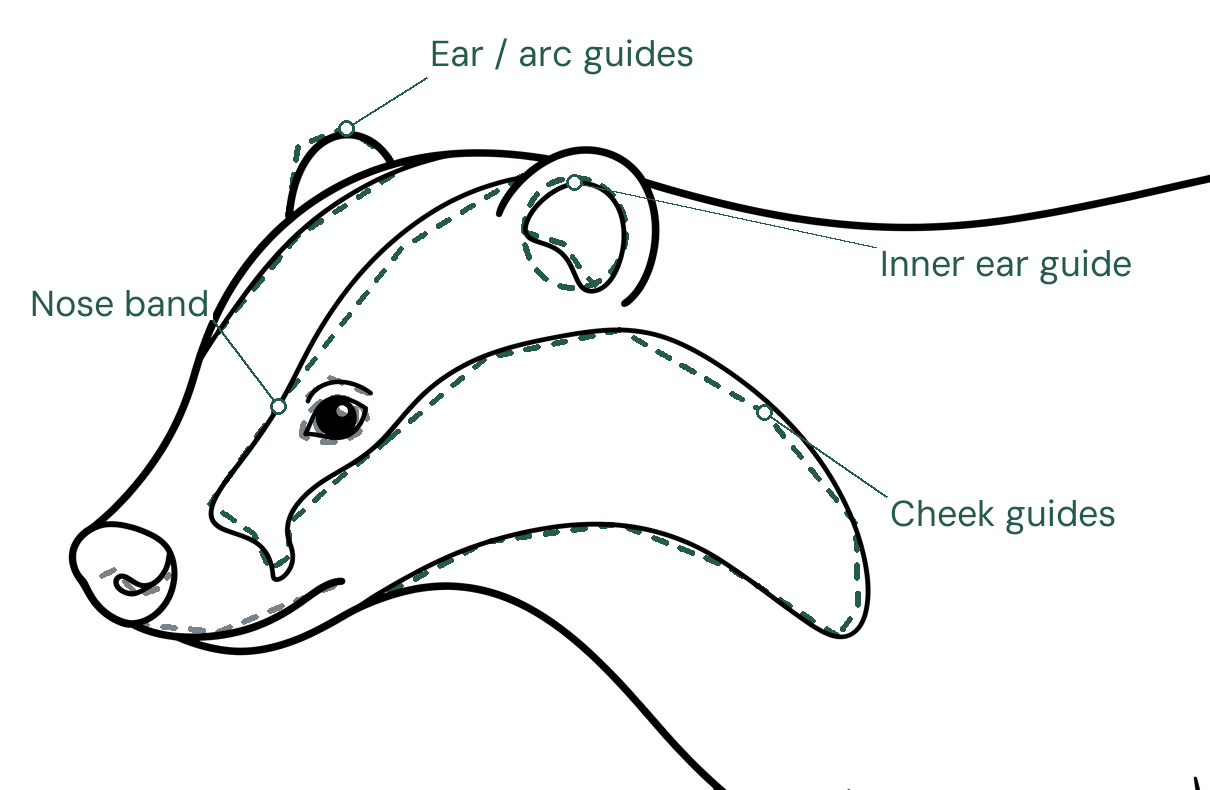
Erase the face guides
Mark the ear and band guides for erasing; keep the finished face lines.
Enlarge this picture ↗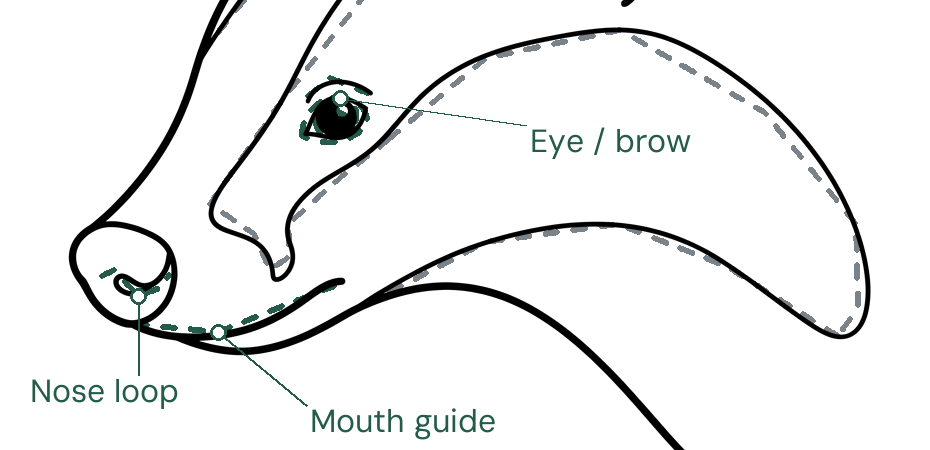
Mark the small face guides
Mark the eye, nose and mouth guides, then erase all face guides.
Enlarge this picture ↗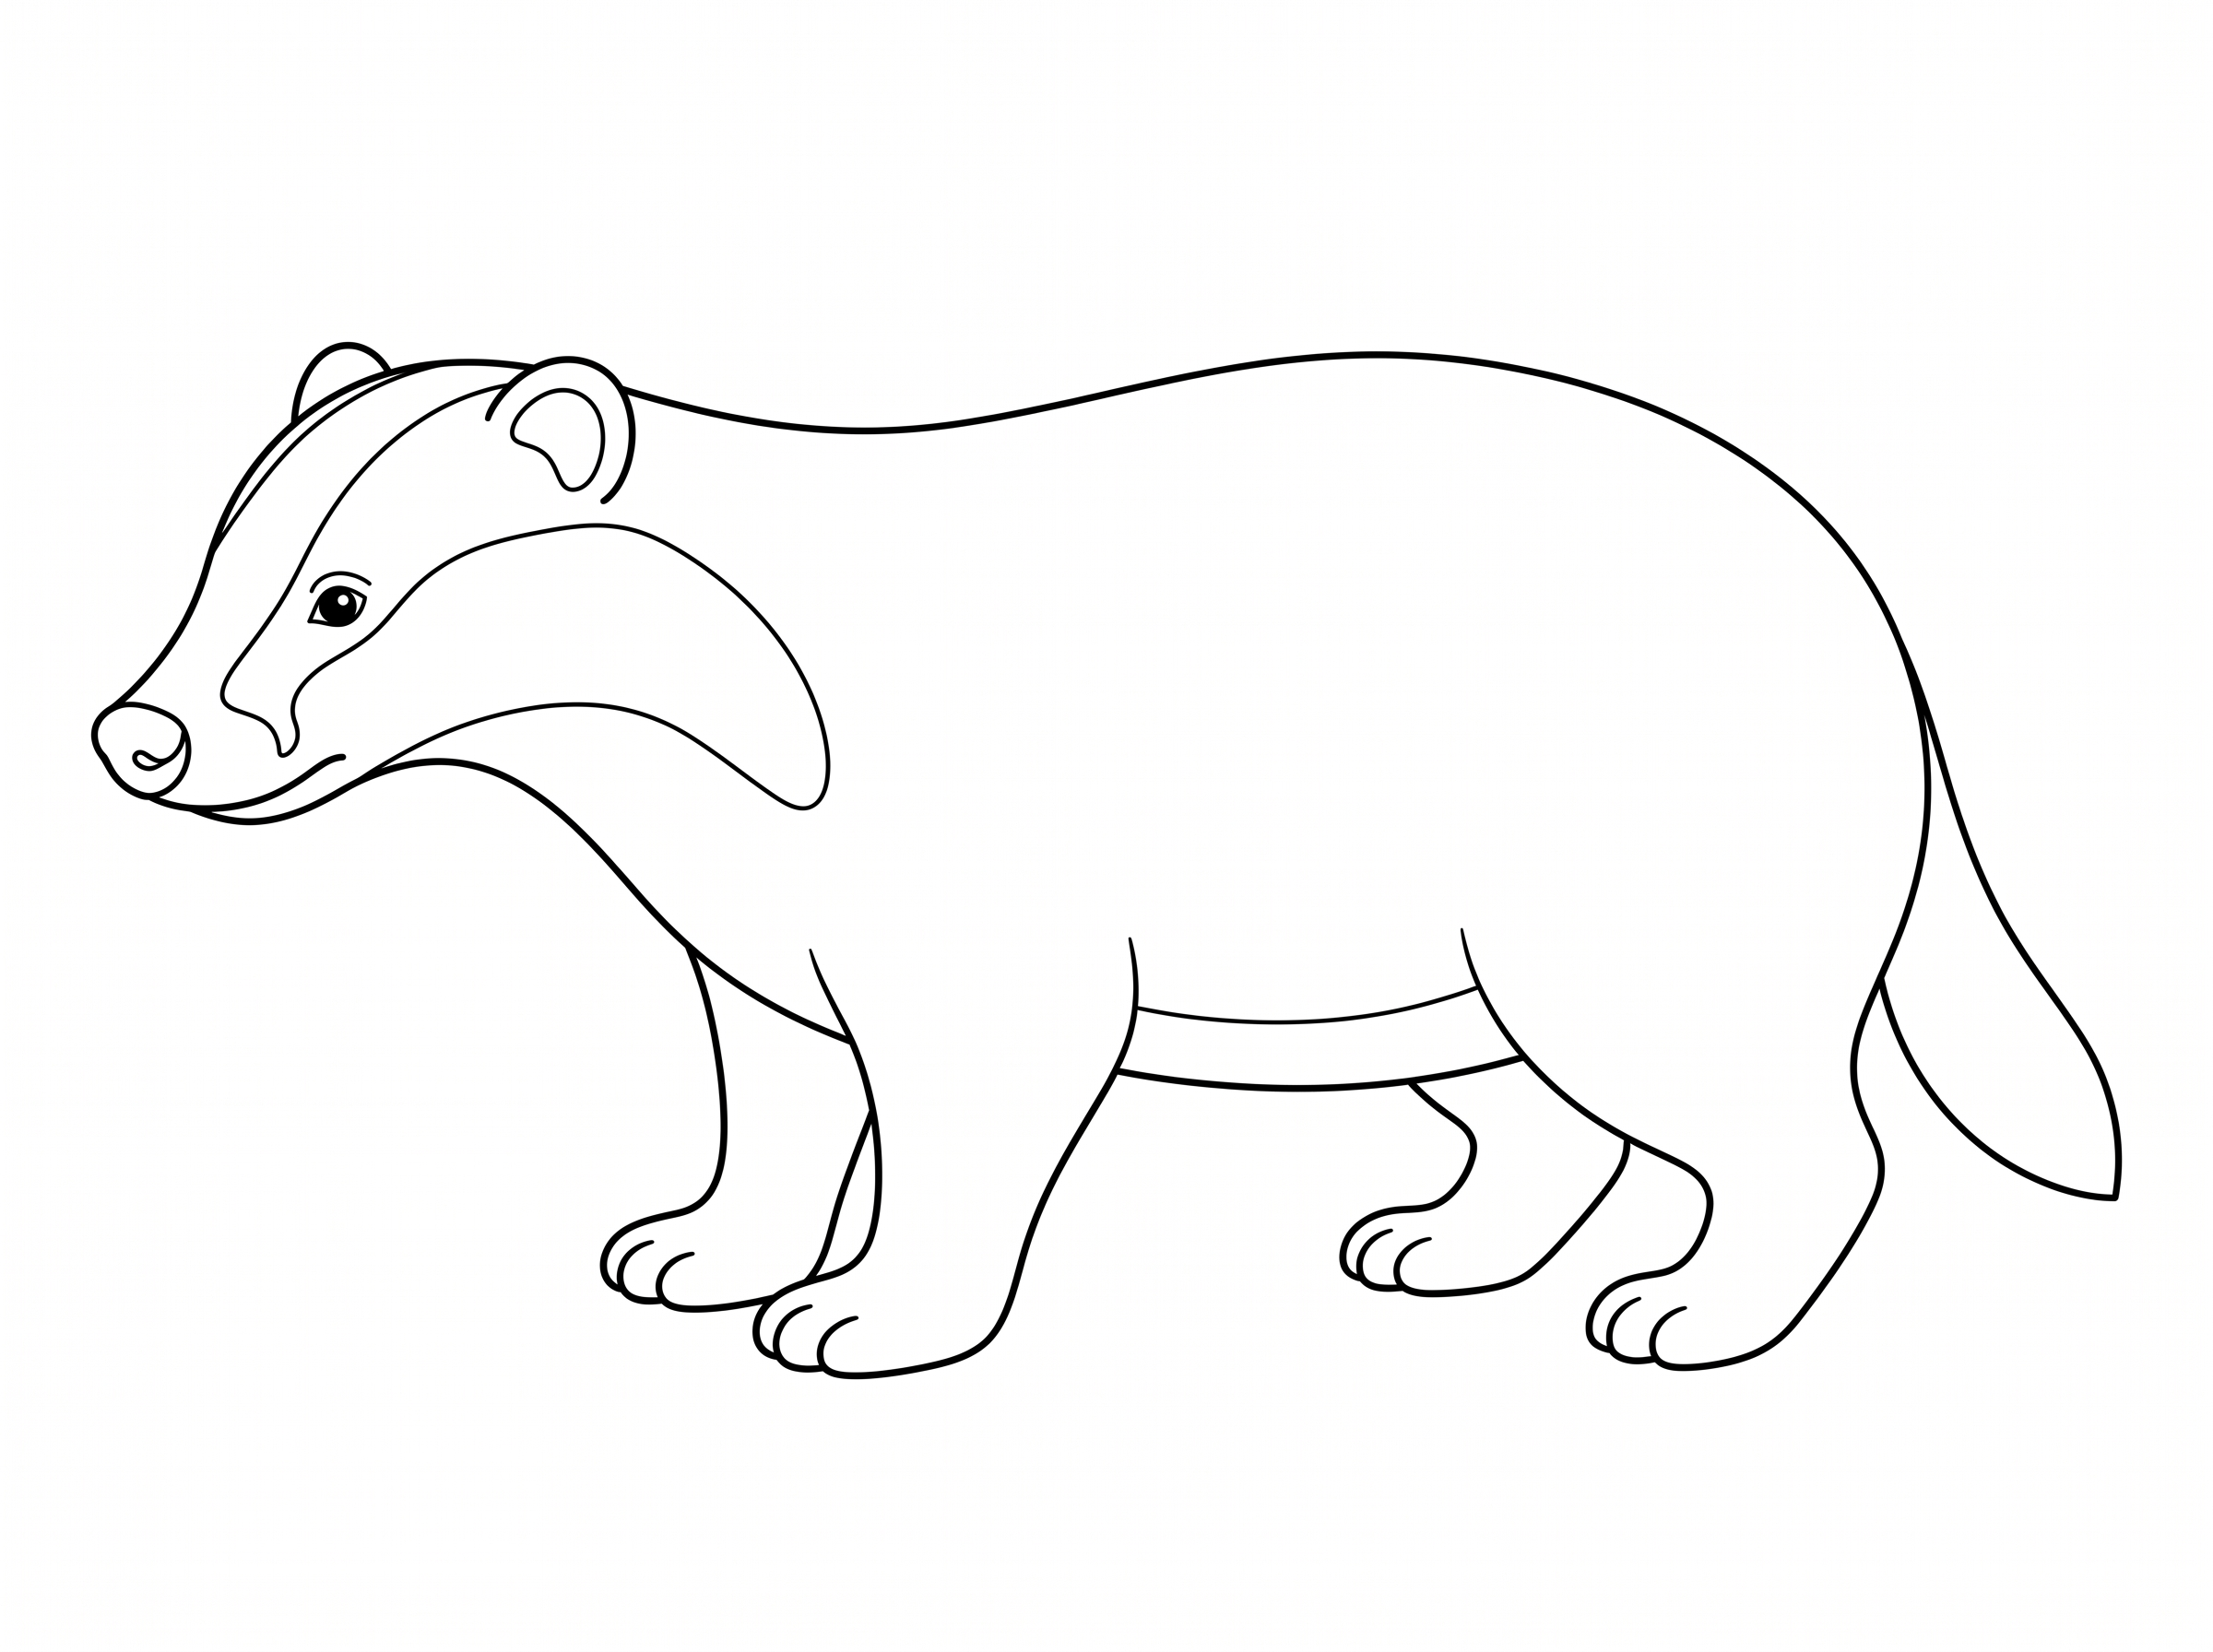
Finish the badger
Keep the complete badger outline, face bands and all four feet; coloring is optional.
Enlarge this picture ↗Check: Keep the face bands separate, the inner-ear notch open and the small eye highlight white; erase the remaining guides.
Your badger line drawing is complete.
Check that all four legs join the body, both tail edges connect and the temporary guides are gone. Leave the eye highlight white, then choose whether to color your drawing.
Optional repair help
Remove a line hidden behind the front leg
Use this repair only if an extra line crosses above your far front leg.
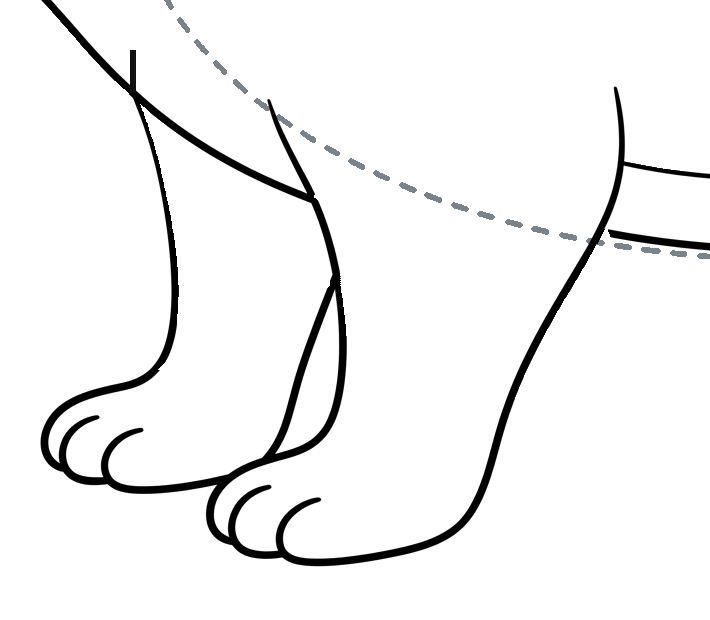
Find the hidden line
Find the short dark line above the far leg.
Enlarge this picture ↗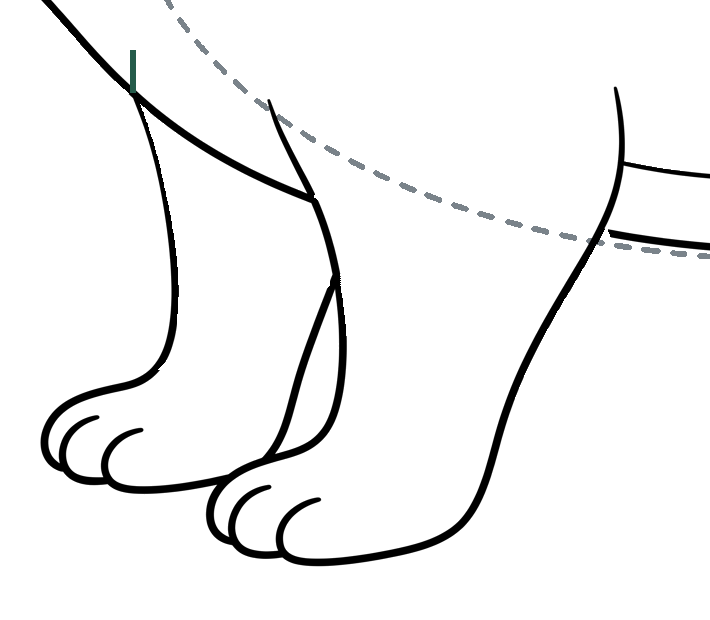
Mark that short segment
Erase only the marked extension; keep the chest edge and visible leg.
Enlarge this picture ↗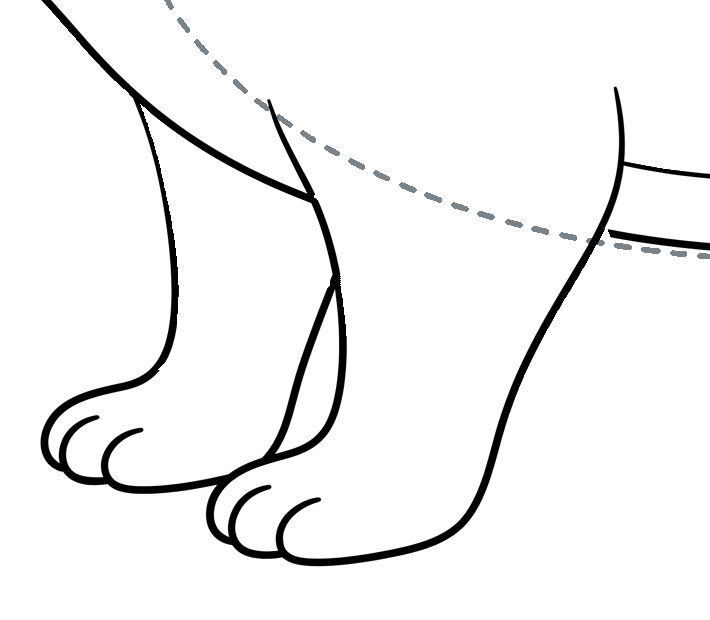
Check the local repair
Check that the hidden line is gone and the leg stays in place.
Enlarge this picture ↗Take the complete lesson with you.
The complete illustrated walkthrough includes all five goals, 46 construction pictures, four whole-drawing views and three optional repair pictures. Letter and A4 each contain 29 pages. The phone guide contains seven scrolling pages.
Use the one-page reference for repeat practice. Follow the detailed lesson for every construction action, including the leg overlaps and face-band turns.
Printing help
Choose US Letter for 8.5 × 11 inch paper or A4 for 210 × 297 mm. Print at Actual Size / 100%, or use Fit if your printer needs more margin.
Read the printing guide →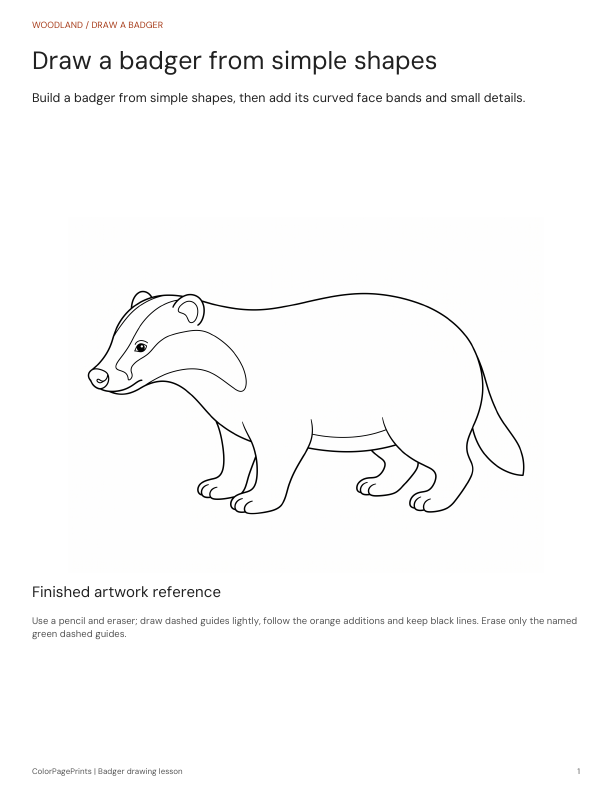 See the printable lesson ↗